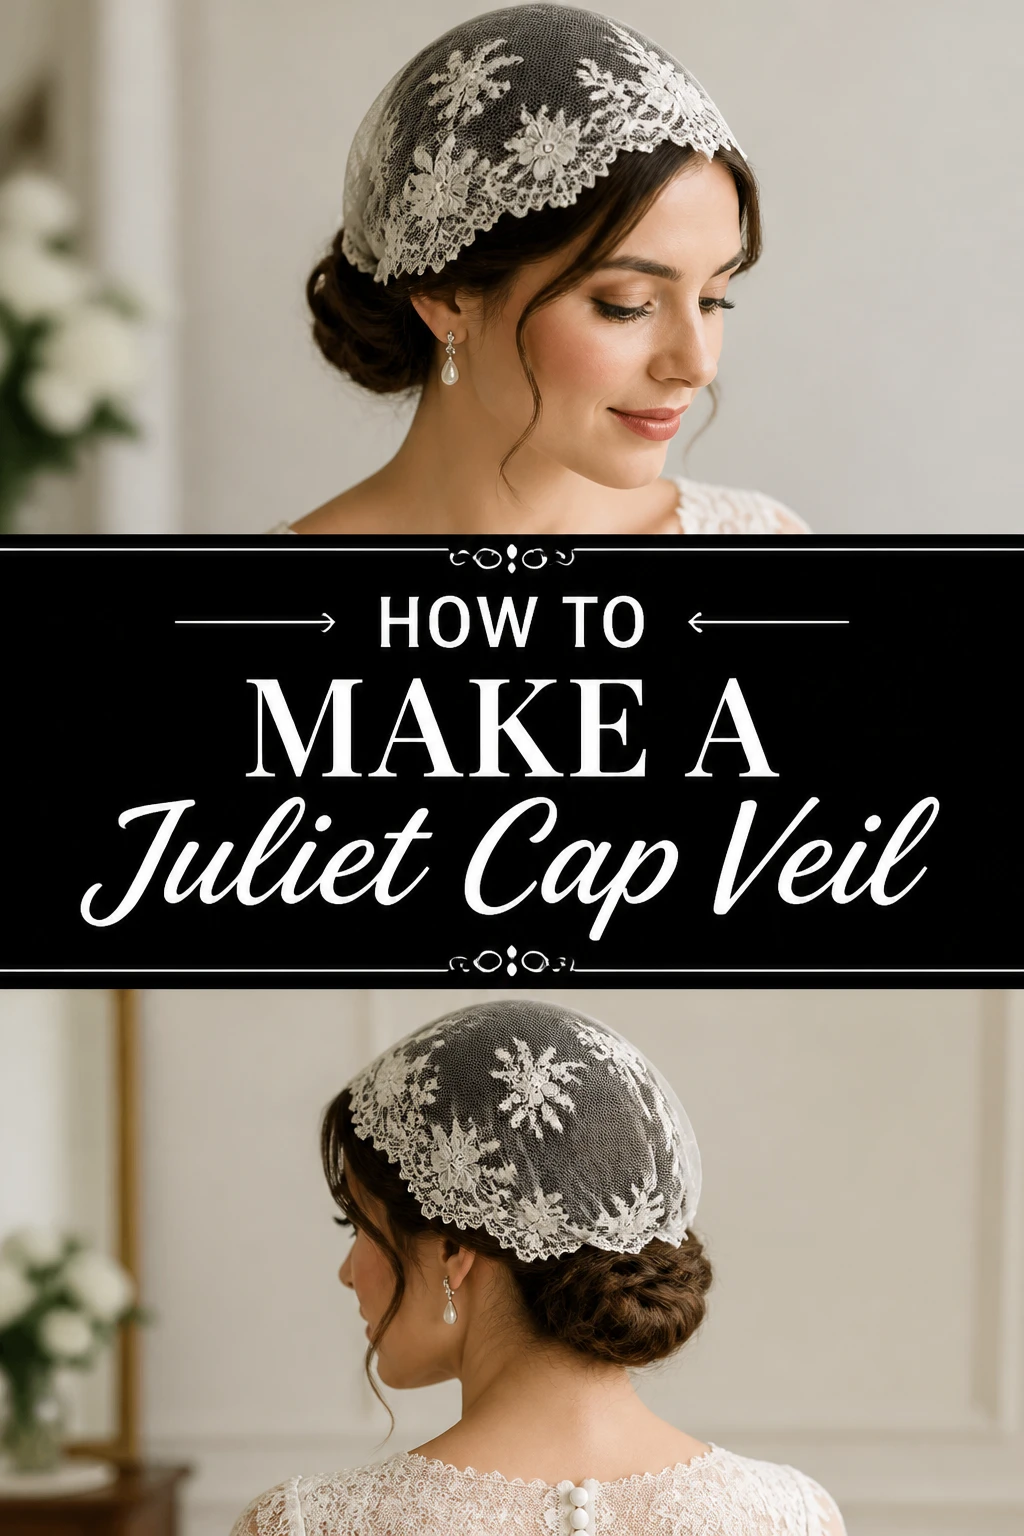
👰♀️ How To Make A Juliet Cap Veil

Wedding Planning
No fluff, no drama. Just easy weekly advice, planning shortcuts, and gentle reminders to help you actually enjoy your engagement.
Crafting your own Juliet cap veil is a beautiful way to personalize your special day.
I’ve made several of these for friends and family, and each one felt incredibly unique.
This guide shares my hands-on experience, ensuring you can create a stunning, heirloom-quality piece.
Quick Overview
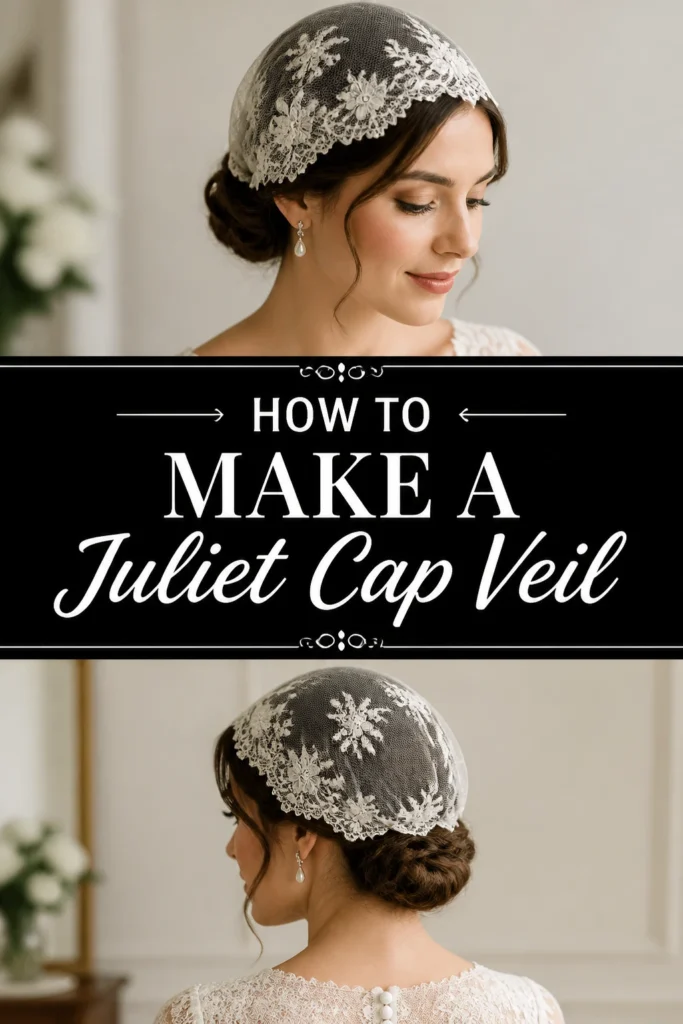
You’re about to embark on creating a timeless accessory, a Juliet cap veil, perfect for a vintage-inspired or romantic bridal look.
This project will guide you through pattern making, sewing the cap, attaching the delicate veil, and adding your personal touches.
- Time needed: 6-10 hours (depending on embellishment complexity)
- Difficulty: Intermediate
- What you’ll need: Bridal tulle, lace, sewing machine, thread, scissors, measuring tape, pins, pattern paper, hair comb or clips.
Step-by-Step Instructions
Step 1: Gather Your Materials
Begin by collecting all your necessary supplies before you start cutting.
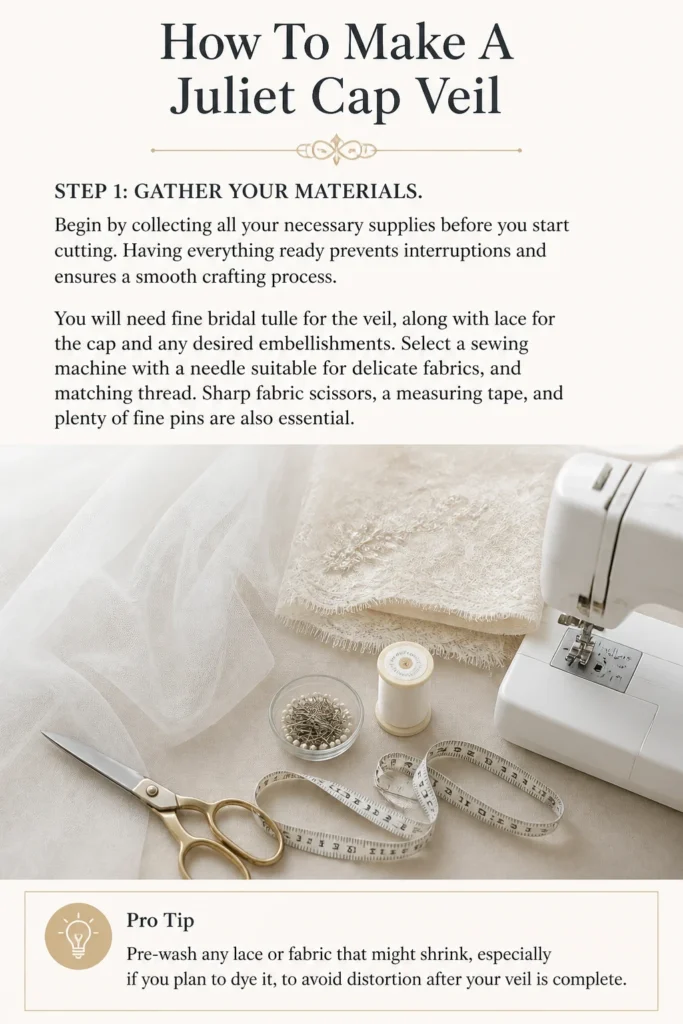
Having everything ready prevents interruptions and ensures a smooth crafting process.
You will need fine bridal tulle for the veil, along with lace for the cap and any desired embellishments.
Select a sewing machine with a needle suitable for delicate fabrics, and matching thread.
Sharp fabric scissors, a measuring tape, and plenty of fine pins are also essential.
Pro Tip: Pre-wash any lace or fabric that might shrink, especially if you plan to dye it, to avoid distortion after your veil is complete.
Step 2: Create Your Cap Pattern
A well-fitting cap starts with a custom pattern.
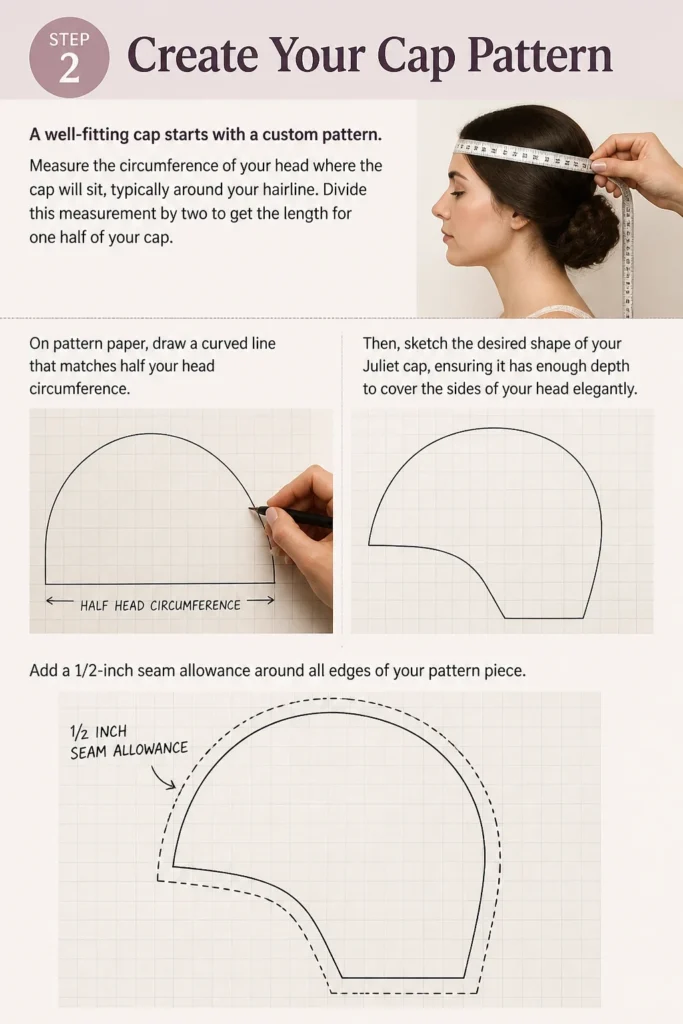
Measure the circumference of your head where the cap will sit, typically around your hairline.
Divide this measurement by two to get the length for one half of your cap.
On pattern paper, draw a curved line that matches half your head circumference.
Then, sketch the desired shape of your Juliet cap, ensuring it has enough depth to cover the sides of your head elegantly.
Add a 1/2-inch seam allowance around all edges of your pattern piece.
Step 3: Cut Your Fabric Pieces
Carefully lay your lace fabric flat and pin your cap pattern piece onto it.
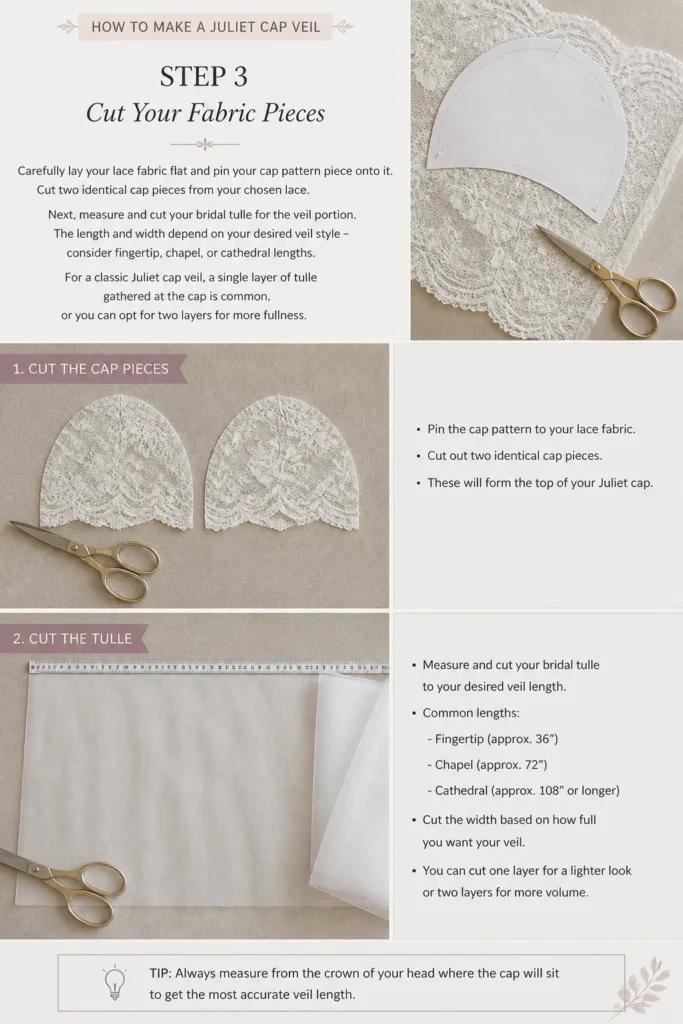
Cut two identical cap pieces from your chosen lace.
Next, measure and cut your bridal tulle for the veil portion.
The length and width depend on your desired veil style – consider fingertip, chapel, or cathedral lengths.
For a classic Juliet cap veil, a single layer of tulle gathered at the cap is common, or you can opt for two layers for more fullness.
Step 4: Assemble the Cap
Place your two lace cap pieces right sides together.
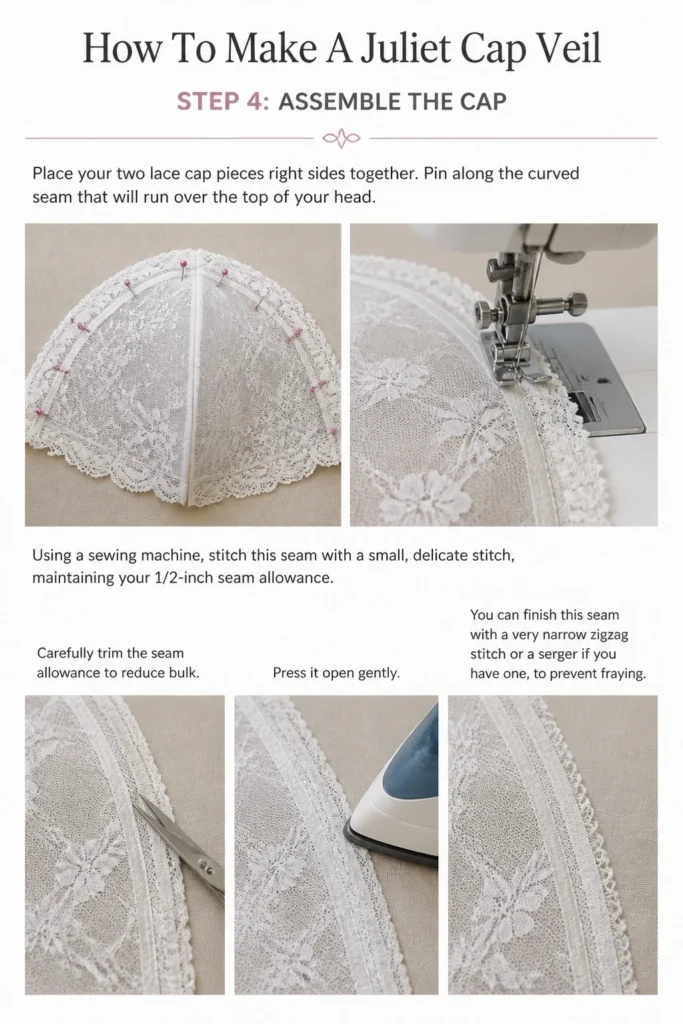
Pin along the curved seam that will run over the top of your head.
Using a sewing machine, stitch this seam with a small, delicate stitch, maintaining your 1/2-inch seam allowance.
Carefully trim the seam allowance to reduce bulk and press it open gently.
You can finish this seam with a very narrow zigzag stitch or a serger if you have one, to prevent fraying.
Step 5: Prepare the Veil Tulle
Take your cut tulle piece and decide where it will attach to the cap.
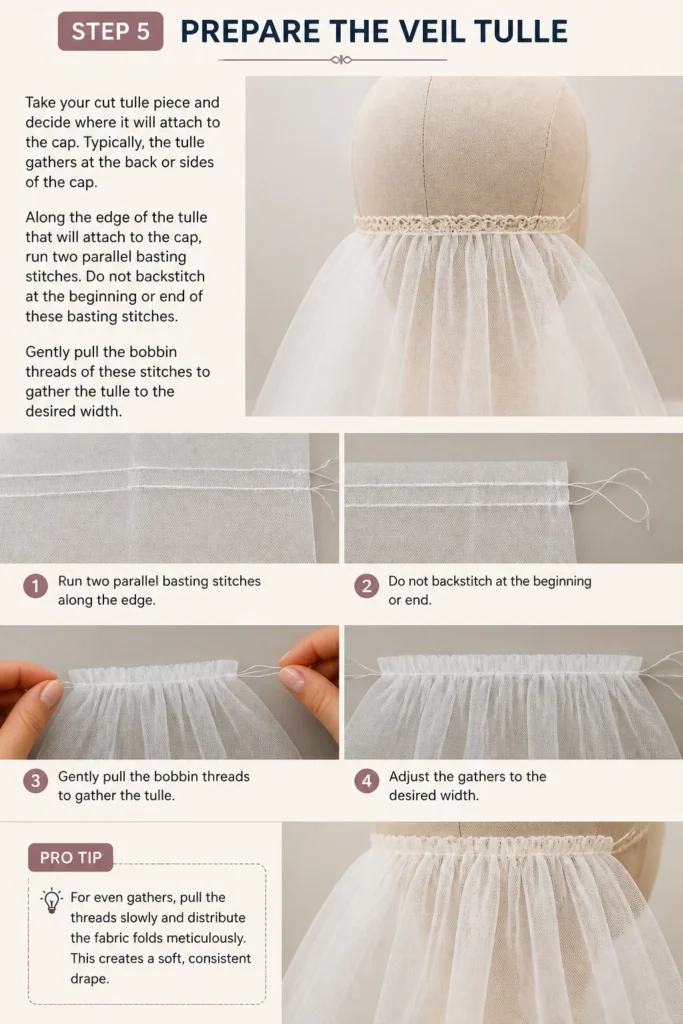
Typically, the tulle gathers at the back or sides of the cap.
Along the edge of the tulle that will attach to the cap, run two parallel basting stitches.
Do not backstitch at the beginning or end of these basting stitches.
Gently pull the bobbin threads of these stitches to gather the tulle to the desired width.
Pro Tip: For even gathers, pull the threads slowly and distribute the fabric folds meticulously. This creates a soft, consistent drape.
Step 6: Attach the Veil to the Cap
With your tulle gathered, carefully pin it to the inside of your lace cap.
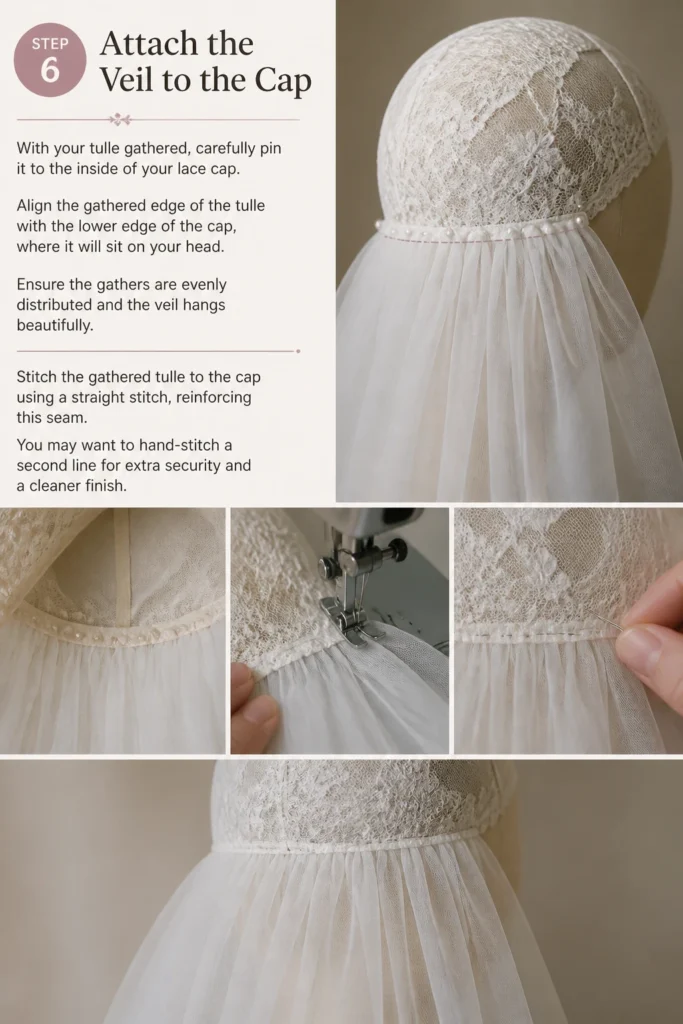
Align the gathered edge of the tulle with the lower edge of the cap, where it will sit on your head.
Ensure the gathers are evenly distributed and the veil hangs beautifully.
Stitch the gathered tulle to the cap using a straight stitch, reinforcing this seam.
You may want to hand-stitch a second line for extra security and a cleaner finish.
Step 7: Embellish Your Veil
This is where your Juliet cap veil truly comes to life with your personal style.
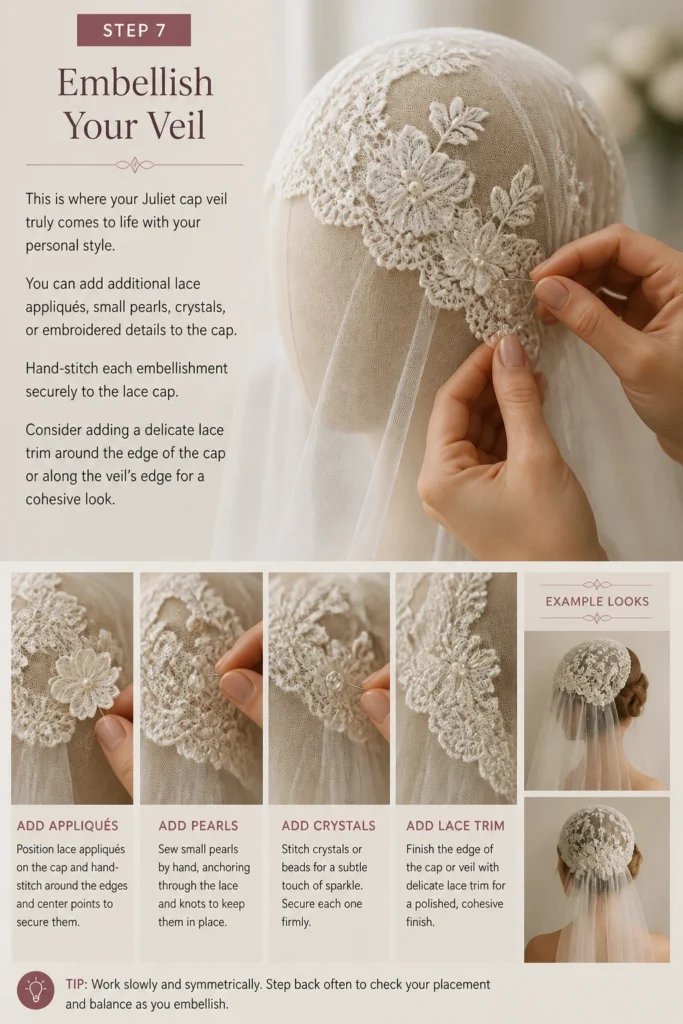
You can add additional lace appliqués, small pearls, crystals, or embroidered details to the cap.
Hand-stitch each embellishment securely to the lace cap.
Consider adding a delicate lace trim around the edge of the cap or along the veil’s edge for a cohesive look.
Step 8: Add Finishing Touches
To secure the veil to your hair, you’ll need to attach a comb or clips.
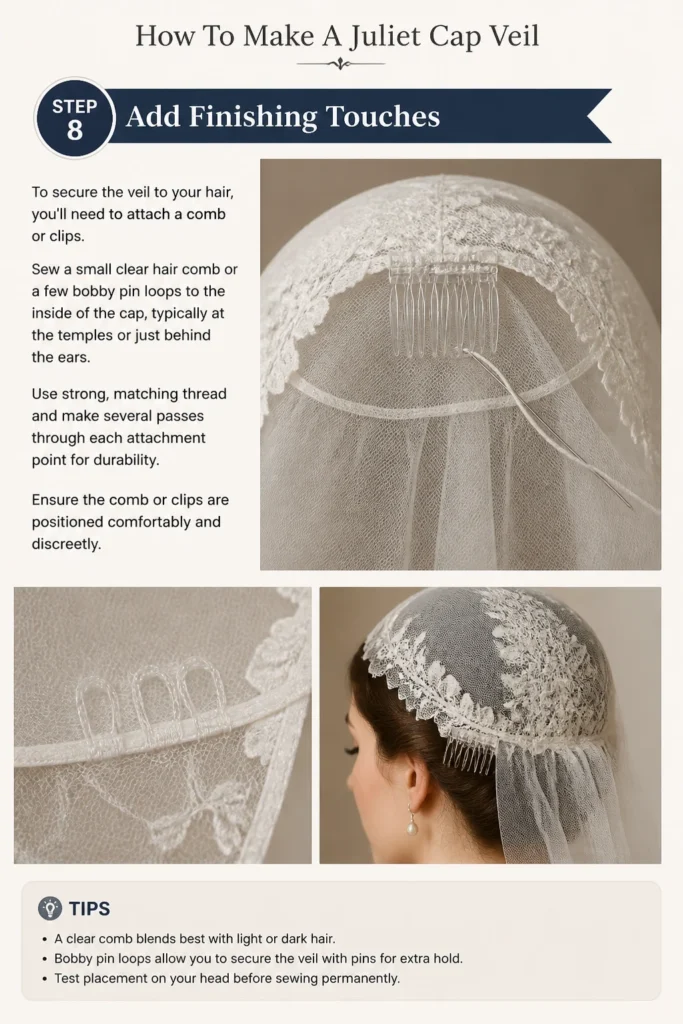
Sew a small clear hair comb or a few bobby pin loops to the inside of the cap, typically at the temples or just behind the ears.
Use strong, matching thread and make several passes through each attachment point for durability.
Ensure the comb or clips are positioned comfortably and discreetly.
Step 9: Final Inspection and Press
Carefully examine your entire Juliet cap veil for any loose threads or missed stitches.
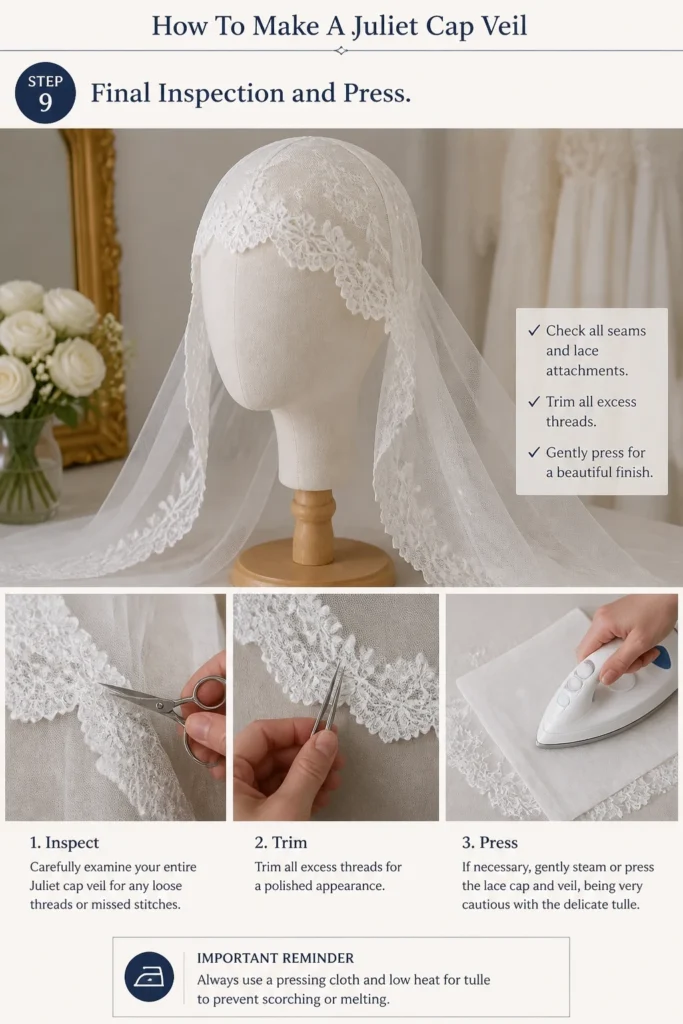
Trim all excess threads for a polished appearance.
If necessary, gently steam or press the lace cap and veil, being very cautious with the delicate tulle.
Always use a pressing cloth and low heat for tulle to prevent scorching or melting.
Common Mistakes to Avoid
Incorrect Head Measurement
Measuring your head inaccurately is a common pitfall that leads to a poorly fitting cap.
A cap that is too loose will slip, and one that is too tight will be uncomfortable.
Always use a flexible measuring tape and measure twice to ensure precision.
Pulling Tulle Too Tightly When Gathering
Over-gathering the tulle can result in a stiff, unnatural drape for your veil.
It can also cause the delicate fabric to tear or pucker unevenly.
Gather the tulle gently, distributing the fabric folds softly to achieve an ethereal flow.
Using Heavy or Stiff Lace for the Cap
A Juliet cap is designed to be delicate and sit softly on the head.
Opting for a heavy or rigid lace will make the cap uncomfortable and unable to conform to the head’s shape.
Choose a lightweight, pliable lace with a beautiful drape for the most elegant result.
Skipping Seam Finishing
Neglecting to finish your seams, especially on delicate lace, can lead to fraying and unraveling over time.
This compromises the durability and appearance of your veil.
Use a narrow zigzag stitch, a serger, or a French seam technique for clean and lasting edges.
Troubleshooting
Cap Feels Too Tight or Too Loose
If your cap doesn’t fit quite right, it’s often due to an initial measurement error or inconsistent seam allowance.
Carefully unpick the main seam of the cap.
Re-measure your head, adjust the seam allowance, and re-stitch for a more comfortable fit.
Veil Not Draping Properly
A stiff or uneven drape usually indicates issues with the gathering technique or tulle choice.
Examine your gathered stitches; if they are too tight, release them slightly and redistribute the gathers.
Ensure you are using soft, high-quality bridal tulle designed for flowing drapes.
Embellishments Falling Off
This problem typically arises from insufficient stitching or using an inappropriate thread.
Re-attach any loose embellishments with strong, fine thread, making several small, secure stitches.
Consider using a fabric adhesive designed for delicate materials for tiny beads, applied sparingly.
Key Takeaways
- Accurate head measurements are crucial for a comfortable and well-fitting cap.
- Select lightweight, soft lace and fine bridal tulle for the best drape and aesthetic.
- Gentle, even gathering of the tulle creates a beautiful, flowing veil.
- Securely attach all embellishments and finishing elements like hair combs.
- Careful seam finishing ensures the longevity and polished look of your handmade veil.
- Personalize your veil with unique lace, pearls, or embroidery to reflect your style.
Frequently Asked Questions
Can I make this veil without a sewing machine?
While a sewing machine makes the process faster and seams more uniform, you can absolutely hand-sew a Juliet cap veil. It will require more time and patience, but the result can be equally beautiful and sturdy if you use small, neat stitches.
What type of tulle is best for a Juliet cap veil?
The best tulle is soft, fine bridal illusion tulle. It drapes beautifully, is lightweight, and comes in various sheerness levels. Avoid stiff or coarse tulle, as it will not achieve the delicate, ethereal look characteristic of a Juliet cap.
How do I make sure the cap stays on my head?
Security is key. Attach a clear hair comb to the inside back of the cap, and consider adding small loops at the temples for bobby pins. These attachment points, combined with a cap that fits well, will keep your veil securely in place.
Can I add color to my Juliet cap veil?
Yes, you can. You can purchase colored tulle or lace, or you can dye white or ivory materials using fabric dye. Test your dye on a scrap piece first to ensure you achieve your desired shade without damaging the fabric.
Our Top Recommended Finds
- Fine Bridal Illusion Tulle: Essential for that soft, flowing drape. Look for a 72-inch width for versatile styling.
- Delicate Chantilly Lace Trim: Perfect for the cap and adding elegant embellishments. Choose a pattern that complements your dress.
- Sharp Fabric Shears: Precision cutting is vital for delicate fabrics like tulle and lace, preventing snags and uneven edges.
Your Heirloom Veil Awaits
You now possess the knowledge and steps to craft a truly unique Juliet cap veil.
Imagine the joy of wearing something made by your own hands, imbued with your personal touch.
Start gathering your materials today and bring your vision to life.
Wedding Planning
No fluff, no drama. Just easy weekly advice, planning shortcuts, and gentle reminders to help you actually enjoy your engagement.