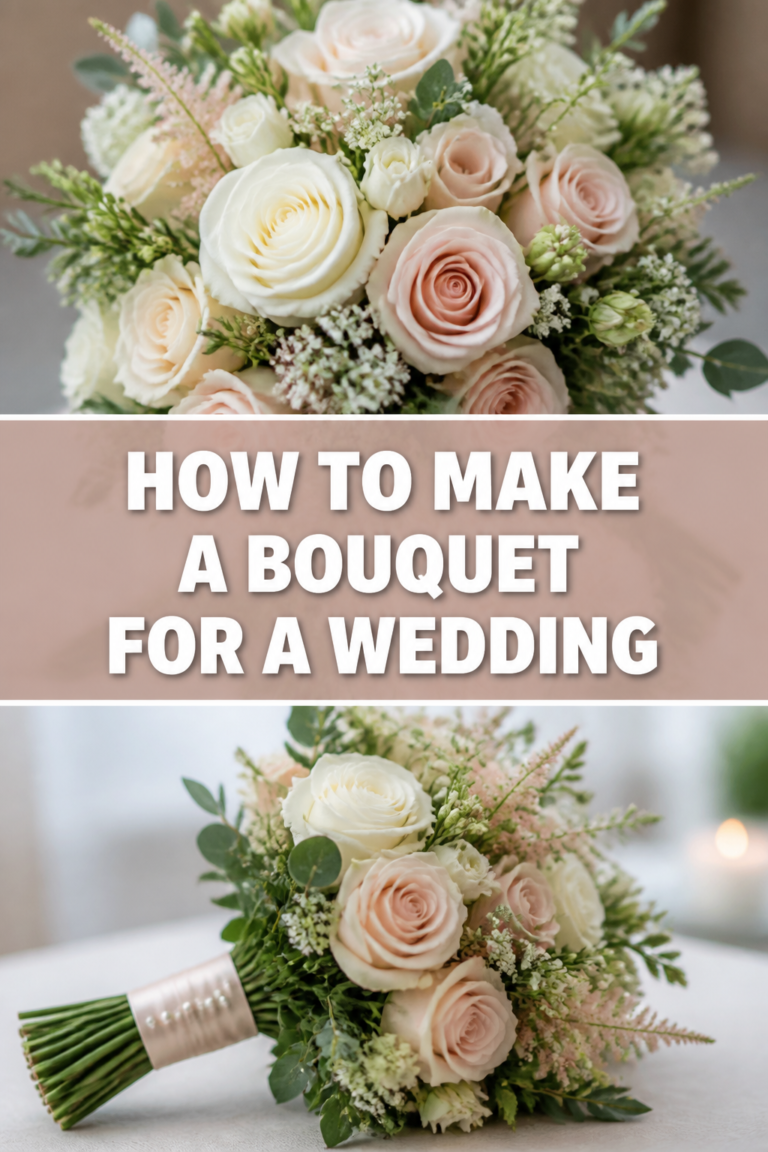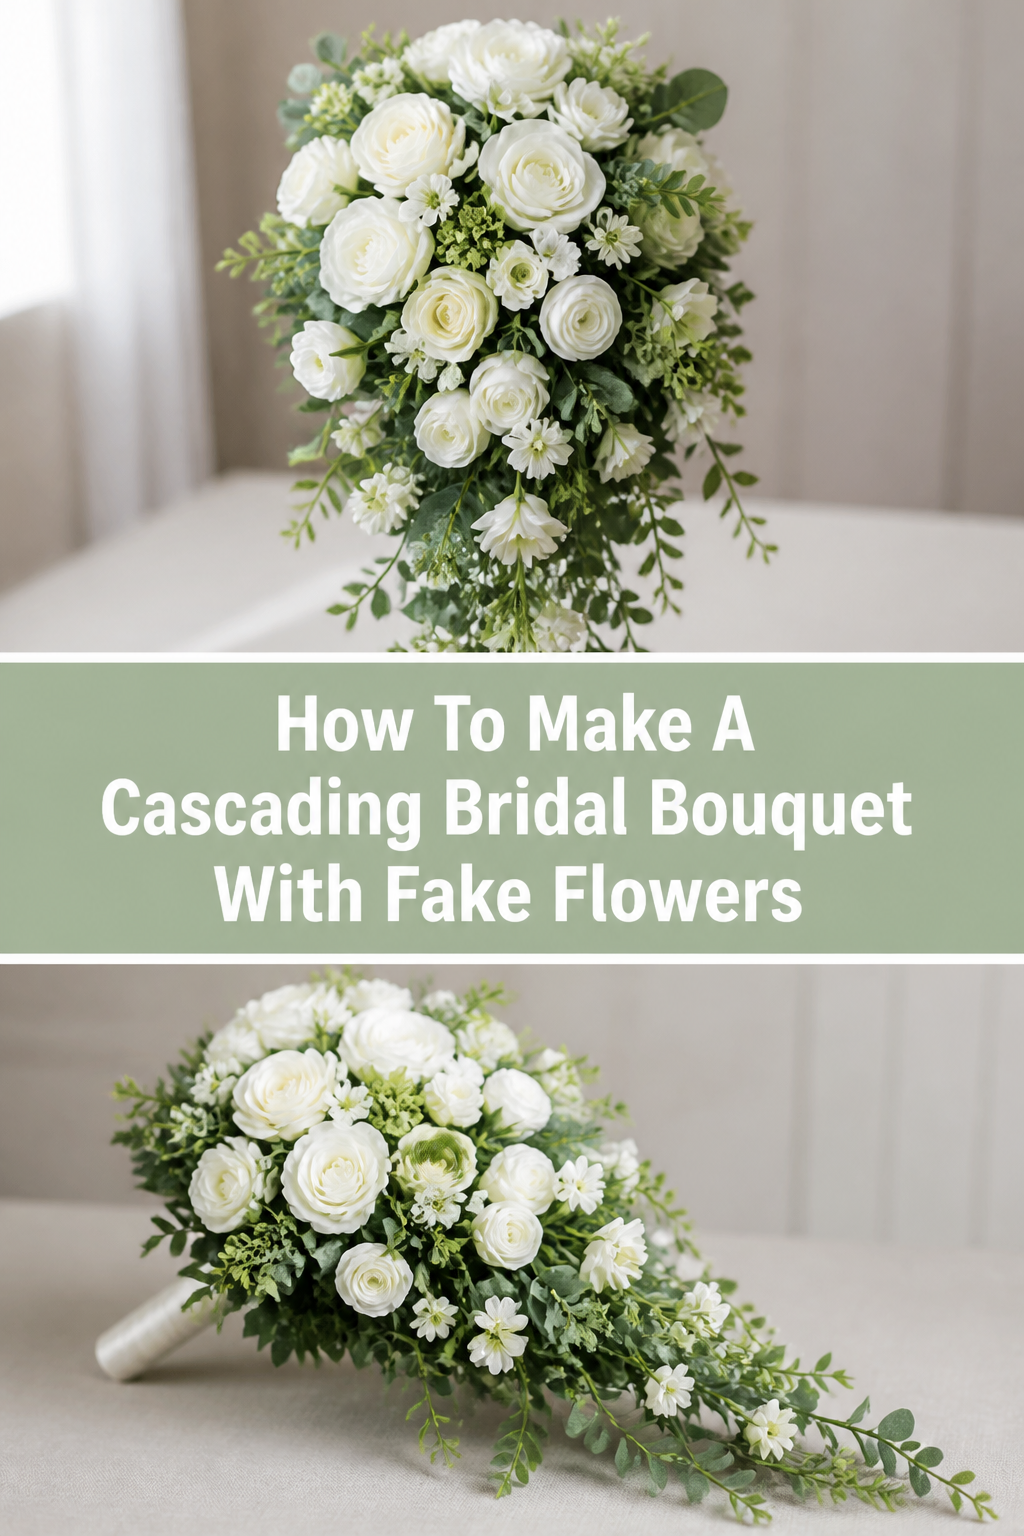
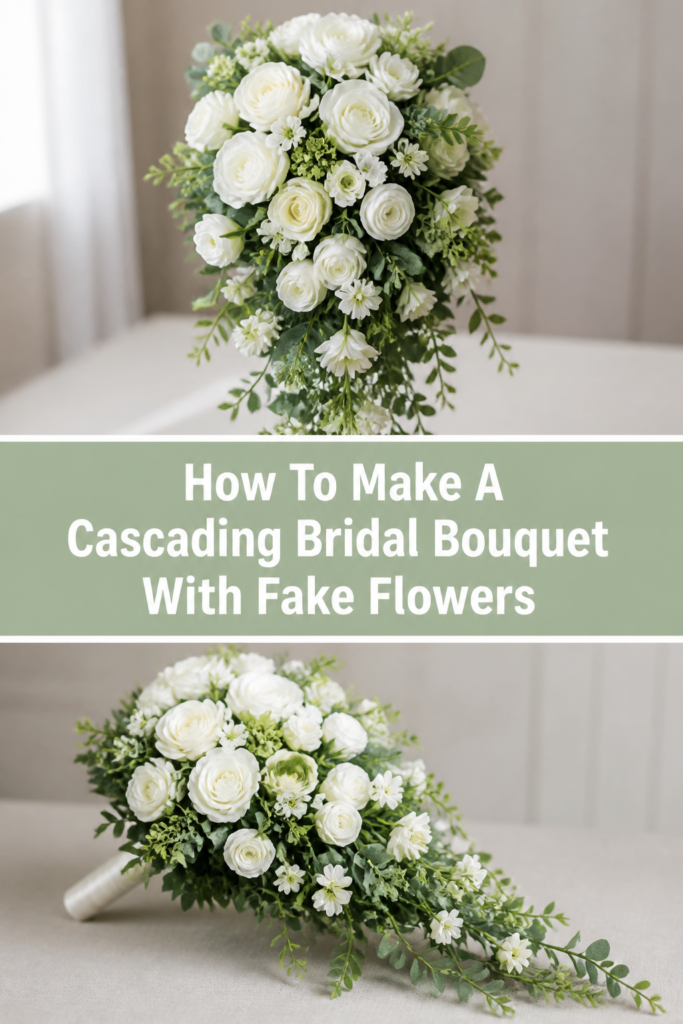
How To Make A Cascading Bridal Bouquet With Fake Flowers
Creating your own wedding flowers is a beautiful way to personalize your big day while keeping your budget intact.
I remember the first time I attempted a cascading bouquet for a friend’s wedding; I was terrified of it looking “cheap” or falling apart halfway down the aisle.
After years of experimenting with high-quality silks and “Real Touch” stems, I’ve found that fake flowers are actually more forgiving and durable than their fresh counterparts.
Quick Overview
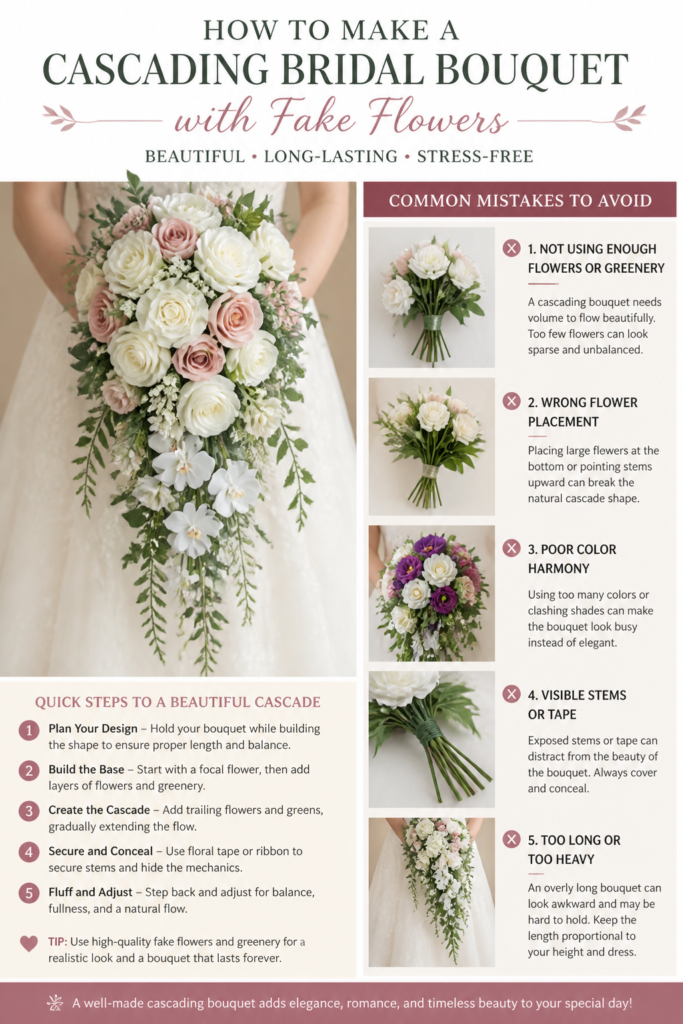
This guide will walk you through the process of building a professional-looking, tear-drop shaped bouquet that stays perfect from the first photo to the last dance.
- Time needed: 3 to 4 hours (including prep time)
- Difficulty: Intermediate
- What you’ll need: High-quality silk flowers, floral foam bouquet holder, floral wire, wire cutters, floral tape, hot glue gun, and decorative ribbon.
Step-by-Step Instructions
Step 1: Curate Your Floral Palette
Select a mix of flower sizes and textures to create a natural, multidimensional look. You should aim for three categories: focal flowers, secondary flowers, and filler greenery.
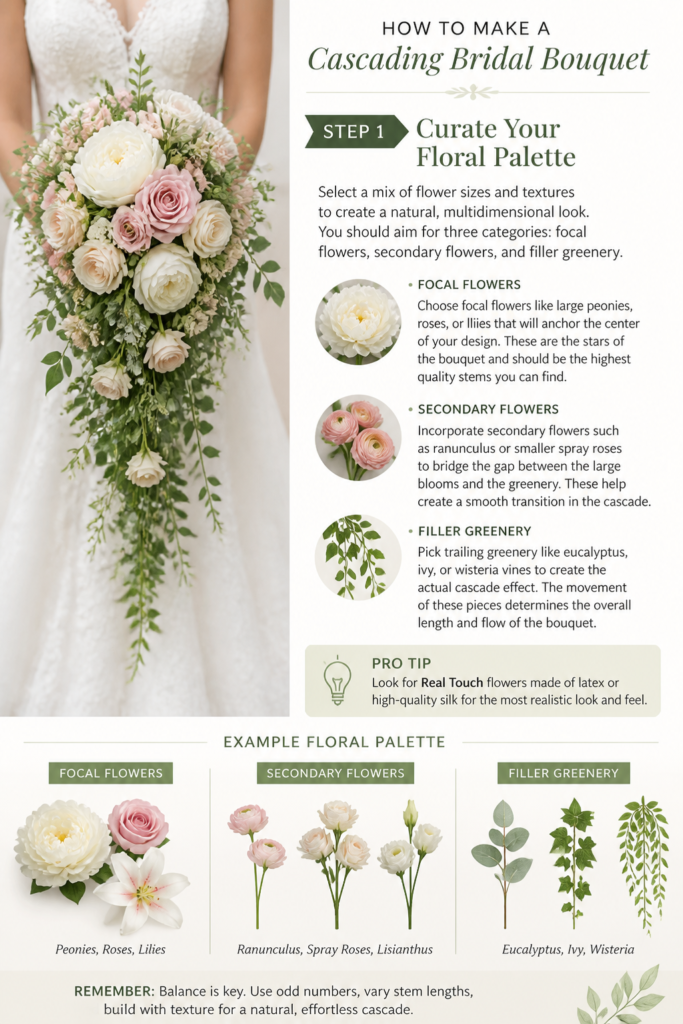
Choose focal flowers like large peonies, roses, or lilies that will anchor the center of your design. These are the “stars” of the bouquet and should be the highest quality stems you can find.
Incorporate secondary flowers such as ranunculus or smaller spray roses to bridge the gap between the large blooms and the greenery. These help create a smooth transition in the cascade.
Pick trailing greenery like eucalyptus, ivy, or wisteria vines to create the actual “cascade” effect. The movement of these pieces determines the overall length and flow of the bouquet.
Pro Tip: Look for “Real Touch” flowers made of latex or coated silk. They have a waxy texture that mimics live petals and prevents that papery, artificial look in close-up photos.
Step 2: Prepare the Stems and Tools
Trim the plastic stems of your flowers using heavy-duty wire cutters. Leave about 3 to 4 inches of stem for the flowers that will go into the foam handle.
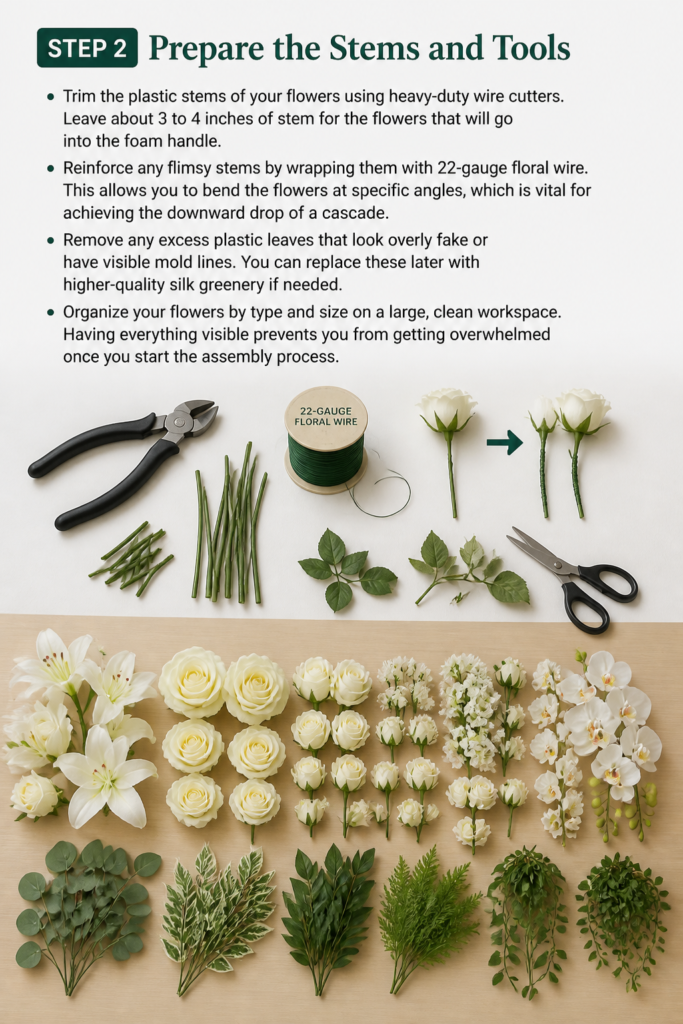
Reinforce any flimsy stems by wrapping them with 22-gauge floral wire. This allows you to bend the flowers at specific angles, which is vital for achieving the downward “drop” of a cascade.
Remove any excess plastic leaves that look overly fake or have visible mold lines. You can replace these later with higher-quality silk greenery if needed.
Organize your flowers by type and size on a large, clean workspace. Having everything visible prevents you from getting overwhelmed once you start the assembly process.
Step 3: Secure the Bouquet Holder
Choose a slanted bouquet holder with floral foam specifically designed for artificial flowers. This foam is denser than the type used for fresh flowers and holds heavy stems more securely.

Anchor the foam into the plastic cage by adding a few dabs of hot glue where the plastic meets the foam. This ensures the entire floral mass won’t shift during transport.
Wrap the handle of the holder with a base layer of floral tape. This provides a “grippy” surface for the decorative ribbon you will add at the very end.
Place the holder in a heavy vase or a dedicated bouquet stand. Having both hands free is essential for maintaining symmetry as you build the arrangement.
Step 4: Establish the Cascade Length
Insert your longest pieces of greenery into the bottom-most part of the foam. These pieces should point directly toward the floor to create the “tail” of the bouquet.

Vary the lengths of these trailing stems to create a natural, tapered look. The center stem should be the longest, with slightly shorter stems flanking it on either side.
Secure these heavy trailing pieces with a bit of hot glue on the stem before pushing them into the foam. Since these stems carry the most weight, they are the most likely to slip out.
Check the balance by holding the bouquet up to a mirror. Ensure the “tail” isn’t too thin; it should look like a lush, flowing extension of the main bunch.
Pro Tip: Use “weeping” greenery like amaranthus or willow to add effortless movement. These materials naturally hang downward, reducing the amount of wiring you have to do manually.
Step 5: Position the Focal Blooms
Place your largest focal flower in the center of the foam, slightly angled toward the front. This serves as the “heart” of the bouquet and is where the eye will naturally rest.
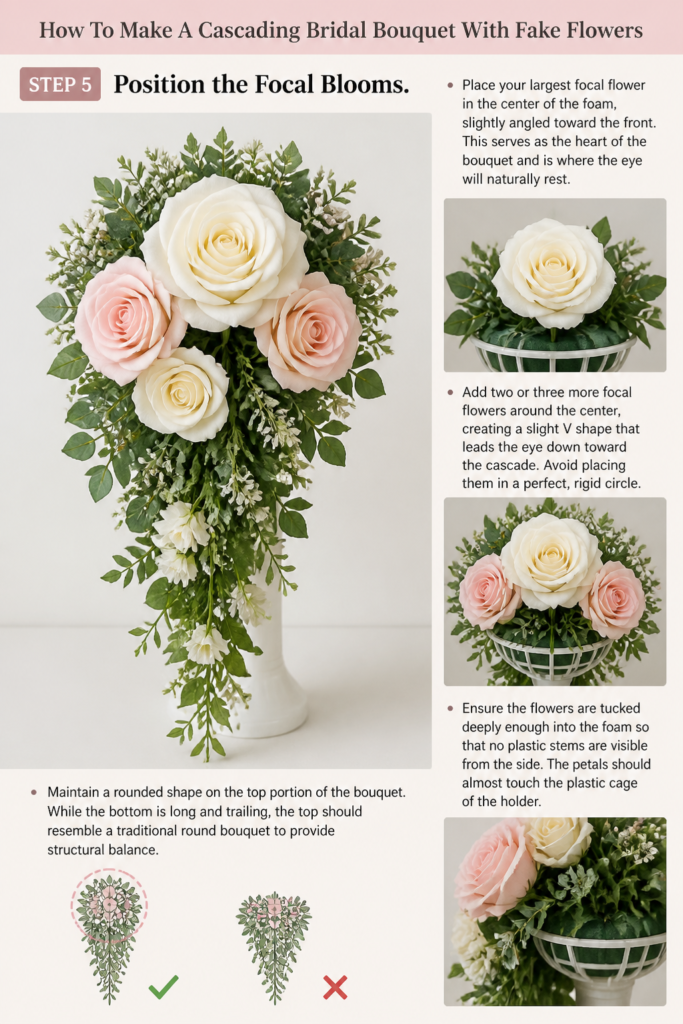
Add two or three more focal flowers around the center, creating a slight “V” shape that leads the eye down toward the cascade. Avoid placing them in a perfect, rigid circle.
Ensure the flowers are tucked deeply enough into the foam so that no plastic stems are visible from the side. The petals should almost touch the plastic cage of the holder.
Maintain a rounded shape on the top portion of the bouquet. While the bottom is long and trailing, the top should resemble a traditional round bouquet to provide structural balance.
Step 6: Integrate Secondary Flowers and Fillers
Fill the empty spaces between your focal flowers with your secondary blooms. These should be placed at varying depths to create a 3D effect.
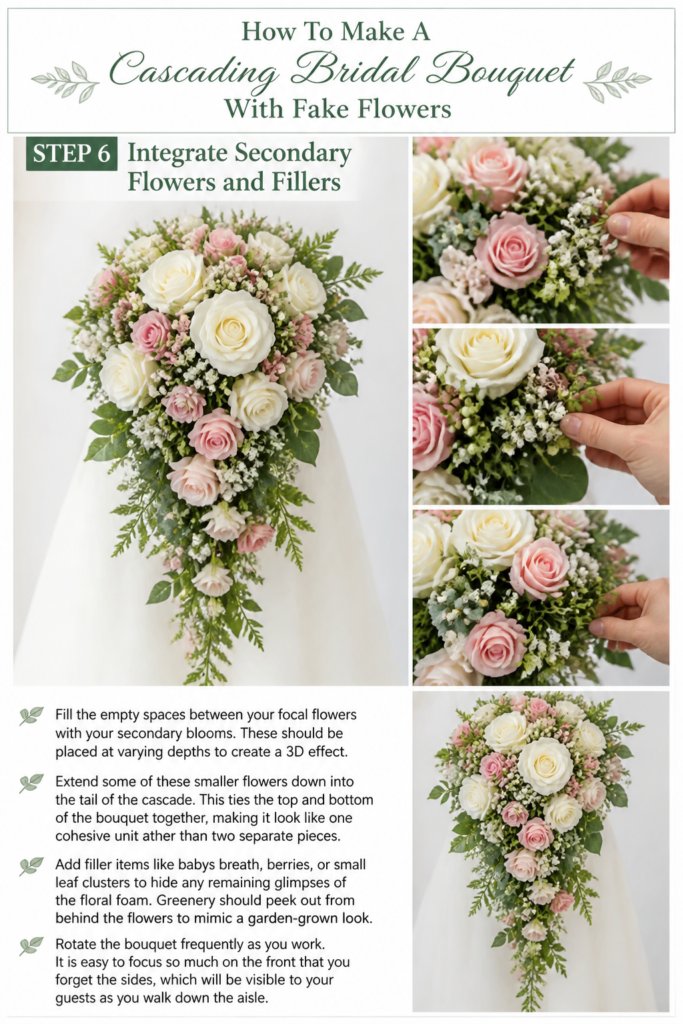
Extend some of these smaller flowers down into the “tail” of the cascade. This ties the top and bottom of the bouquet together, making it look like one cohesive unit rather than two separate pieces.
Add “filler” items like baby’s breath, berries, or small leaf clusters to hide any remaining glimpses of the floral foam. Greenery should peek out from behind the flowers to mimic a garden-grown look.
Rotate the bouquet frequently as you work. It is easy to focus so much on the front that you forget the sides, which will be visible to your guests as you walk down the aisle.
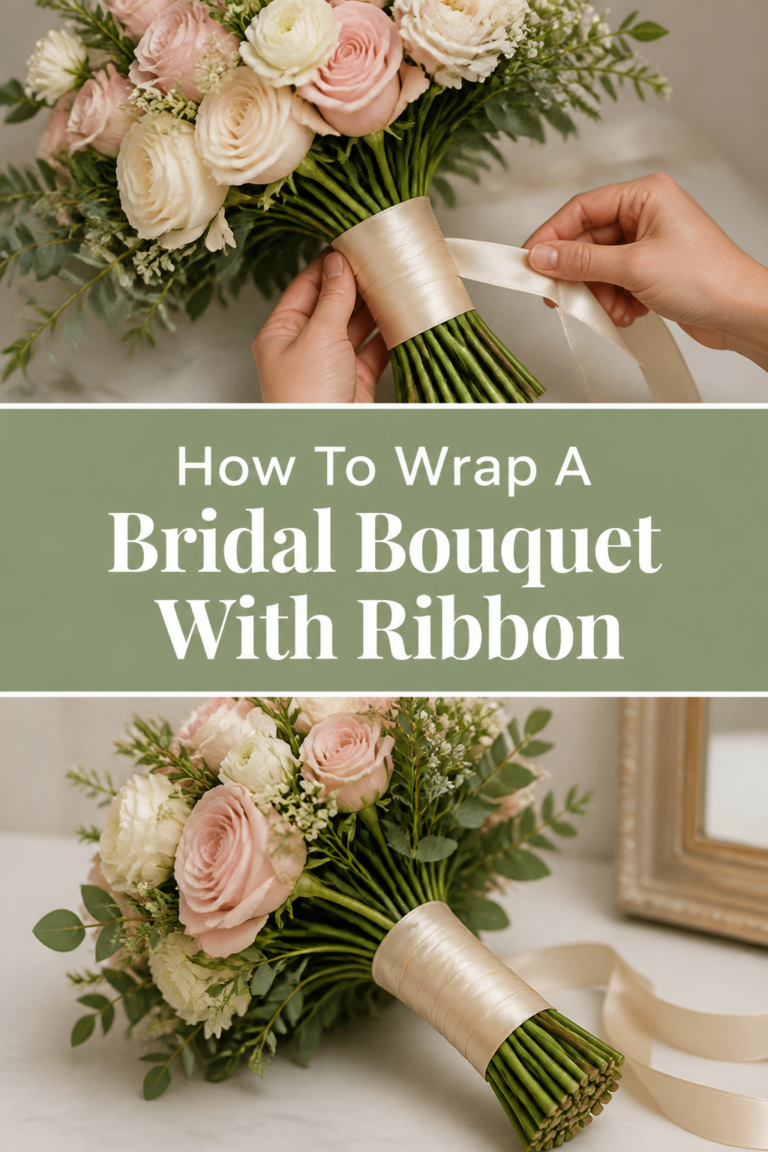
Step 7: Final Flourishes and Handle Wrap
Inspect the bouquet for any “holes” or flat spots. If a section looks thin, add a few sprigs of greenery or a small flower bud to round it out.
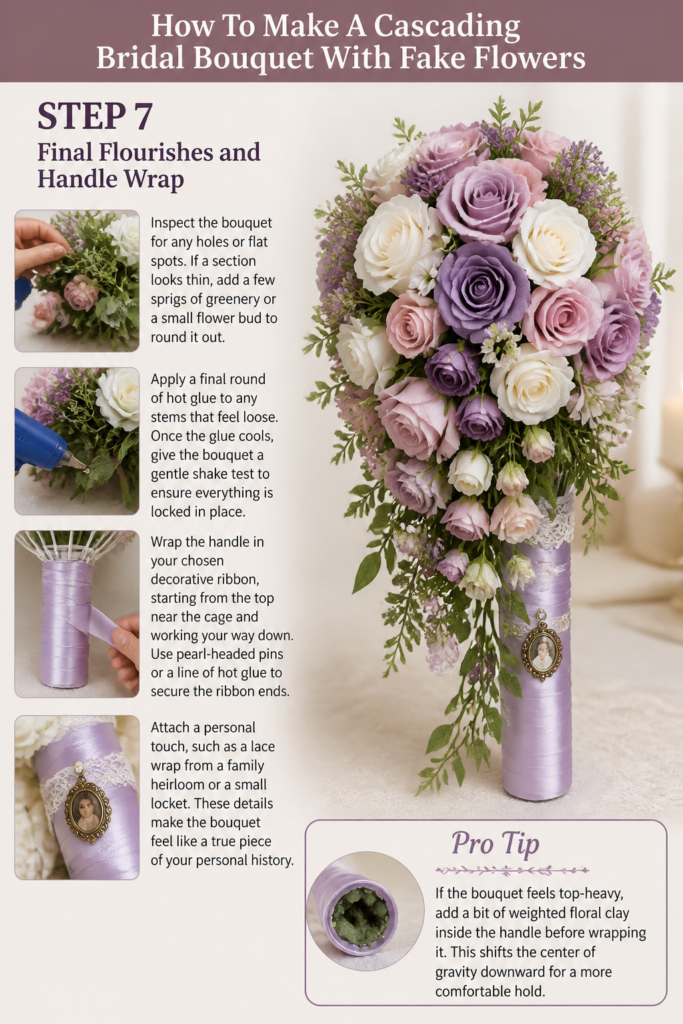
Apply a final round of hot glue to any stems that feel loose. Once the glue cools, give the bouquet a gentle “shake test” to ensure everything is locked in place.
Wrap the handle in your chosen decorative ribbon, starting from the top near the cage and working your way down. Use pearl-headed pins or a line of hot glue to secure the ribbon ends.
Attach a personal touch, such as a lace wrap from a family heirloom or a small locket. These details make the bouquet feel like a true piece of your personal history.
Pro Tip: If the bouquet feels top-heavy, add a bit of weighted floral clay inside the handle before wrapping it. This shifts the center of gravity and makes it much more comfortable to carry for long periods.
Common Mistakes to Avoid
The “Ice Cream Cone” Effect
Many beginners make the mistake of making the top of the bouquet too wide and the cascade too narrow. This results in a shape that looks like a scoop of ice cream on a cone rather than a flowing waterfall. To avoid this, ensure your greenery transitions gradually from the sides into the center tail.
Visible Plastic Stems
Nothing ruins the illusion of “real” flowers faster than seeing green plastic stems poking out at odd angles. Always use greenery or small filler flowers to “collar” the base of the bouquet. This hides the mechanics of the foam and the plastic cage, ensuring the bouquet looks beautiful from every angle.
Overcrowding the Blooms
It is tempting to pack as many flowers as possible into the foam, but this can make the bouquet look heavy and “stiff.” Flowers need “breathing room” to look natural. Leave small gaps for greenery to peek through, which mimics the way flowers actually grow in nature.
Troubleshooting
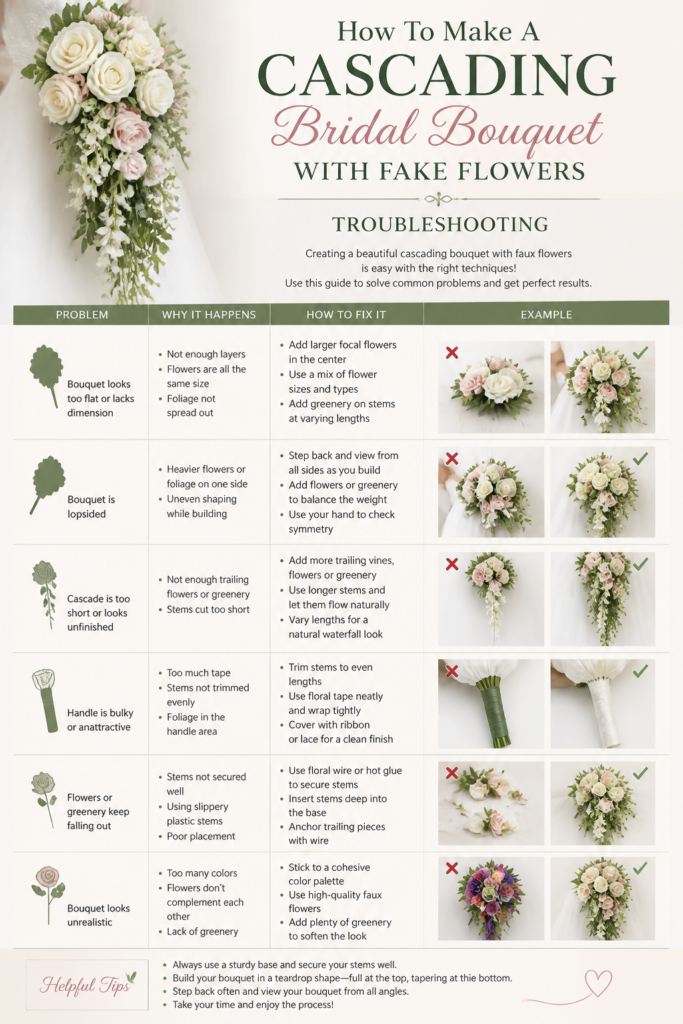
The Cascade Is Too Heavy and Drooping
If your trailing flowers are pulling out of the foam due to weight, you need to “cross-wire” them. Insert a long piece of floral wire through the plastic cage, wrap it around the heavy stem, and twist it shut. This creates a mechanical bond that doesn’t rely solely on the foam’s grip.
The Bouquet Feels Unbalanced in My Hand
Cascading bouquets are naturally front-heavy because of the trailing elements. If it feels like it’s tipping forward, add a few more large leaves or flowers to the very back of the arrangement, near the handle. This acts as a counterweight and helps the bouquet sit level when you hold it at your waist.
Flowers Looking Flat After Storage
Silk flowers can become compressed if they are stored in a box or against a wall. Use a handheld garment steamer on a low setting to gently “fluff” the petals. The steam relaxes the fabric and allows the flower to return to its original, full shape without damaging the dyes.
Key Takeaways
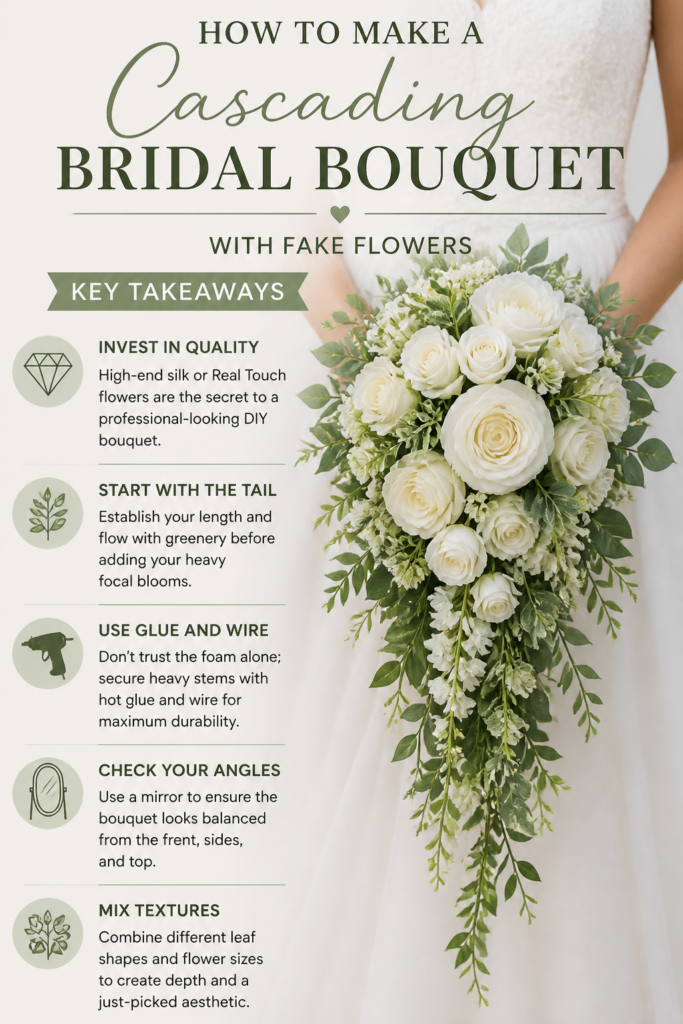
- Invest in quality: High-end silk or “Real Touch” flowers are the secret to a professional-looking DIY bouquet.
- Start with the tail: Establish your length and flow with greenery before adding your heavy focal blooms.
- Use glue and wire: Don’t trust the foam alone; secure heavy stems with hot glue and wire for maximum durability.
- Check your angles: Use a mirror to ensure the bouquet looks balanced from the front, sides, and top.
- Mix textures: Combine different leaf shapes and flower sizes to create depth and a “just-picked” aesthetic.
Frequently Asked Questions
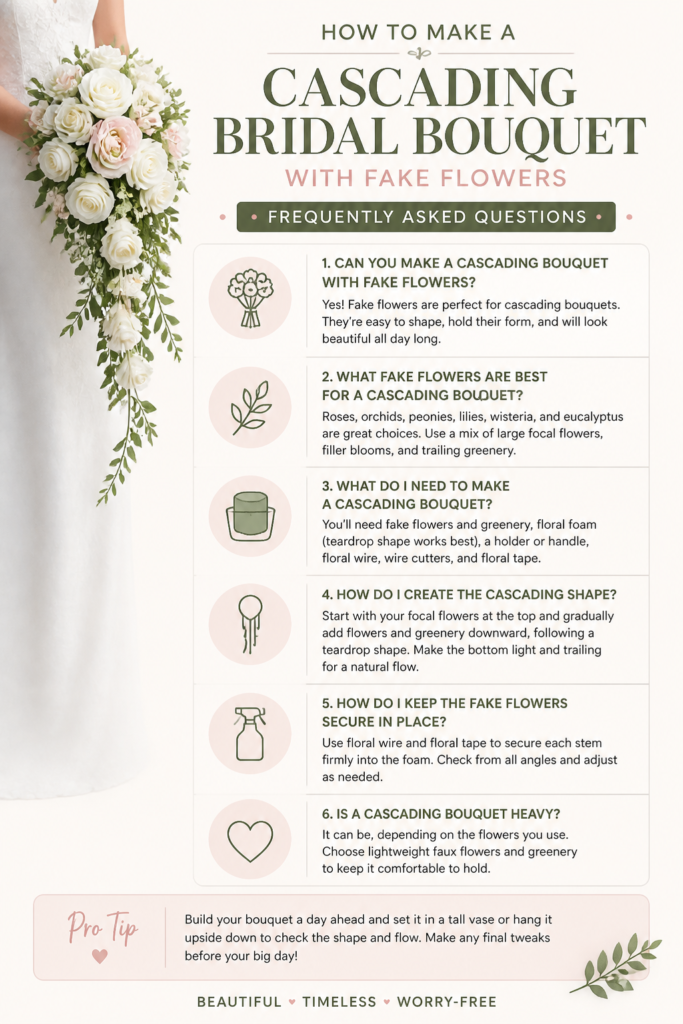
Can I make this bouquet months in advance?
One of the best parts of using fake flowers is that you can finish your bouquet months before the wedding. Store it in a cool, dry place away from direct sunlight to prevent the colors from fading. Covering it with a light silk cloth or a large plastic bag will keep it dust-free until the big day.
How do I make the flowers smell like real roses?
You can purchase floral scents or essential oils specifically designed for silk flowers. Lightly mist the “inner” petals of the flowers a few days before the wedding. Avoid spraying the outer petals directly, as some oils can leave translucent spots on certain fabrics.
Is a cascading bouquet harder to carry than a round one?
Cascading bouquets require a specific “hold” to look their best. You should hold the handle at your belly button with the cascade pointing slightly away from your body. Because they are larger and heavier, practicing your walk with the bouquet in front of a mirror is a great way to get comfortable.
What happens if a flower falls out during the ceremony?
If you have followed the steps of gluing and wiring each stem, this is very unlikely to happen. However, it is always a good idea to keep a small “emergency kit” with a few floral pins and a tiny tube of superglue in your bridal suite. This allows for a five-second fix if any accidents occur during photos.
Our Top Recommended Finds
- High-Density Floral Foam Bouquet Holder: Look for the “Dry Foam” variety specifically labeled for silk or dried flowers to ensure the best grip.
- 22-Gauge Green Floral Wire: This thickness is the perfect balance between being easy to bend and strong enough to support heavy silk rose heads.
- Professional Wire Cutters: Avoid using your craft scissors; a dedicated pair of wire cutters will save your hands from fatigue and keep your cuts clean.
Bring Your Floral Vision To Life
Now that you have the blueprint for a stunning cascading bouquet, you can start experimenting with your favorite colors and textures. Artificial flowers offer a level of creative freedom that fresh flowers simply can’t match, allowing you to tweak your design until it is absolutely perfect.
If you enjoyed this project, you might also want to look into creating matching boutonnieres or silk flower hair combs to complete your bridal look. The skills you learned here—wiring, taping, and balancing—are the foundation for almost any floral arrangement you can imagine.
Pick up your wire cutters and start building your dream bouquet today. You will love having a beautiful memento of your wedding day that will never wilt or fade.