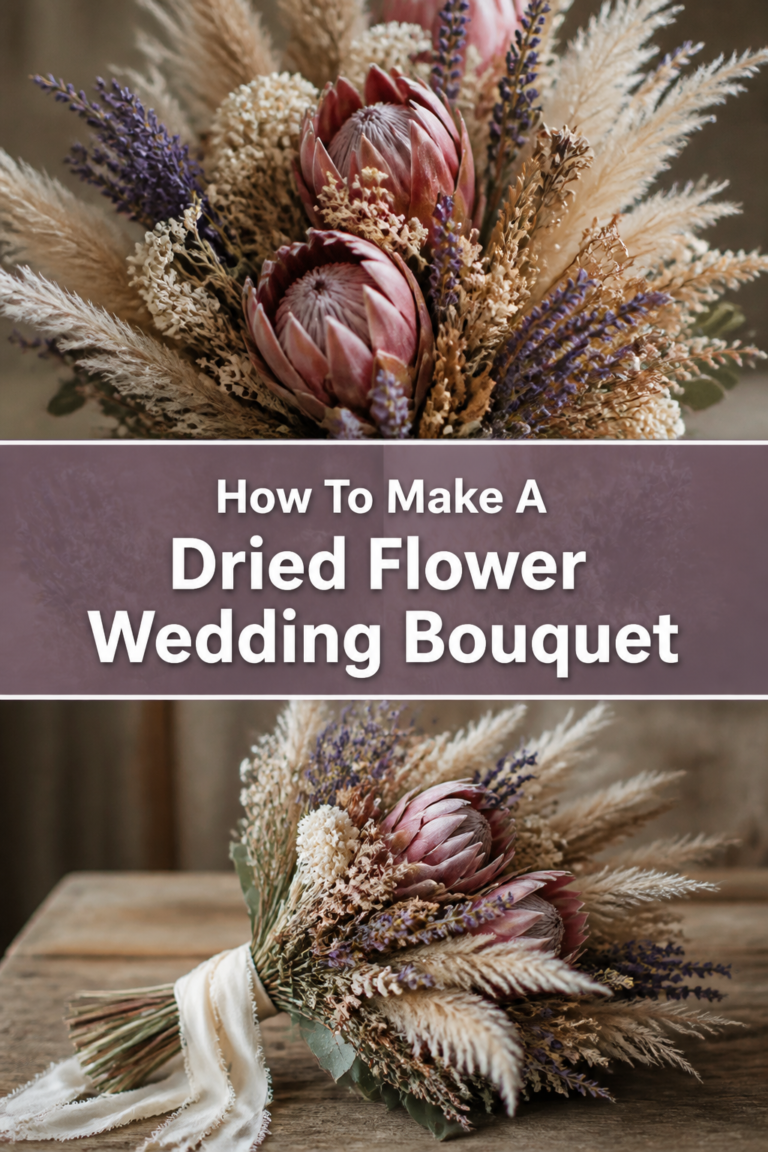
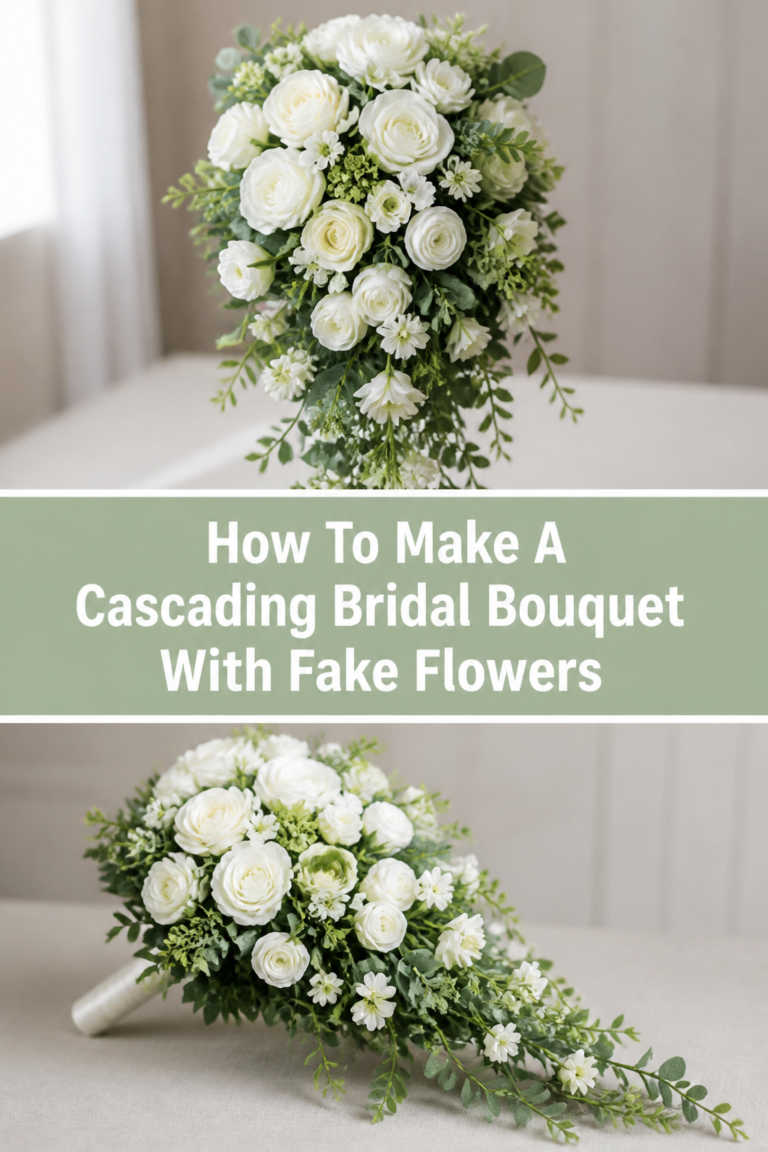
💐 How To Make A Cascading Bridal Bouquet With Silk Flowers
Crafting a cascading bouquet is an art form that transforms simple silk stems into a flowing masterpiece.
After helping dozens of brides navigate the world of DIY florals, I have found that silk flowers offer a stress-free alternative to fresh blooms.
This guide provides the exact blueprint you need to build a sturdy, breathtaking arrangement that looks stunning in every photograph.

Quick Overview
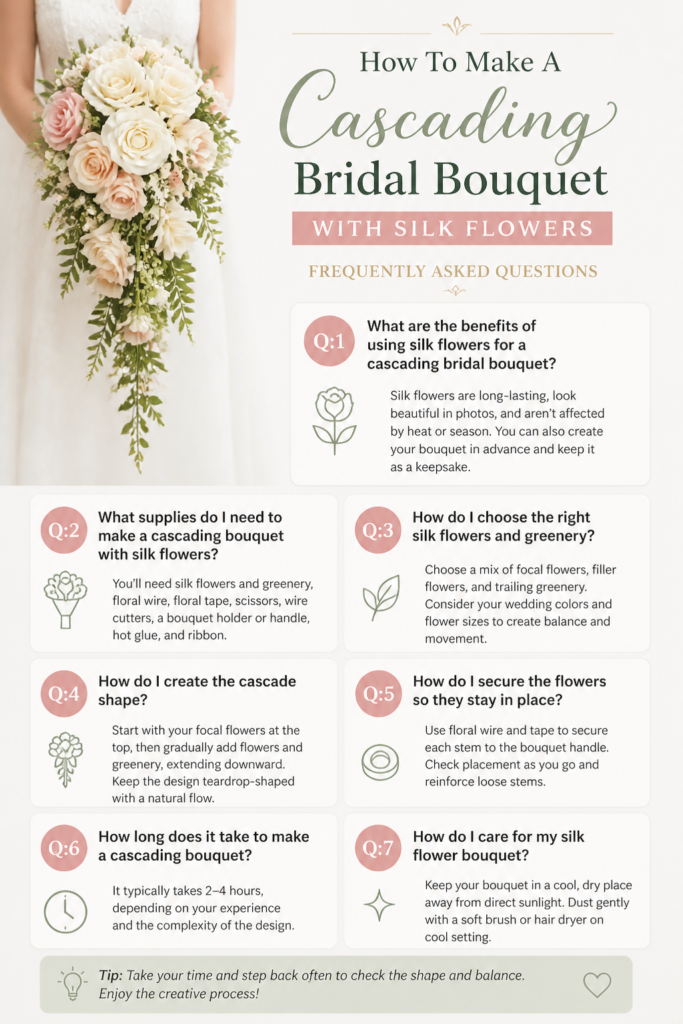
This project allows you to create a dramatic, teardrop-shaped arrangement that flows elegantly from your hands.
- Time needed: 3 to 5 hours
- Difficulty: Intermediate
- What you’ll need: Silk flowers, floral foam holder, wire cutters, floral tape, hot glue, and ribbon.
Step-by-Step Instructions
Step 1: Select High-Quality Silk Stems
Choose “Real Touch” or high-end silk flowers to ensure your bouquet looks authentic from a distance and in close-up photos.
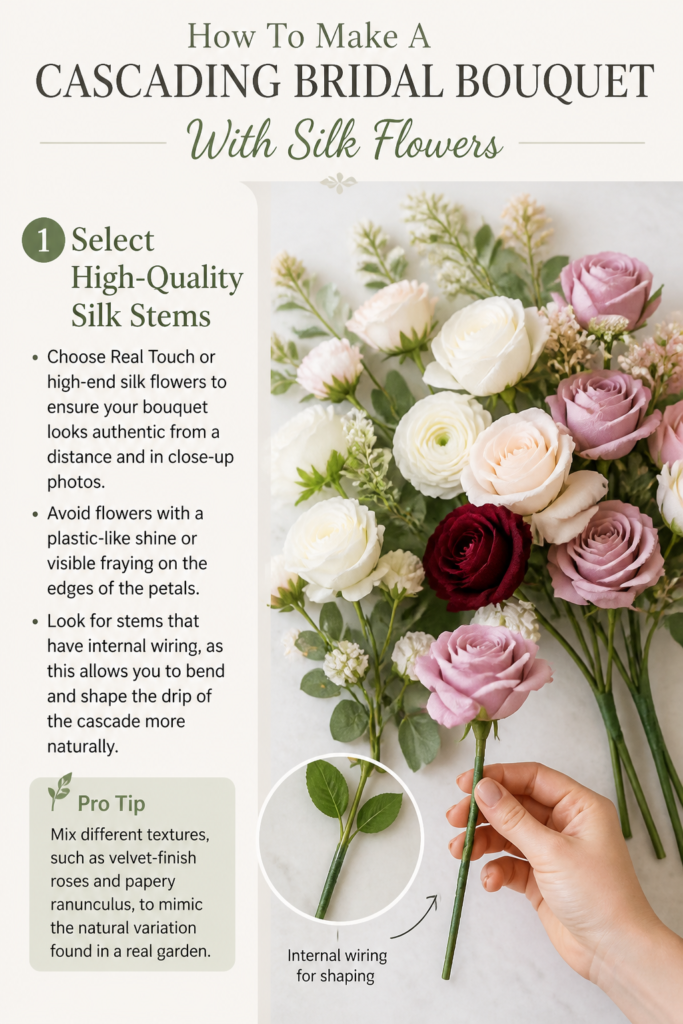
Avoid flowers with a plastic-like shine or visible fraying on the edges of the petals.
Look for stems that have internal wiring, as this allows you to bend and shape the “drip” of the cascade more naturally.
Pro Tip: Mix different textures, such as velvet-finish roses and papery ranunculus, to mimic the natural variation found in a real garden.
Step 2: Prepare Your Workstation and Tools
Clear a large, flat surface where you can lay out all your flowers by type and color.
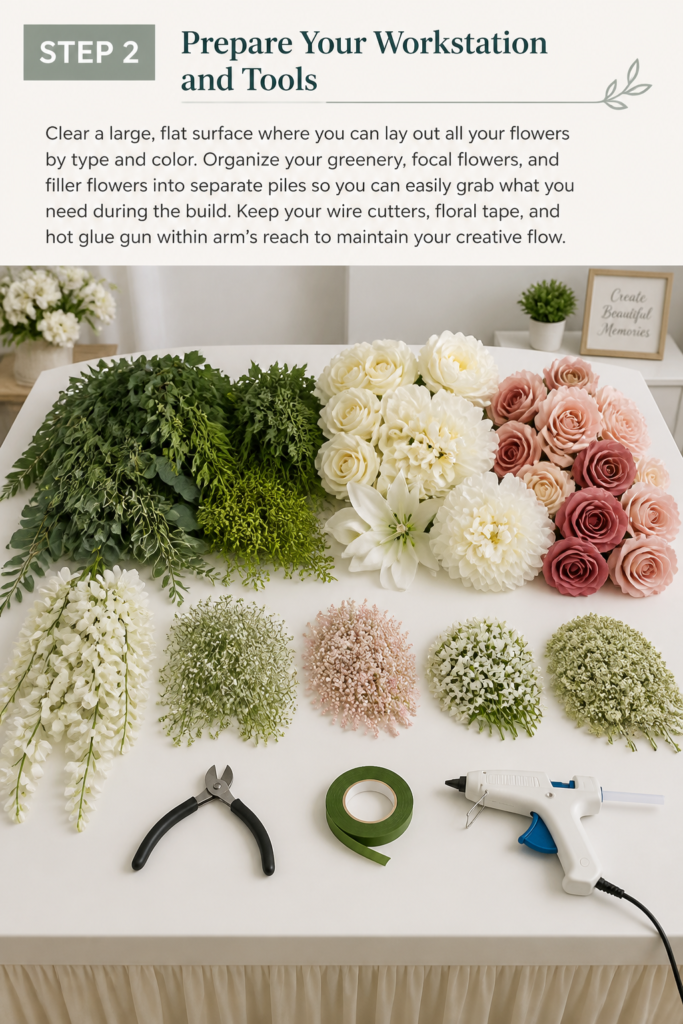
Organize your greenery, focal flowers, and filler flowers into separate piles so you can easily grab what you need during the build.
Keep your wire cutters, floral tape, and hot glue gun within arm’s reach to maintain your creative flow.
Step 3: Secure the Floral Foam Holder
Inspect your slanted floral foam holder to ensure the plastic cage is snapped tightly into place.
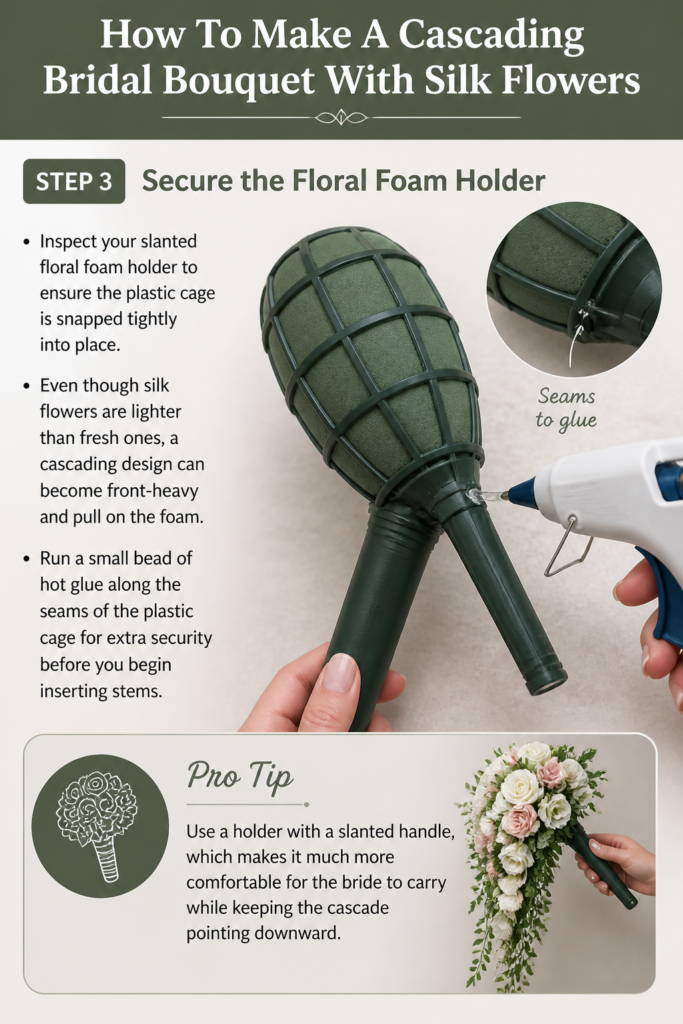
Even though silk flowers are lighter than fresh ones, a cascading design can become front-heavy and pull on the foam.
Run a small bead of hot glue along the seams of the plastic cage for extra security before you begin inserting stems.
Pro Tip: Use a holder with a slanted handle, which makes it much more comfortable for the bride to carry while keeping the cascade pointing downward.
Step 4: Establish the Length of the Cascade
Select your longest, most flexible greenery or “vine-like” stems to create the bottom point of the teardrop.
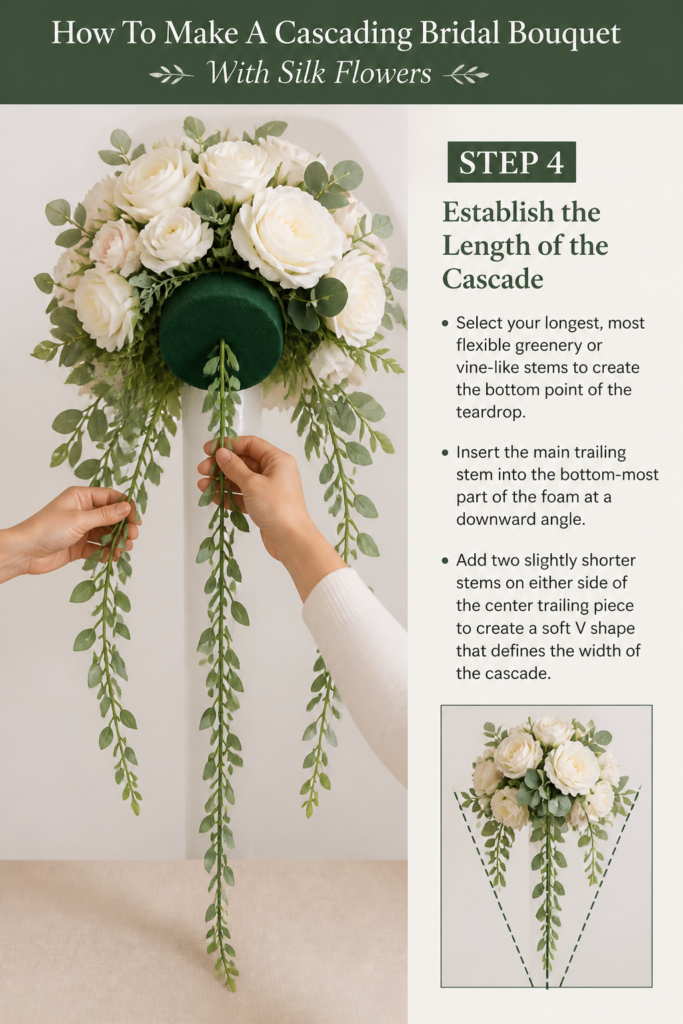
Insert the main trailing stem into the bottom-most part of the foam at a downward angle.
Add two slightly shorter stems on either side of the center trailing piece to create a soft “V” shape that defines the width of the cascade.
Step 5: Create the Focal Point
Place your largest, most beautiful “hero” flowers in the center of the foam holder, just above the handle.
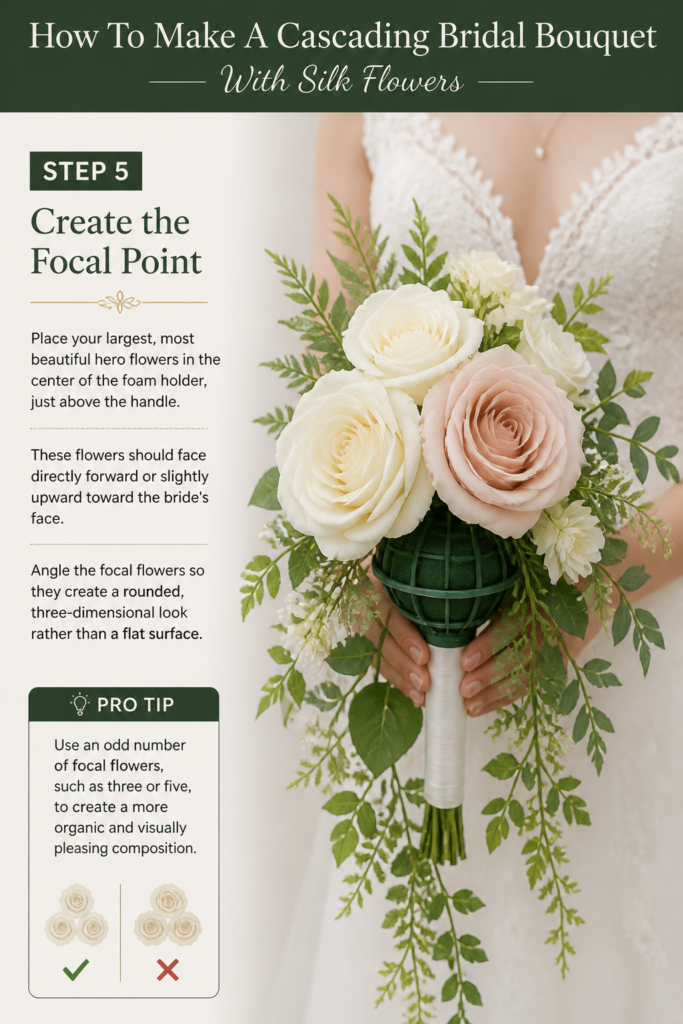
These flowers should face directly forward or slightly upward toward the bride’s face.
Angle the focal flowers so they create a rounded, three-dimensional look rather than a flat surface.
Pro Tip: Use an odd number of focal flowers, such as three or five, to create a more organic and visually pleasing composition.
Step 6: Build the Transition Zone
Bridge the gap between the focal flowers at the top and the long trailing stems at the bottom.
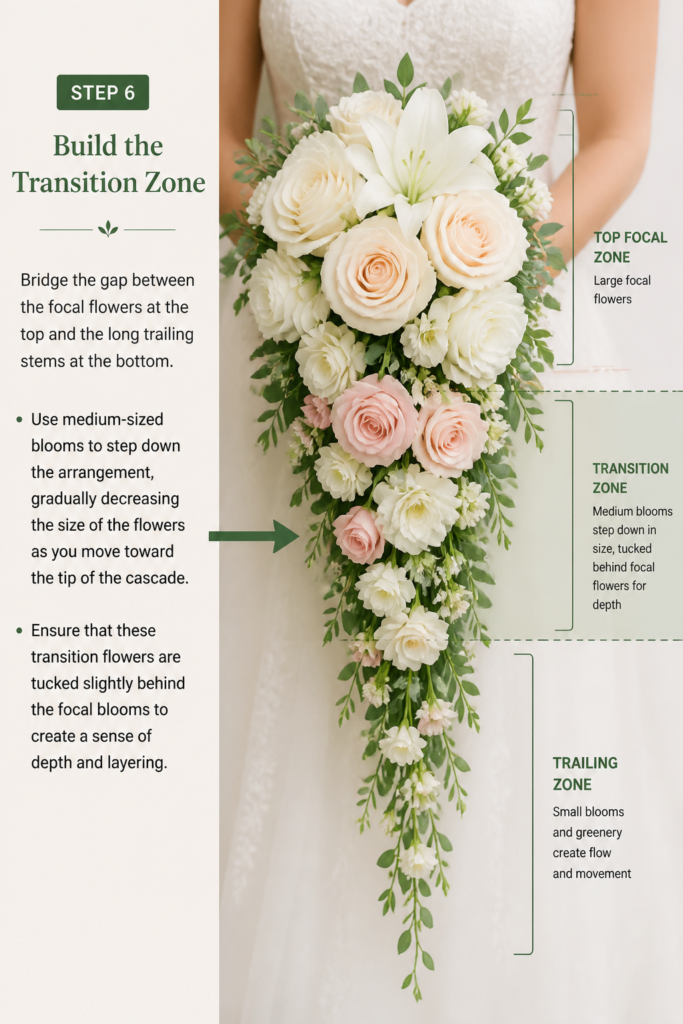
Use medium-sized blooms to “step down” the arrangement, gradually decreasing the size of the flowers as you move toward the tip of the cascade.
Ensure that these transition flowers are tucked slightly behind the focal blooms to create a sense of depth and layering.
Step 7: Fill the Body and Sides
Insert filler flowers and smaller greenery stems into the sides of the foam to hide the plastic cage completely.
Make sure to add a few stems to the back of the bouquet so it looks finished from every angle, including the side view.
Check for any “holes” or visible foam and plug them with small bits of moss or tiny leaf clusters.
Step 8: Reinforce Stems with Glue
Apply a small drop of hot glue to the end of each stem before pushing it back into its final position in the foam.
This is a vital step for silk bouquets, as it prevents flowers from vibrating loose or falling out during transport or the “toss” at the reception.
Be careful not to use too much glue, as excess drips can be difficult to hide once they harden.
Pro Tip: If a stem feels loose, wrap a small bit of floral tape around the base of the wire to thicken it before adding glue and re-inserting.
Step 9: Wrap the Handle
Cover the plastic handle with floral tape first to provide a grippy surface for your decorative ribbon.
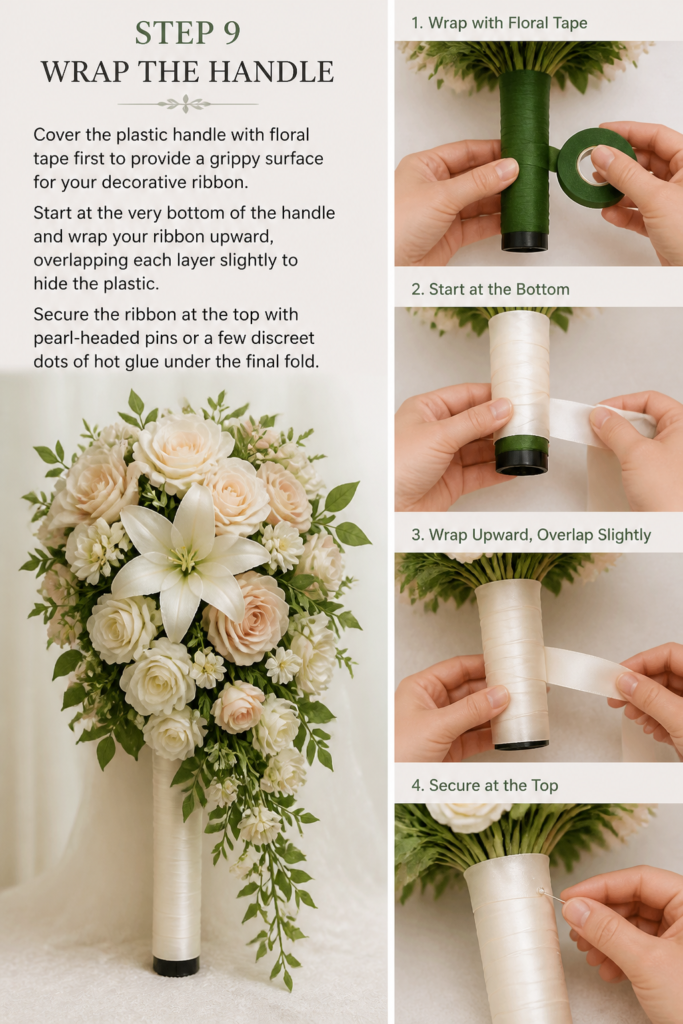
Start at the very bottom of the handle and wrap your ribbon upward, overlapping each layer slightly to hide the plastic.
Secure the ribbon at the top with pearl-headed pins or a few discreet dots of hot glue under the final fold.
Step 10: Final Shaping and Steaming
Hold the bouquet in front of a mirror to see how it will look when you are walking down the aisle.
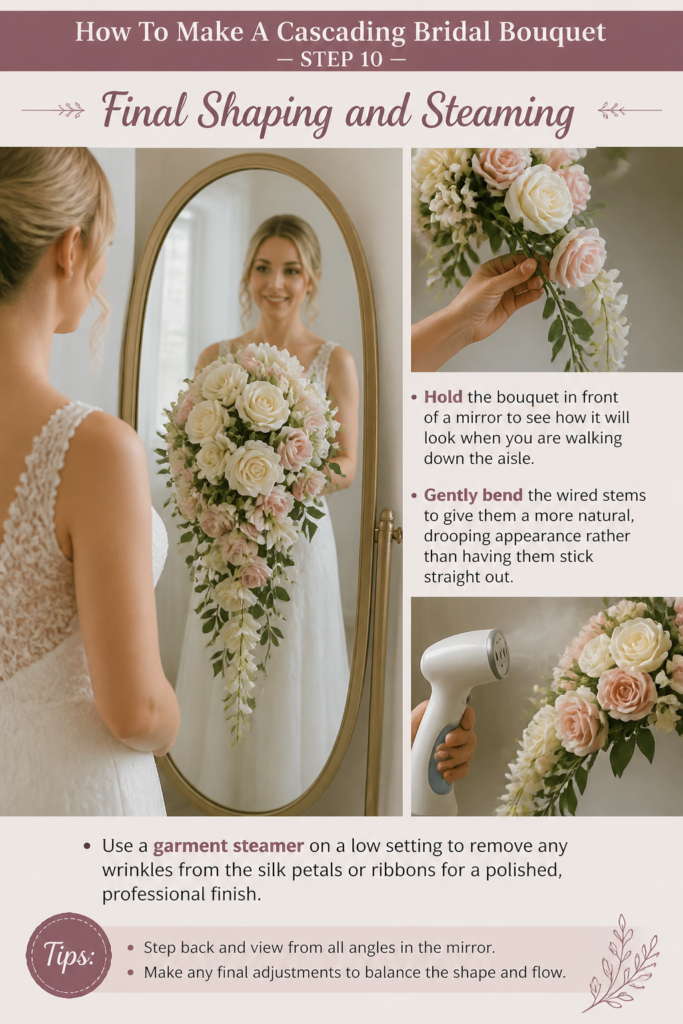
Gently bend the wired stems to give them a more natural, drooping appearance rather than having them stick straight out.
Use a garment steamer on a low setting to remove any wrinkles from the silk petals or ribbons for a polished, professional finish.
Common Mistakes to Avoid
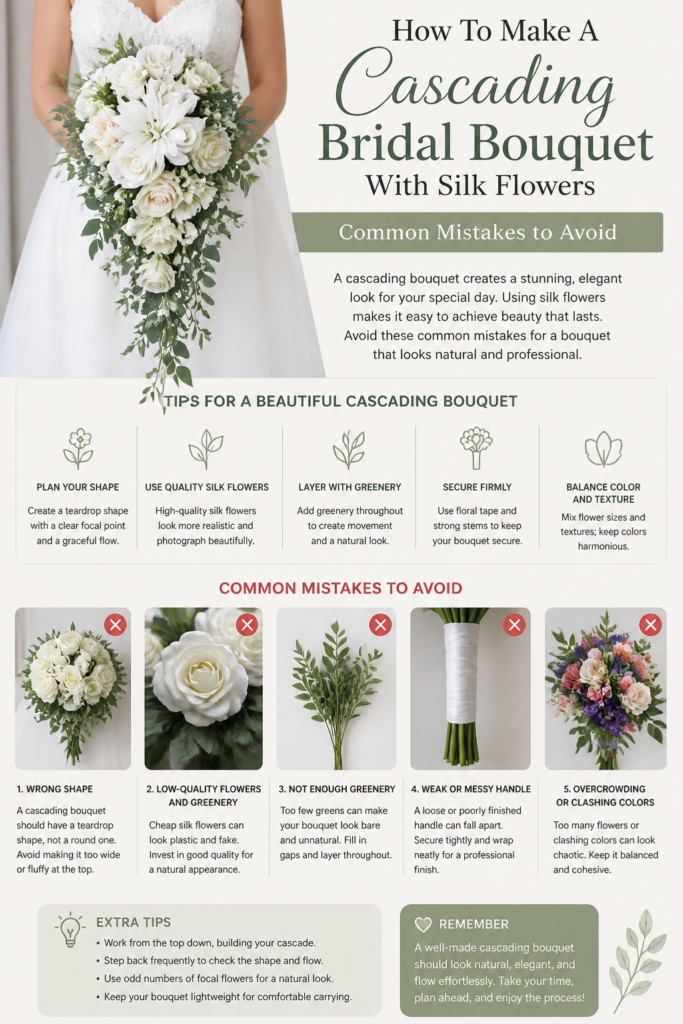
The Lollipop Look
Many beginners make the mistake of cutting all their stems to the same length. This results in a bouquet that looks like a flat ball rather than a flowing cascade. Varying the stem lengths is the only way to achieve that beautiful, tiered effect that defines this style.
Ignoring the Profile View
It is easy to focus entirely on how the bouquet looks from the front. However, guests and photographers will see the bouquet from the side as you walk past them. Always check that the flowers wrap around the sides of the foam holder so no plastic is visible from the profile view.
Using Heavy Flowers at the Tip
Placing your largest or heaviest silk flowers at the very bottom of the cascade will make the bouquet bounce awkwardly when you move. It also puts unnecessary strain on the foam. Always keep the weight and size concentrated near the handle, using light greenery and small buds for the trailing end.
Troubleshooting
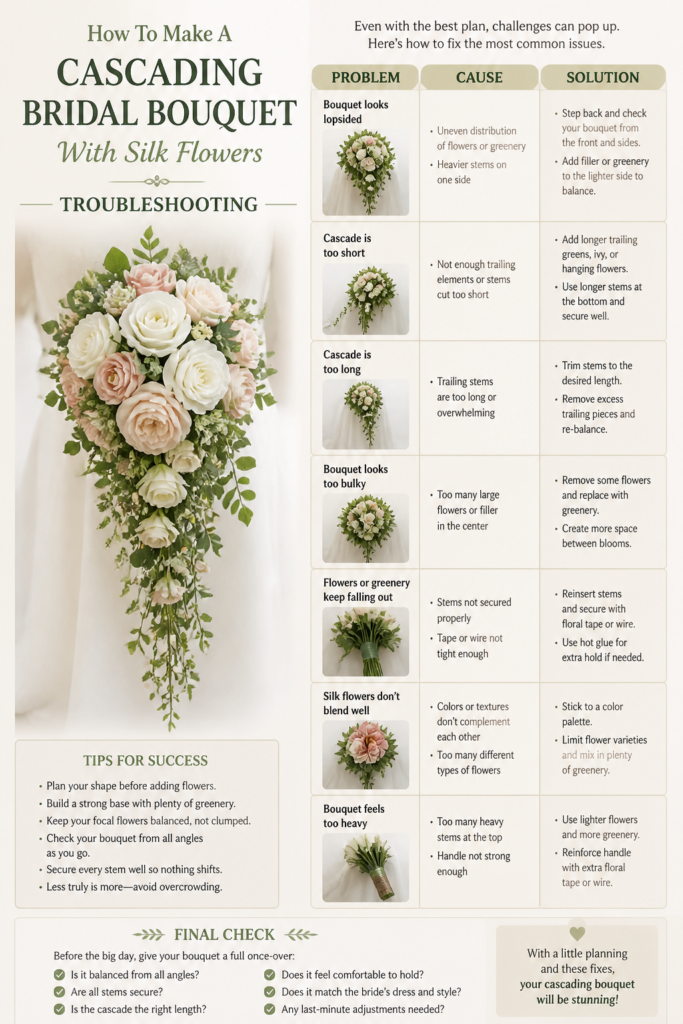
The Bouquet Feels Front-Heavy
If the bouquet keeps tipping forward in your hand, you likely have too much weight in the cascade and not enough balance at the top. You can fix this by adding a few more dense flowers or greenery to the very top and back of the holder. This shifts the center of gravity back toward your hand.
Stems Won’t Stay in the Foam
Silk flower stems are often thin wires that don’t “grip” the foam as well as thick, fleshy real stems. If they keep sliding out, try bending the last half-inch of the wire into a small “U” or “L” shape before inserting it. This creates a hook that anchors the stem into the foam much more effectively.
The Colors Look Too Artificial
Sometimes silk flowers can look “flat” because they are all exactly the same shade. You can fix this by using a floral tint spray or even a light dusting of eyeshadow in a slightly darker shade at the base of the petals. This adds the subtle shadows and highlights found in nature.
Key Takeaways
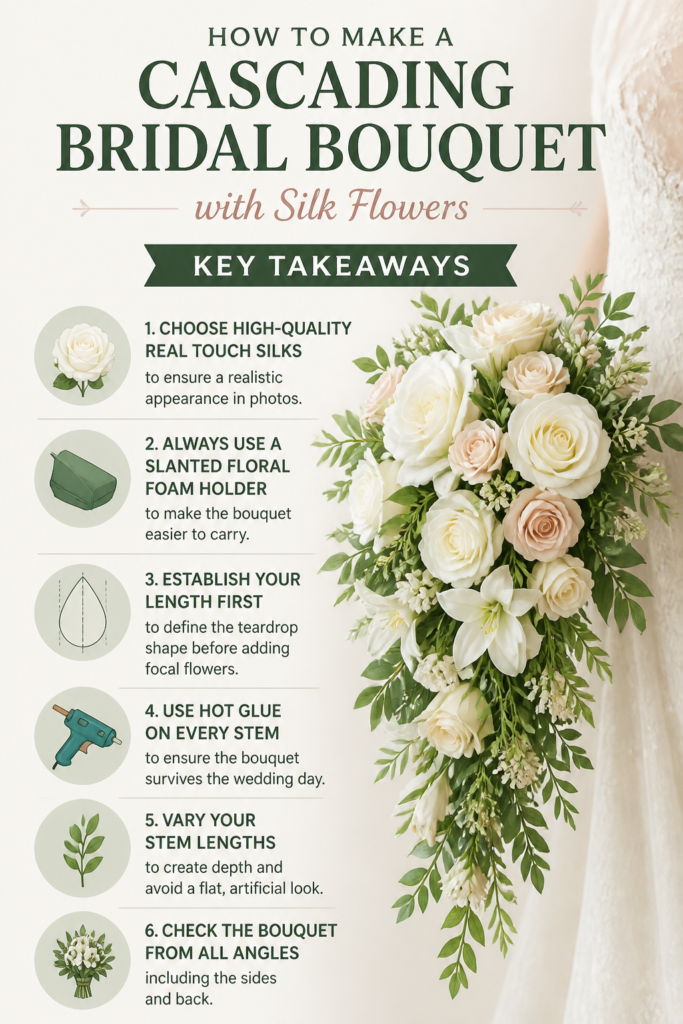
- Choose high-quality “Real Touch” silks to ensure a realistic appearance in photos.
- Always use a slanted floral foam holder to make the bouquet easier to carry.
- Establish your length first to define the “teardrop” shape before adding focal flowers.
- Use hot glue on every stem to ensure the bouquet survives the wedding day.
- Vary your stem lengths to create depth and avoid a flat, artificial look.
- Check the bouquet from all angles, including the sides and back.
Frequently Asked Questions
Can I make this bouquet months in advance?
One of the best parts about using silk flowers is that you can finish your bouquet months before the wedding. Just make sure to store it in a cool, dry place away from direct sunlight to prevent the colors from fading. Covering it with a large, clean silk scarf or a light plastic bag will keep it dust-free.
How heavy will a silk cascading bouquet be?
Silk bouquets are generally lighter than fresh ones because they don’t contain water weight. However, a large cascading design can still be substantial. Using a foam holder with a sturdy handle helps distribute the weight across your palm, making it much easier to hold for long periods than a hand-tied bouquet.
What if I want to mix silk and dried flowers?
Mixing silk with dried elements like pampas grass or preserved eucalyptus is a wonderful way to add texture. Just be aware that dried elements are much more fragile than silk. Add the dried pieces last so you don’t crush them while you are positioning the sturdier silk stems.
How do I transport the bouquet to the venue?
The best way to transport a cascading bouquet is in a tall, narrow vase or a weighted box with a hole cut in the top. This keeps the trailing stems from resting on a flat surface, which could crush or bend them. Ensure the vase is heavy enough that it won’t tip over during the car ride.
Our Top Recommended Finds
- FloraCraft Floral Foam Bouquet Holder: Look for the “Slant Handle” version specifically designed for cascading arrangements.
- Professional Wire Cutters: A pair of heavy-duty cutters will save your hands from fatigue when cutting through thick, silk-wrapped wires.
- Double-Faced Satin Ribbon: This provides a luxurious feel for the handle and won’t fray as easily as cheaper options.
Bringing Your Floral Vision To Life
Now that you have the techniques down, you can start experimenting with different flower combinations and colors.
You might consider making matching boutonnieres or bridesmaid bouquets using the leftover silk stems from your main project.
Take your time with the placement, trust your creative instincts, and enjoy the process of building a bouquet that will never wilt.