🧵 How To Make A Bustle On A Wedding Dress
Walking down the aisle with a cathedral-length train is a dream for many brides.
However, dancing the night away with several feet of heavy fabric dragging behind you is a recipe for a tripped-up disaster.
Having spent years in bridal alterations, I have seen exactly how a well-placed bustle can transform a gown from a formal masterpiece into a functional party dress.

Quick Overview
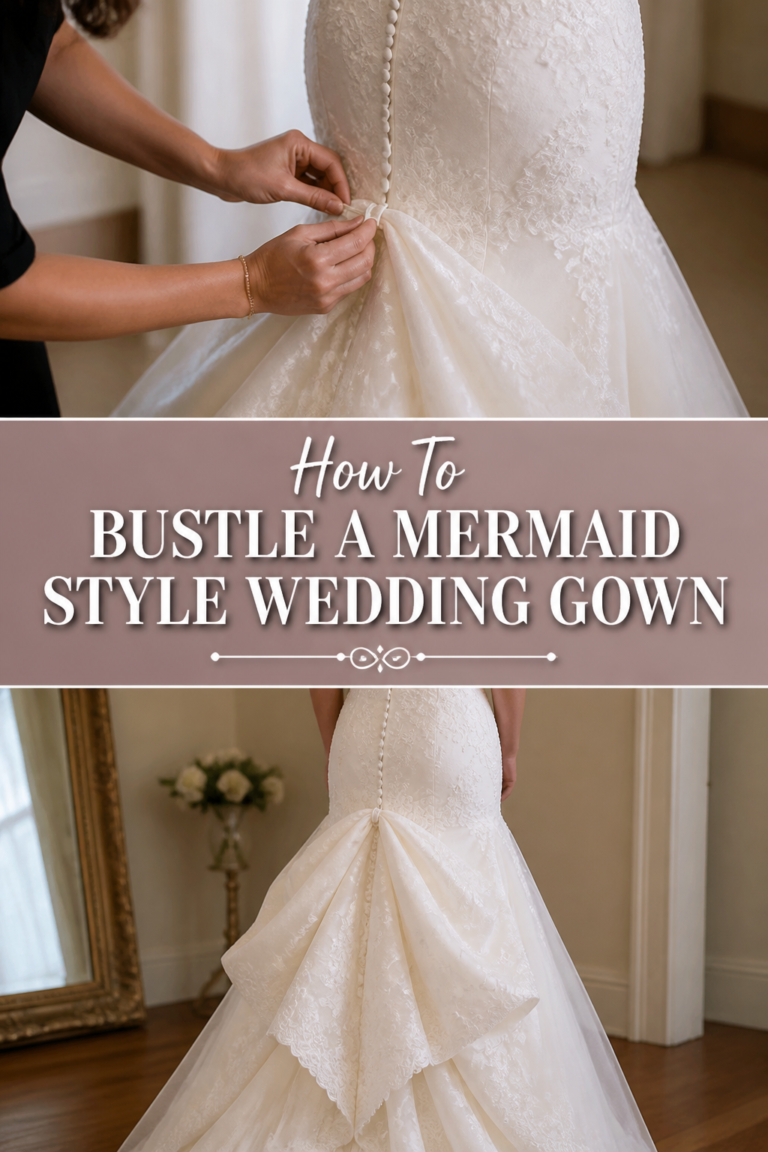
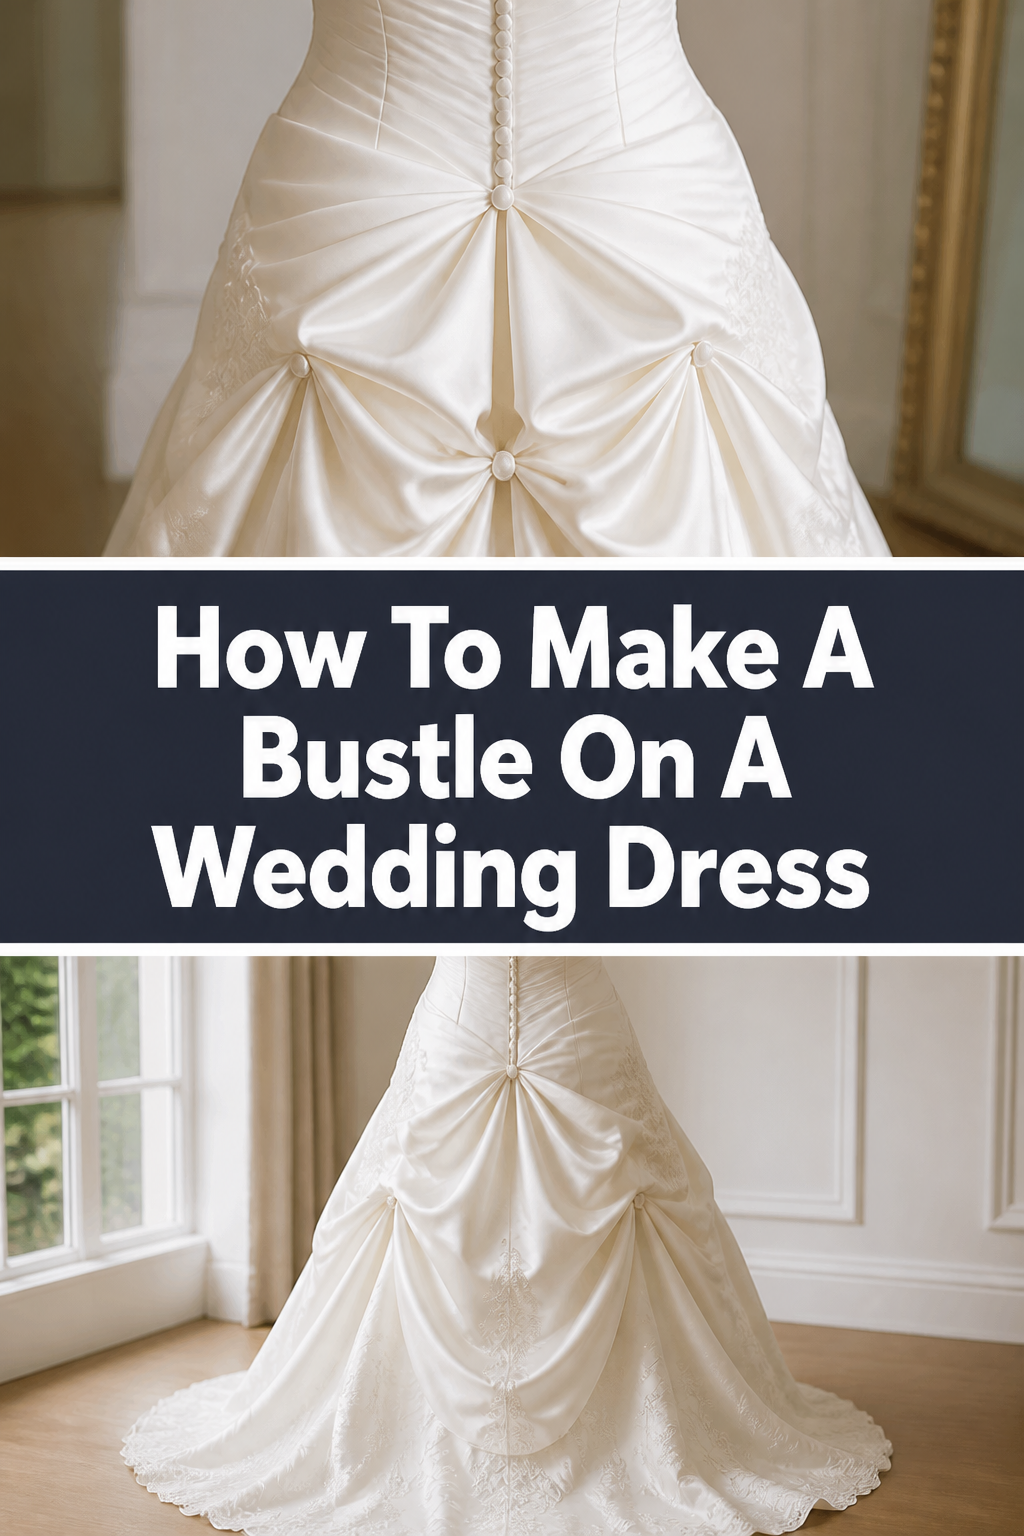
A bustle is a series of buttons, hooks, or ribbons added to a wedding dress to lift the train off the floor.
This modification allows the bride to move freely during the reception without losing the beauty of her gown’s silhouette.
- Time needed: 2 to 4 hours depending on the complexity of the train.
- Difficulty: Intermediate (requires basic sewing skills and an eye for draping).
- What you’ll need: Clear buttons, sturdy thread, fabric chalk, a sewing needle, safety pins, and a seam ripper.
Step-by-Step Instructions
Step 1: Analyze the Dress Silhouette
Examine the fabric weight and the shape of the skirt before you start pinning.
A heavy satin ballgown requires a much stronger support system than a light, airy tulle A-line dress.
Identify the natural waistline and the hip area to determine where the weight of the train will eventually hang.
Pro Tip: Always have the bride wear her wedding shoes during this process to ensure the hem clears the floor perfectly.
Step 2: Choose the Bustle Style
Decide between an American bustle or a French bustle based on the dress design.
The American bustle, or “over-bustle,” lifts the train and attaches it to the outside of the skirt at the waist or hips.
The French bustle, or “under-bustle,” tucks the fabric underneath itself using ribbons tied on the inside of the gown.
Consider how the lace or beadwork will look when folded; some patterns look better lifted, while others look better tucked.
Step 3: Find the Center Point
Locate the center back seam of the dress and mark it with a piece of fabric chalk.
Lift the center of the train up toward the waistline to see how the fabric drapes naturally.
Observe if a single point of attachment is enough or if the sides of the train are still dragging on the floor.
Step 4: Mark the Attachment Points
Use safety pins to temporarily secure the fabric at the height where the hem just touches the floor.
For a three-point bustle, mark one spot on the center seam and two spots equidistant from the center on the sides.
Check the symmetry from a distance to make sure the “pick-up” points look intentional and balanced.
Pro Tip: Use different colored safety pins for the “loop” side and the “button” side to avoid confusion during the sewing phase.
Step 5: Prepare the Buttons or Hooks
Select buttons that match the dress color or use clear acrylic buttons that disappear into the fabric.
If the dress is exceptionally heavy, use large coat buttons on the inside of the lining to act as an anchor for the exterior buttons.
Thread your needle with a double strand of high-quality upholstery thread for maximum durability.
Step 6: Sew the Support Hardware
Stitch the buttons onto the dress at the marked points on the waistline or hip area.
Ensure you are sewing through the structural layers of the dress, such as the bodice stay or the reinforced waist tape.
Avoid sewing only through a thin layer of lace, as the weight of the train will likely tear the delicate fabric.
Step 7: Create the Loops or Ties
Construct loops using sturdy crochet thread or thin silk ribbon for an American bustle.
For a French bustle, sew pairs of numbered ribbons to the underside of the skirt and the lining.
Test each loop by hooking it over the button to ensure it is tight enough to stay secure but loose enough to manipulate easily.
Step 8: Reinforce the Stitching
Go back over each attachment point with several “locking” stitches to prevent the thread from unraveling.
Apply a small drop of clear fray-check or fabric glue to the knots for extra security.
Tug firmly on each button and loop to simulate the movement of dancing and walking.
Step 9: Conduct a Final Fitting
Ask the bride to walk, spin, and sit down while the dress is bustled.
Check that the fabric doesn’t bunch awkwardly and that the hem remains at a safe height all the way around.
Adjust the placement of the side points if the fabric creates “wings” that stick out too far from the body.
Common Mistakes to Avoid
Using Weak Thread
Standard all-purpose thread is often too thin to hold the weight of a multi-layered wedding train.
If the thread snaps during the reception, the bride will be stuck carrying her train over her arm all night.
Always opt for heavy-duty button thread or upholstery thread to ensure the bustle stays intact through hours of movement.
Ignoring the Lining
Many people make the mistake of only bustling the outer layer of the dress while leaving the lining to drag.
This creates a tripping hazard and can cause the outer fabric to look lumpy or uneven.
You must coordinate the lift of the lining with the lift of the fashion fabric for a clean, professional finish.
Placing Buttons on Delicate Lace
Attaching a bustle point directly to a single layer of illusion mesh or fine lace is a recipe for a visible tear.
The tension from the train is significant, especially when the bride is moving quickly or someone accidentally steps on the dress.
Always anchor your hardware to a seam or a reinforced area of the gown’s internal structure.
Troubleshooting
The Train Still Drags
If the train is still touching the floor after bustling, your attachment points are likely too low on the skirt.
You will need to move the buttons higher up toward the waist or create deeper loops to pull the fabric further off the ground.
Check that the loops haven’t stretched out, which can happen with certain types of elasticated cording.
The Bustle Looks Lopsided
Lopsidedness usually occurs when the side points are not measured accurately from the center seam.
Use a measuring tape to confirm that the distance from the floor to the attachment point is identical on both the left and right sides.
If the dress has an asymmetrical design, you may need to adjust the points visually rather than mathematically.
Buttons Popping Off
If a button pops off during the testing phase, it means there is too much tension on a single point.
Consider adding more bustle points to distribute the weight of the fabric more evenly across the back of the dress.
You can also try using a “backing button” on the inside of the fabric to prevent the thread from pulling through the weave.
Key Takeaways
- Always perform the bustling process while the bride is wearing her actual wedding shoes.
- The American bustle is best for dresses with intricate back details you want to showcase.
- The French bustle provides a more rounded, vintage look and is often more secure for heavy fabrics.
- Reinforcement is the most important step to prevent mid-reception wardrobe malfunctions.
- Numbering the ribbons on a French bustle makes it much easier for the bridesmaids to assemble on the wedding day.
- Clear buttons are the secret to a bustle that looks like it is part of the original dress design.
Frequently Asked Questions
When should the bustle be done during the wedding day?
The bustle is typically pinned up immediately following the ceremony and formal photographs.
This transition happens right before the grand entrance to the reception or during the cocktail hour.
It is helpful to have a designated bridesmaid or family member practice the process beforehand so it goes quickly.
Can any wedding dress be bustled?
Almost any dress with a train can be bustled, though the method will vary significantly based on the cut.
Short sweeps might only need one point, while massive royal trains might require fifteen or more points to stay lifted.
Dresses with very short trains or no trains at all do not require a bustle.
How much does it cost to have a bustle professionally added?
Professional seamstresses usually charge per bustle point, with prices ranging from $15 to $50 per point.
A complex French bustle on a heavy gown can easily cost several hundred dollars in a high-end bridal shop.
Learning to do it yourself can save a significant portion of your alterations budget if you have the patience.
Will bustling the dress damage the fabric?
If done correctly, bustling does not damage the fabric and is considered a standard part of bridal tailoring.
Small needle holes are usually hidden by the folds of the fabric or the lace patterns.
However, if the bustle is pulled too hard or stepped on, it can cause small tears that may need repair later.
Our Top Recommended Finds
- Extra-Strong Upholstery Thread: This is essential for ensuring the buttons don’t snap off during the first dance.
- Clear Acrylic Buttons: These are nearly invisible on any color of fabric, making them perfect for external attachment points.
- Numbered Ribbon Tags: These help you keep track of which ribbons tie together on a complex French bustle.
Mastering the Art of the Bridal Lift
Now that you understand the mechanics of the bustle, you can ensure the gown looks stunning from every angle.
Take your time with the pinning process, as this is where the “magic” of the drape actually happens.
Once the sewing is complete, you might also want to look into how to properly steam a wedding dress to remove any remaining wrinkles.
Grab your sewing kit today and start experimenting with the drape to find the perfect look for the big day.