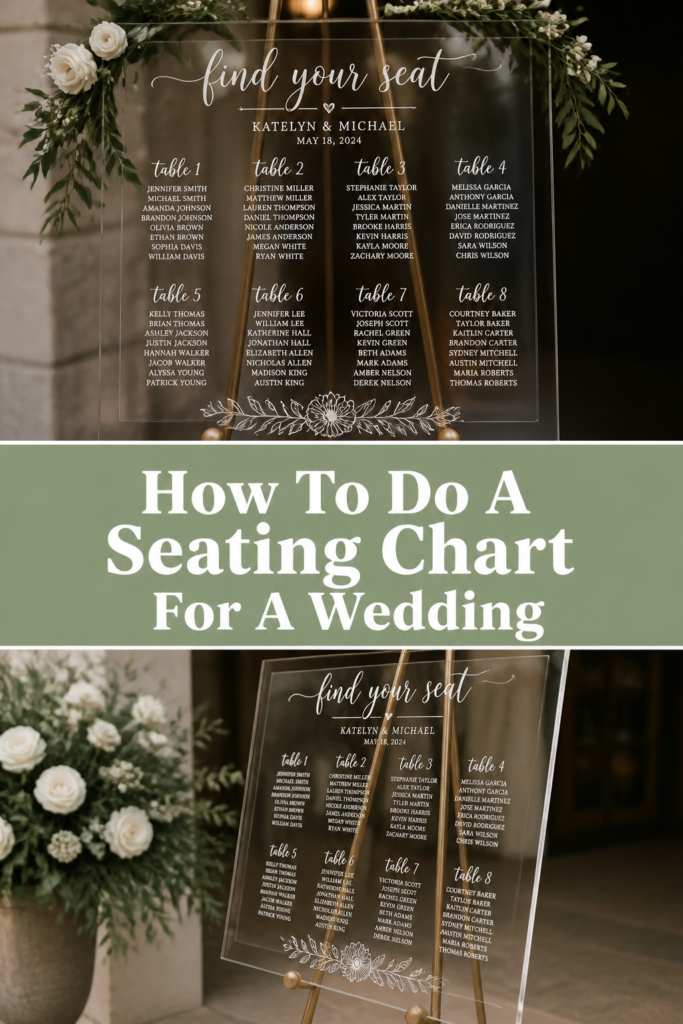
💍 How To Do A Seating Chart For A Wedding
Planning a wedding often feels like a series of fun choices followed by one giant logistical puzzle.
The seating chart is that puzzle, and it is usually the final hurdle before your big day arrives.
Having navigated the complex social dynamics of hundreds of weddings, I can tell you that a well-planned chart is the secret to a high-energy reception.
Quick Overview
This guide will take you from a messy list of names to a finalized, venue-ready floor plan that keeps your guests happy and the party moving.
- Time needed: 4 to 6 hours (spread over 2 days)
- Difficulty: Intermediate
- What you’ll need: Final guest list, venue floor plan, digital seating tool or sticky notes, and a large dose of patience.
Step-by-Step Instructions
Step 1: Finalize Your Guest List and RSVPs
Wait until your RSVP deadline has passed before you even think about placing people at tables.
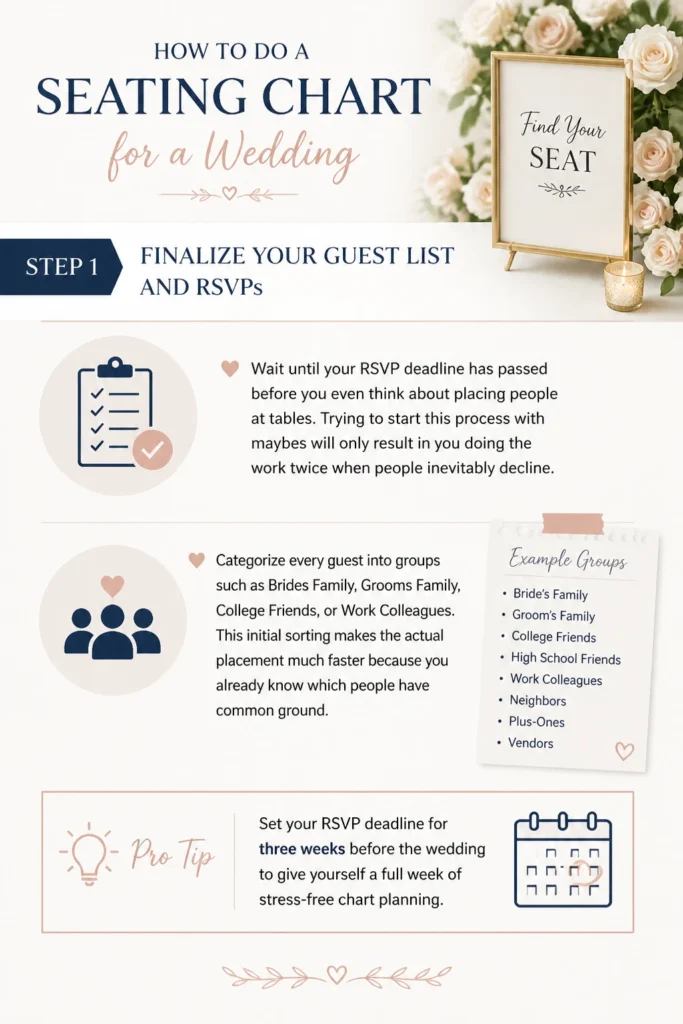
Trying to start this process with “maybes” will only result in you doing the work twice when people inevitably decline.
Categorize every guest into groups such as “Bride’s Family,” “Groom’s Family,” “College Friends,” or “Work Colleagues.”
This initial sorting makes the actual placement much faster because you already know which people have common ground.
Pro Tip: Set your RSVP deadline for three weeks before the wedding to give yourself a full week of stress-free chart planning.
Step 2: Obtain a Scaled Floor Plan from Your Venue
Request a digital or physical copy of the reception space that includes the exact dimensions of the room.
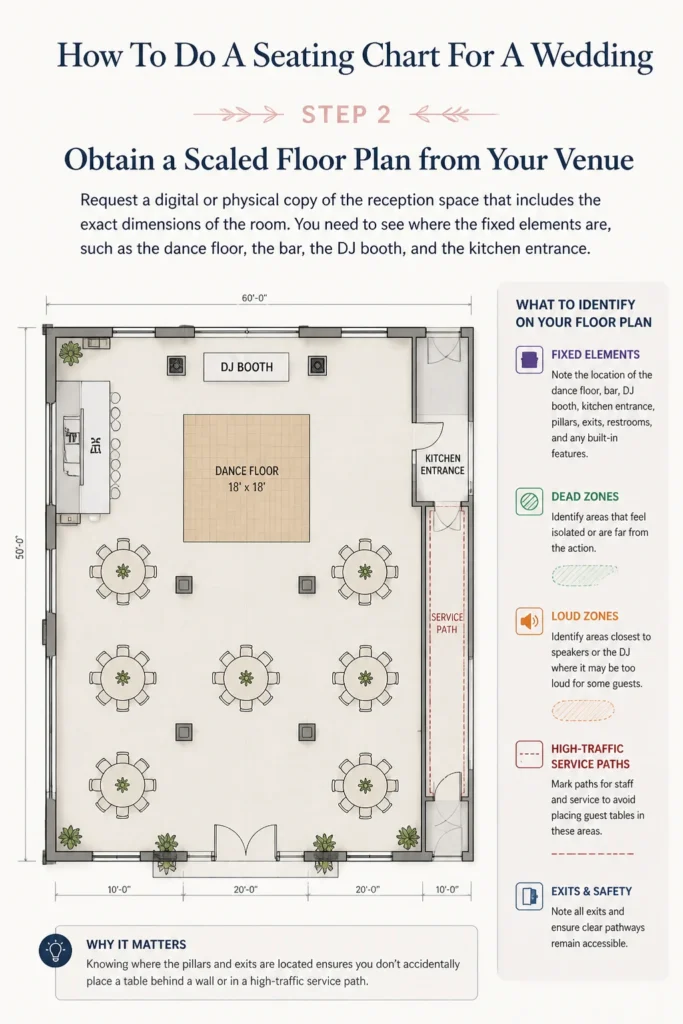
You need to see where the fixed elements are, such as the dance floor, the bar, the DJ booth, and the kitchen entrance.
Identify “dead zones” where guests might feel isolated or “loud zones” where older guests might struggle to hear over the speakers.
Knowing where the pillars and exits are located ensures you don’t accidentally place a table behind a wall or in a high-traffic service path.
Step 3: Decide on Table Shapes and Sizes
Choose between round, rectangular, or long banquet-style tables based on your venue’s capacity and your desired aesthetic.
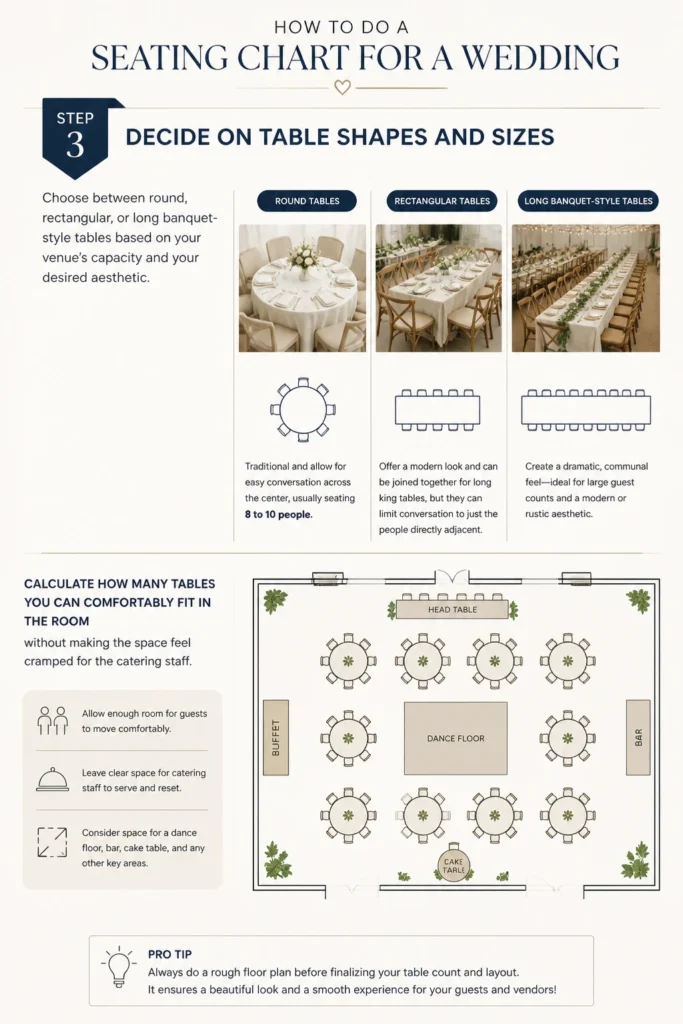
Round tables are traditional and allow for easy conversation across the center, usually seating 8 to 10 people.
Rectangular tables offer a modern look and can be joined together for long “king” tables, but they can limit conversation to just the people directly adjacent.
Calculate how many tables you can comfortably fit in the room without making the space feel cramped for the catering staff.
Step 4: Place the Wedding Party and Immediate Family
Determine if you want a “Head Table” for the full wedding party or a “Sweetheart Table” just for the two of you.
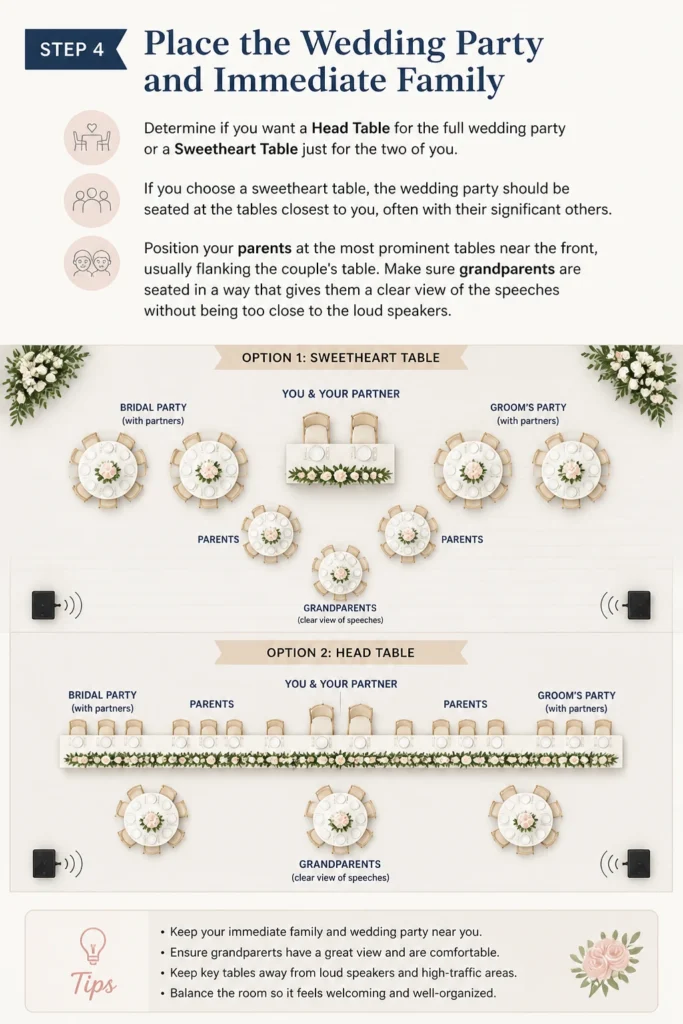
If you choose a sweetheart table, the wedding party should be seated at the tables closest to you, often with their significant others.
Position your parents at the most prominent tables near the front, usually flanking the couple’s table.
Make sure grandparents are seated in a way that gives them a clear view of the speeches without being too close to the loud speakers.
Step 5: Group Guests by Social Circles
Start placing your guests by grouping them with people they already know and enjoy.
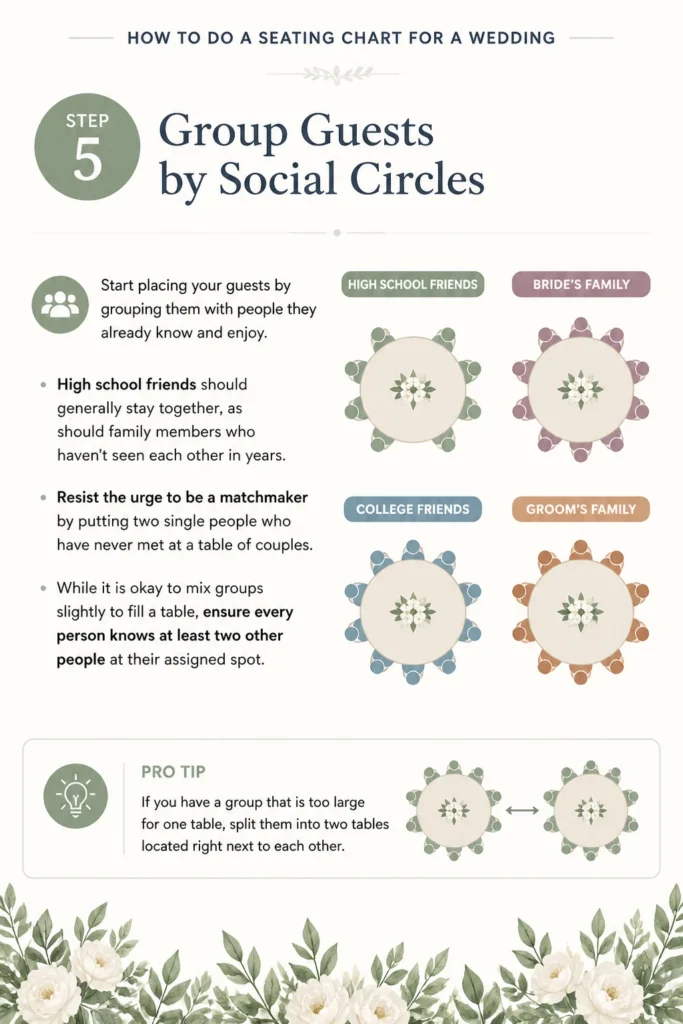
High school friends should generally stay together, as should family members who haven’t seen each other in years.
Resist the urge to be a “matchmaker” by putting two single people who have never met at a table of couples.
While it is okay to mix groups slightly to fill a table, ensure every person knows at least two other people at their assigned spot.
Pro Tip: If you have a group that is too large for one table, split them into two tables located right next to each other.
Step 6: Balance the Table Dynamics
Look at each table and evaluate the “vibe” you are creating with that specific mix of personalities.
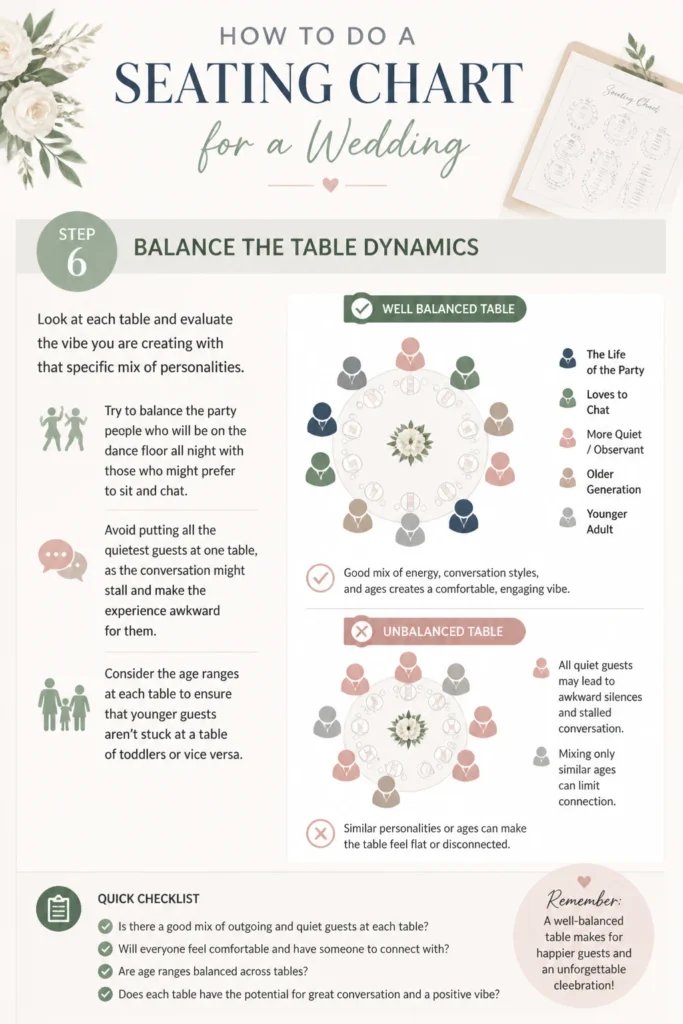
Try to balance the “party people” who will be on the dance floor all night with those who might prefer to sit and chat.
Avoid putting all the quietest guests at one table, as the conversation might stall and make the experience awkward for them.
Consider the age ranges at each table to ensure that younger guests aren’t stuck at a table of toddlers or vice versa.
Step 7: Create Your Physical or Digital Map
Use a digital tool like AllSeated or WeddingWire to drag and drop guests into their seats for an easy visual reference.
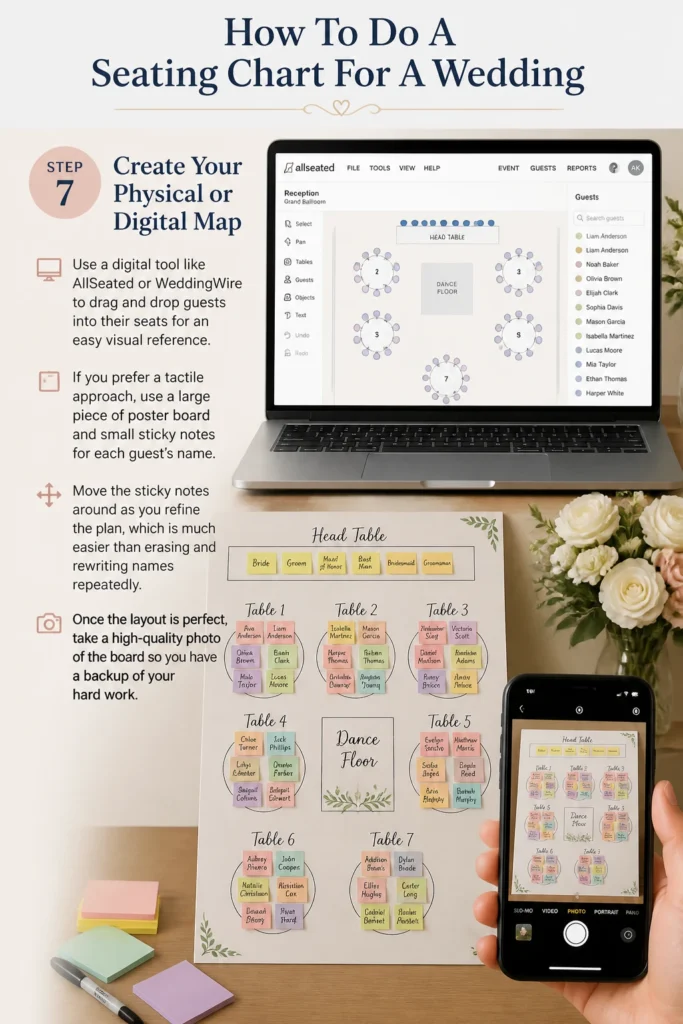
If you prefer a tactile approach, use a large piece of poster board and small sticky notes for each guest’s name.
Move the sticky notes around as you refine the plan, which is much easier than erasing and rewriting names repeatedly.
Once the layout is perfect, take a high-quality photo of the board so you have a backup of your hard work.
Step 8: Finalize Your Display Method
Decide if you will use a large printed seating chart or individual escort cards for your guests.
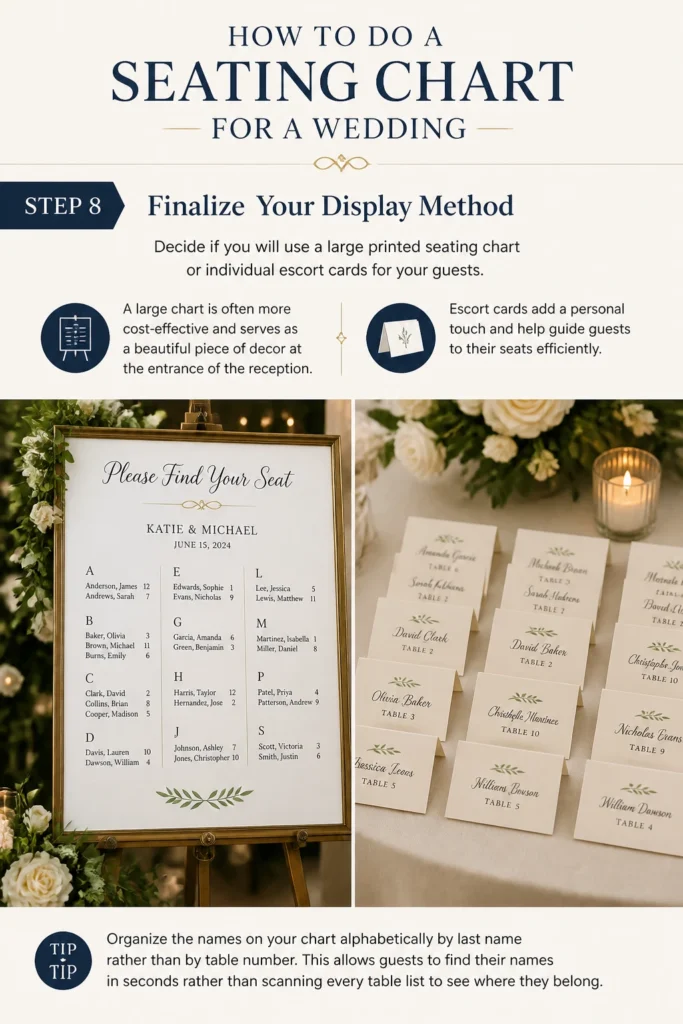
A large chart is often more cost-effective and serves as a beautiful piece of decor at the entrance of the reception.
Organize the names on your chart alphabetically by last name rather than by table number.
This allows guests to find their names in seconds rather than scanning every table list to see where they belong.
Common Mistakes to Avoid
The Dreaded Singles Table
Grouping all your single friends at one table can make them feel like they are being highlighted in an uncomfortable way.
It is much better to integrate single guests into tables with people they already know or have common interests with.
Focus on social compatibility rather than relationship status to ensure everyone feels like a valued part of the celebration.
Overcrowding the Tables
Trying to squeeze ten people at a table designed for eight is a recipe for a frustrated guest experience.
Guests need enough “elbow room” to eat comfortably and enough space to push their chairs back without hitting the person behind them.
Always follow the venue’s recommendations for maximum capacity per table to maintain a sense of luxury and comfort.
Placing Elderly Guests Near the DJ
It is easy to forget how loud professional speakers can be when you are looking at a silent floor plan.
Older guests often have more sensitive hearing and will appreciate being seated further away from the bass and high-volume music.
Reserve the tables closest to the speakers for your younger, high-energy friends who will spend most of their time on the dance floor anyway.
Troubleshooting
Last-Minute Cancellations
It is almost guaranteed that someone will have an emergency and cancel 48 hours before the wedding.
Do not feel the need to reprint your entire seating chart for one or two missing people.
Simply inform the catering lead and the venue coordinator so they can remove the extra chair and place setting before the doors open.
Family Feuds and Tensions
If you have family members who do not get along, the seating chart is your best tool for keeping the peace.
Place these individuals on opposite sides of the room with plenty of “buffer tables” in between them.
Ensure they both have a clear view of the main events so neither feels like they were given a “bad” seat due to the conflict.
Too Many Guests for the Space
If your final count is higher than expected, you may need to rethink your table shapes to maximize the floor plan.
Long banquet tables are often more space-efficient than round tables and can accommodate more people in a smaller footprint.
Talk to your venue coordinator about alternative layouts that might create more flow while still fitting everyone comfortably.
Key Takeaways
- Wait for all RSVPs to be finalized before starting the layout.
- Use a scaled floor plan to account for speakers, bars, and exits.
- Prioritize immediate family and the wedding party in the best viewing spots.
- Group guests by social circles or common interests to encourage conversation.
- Alphabetize your seating chart display to prevent bottlenecks at the entrance.
- Review the final plan with your venue and caterer to ensure service flow.
Frequently Asked Questions
Should I do a seating chart or let guests choose their own seats?
A seating chart is highly recommended for any wedding with more than 50 guests. Without one, the “buffet line effect” happens where guests wander aimlessly, and groups are often split up because they can’t find enough adjacent empty chairs.
When is the best time to start the seating chart?
You should start drafting the groups about a month out, but do not finalize the physical chart until two weeks before the wedding. This window allows you to account for late RSVPs while still giving your stationer time to print the final display.
Do I need to assign specific seats or just tables?
Assigning guests to a specific table is usually sufficient for most weddings. Assigning specific seats at the table is only necessary if you are serving a plated meal with multiple choice options, as the servers will need to know exactly who gets the beef and who gets the fish.
How do I handle children on the seating chart?
Children should almost always be seated with their parents unless you are having a very large wedding with a dedicated “kids’ table” and professional childcare. If you do a kids’ table, make sure it is visible to the parents so they can keep an eye on their little ones throughout the night.
Our Top Recommended Finds
- Digital Floor Plan Software: Tools like AllSeated allow you to upload your venue’s exact dimensions and virtually move furniture to see how it fits.
- Custom Acrylic Seating Chart: A modern and elegant way to display your guest list that can be easily wiped clean if you need to make a last-minute change with a paint pen.
- Color-Coded Sticky Notes: Perfect for the “analog” planner, these allow you to assign a color to each “side” of the family or friend group for quick visual balancing.
Crossing The Finish Line With Confidence
Once you hand that finalized chart over to your coordinator, a massive weight will lift off your shoulders.
Remember that the seating chart is simply a starting point for the evening; once the music starts, people will mix and mingle naturally.
If you have followed these steps, you have done everything possible to ensure your guests feel comfortable, seen, and ready to celebrate.
Now that the logistics are handled, you can focus on the more personal details, like writing your vows or picking out your wedding day accessories.
Take a deep breath and trust the plan you have built—your reception is going to be incredible.