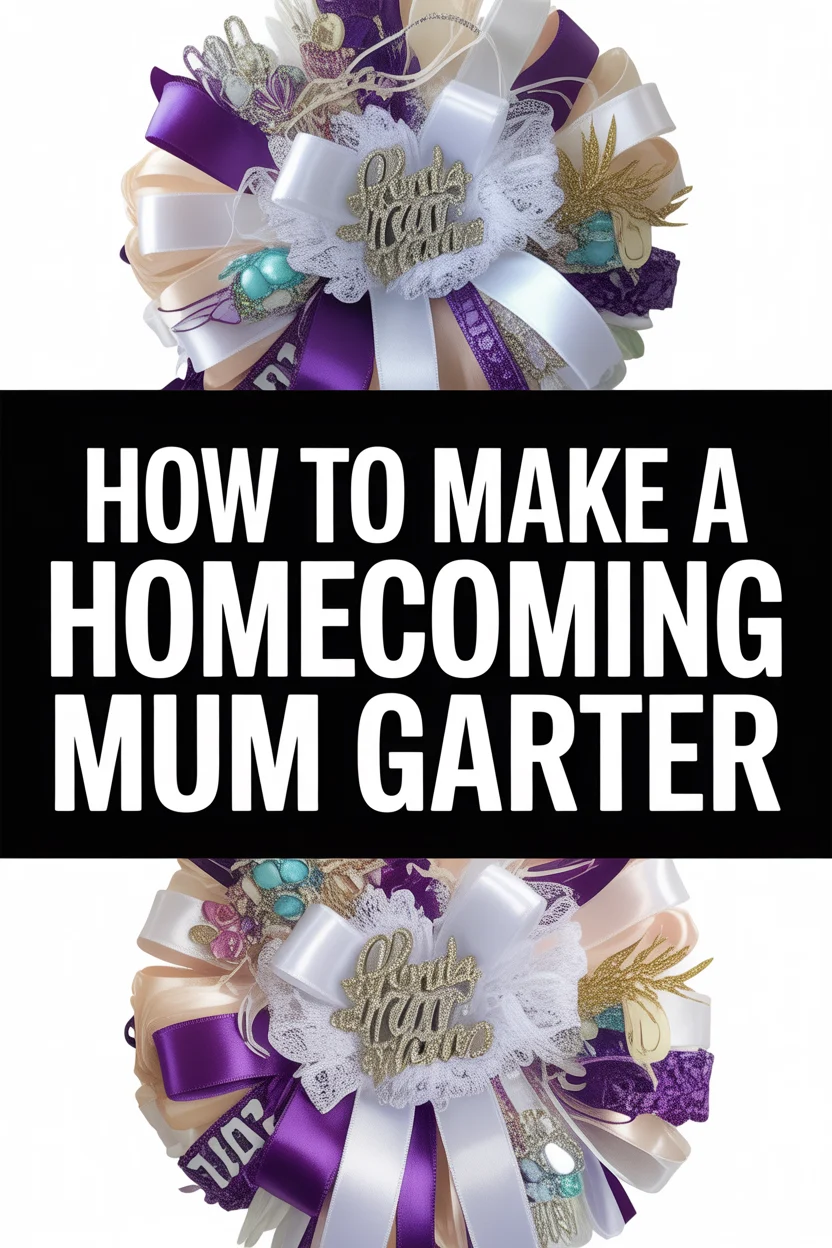
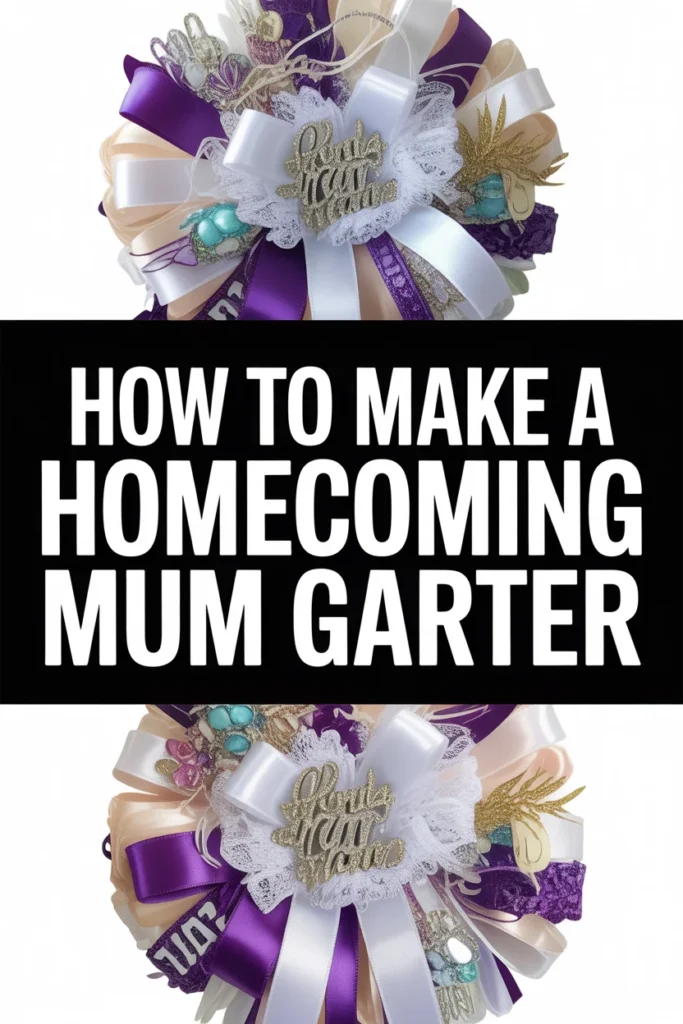
🎀 How To Make A Homecoming Mum Garter

Wedding Planning
No fluff, no drama. Just easy weekly advice, planning shortcuts, and gentle reminders to help you actually enjoy your engagement.
Homecoming season brings a wave of excitement, especially when it’s time to craft those iconic mums.
Making a mum garter yourself adds a truly personal touch to this cherished tradition.
I’ve been creating these unique keepsakes for years, and I’m thrilled to share my tried-and-true methods with you.
Quick Overview
You’re about to create a stunning, custom homecoming mum garter that will be the envy of the dance.
This guide will walk you through every detail, ensuring a beautiful result.
- Time needed: 2-4 hours (depending on complexity and experience)
- Difficulty: Beginner to Intermediate
- What you’ll need: Ribbon, elastic, artificial flowers, embellishments, hot glue, scissors, and a ruler.
Step-by-Step Instructions
Step 1: Gather Your Materials
Before you begin, lay out all your supplies in an organized manner.
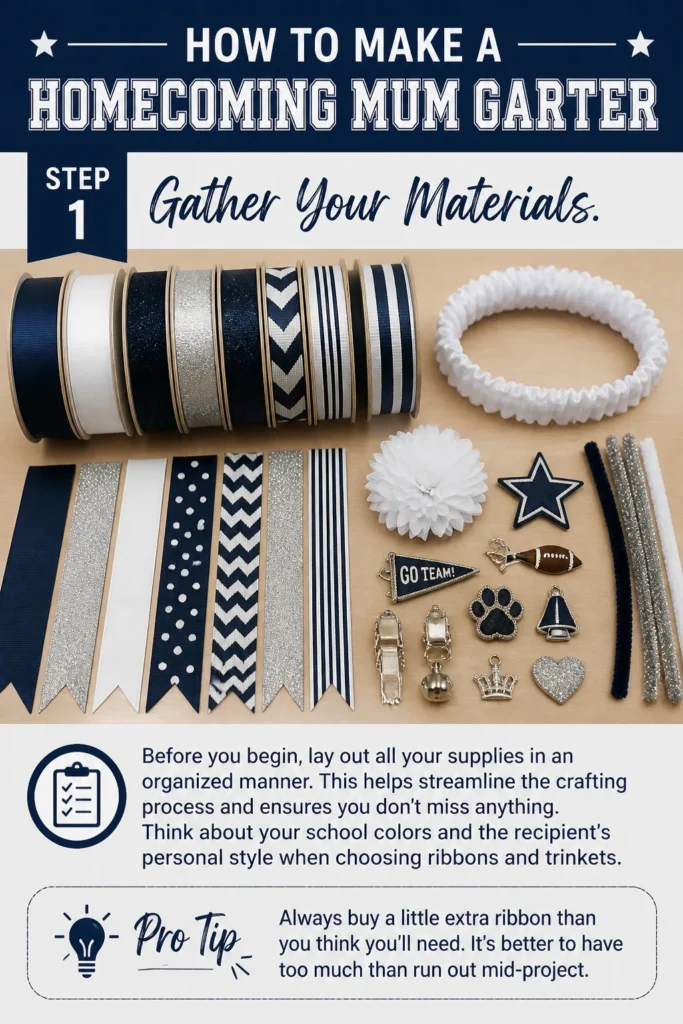
This helps streamline the crafting process and ensures you don’t miss anything.
Think about your school colors and the recipient’s personal style when choosing ribbons and trinkets.
Pro Tip: Always buy a little extra ribbon than you think you’ll need. It’s better to have too much than run out mid-project.
Step 2: Measure and Cut the Elastic Base
You need a comfortable base for the garter to fit around the arm or leg.
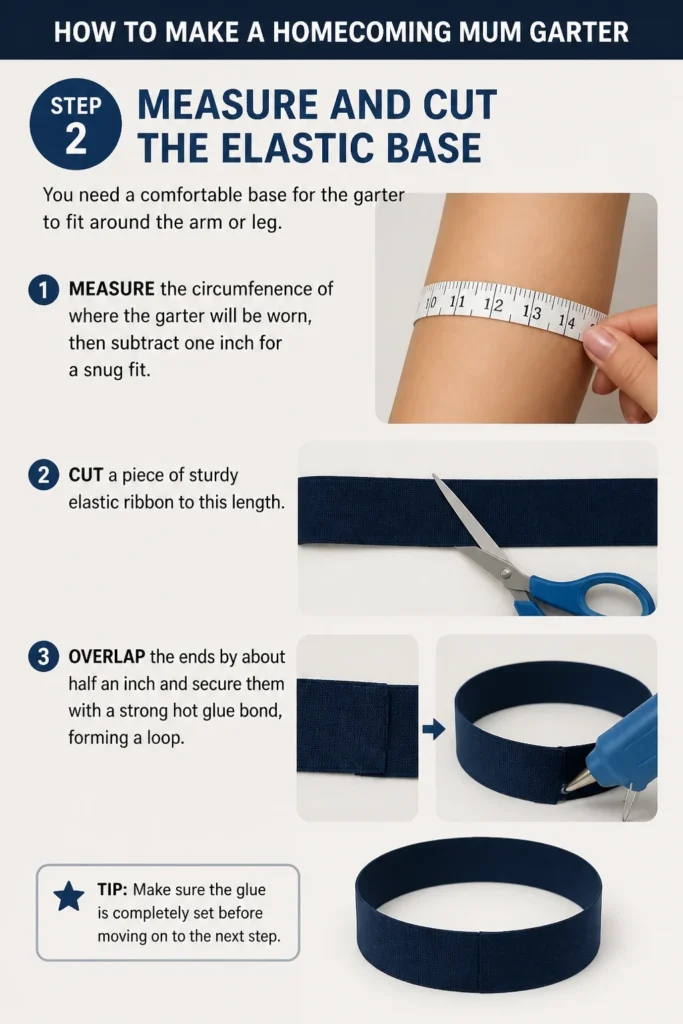
Measure the circumference of where the garter will be worn, then subtract one inch for a snug fit.
Cut a piece of sturdy elastic ribbon to this length.
Overlap the ends by about half an inch and secure them with a strong hot glue bond, forming a loop.
Step 3: Create the Ribbon Loop Base
This step forms the foundation for your mum’s decorative elements.
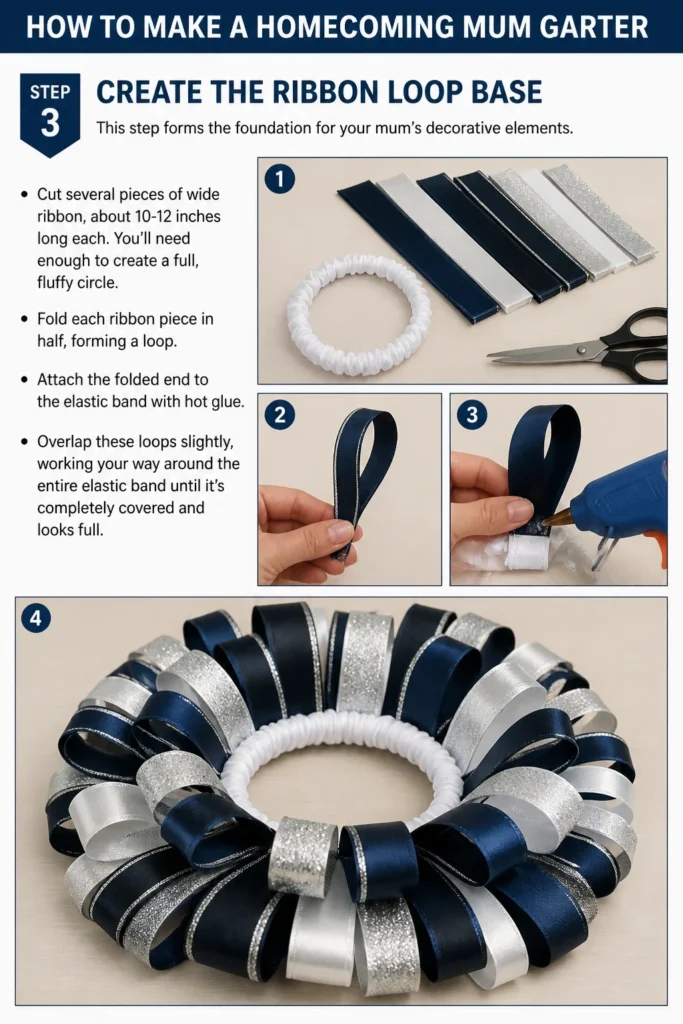
Cut several pieces of wide ribbon, about 10-12 inches long each.
You’ll need enough to create a full, fluffy circle.
Fold each ribbon piece in half, forming a loop, and then attach the folded end to the elastic band with hot glue.
Overlap these loops slightly, working your way around the entire elastic band until it’s completely covered and looks full.
Step 4: Assemble the Mum Flower
The artificial flower is the centerpiece of your garter.
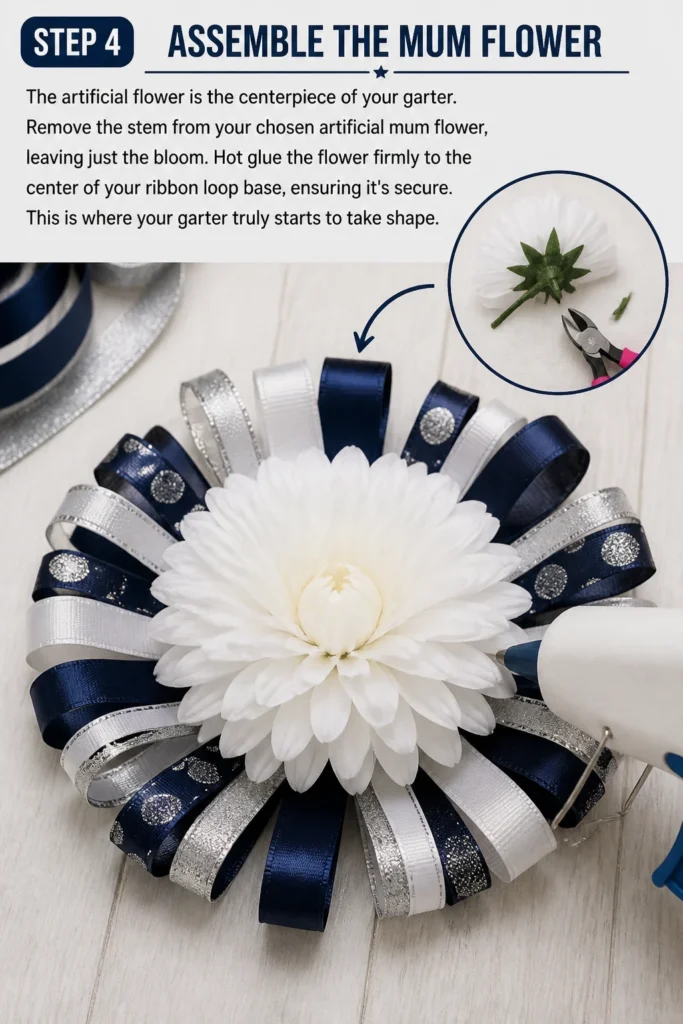
Remove the stem from your chosen artificial mum flower, leaving just the bloom.
Hot glue the flower firmly to the center of your ribbon loop base, ensuring it’s secure.
This is where your garter truly starts to take shape.
Step 5: Add Decorative Ribbons
Now, it’s time to make your garter vibrant and personalized.
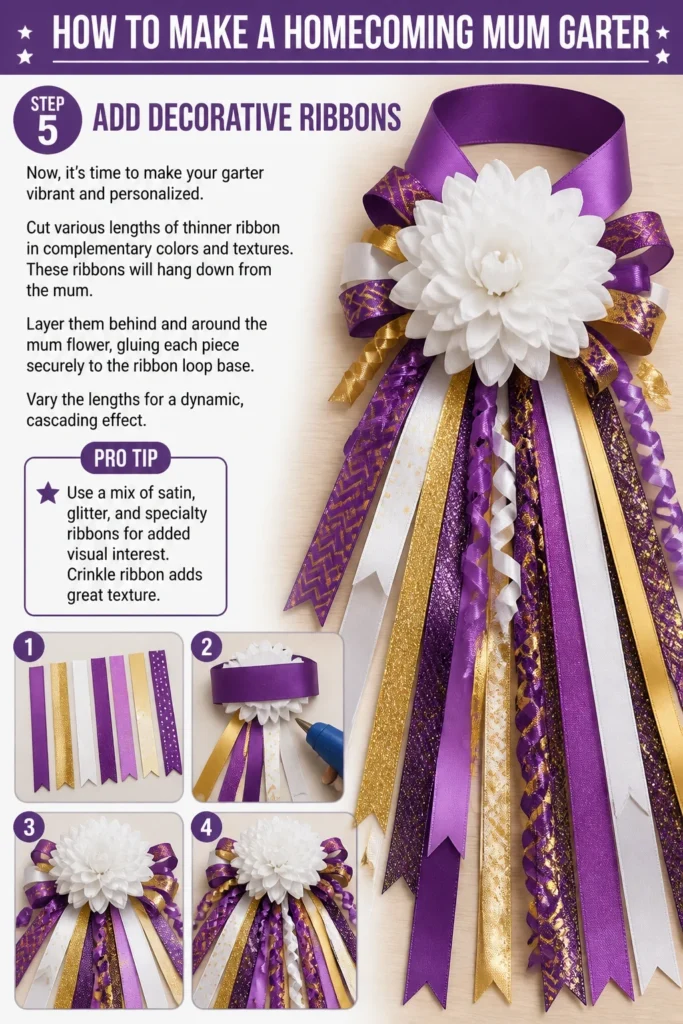
Cut various lengths of thinner ribbon in complementary colors and textures.
These ribbons will hang down from the mum.
Layer them behind and around the mum flower, gluing each piece securely to the ribbon loop base.
Vary the lengths for a dynamic, cascading effect.
Pro Tip: Use a mix of satin, glitter, and specialty ribbons for added visual interest. Crinkle ribbon adds great texture.
Step 6: Incorporate Braids and Loops
Braids and specialty loops elevate the garter’s design.
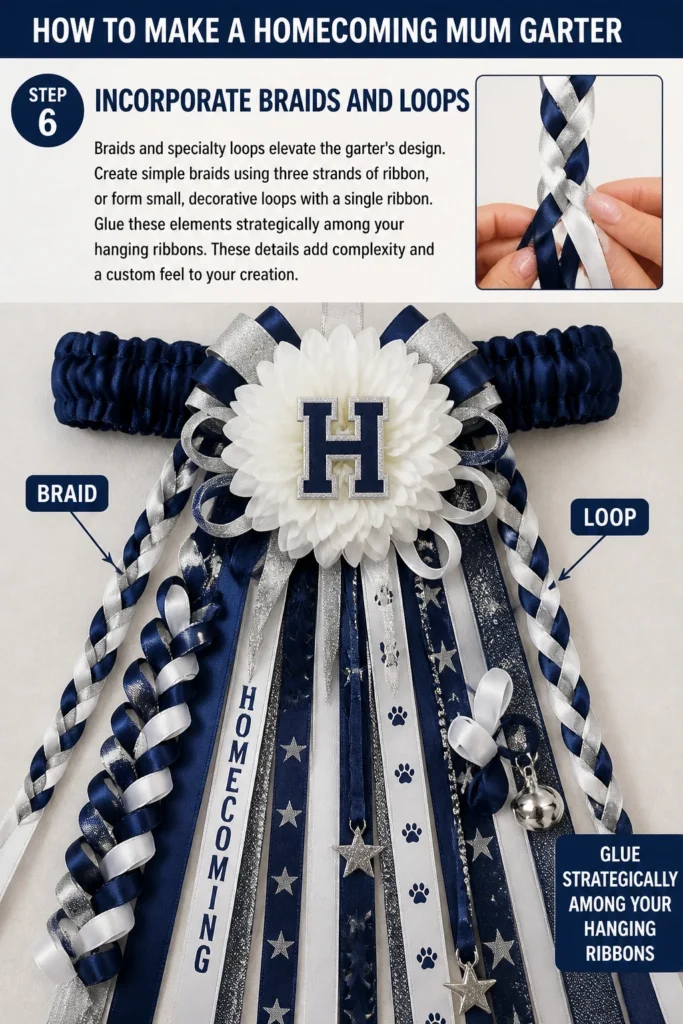
Create simple braids using three strands of ribbon, or form small, decorative loops with a single ribbon.
Glue these elements strategically among your hanging ribbons.
These details add complexity and a custom feel to your creation.
Step 7: Attach Trinkets and Charms
Trinkets are essential for personalizing a homecoming mum garter.
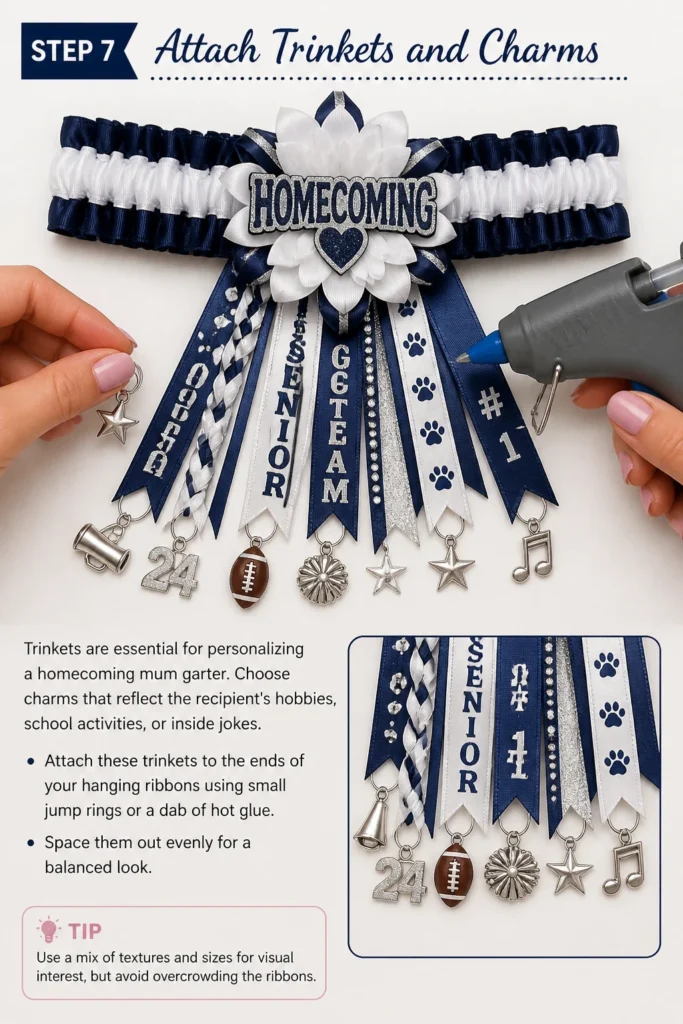
Choose charms that reflect the recipient’s hobbies, school activities, or inside jokes.
Attach these trinkets to the ends of your hanging ribbons using small jump rings or a dab of hot glue.
Space them out evenly for a balanced look.
Step 8: Add Bells and Faux Feathers
Bells provide that classic mum jingle, and feathers add flair.
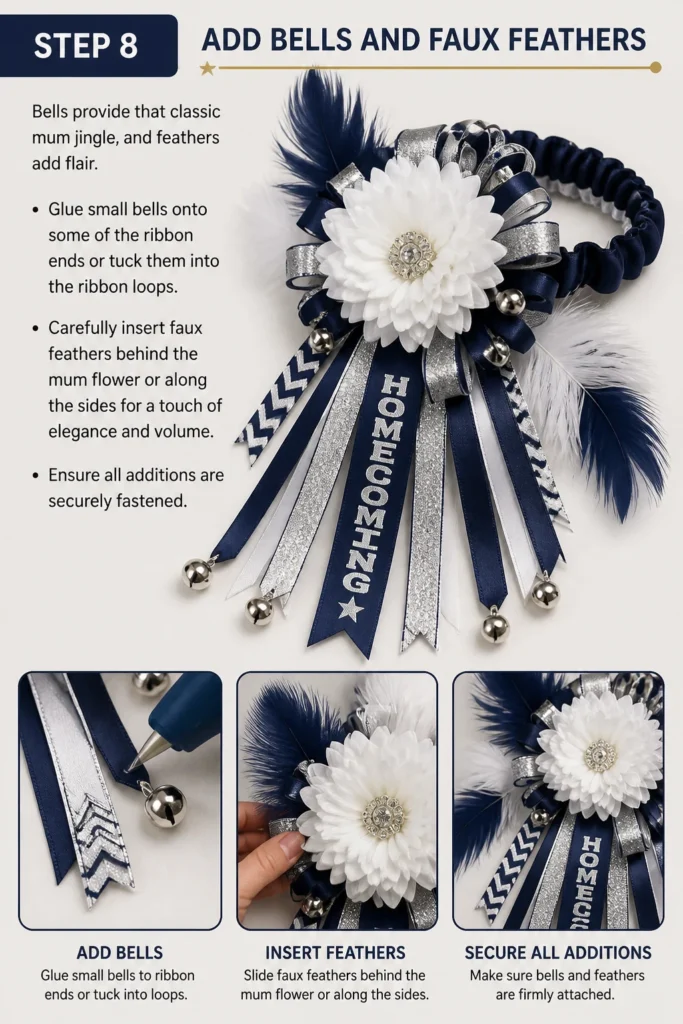
Glue small bells onto some of the ribbon ends or tuck them into the ribbon loops.
Carefully insert faux feathers behind the mum flower or along the sides for a touch of elegance and volume.
Ensure all additions are securely fastened.
Step 9: Final Touches and Security Check
Take a moment to inspect your entire garter from all angles.
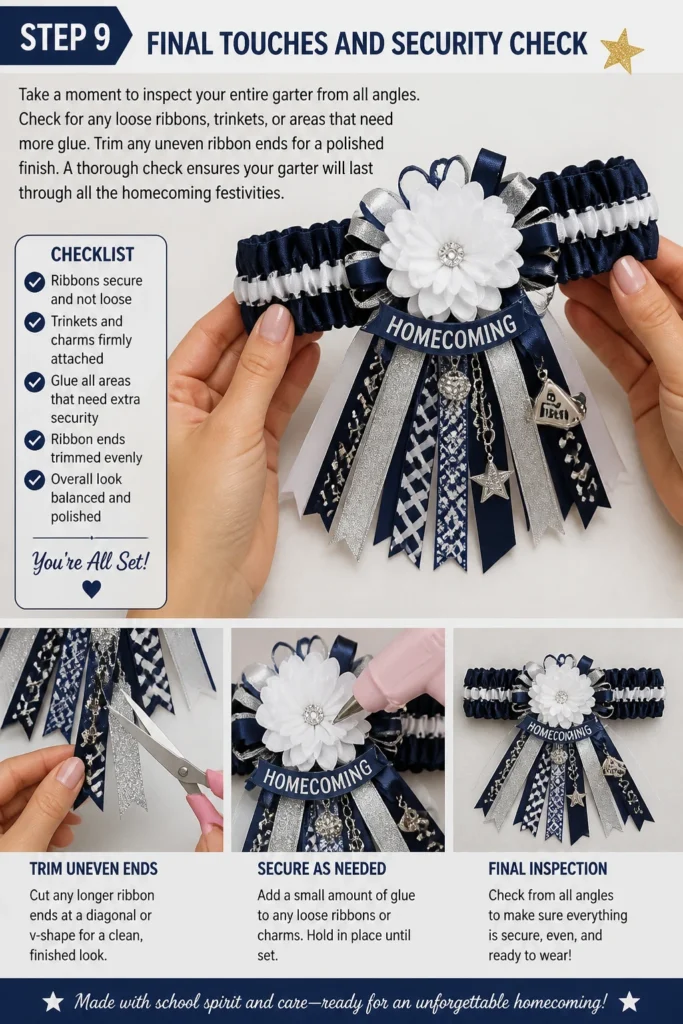
Check for any loose ribbons, trinkets, or areas that need more glue.
Trim any uneven ribbon ends for a polished finish.
A thorough check ensures your garter will last through all the homecoming festivities.
Common Mistakes to Avoid
Over-Gluing
It’s tempting to use a lot of hot glue to ensure everything stays put.
However, excessive glue can create stiff, visible clumps and make your garter look messy.
Instead, use small, strategic dots of glue and hold pieces firmly in place until they set.
Uneven Ribbon Lengths
Cutting all your hanging ribbons to the exact same length can result in a flat, uninspired look.
Varying ribbon lengths creates depth, movement, and visual interest.
Aim for a natural, cascading effect with different tiers of ribbons.
Ignoring the Wearer’s Comfort
A beautiful garter isn’t much good if it’s uncomfortable to wear.
Ensure the elastic base isn’t too tight or too loose, and that heavy embellishments aren’t placed in a way that will dig into the skin.
Prioritize comfort alongside aesthetics for a truly successful garter.
Forgetting a Theme
While spontaneous creativity is fun, a cohesive theme elevates a garter from good to great.
Consider the school colors, the wearer’s interests, or a specific homecoming theme.
This helps guide your choices for ribbons, trinkets, and overall design, resulting in a more impactful piece.
Troubleshooting
Garter Feels Too Loose/Tight
If the elastic base feels off after assembly, you have a few options.
For a loose garter, carefully unglue one end of the elastic, overlap it a bit more, and re-glue to shorten it.
If it’s too tight, you might need to cut a small piece of matching elastic, glue it to each end of the existing elastic to extend the loop, and then cover the new joint with a decorative ribbon.
Ribbons Are Falling Off
This usually happens if the glue wasn’t hot enough, or not enough was applied.
Carefully re-glue any detached ribbons, ensuring you press them firmly into the elastic or ribbon base until the glue cools and sets completely.
You can also use a small piece of floral wire to secure very heavy elements if hot glue isn’t holding.
Design Looks Sparse or Empty
If your garter isn’t as full as you’d like, it’s easy to add more.
Cut additional lengths of ribbon, create more loops, or add extra trinkets and bells to fill in gaps.
Sometimes, simply fluffing up the existing ribbons can make a big difference.
Key Takeaways
- Always start with a precise measurement for the elastic base to ensure comfort.
- Layering different types and lengths of ribbon creates a rich, dynamic look.
- Personalize your garter with trinkets, bells, and colors that reflect the wearer.
- Use hot glue strategically, applying just enough for a strong hold without creating visible clumps.
- Regularly check for security of all elements throughout the crafting process.
- Don’t be afraid to experiment with braids and specialty ribbons to add unique flair.
Frequently Asked Questions
What kind of ribbon is best for a homecoming mum garter?
A variety of ribbons works best! Satin ribbon forms the base, while glitter, crinkle, and specialty printed ribbons add texture and visual interest. Choose ribbons that hold their shape well and complement your chosen colors.
How do I make sure my garter stays on securely?
The key is an elastic base cut to the correct size. It should be snug but not uncomfortably tight. When gluing, ensure all ribbons and embellishments are firmly attached to the elastic or the initial ribbon loops, creating a robust structure.
Can I make a mum garter without a hot glue gun?
While a hot glue gun is highly recommended for its speed and strong bond, you could use a strong fabric adhesive or E6000 glue. However, these glues take much longer to dry, significantly extending your crafting time and requiring more patience for holding pieces in place.
How far in advance can I make a homecoming mum garter?
You can make a mum garter several weeks in advance. Store it carefully in a box to protect it from dust and crushing. Keeping it in a cool, dry place will preserve its appearance until homecoming day.
Our Top Recommended Finds
- High-Temperature Hot Glue Gun: Essential for strong, fast bonds on various materials.
- Assorted Ribbon Pack: A mix of colors and textures helps with creativity and layering.
- Homecoming Trinket Assortment: Offers a wide range of charms for easy personalization.
Craft Your Homecoming Masterpiece Today
Creating a homecoming mum garter is a rewarding project that allows you to express creativity and celebrate a special occasion.
With these steps, you have all the knowledge to design something truly memorable.
Gather your supplies, put on some music, and start crafting your unique garter this week!
Wedding Planning
No fluff, no drama. Just easy weekly advice, planning shortcuts, and gentle reminders to help you actually enjoy your engagement.