🎂 How To Decorate A Cake Table For Birthday
Setting up a birthday table is more than just placing a cake on a flat surface.
I remember my first attempt at a professional-looking dessert display where the cake looked lonely and the colors felt completely disconnected.
After years of styling events and learning the secrets of visual balance, I have mastered the art of creating tables that stop guests in their tracks.
Quick Overview
This guide will help you transform a basic table into a stunning focal point that anchors your entire party theme.
- Time needed: 60 to 90 minutes
- Difficulty: Beginner
- What you’ll need: Table, linens, cake stand, backdrop materials, height boosters, and themed decor.
Step-by-Step Instructions
Step 1: Define Your Theme and Color Palette
Start by choosing a clear direction for your design before you buy a single decoration.
A cohesive theme acts as a roadmap, ensuring every item you place on the table feels like it belongs there.
Select three main colors to keep the look sophisticated and intentional rather than cluttered.
Usually, this includes one primary color, one secondary color, and a metallic or neutral accent like gold, silver, or white.
Gather inspiration from the cake design itself, as the table should serve as an extension of the dessert’s aesthetic.
Pro Tip: Use a digital mood board or a simple physical tray to see how your colors and textures look next to each other before the big day.
Step 2: Choose the Perfect Location and Surface
Position your table against a plain wall or a beautiful window to provide a natural frame for your display.
Avoid placing the table in high-traffic areas where guests might accidentally bump into it or knock over the cake.
Consider the size of the table in relation to the room and the number of items you plan to display.
A table that is too large will make your decorations look sparse, while a table that is too small will feel cramped and messy.
Ensure the surface is completely level and sturdy enough to hold the weight of the cake and any heavy platters.
Step 3: Build a High-Impact Backdrop
Create a vertical element behind the table to draw the eye upward and provide a professional finish.
Backdrops can be as simple as a cluster of balloons or as elaborate as a custom-printed fabric panel.
Hang streamers, floral garlands, or a “Happy Birthday” banner at eye level to ensure it appears in every photograph.
If you are working in a space where you cannot attach items to the wall, use a portable backdrop stand or a large folding screen.
Frame the cake by centering your backdrop elements directly behind the spot where the cake will sit.
Pro Tip: Make sure your backdrop is wider than the table itself to prevent the edges of the room from distracting from the display.
Step 4: Layer Your Table Linens
Begin with a high-quality base tablecloth that reaches all the way to the floor to hide the table legs.
Wrinkled fabric can ruin the entire look, so take the time to steam or iron your linens before the setup begins.
Add a table runner or a second layer of fabric in a contrasting texture to create visual depth.
Using different materials like lace, velvet, or sequins can make a simple setup feel much more luxurious.
Tuck and pin any excess fabric neatly so that guests don’t trip and the table looks tailored.
Step 5: Incorporate Varied Heights
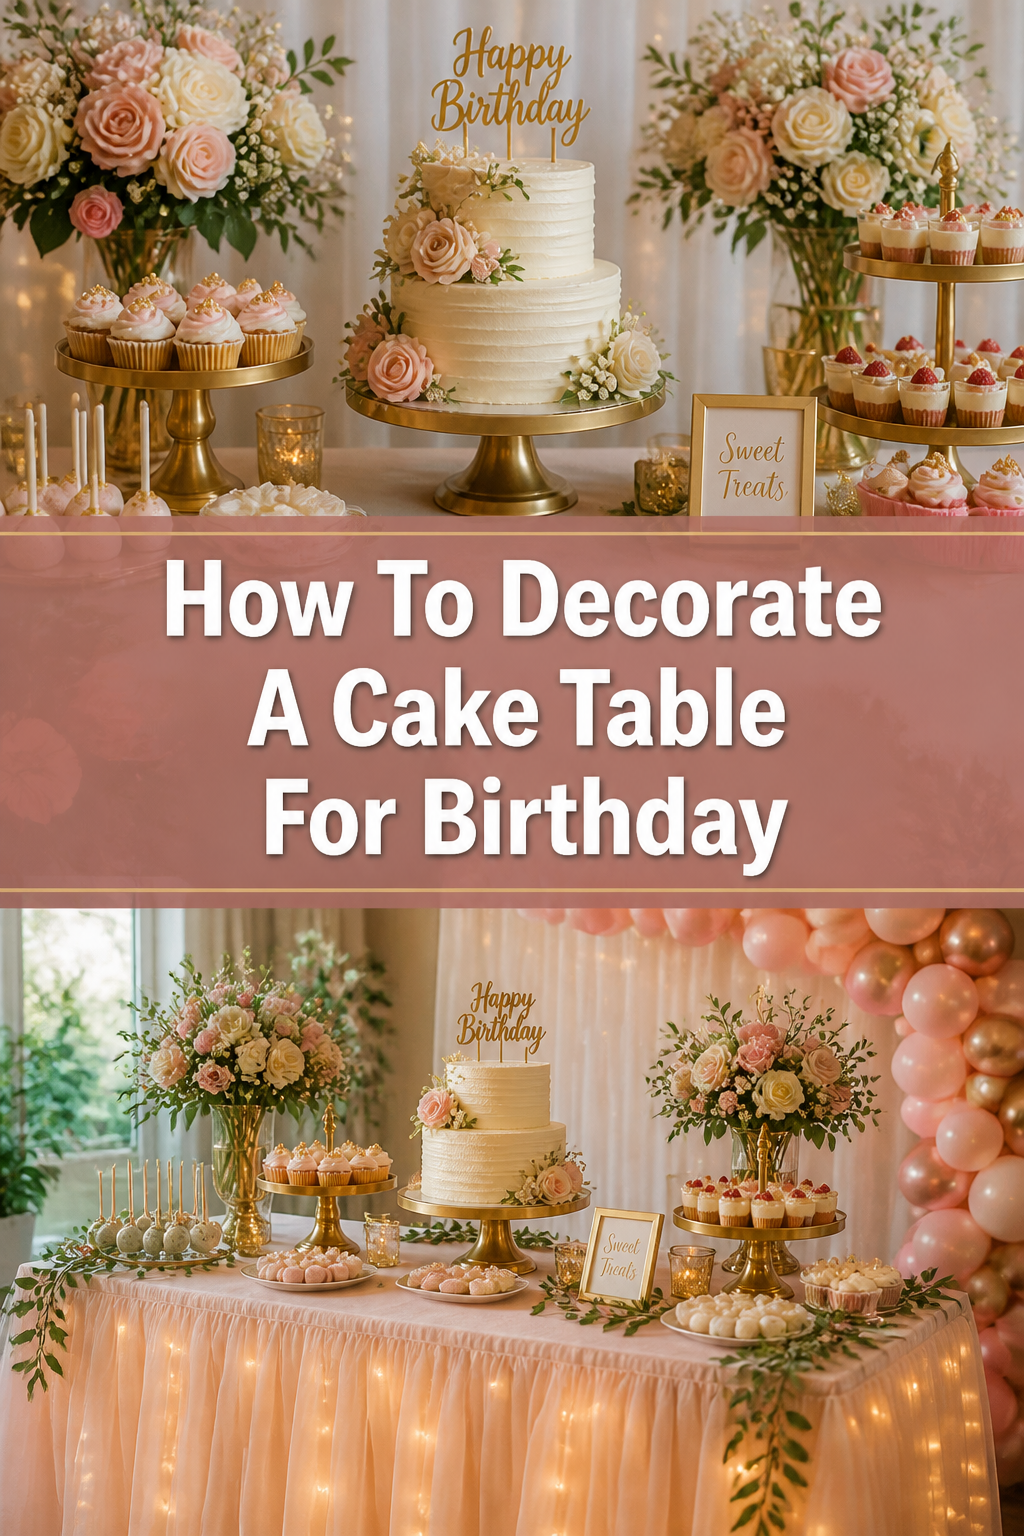
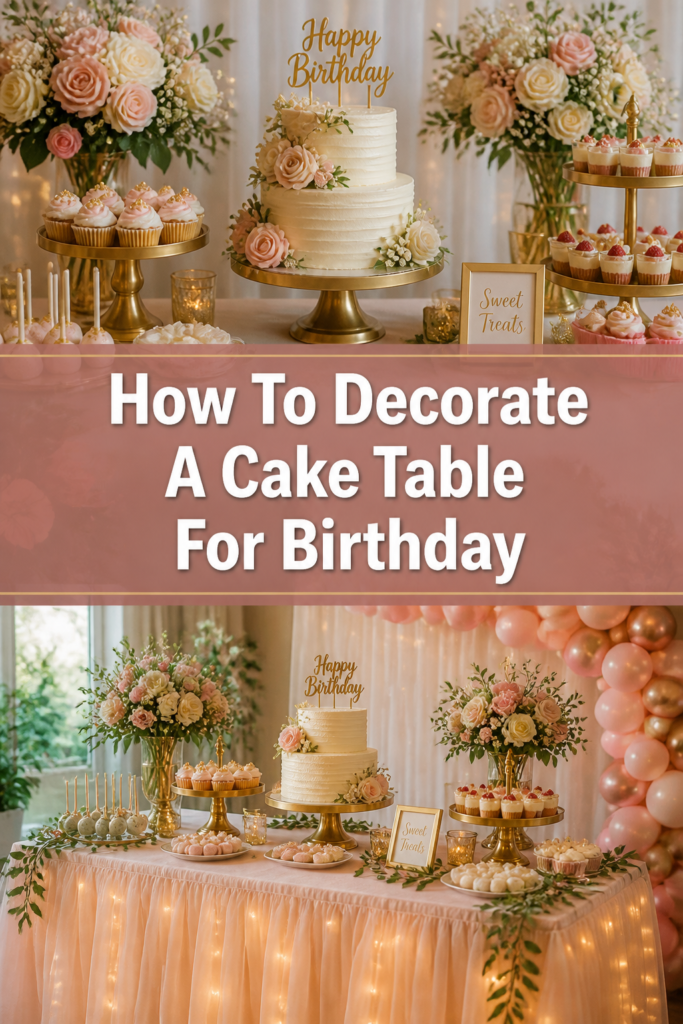
Avoid placing everything flat on the table, which makes the display look two-dimensional and boring.
Use “risers” to lift different elements; these can be actual acrylic stands, sturdy wooden crates, or even upside-down bowls hidden under the tablecloth.
Arrange your tallest items at the back and shorter items toward the front to create a “stadium seating” effect.
This ensures that every treat and decoration is visible and accessible to guests.
Balance the heights on both sides of the cake to create a sense of symmetry that is pleasing to the eye.
Pro Tip: Use the “Rule of Three” by grouping items in sets of three at different heights for a more natural and professional look.
Step 6: Position the Cake as the Star
Place the cake in the center of the table, ideally on the tallest and most decorative stand you have.
The cake stand should be slightly wider than the cake board to provide a stable base and a clean silhouette.
Ensure the most attractive side of the cake is facing forward toward the guests.
If you have a cake topper, wait until the cake is safely on the table before inserting it to avoid any wobbling during transport.
Clear a small radius around the cake so it remains the undisputed focal point of the entire arrangement.
Step 7: Add Fillers and Themed Accents
Fill the empty spaces between your main platters with smaller decorative items that reinforce the theme.
This could include framed photos of the birthday person, themed figurines, or small vases of fresh flowers.
Scatter loose elements like rose petals, confetti, or polished stones directly onto the tablecloth for a finished look.
Be careful not to over-decorate; you still want the table to feel organized and intentional.
Incorporate the birthday person’s name or age through custom signage or letter blocks to personalize the space.
Step 8: Set the Mood with Lighting
Enhance the atmosphere by adding soft lighting elements directly to the table surface.
Battery-operated fairy lights can be woven through greenery or tucked inside glass jars for a magical glow.
Place flameless LED candles around the cake to add warmth without the risk of melting the frosting or starting a fire.
If the party is in the evening, consider using a small spotlight to highlight the cake from the front.
Check the lighting through a camera lens to make sure there aren’t any harsh shadows or glares that will ruin the photos.
Common Mistakes to Avoid
The “Floating” Backdrop
Many people hang their banners or decorations too high above the table, leaving a large gap of empty wall space. This disconnects the backdrop from the table, making the display feel disjointed. Always ensure your backdrop elements start just above the table surface or overlap slightly with the items on the table.
Cluttering the Front Edge
Placing too many decorations or food items right at the front edge of the table makes it difficult for guests to reach the cake. It also creates a messy look in photos because the main attractions are obscured. Keep the front edge clear or use very low-profile items like flat greenery or scattered confetti.
Ignoring the “Feet” of the Table
Using a tablecloth that is too short is a very common mistake that makes a professional setup look amateur. Exposed table legs can be distracting and often look industrial or mismatched. Always use a floor-length cloth or a table skirt to create a solid, clean block of color from the floor up.
Poor Color Distribution
Sometimes people put all their brightly colored items on one side and neutral items on the other. This makes the table feel heavy on one side and lopsided. Spread your accent colors evenly across the entire surface to keep the viewer’s eye moving around the whole display.
Troubleshooting
The Cake Stand is Unstable
If your cake stand feels wobbly on a thick or uneven tablecloth, the cake could slide or tilt. Place a small piece of non-slip shelf liner or a flat wooden board under the tablecloth where the stand will sit. This provides a firm, level foundation without ruining the look of the fabric.
The Table Looks Too Empty
If you have a large table but only a few items, the setup can look unfinished and sparse. Increase the size of your decorations, such as using larger floral arrangements or bigger balloons. You can also “eat up” space by bunching the tablecloth fabric or adding more layers of runners to create volume.
The Backdrop Keeps Falling Down
Tape often fails on certain wall textures or under the weight of heavy garlands. Use Command hooks for a stronger hold that won’t damage the paint, or tie your decorations to a freestanding frame. If you are outdoors, ensure everything is weighted down or tied securely to prevent the wind from blowing your hard work away.
Key Takeaways
- Stick to a tight color palette of three colors to ensure a professional and cohesive look.
- Use varying heights with risers and stands to create visual interest and make every item visible.
- Center the cake as the primary focal point and build the rest of the decorations around it.
- Don’t forget the backdrop, as it frames the table and provides the perfect setting for birthday photos.
- Steam your linens to remove wrinkles, as smooth fabric instantly elevates the quality of the display.
- Balance the table by distributing colors and textures evenly across the entire surface.
Frequently Asked Questions
How far in advance should I set up the cake table?
You should set up the table structure, linens, and non-perishable decorations at least two to three hours before the party starts. However, wait to place the actual cake and any temperature-sensitive treats on the table until about 30 minutes before guests arrive. This prevents the cake from melting or losing its structure in a warm room.
What if I don’t have a professional cake stand?
You can easily DIY a cake stand using items you already have at home. Flip a sturdy ceramic bowl upside down and place a flat dinner plate on top of it. You can also use a thick, decorative piece of wood or a stack of large, vintage books that match your theme.
How do I decorate a cake table on a small budget?
Focus on high-impact, low-cost items like balloons, crepe paper streamers, and fresh greenery from your garden. Use items from around your house, like picture frames and glass jars, to add height and detail. A simple, clean white tablecloth can be dressed up with inexpensive ribbon or a few sprigs of herbs.
Should I put other food on the cake table?
It depends on the size of the table, but generally, it is best to keep the cake table dedicated to desserts and sweets. Mixing savory appetizers with a beautiful cake can sometimes clash in terms of smell and visual style. If you do add other treats, ensure they match the color scheme and are displayed on smaller platters that don’t overshadow the cake.
Our Top Recommended Finds
- Adjustable Cake Stand: A sturdy, neutral-colored stand that can be used for various cake sizes and party themes.
- Portable Backdrop Frame: A lightweight, collapsible stand that allows you to create a professional background anywhere in your home.
- LED Flameless Candles: These provide a warm, flickering glow without the safety hazards of real fire near decorations and frosting.
Bring Your Celebration To Life
Now that you have the blueprint for a perfect cake table, it is time to start gathering your materials.
Think about the person you are celebrating and how you can incorporate their personality into the small details of the display.
Once you have mastered the cake table, you might want to look into how to coordinate your entire room decor or how to create a matching balloon arch.
Take the first step today by sketching out a quick layout of your table and choosing your three primary colors.