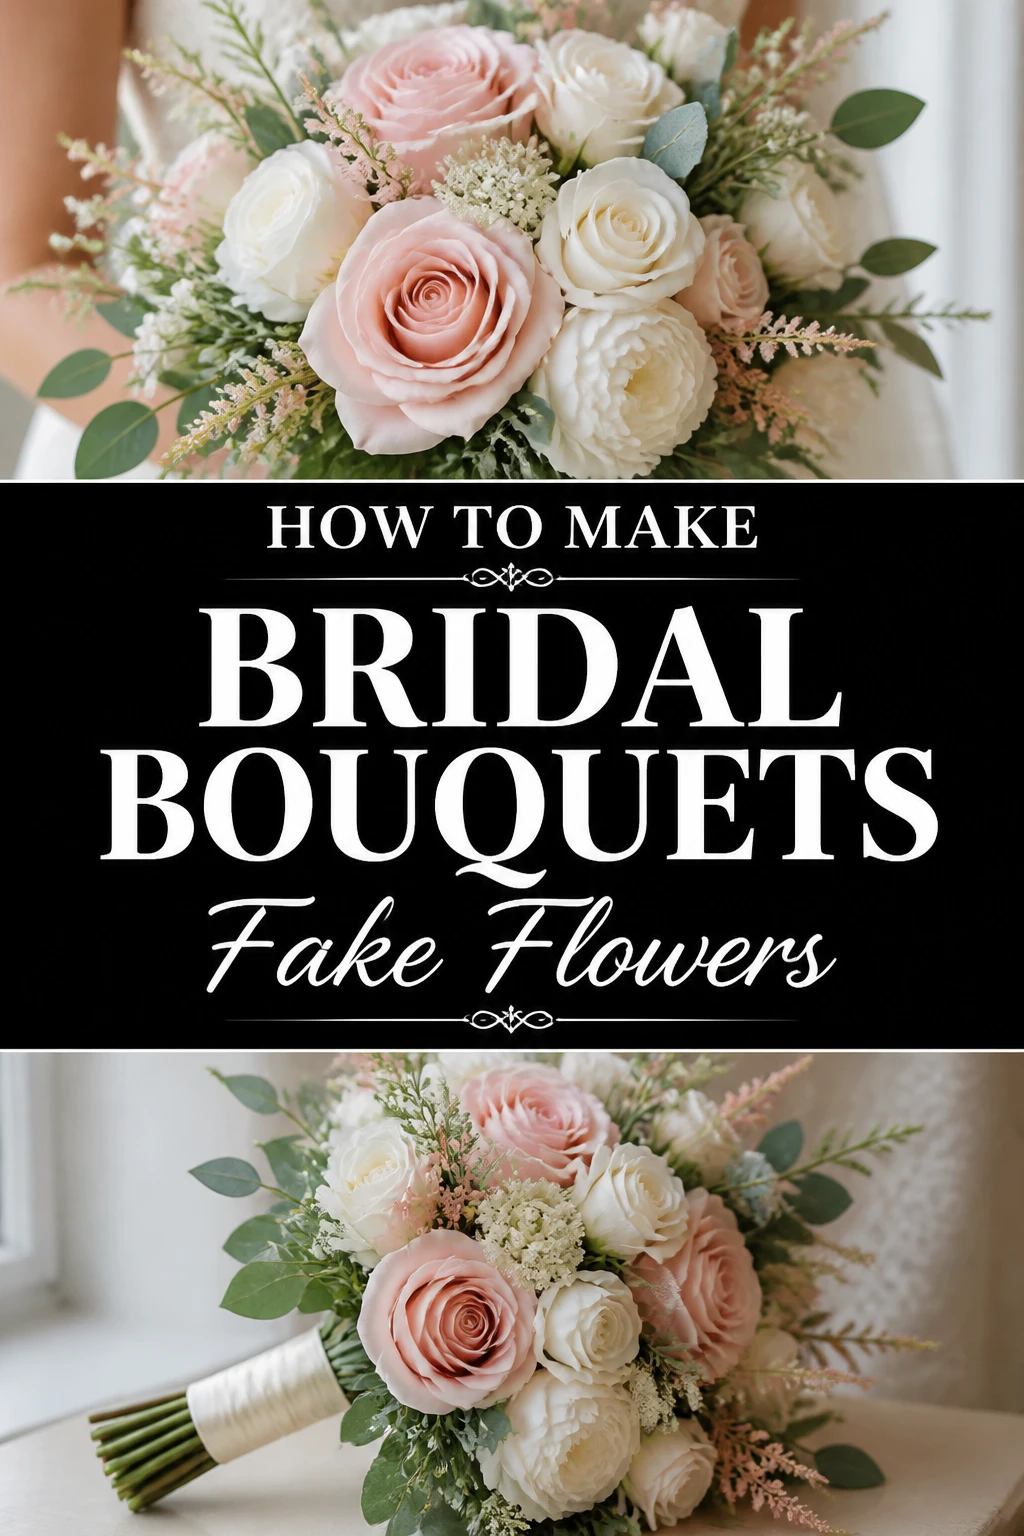
💐 How To Make Bridal Bouquets Fake Flowers

Wedding Planning
No fluff, no drama. Just easy weekly advice, planning shortcuts, and gentle reminders to help you actually enjoy your engagement.
I remember sitting on my living room floor three weeks before my best friend’s wedding, surrounded by hundreds of silk peonies and wire cutters.
We wanted that high-end floral look without the four-figure price tag, and that afternoon changed how I view wedding decor forever.
This guide comes from years of trial, error, and dozens of successful DIY bouquets that looked just as stunning as the real thing.
Quick Overview
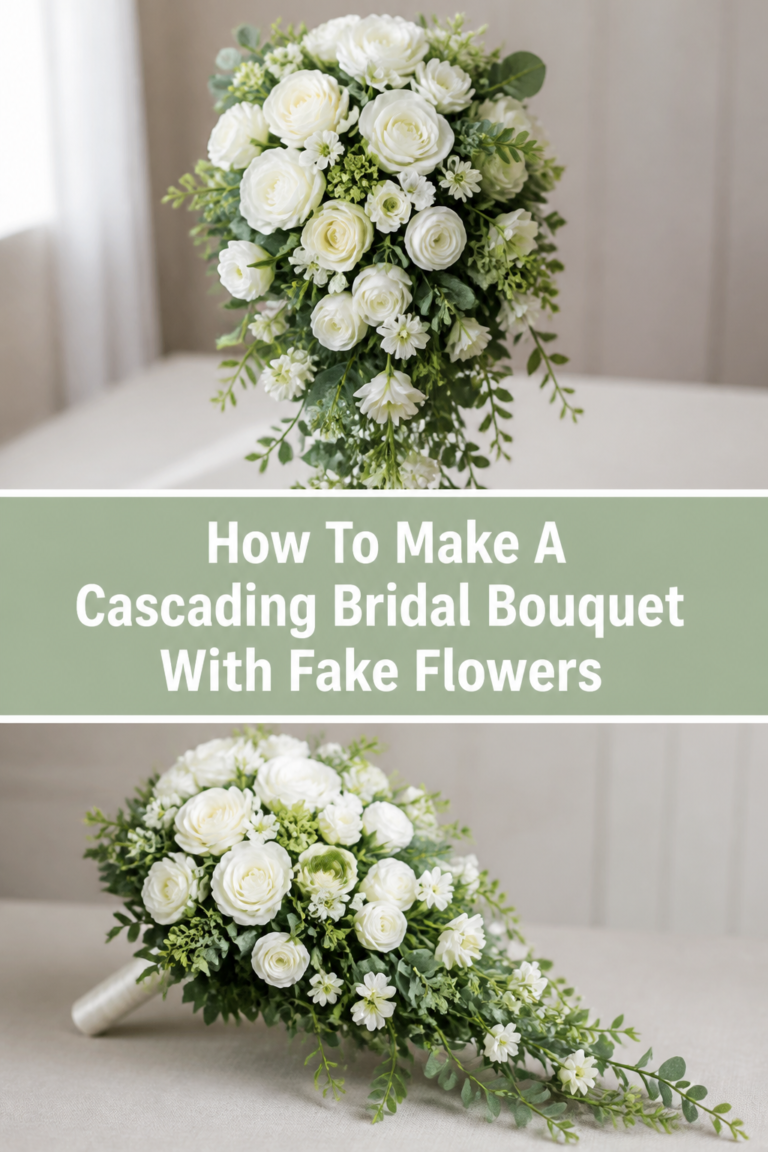
Creating your own bouquet is a rewarding way to personalize your wedding while keeping your budget intact.
Fake flowers offer the advantage of durability, meaning you can finish your project weeks before the big day arrives.
- Time needed: 2 to 4 hours
- Difficulty: Beginner
- What you’ll need: High-quality silk flowers, floral tape, wire cutters, ribbon, and pearl pins.
Step 1: Select Your Floral Palette
Choose a cohesive color scheme that complements your wedding theme and the season of your ceremony.
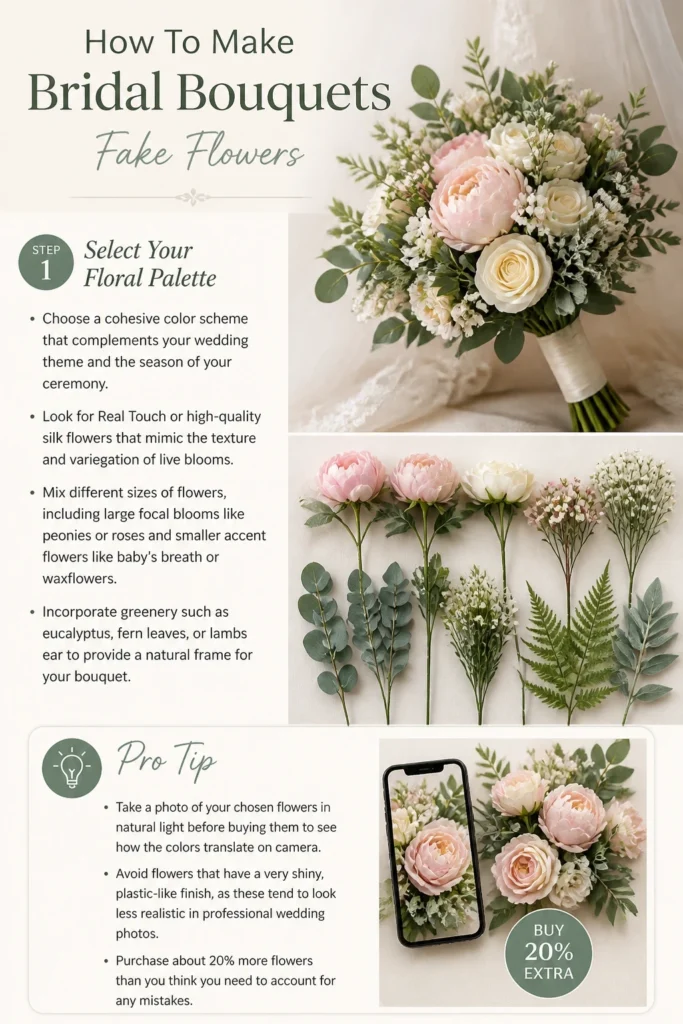
Look for “Real Touch” or high-quality silk flowers that mimic the texture and variegation of live blooms.
Mix different sizes of flowers, including large focal blooms like peonies or roses and smaller accent flowers like baby’s breath or waxflowers.
Incorporate greenery such as eucalyptus, fern leaves, or lamb’s ear to provide a natural frame for your bouquet.
Pro Tip: Take a photo of your chosen flowers in natural light before buying them to see how the colors translate on camera.
Avoid flowers that have a very shiny, plastic-like finish, as these tend to look less realistic in professional wedding photos.
Purchase about 20% more flowers than you think you need to account for any mistakes or gaps that appear during the assembly process.
Step 2: Prepare Your Stems
Remove any excess plastic leaves from the lower two-thirds of each stem to create a clean handle area.
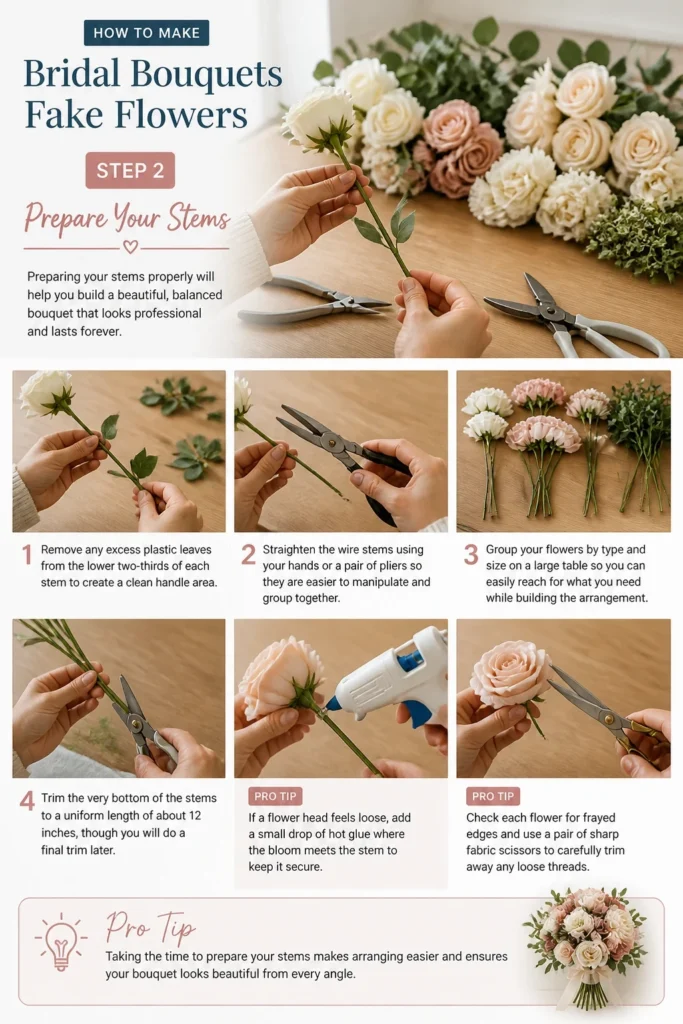
Straighten the wire stems using your hands or a pair of pliers so they are easier to manipulate and group together.
Group your flowers by type and size on a large table so you can easily reach for what you need while building the arrangement.
Trim the very bottom of the stems to a uniform length of about 12 inches, though you will do a final trim later.
Pro Tip: If a flower head feels loose, add a small drop of hot glue where the bloom meets the stem to keep it secure.
Check each flower for frayed edges and use a pair of sharp fabric scissors to carefully trim away any loose threads.
Step 3: Create the Focal Core
Select three of your largest and most beautiful flowers to serve as the heart of your bridal bouquet.
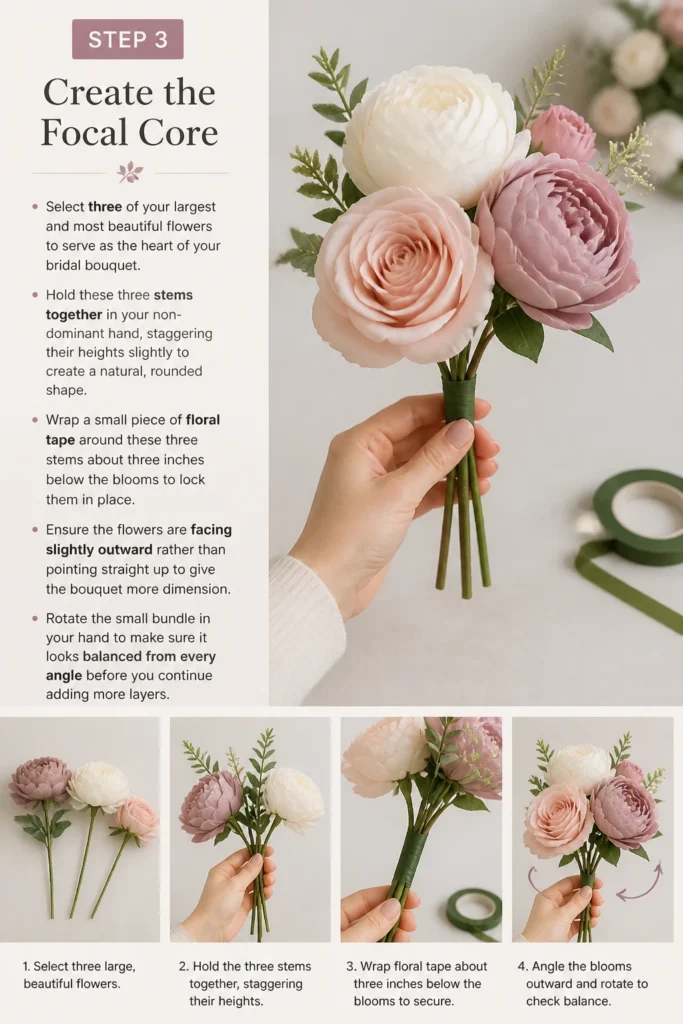
Hold these three stems together in your non-dominant hand, staggering their heights slightly to create a natural, rounded shape.
Wrap a small piece of floral tape around these three stems about three inches below the blooms to lock them in place.
Ensure the flowers are facing slightly outward rather than pointing straight up to give the bouquet more dimension.
Rotate the small bundle in your hand to make sure it looks balanced from every angle before you continue adding more layers.
Step 4: Build Layers With the Spiral Technique
Add new stems one by one at a slight angle, crossing them over the central stems in a clockwise or counter-clockwise direction.
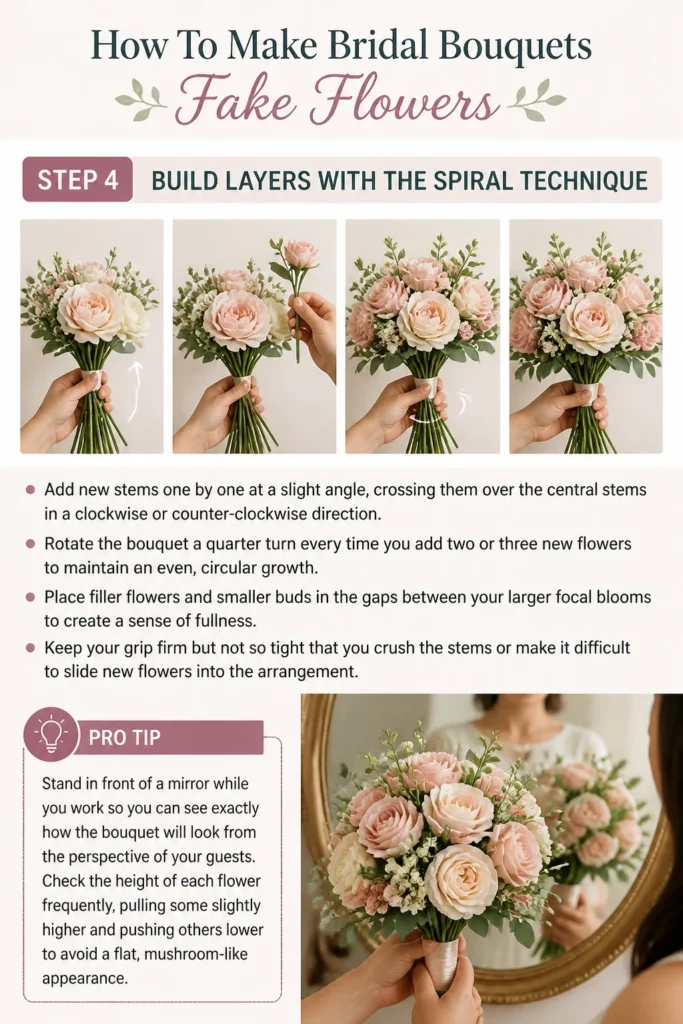
Rotate the bouquet a quarter turn every time you add two or three new flowers to maintain an even, circular growth.
Place filler flowers and smaller buds in the gaps between your larger focal blooms to create a sense of fullness.
Keep your grip firm but not so tight that you crush the stems or make it difficult to slide new flowers into the arrangement.
Pro Tip: Stand in front of a mirror while you work so you can see exactly how the bouquet will look from the perspective of your guests.
Check the height of each flower frequently, pulling some slightly higher and pushing others lower to avoid a flat, mushroom-like appearance.
Step 5: Integrate Greenery and Texture
Tuck sprigs of greenery around the outer edge of the bouquet to create a lush, organic border that softens the look.
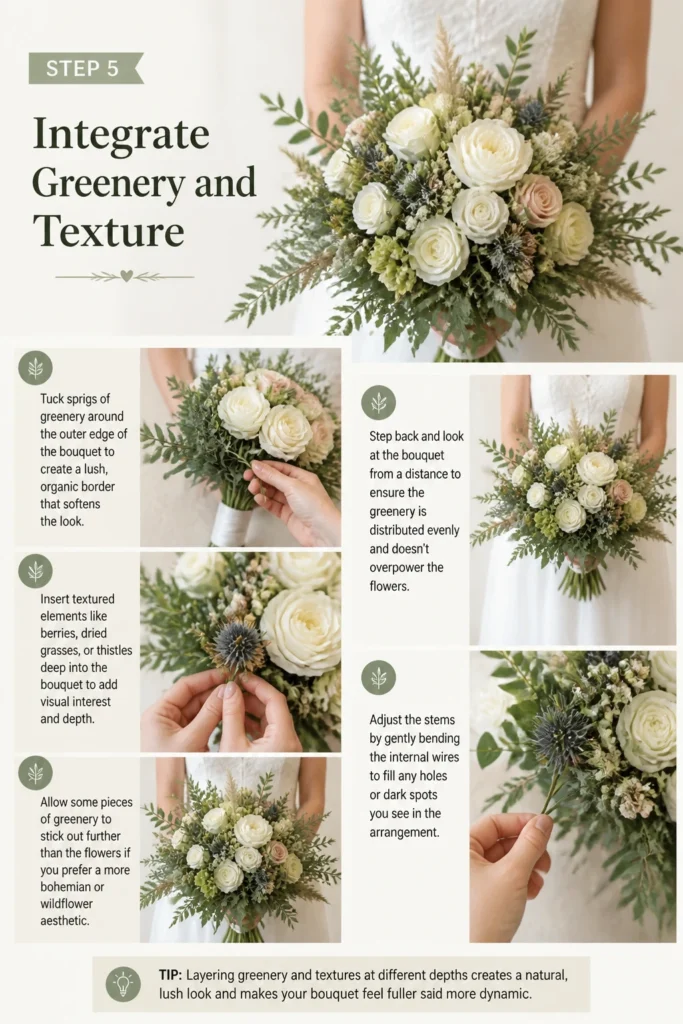
Insert textured elements like berries, dried grasses, or thistles deep into the bouquet to add visual interest and depth.
Allow some pieces of greenery to stick out further than the flowers if you prefer a more bohemian or “wildflower” aesthetic.
Step back and look at the bouquet from a distance to ensure the greenery is distributed evenly and doesn’t overpower the flowers.
Adjust the stems by gently bending the internal wires to fill any “holes” or dark spots you see in the arrangement.
Step 6: Secure the Bundle
Wrap floral tape tightly around the stems, starting about two inches below the flower heads and working your way down about five inches.
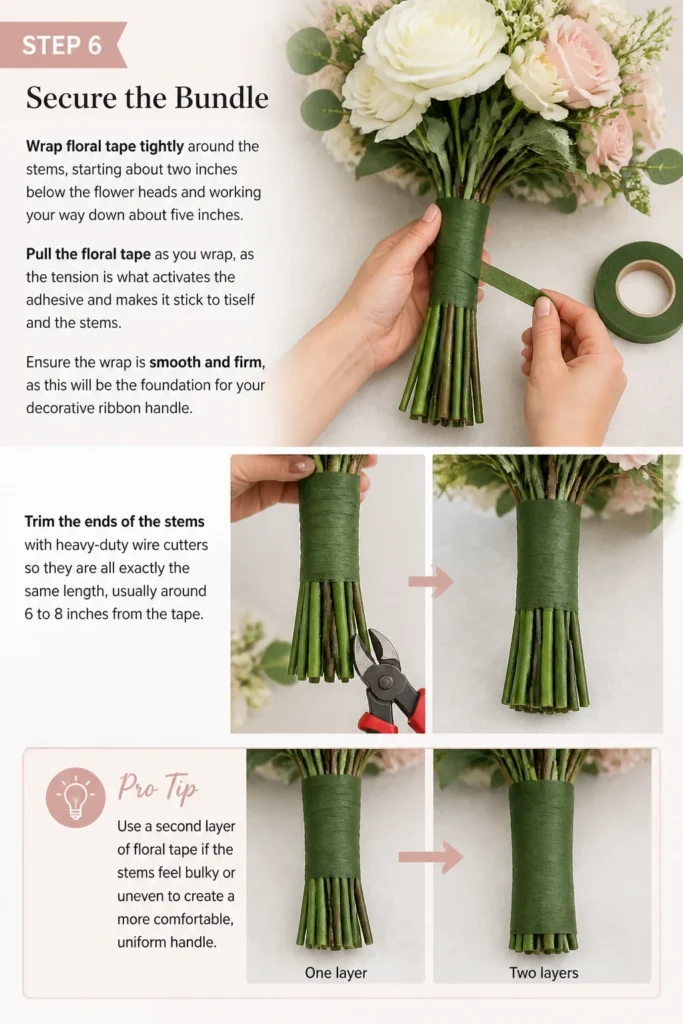
Pull the floral tape as you wrap, as the tension is what activates the adhesive and makes it stick to itself and the stems.
Ensure the wrap is smooth and firm, as this will be the foundation for your decorative ribbon handle.
Trim the ends of the stems with heavy-duty wire cutters so they are all exactly the same length, usually around 6 to 8 inches from the tape.
Pro Tip: Use a second layer of floral tape if the stems feel bulky or uneven to create a more comfortable, uniform handle.
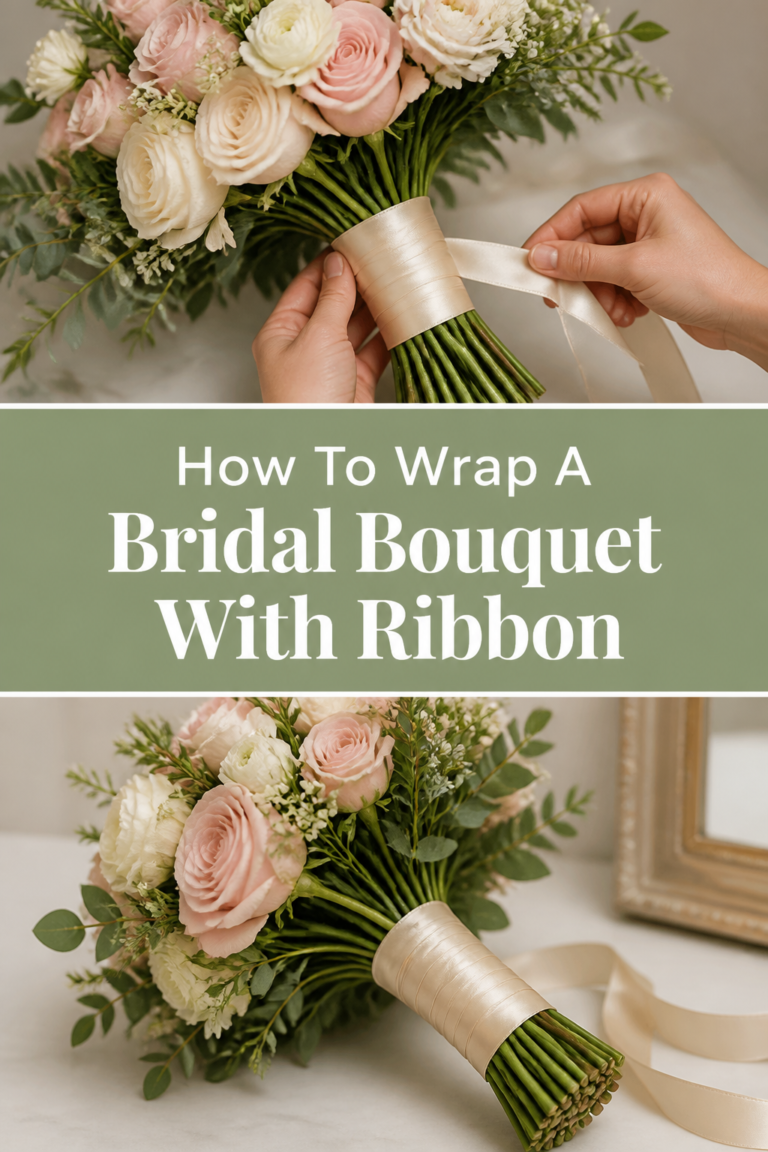
Step 7: Wrap the Handle with Ribbon
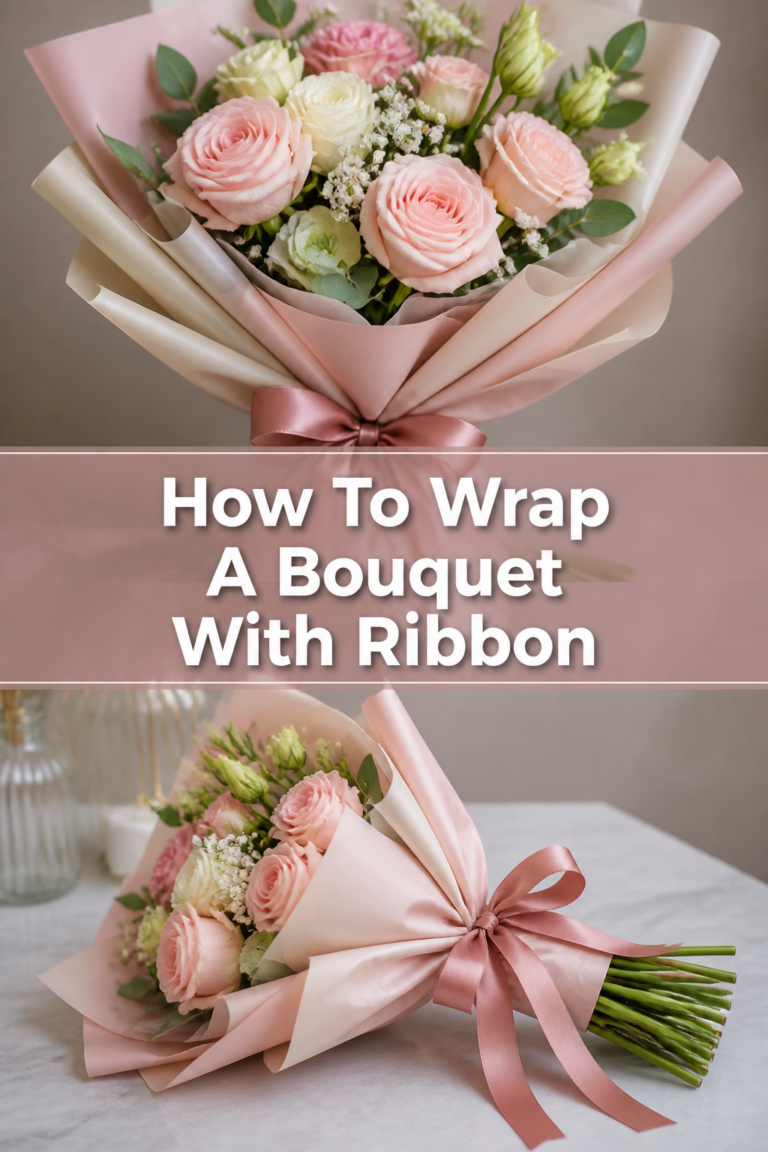
Secure the end of your decorative ribbon to the top of the floral tape using a hot glue gun or a pearl-headed pin.
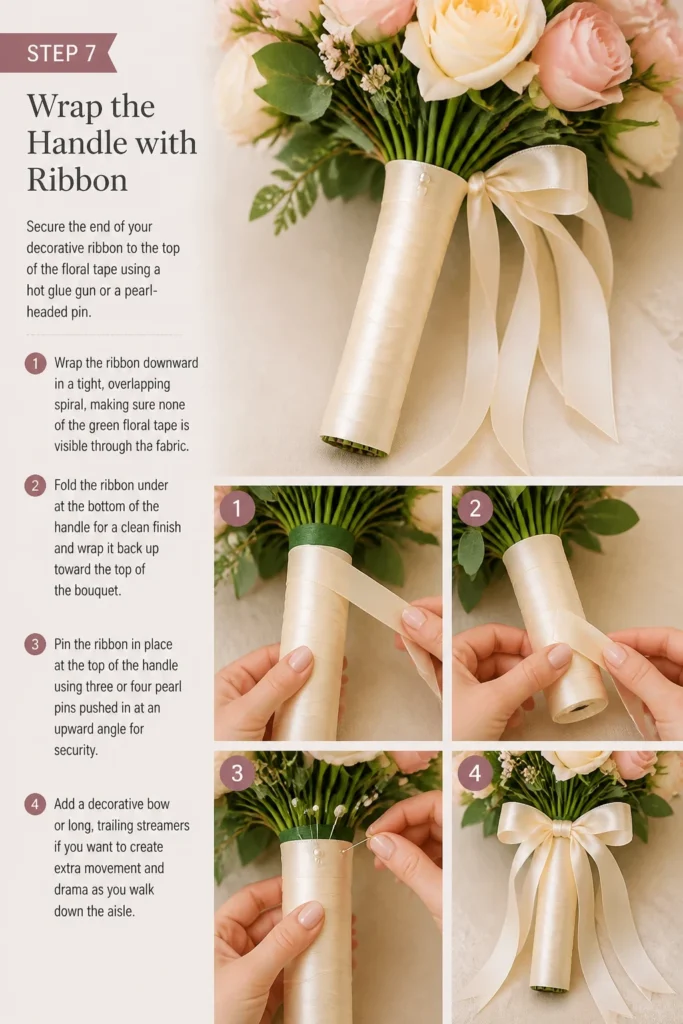
Wrap the ribbon downward in a tight, overlapping spiral, making sure none of the green floral tape is visible through the fabric.
Fold the ribbon under at the bottom of the handle for a clean finish and wrap it back up toward the top of the bouquet.
Pin the ribbon in place at the top of the handle using three or four pearl pins pushed in at an upward angle for security.
Add a decorative bow or long, trailing streamers if you want to create extra movement and drama as you walk down the aisle.
Step 8: Final Adjustments and Storage
Fluff the petals of each flower, gently opening them with your fingers to make them look more like they are in full bloom.
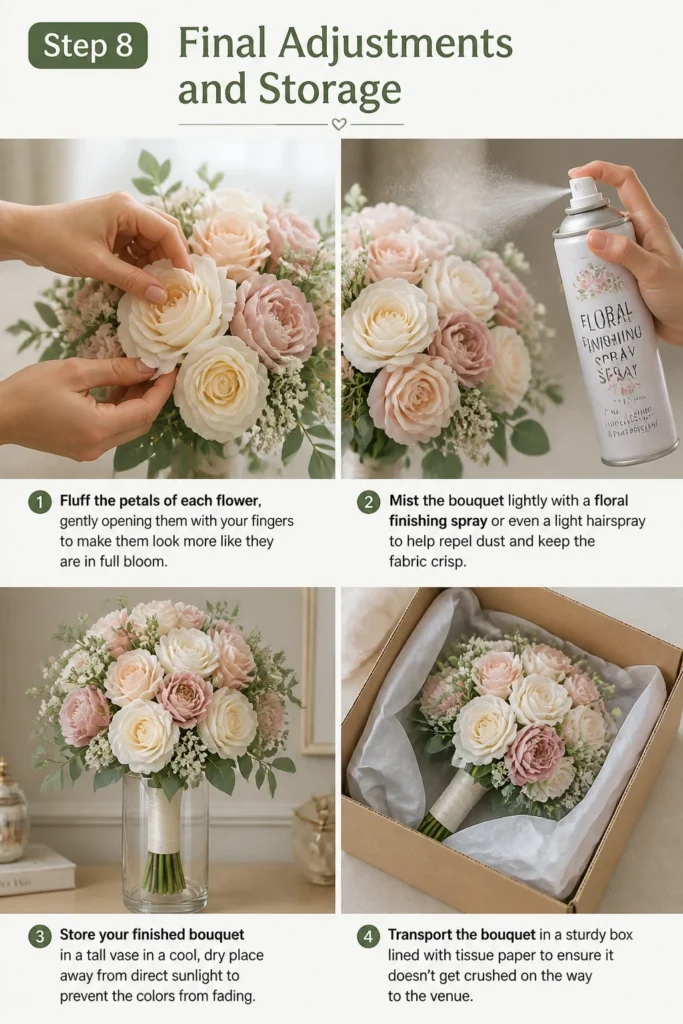
Mist the bouquet lightly with a floral finishing spray or even a light hairspray to help repel dust and keep the fabric crisp.
Store your finished bouquet in a tall vase in a cool, dry place away from direct sunlight to prevent the colors from fading.
Transport the bouquet in a sturdy box lined with tissue paper to ensure it doesn’t get crushed on the way to the venue.
Common Mistakes to Avoid
Choosing Cheap Materials
The most frequent error is selecting flowers from a discount store that have visible plastic seams or neon-bright colors. These materials rarely look good in photos and can make the entire wedding aesthetic feel less formal. Investing in mid-range or high-end silk flowers is essential for a professional finish.
Ignoring the Profile View
Many beginners focus only on the top of the bouquet, resulting in a flat arrangement that looks awkward from the side. You must ensure that flowers and greenery wrap slightly around the edges. This creates a beautiful silhouette for the side-profile photos taken during the ceremony.
Leaving the Handle Too Long
A handle that is too long can look disproportionate and make the bouquet difficult to hold gracefully against your dress. Aim for a handle length that fits comfortably in two hands, usually between five and seven inches. Anything longer tends to get caught on the fabric of the bridal gown.
Troubleshooting
The Bouquet Feels Wobbly
If the flowers are shifting around, your floral tape wrap likely isn’t tight enough. You can fix this by adding another layer of tape over the existing one, pulling it much tighter this time. If individual flowers are moving, you may need to insert a secondary support wire next to their stems before retaping.
The Arrangement Looks Too Symmetrical
A bouquet that is perfectly round and even can sometimes look unnatural or “dated.” To fix this, try pulling a few stems slightly outward or adding a few asymmetrical sprigs of greenery. Breaking up the perfect circle creates a more modern, organic look that mimics high-end floral design.
The Ribbon is Slipping
Ribbon can easily slide off smooth plastic stems or loose floral tape. To prevent this, apply a thin line of hot glue every few rotations as you wrap the handle. You should also ensure you are using pins that are long enough to grip the internal stems through the ribbon layers.
Key Takeaways
- Use high-quality “Real Touch” silks to ensure a realistic and professional appearance.
- The spiral technique is the secret to creating a full, rounded, and professional-looking shape.
- Vary the heights and textures of your flowers to add depth and prevent a flat look.
- Secure the handle tightly with floral tape before adding decorative ribbon to ensure stability.
- Store the bouquet in a cool, dark place to maintain the vibrant colors until your wedding day.
Frequently Asked Questions
Can I mix fake flowers with real greenery?
Yes, mixing real greenery with high-quality silk flowers is a popular way to add a fresh scent and realistic movement. However, remember that the real greenery will wilt, so you will need to add it only a day or two before the wedding. This hybrid approach offers the best of both worlds in terms of cost and aesthetics.
How far in advance can I make my fake flower bouquet?
One of the greatest benefits of fake flowers is that you can complete your bouquet months in advance. Most brides find that 2 to 4 weeks before the wedding is the sweet spot for finishing DIY projects. This allows you to check one major item off your to-do list while the materials are still fresh and dust-free.
How do I clean dust off my silk flowers?
If your bouquet has been sitting out for a while, you can use a blow dryer on the “cool” and “low” settings to gently blow away dust. For deeper cleaning, a microfiber cloth or a specialized silk flower cleaning spray can be used. Avoid using water, as it can cause some dyes to bleed or the fabric to lose its shape.
What is the best way to cut thick wire stems?
Standard kitchen scissors or craft scissors will likely be ruined if you try to cut floral wire. Always use a pair of heavy-duty wire cutters or lineman’s pliers designed for metal. This ensures a clean cut and prevents you from straining your hands during the assembly process.
Our Top Recommended Finds
- Heavy-Duty Wire Cutters: Essential for trimming thick, plastic-coated wire stems without damaging your hands or tools.
- Self-Sealing Floral Tape: This tape is necessary for binding stems together securely and creating a smooth handle base.
- Double-Sided Satin Ribbon: A high-quality ribbon provides a luxurious feel to the handle and covers all the mechanical parts of the bouquet.
Walking Down The Aisle With Your Creation
Now that your bouquet is complete, you have a beautiful keepsake that will last long after the final dance.
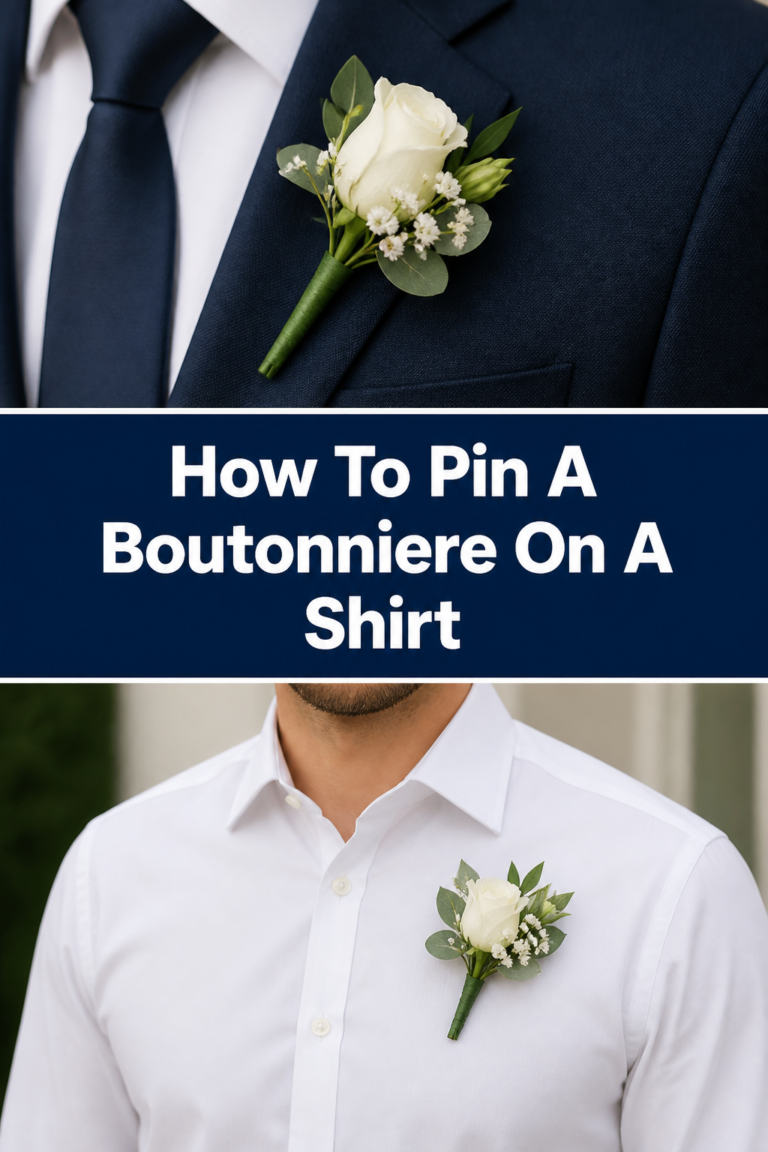
You might consider using these same techniques to create matching boutonnieres for the groomsmen or smaller posies for your bridesmaids.
The skills you learned today can even be applied to making seasonal wreaths or home decor arrangements for your new life together.
Take a moment to admire your handiwork and get ready to carry a piece of your own creativity down the aisle.
Wedding Planning
No fluff, no drama. Just easy weekly advice, planning shortcuts, and gentle reminders to help you actually enjoy your engagement.