✨ How To Bustle A Wedding Dress DIY

Wedding Planning
No fluff, no drama. Just easy weekly advice, planning shortcuts, and gentle reminders to help you actually enjoy your engagement.
That moment a bride steps out, radiant and ready, is truly magical. But after the ceremony, a long, flowing train can become a practical challenge. I remember helping my sister bustle her gown, and the initial panic quickly turned into a rewarding, collaborative moment.
Learning how to bustle a wedding dress yourself gives you invaluable control and peace of mind on the big day. This guide will walk you through every step, ensuring you feel confident and prepared. You’ve got this!
Quick Overview
Bustling a wedding dress transforms a beautiful train into a more manageable, dance-floor-ready silhouette. It’s a key step for any reception.
Here’s what you’ll need to know:
- Time needed: 30-60 minutes (for practice), 5-10 minutes (on the day)
- Difficulty: Intermediate (requires precision and a helper)
- What you’ll need: The wedding dress, a trusted helper, safety pins (just in case), a full-length mirror, and possibly a small stool.
Step-by-Step Instructions
Step 1: Understand the Bustle Style
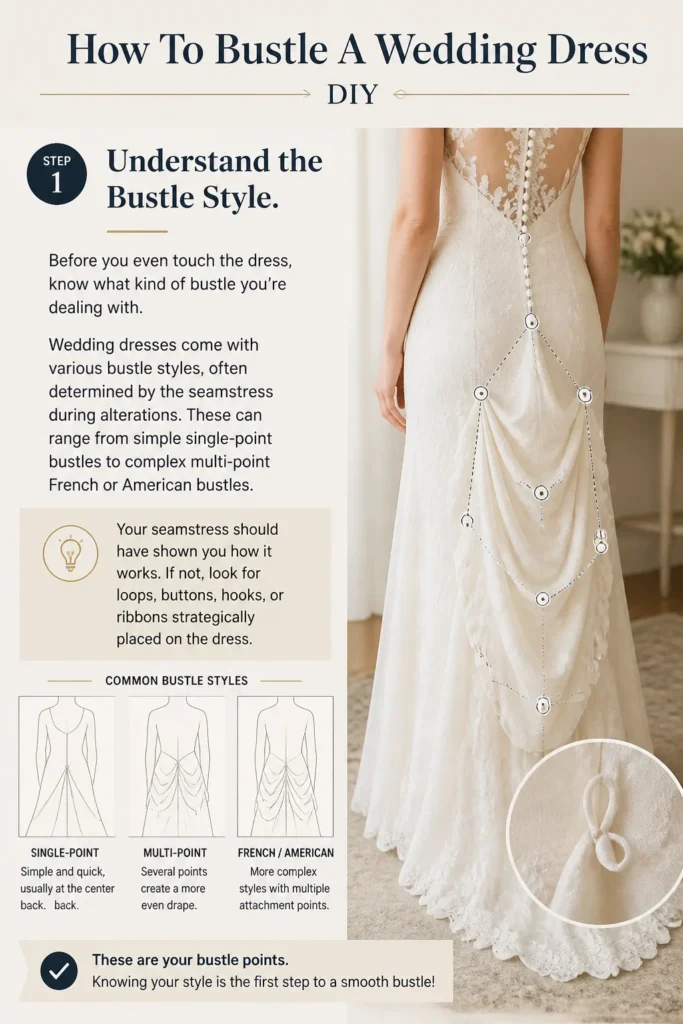
Before you even touch the dress, know what kind of bustle you’re dealing with. Wedding dresses come with various bustle styles, often determined by the seamstress during alterations. These can range from simple single-point bustles to complex multi-point French or American bustles.
Your seamstress should have shown you how it works. If not, look for loops, buttons, hooks, or ribbons strategically placed on the dress. These are your bustle points.
Step 2: Gather Your Tools and Your Trusted Helper
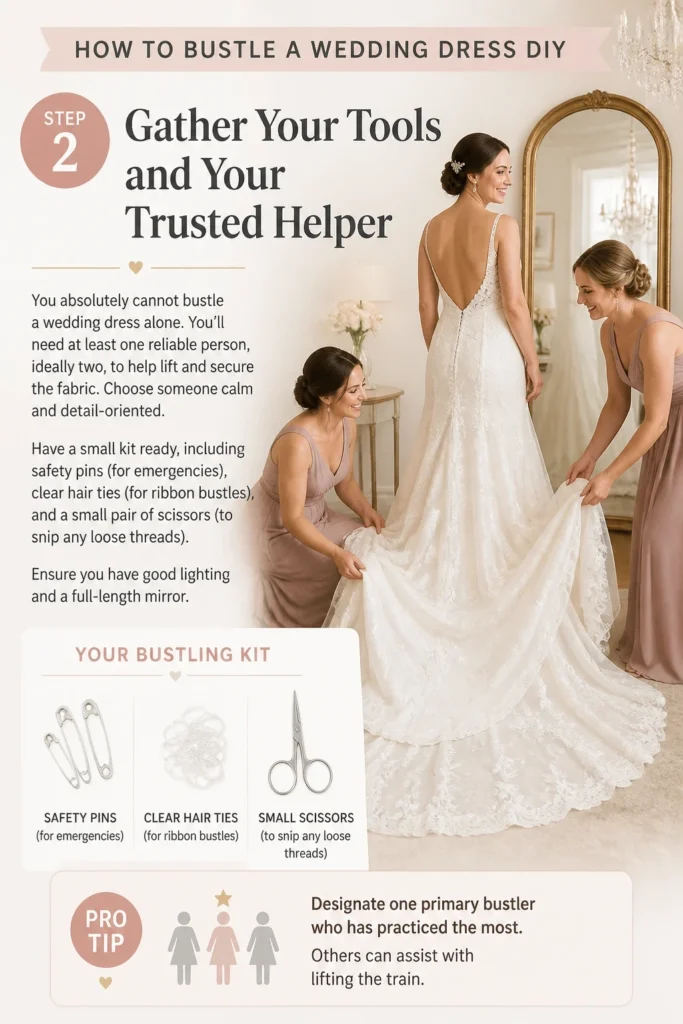
You absolutely cannot bustle a wedding dress alone. You’ll need at least one reliable person, ideally two, to help lift and secure the fabric. Choose someone calm and detail-oriented.
Have a small kit ready, including safety pins (for emergencies), clear hair ties (for ribbon bustles), and a small pair of scissors (to snip any loose threads). Ensure you have good lighting and a full-length mirror.
Pro Tip: Designate one primary “bustler” who has practiced the most. Others can assist with lifting the train.
Step 3: Identify All Bustle Points
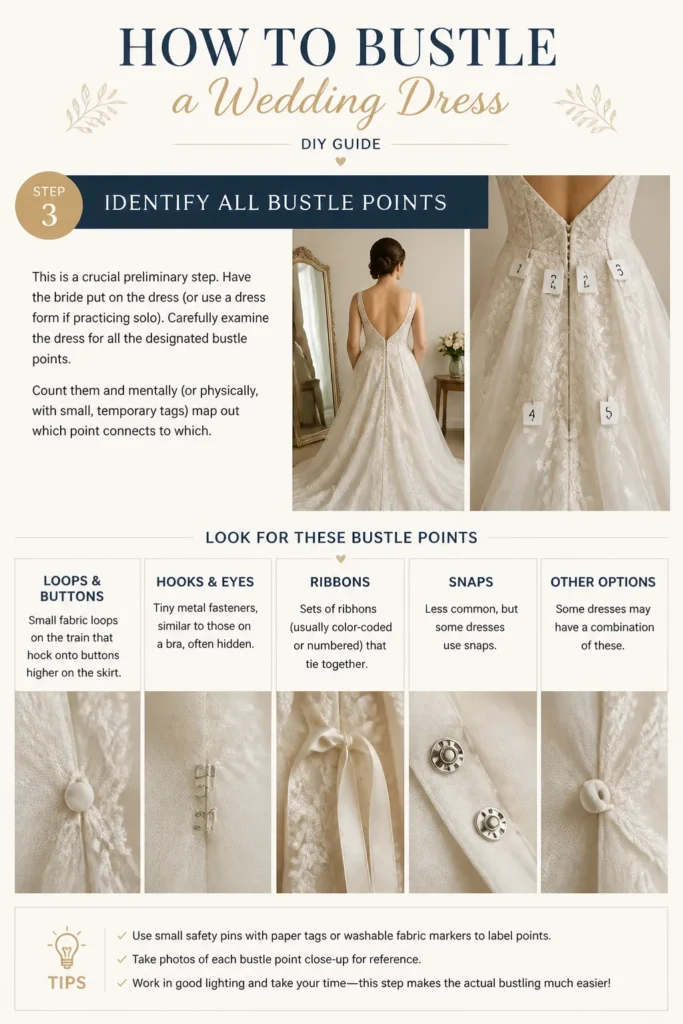
This is a crucial preliminary step. Have the bride put on the dress (or use a dress form if practicing solo). Carefully examine the dress for all the designated bustle points.
Look for:
- Loops and Buttons: Small fabric loops on the train that hook onto buttons higher on the skirt.
- Hooks and Eyes: Tiny metal fasteners, similar to those on a bra, often hidden.
- Ribbons: Sets of ribbons (usually color-coded or numbered) that tie together.
- Snaps: Less common, but some dresses use snaps.
Count them and mentally (or physically, with small, temporary tags) map out which point connects to which.
Step 4: Practice, Practice, Practice
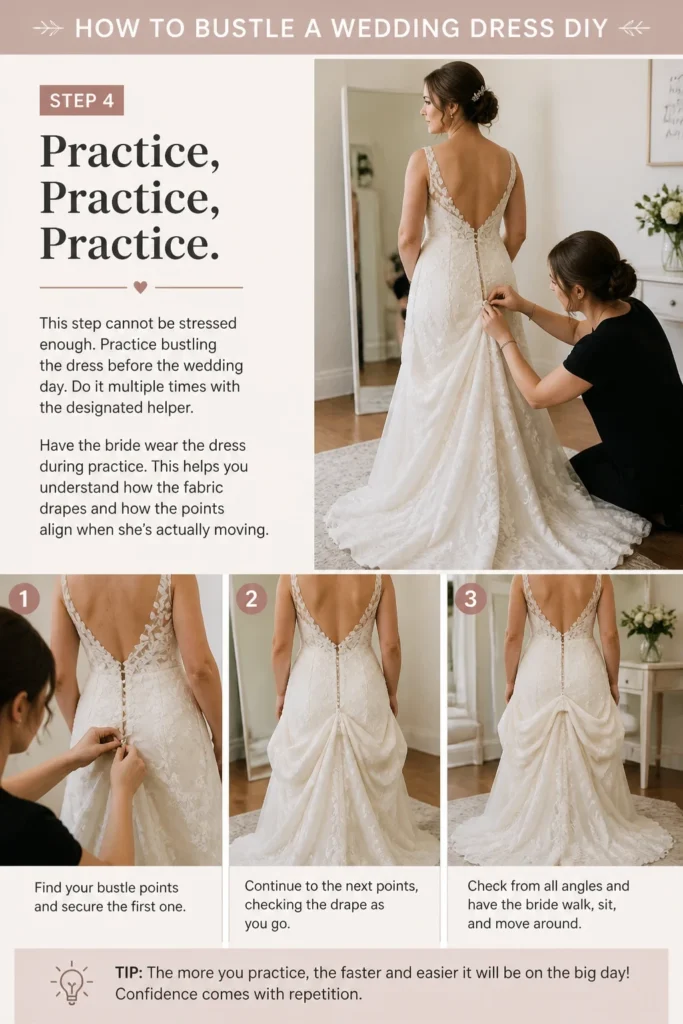
This step cannot be stressed enough. Practice bustling the dress before the wedding day. Do it multiple times with the designated helper.
Have the bride wear the dress during practice. This helps you understand how the fabric drapes and how the points align when she’s actually moving.
Step 5: Position the Bride and Helper
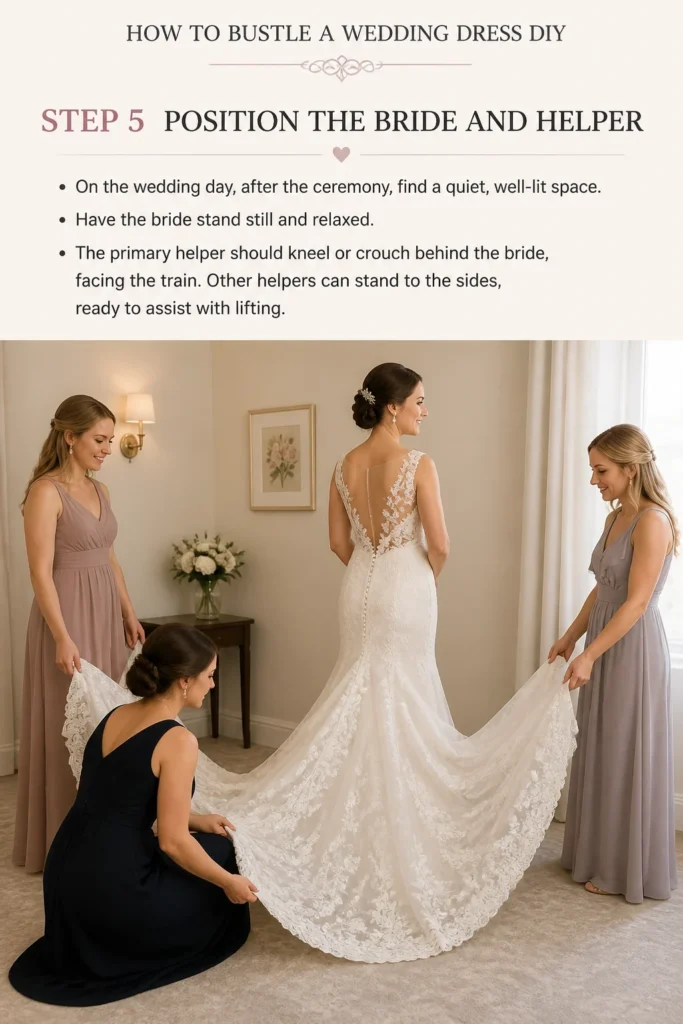
On the wedding day, after the ceremony, find a quiet, well-lit space. Have the bride stand still and relaxed.
The primary helper should kneel or crouch behind the bride, facing the train. Other helpers can stand to the sides, ready to assist with lifting.
Step 6: Lift and Gather the Train
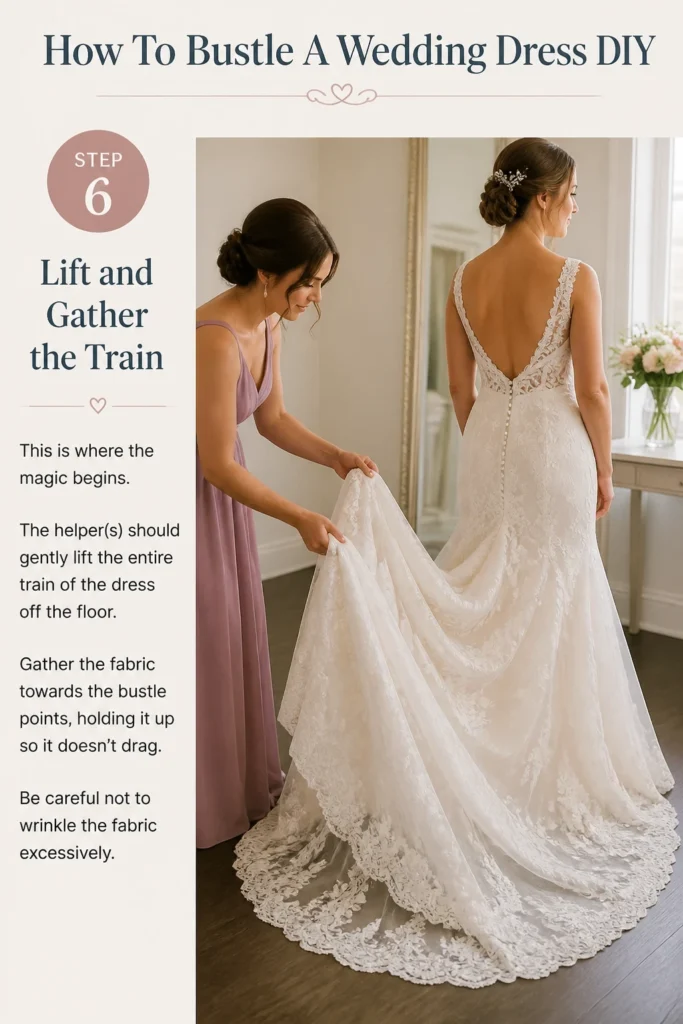
This is where the magic begins. The helper(s) should gently lift the entire train of the dress off the floor.
Gather the fabric towards the bustle points, holding it up so it doesn’t drag. Be careful not to wrinkle the fabric excessively.
Step 7: Connect the First Bustle Point
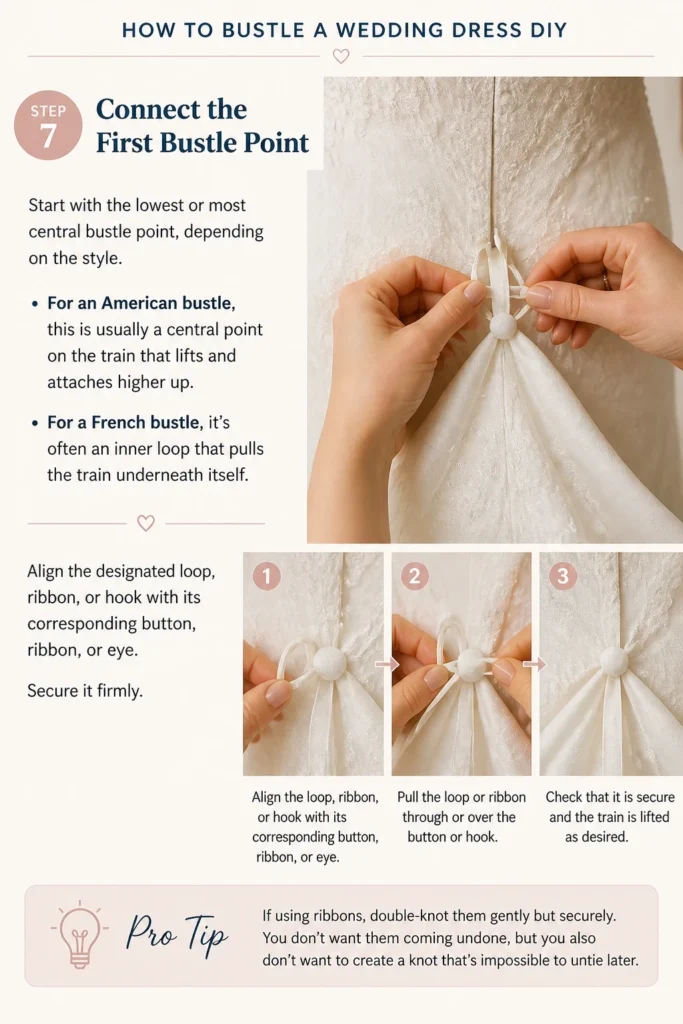
Start with the lowest or most central bustle point, depending on the style. For an American bustle, this is usually a central point on the train that lifts and attaches higher up. For a French bustle, it’s often an inner loop that pulls the train underneath itself.
Align the designated loop, ribbon, or hook with its corresponding button, ribbon, or eye. Secure it firmly.
Pro Tip: If using ribbons, double-knot them gently but securely. You don’t want them coming undone, but you also don’t want to create a knot that’s impossible to untie later.
Step 8: Work Your Way Up (or Out)
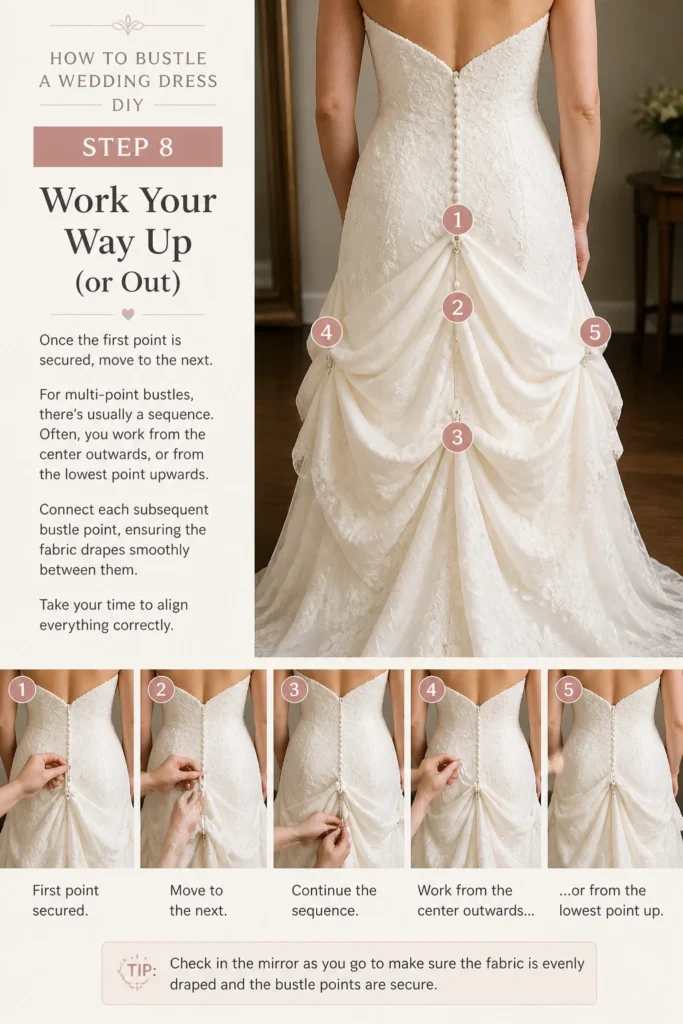
Once the first point is secured, move to the next. For multi-point bustles, there’s usually a sequence. Often, you work from the center outwards, or from the lowest point upwards.
Connect each subsequent bustle point, ensuring the fabric drapes smoothly between them. Take your time to align everything correctly.
Step 9: Check for Evenness and Security
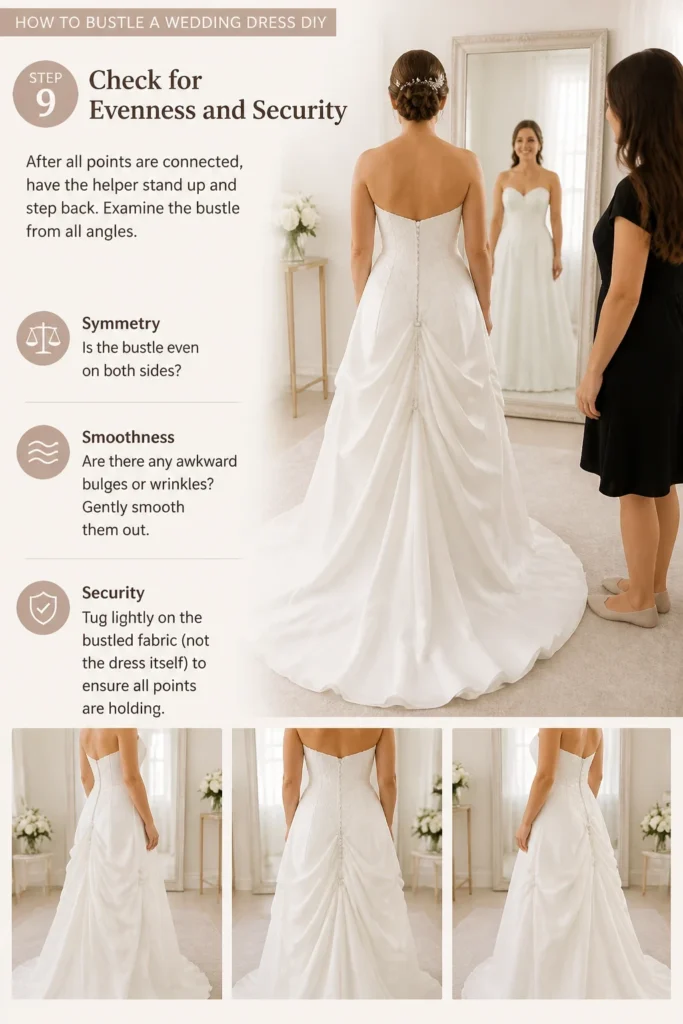
After all points are connected, have the helper stand up and step back. Examine the bustle from all angles.
Look for:
- Symmetry: Is the bustle even on both sides?
- Smoothness: Are there any awkward bulges or wrinkles? Gently smooth them out.
- Security: Tug lightly on the bustled fabric (not the dress itself) to ensure all points are holding.
Step 10: Test the Movement
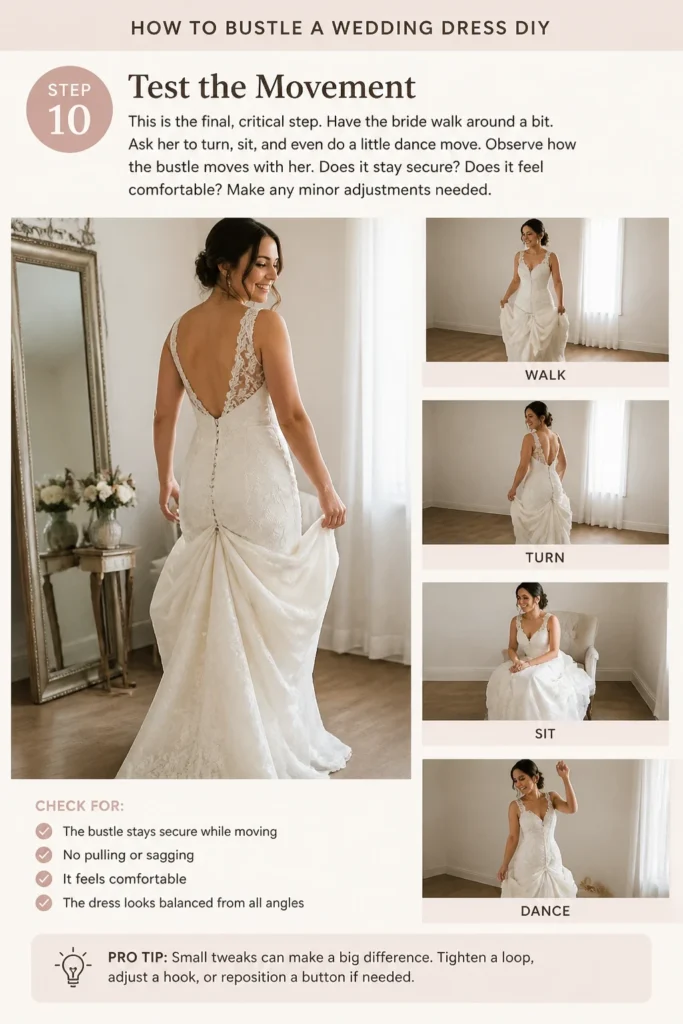
This is the final, critical step. Have the bride walk around a bit. Ask her to turn, sit, and even do a little dance move.
Observe how the bustle moves with her. Does it stay secure? Does it feel comfortable? Make any minor adjustments needed.
Common Mistakes to Avoid
Not Practicing Beforehand
Skipping practice is the biggest mistake you can make. The wedding day is hectic enough without trying to figure out a complex bustle for the very first time. You’ll be stressed, the bride will be stressed, and it will take much longer. Always practice at least once, ideally twice, with the actual dress and helper.
Rushing the Process
It’s tempting to rush, especially with a busy wedding timeline. However, a hurried bustle often results in uneven drapes, missed points, or an insecure connection that will fall apart during the reception. Take a few extra minutes to do it right; it will save you headaches later.
Using the Wrong Tools (or No Tools)
Relying solely on the dress’s built-in fasteners without a backup plan is risky. Things can break or come undone. Not having safety pins or clear hair ties on hand for ribbon bustles can leave you in a bind. Always have a small emergency kit nearby.
Not Checking for Security and Comfort
Just because all the points are connected doesn’t mean the job is done. A bustle that looks good but isn’t secure will fall, and one that’s secure but uncomfortable will bother the bride all night. Always test the bustle by having the bride move, and confirm it feels good to her.
Troubleshooting
The Bustle Keeps Falling Out
This is a common issue, often caused by a few factors. First, check if all the designated bustle points are correctly connected. Sometimes a hook is missed or a ribbon isn’t tied tightly enough.
If the points are all secure but it still falls, the fabric might be too heavy for the existing fastenings, or the fastenings themselves might be damaged. Use a few discreet safety pins from the inside of the skirt to reinforce the connections.
The Bustle Looks Uneven or Lopsided
An uneven bustle usually means the fabric wasn’t gathered symmetrically, or the points weren’t connected in the correct order or alignment. Gently unbustle the dress and start again, focusing on lifting and gathering the train evenly.
Pay close attention to the designated connection points. Sometimes, simply adjusting the tension on one side can balance it out.
There Are Too Many Wrinkles or Bulges
Wrinkles often occur when the train fabric is not smoothed out as it’s being gathered and connected. Before securing each point, gently smooth the fabric downwards and outwards from the connection point.
If there are still bulges, it might mean too much fabric is being pulled into one area, or the bustle style isn’t quite right for the dress’s weight. Try to redistribute the fabric more evenly or adjust the connection points slightly if possible.
Key Takeaways
- Practice is paramount: Rehearse bustling the dress multiple times before the wedding day.
- Enlist a trusted helper: You cannot do this alone; choose someone calm and capable.
- Identify all bustle points: Know exactly where all the loops, buttons, hooks, or ribbons are.
- Work methodically: Connect points in sequence, often from the center/bottom upwards or outwards.
- Prioritize security and comfort: Ensure the bustle is firmly attached and allows the bride to move freely.
- Have an emergency kit: Safety pins and clear hair ties can be lifesavers for unexpected mishaps.
Frequently Asked Questions
What if my dress doesn’t have existing bustle points?
If your dress has no pre-sewn bustle points, you have a few options. The best is to consult with a seamstress immediately. They can add discreet loops, buttons, or ribbons. For an emergency DIY, you could use large, strong safety pins to create a temporary bustle, but this risks damaging the fabric and may not be as secure.
Can I bustle the dress by myself?
No, it’s virtually impossible to bustle a wedding dress effectively by yourself. You need at least one helper to lift the train and align the points while you secure them, or vice-versa. Two helpers are even better for heavier or more elaborate trains.
How long should a bustle last?
A properly executed bustle should last throughout the entire reception, including dancing. If it’s falling apart, it likely wasn’t secured properly, or the dress’s original fastenings are insufficient for the weight of the train. Reinforce with safety pins if needed.
Should the bustle be tight or loose?
The bustle should be secure, but not overly tight. It needs to allow the bride to walk, sit, and dance comfortably without feeling restricted. If it’s too tight, it could pull on the dress, potentially tearing fabric or popping seams. If it’s too loose, it will fall. Aim for a firm, comfortable fit.
Our Top Recommended Finds
- Large, Heavy-Duty Safety Pins: Essential for emergency repairs or reinforcing weak bustle points. Look for ones with a strong clasp.
- Clear Hair Ties or Small Elastic Bands: Perfect for securing ribbon bustles without adding visible bulk or color.
- Travel Sewing Kit: A small kit with a needle and thread can be invaluable for minor rips or reattaching a loose button in a pinch.
Embrace the Dance Floor!
Bustling a wedding dress might seem like a small detail, but it’s crucial for the bride’s comfort and enjoyment of her reception. With a little practice and the right help, you can confidently tackle this task. Imagine the relief and joy when the bride can move freely, dance without tripping, and truly celebrate her special day!
So, gather your team, practice your steps, and get ready to help create unforgettable memories. Your DIY bustle skills will be a treasured gift.
Wedding Planning
No fluff, no drama. Just easy weekly advice, planning shortcuts, and gentle reminders to help you actually enjoy your engagement.