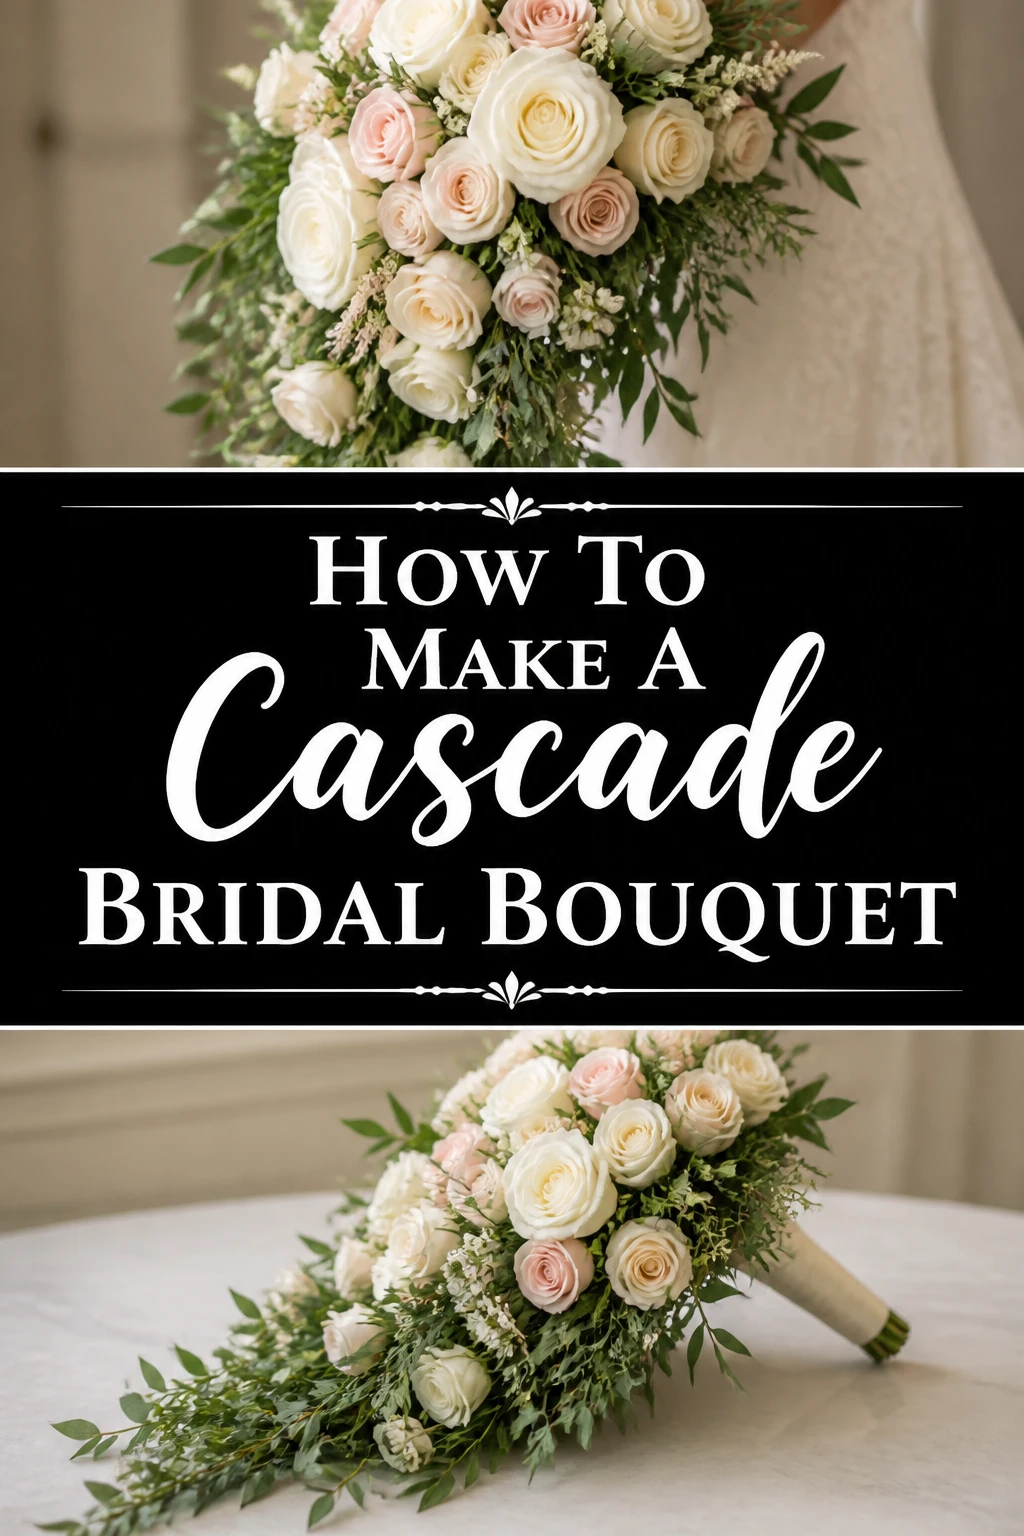
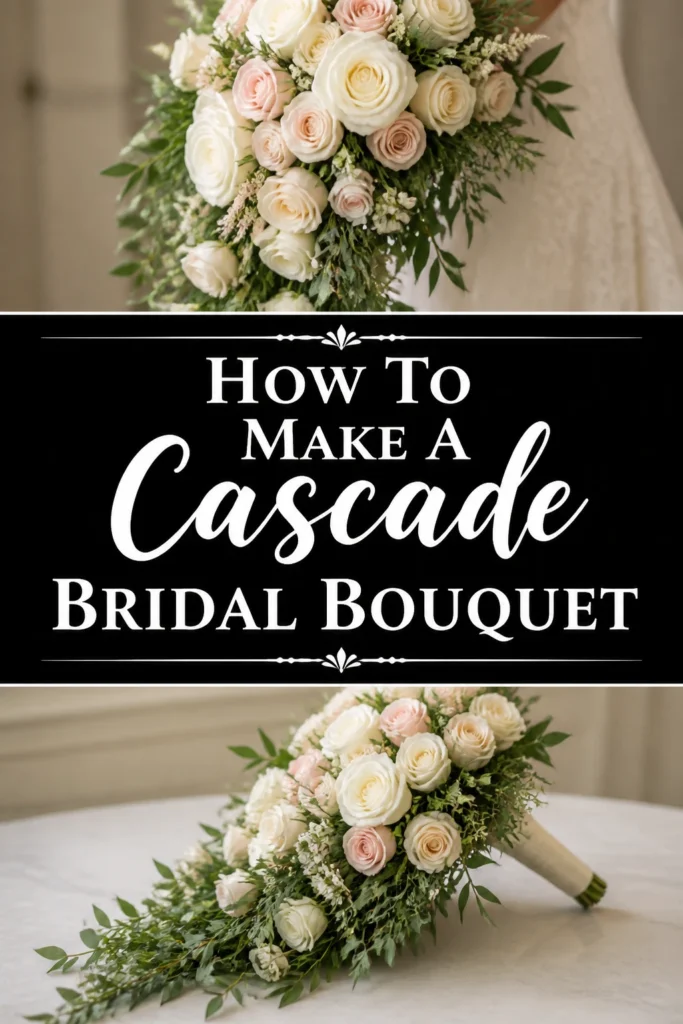
💐 How To Make A Cascade Bridal Bouquet

Wedding Planning
No fluff, no drama. Just easy weekly advice, planning shortcuts, and gentle reminders to help you actually enjoy your engagement.
Creating a cascade bridal bouquet is one of the most rewarding challenges for any floral enthusiast or DIY bride.
I remember the first time I attempted this style for a close friend’s wedding; the sheer elegance of the “spill” transformed the entire bridal look.
After years of refining my technique in professional floral studios, I’ve learned that the secret lies in the structural foundation and the rhythm of the greenery.
Quick Overview
A cascade bouquet, often called a teardrop or shower bouquet, is designed to flow downward from the bride’s hands like a floral waterfall.
- Time needed: 2 to 3 hours (plus overnight hydration time)
- Difficulty: Intermediate
- What you’ll need: Slanted bouquet holder with floral foam, floral tape, floral wire, shears, focal flowers, line flowers, and various types of greenery.
Step 1: Prepare and Condition Your Blooms
Hydrate your flowers for at least 12 to 24 hours before you begin the assembly process.
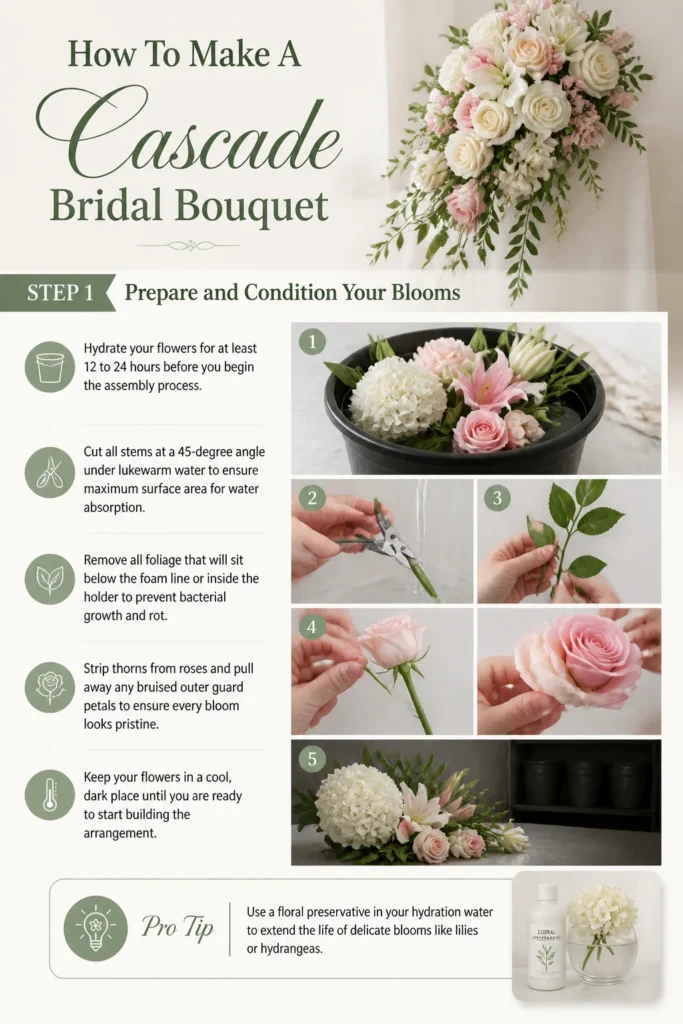
Cut all stems at a 45-degree angle under lukewarm water to ensure maximum surface area for water absorption.
Remove all foliage that will sit below the foam line or inside the holder to prevent bacterial growth and rot.
Strip thorns from roses and pull away any bruised outer “guard” petals to ensure every bloom looks pristine.
Keep your flowers in a cool, dark place until you are ready to start building the arrangement.
Pro Tip: Use a floral preservative in your hydration water to extend the life of delicate blooms like lilies or hydrangeas.
Step 2: Secure the Bouquet Holder
Soak the floral foam head of your bouquet holder in a basin of water until it sinks naturally.
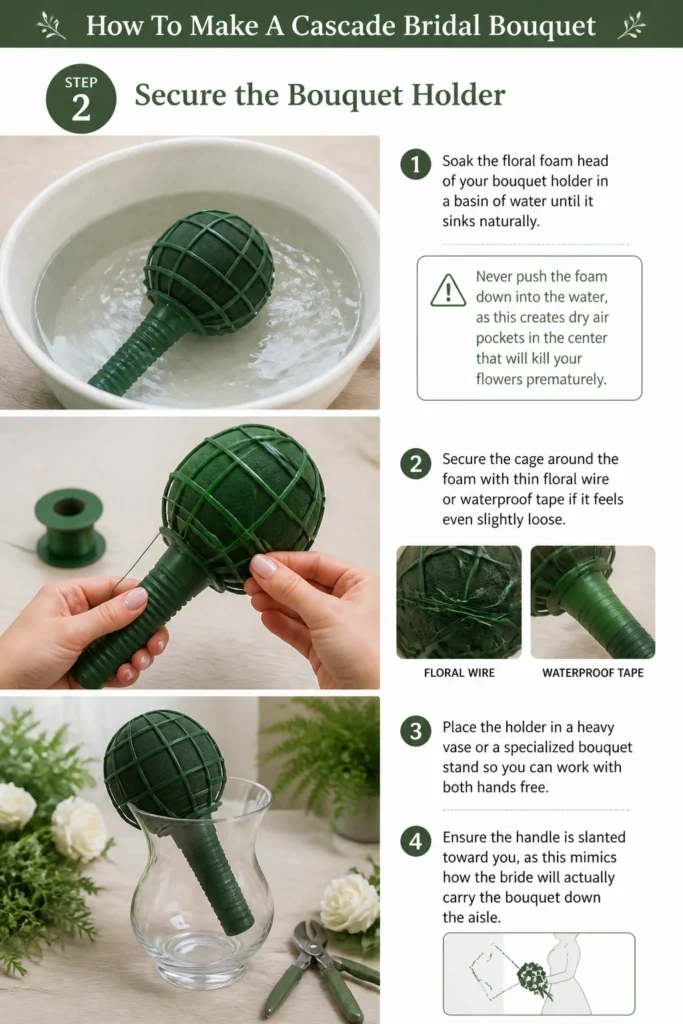
Never push the foam down into the water, as this creates dry air pockets in the center that will kill your flowers prematurely.
Secure the cage around the foam with thin floral wire or waterproof tape if it feels even slightly loose.
Place the holder in a heavy vase or a specialized bouquet stand so you can work with both hands free.
Ensure the handle is slanted toward you, as this mimics how the bride will actually carry the bouquet down the aisle.
Step 3: Establish the Length with Greenery
Select your trailing greenery first, such as Italian Ruscus, Ivy, or Eucalyptus, to define the “tail” of the cascade.
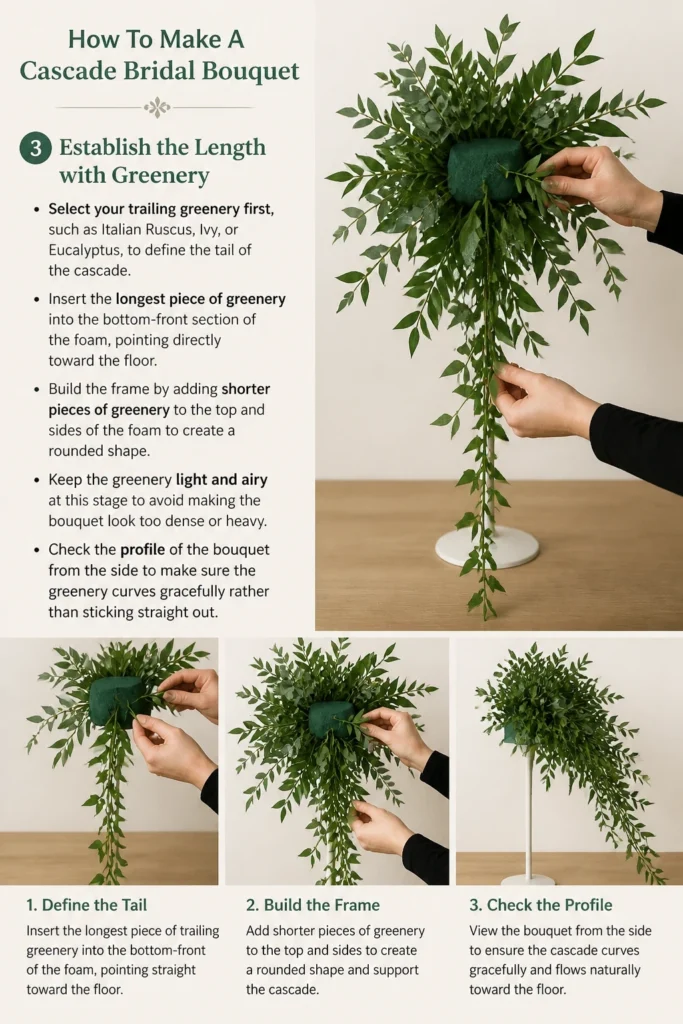
Insert the longest piece of greenery into the bottom-front section of the foam, pointing directly toward the floor.
Build the frame by adding shorter pieces of greenery to the top and sides of the foam to create a rounded shape.
Keep the greenery light and airy at this stage to avoid making the bouquet look too dense or heavy.
Check the profile of the bouquet from the side to make sure the greenery curves gracefully rather than sticking straight out.
Step 4: Insert Your Line Flowers
Use “line” flowers like snapdragons, delphiniums, or orchids to reinforce the downward flow of the bouquet.
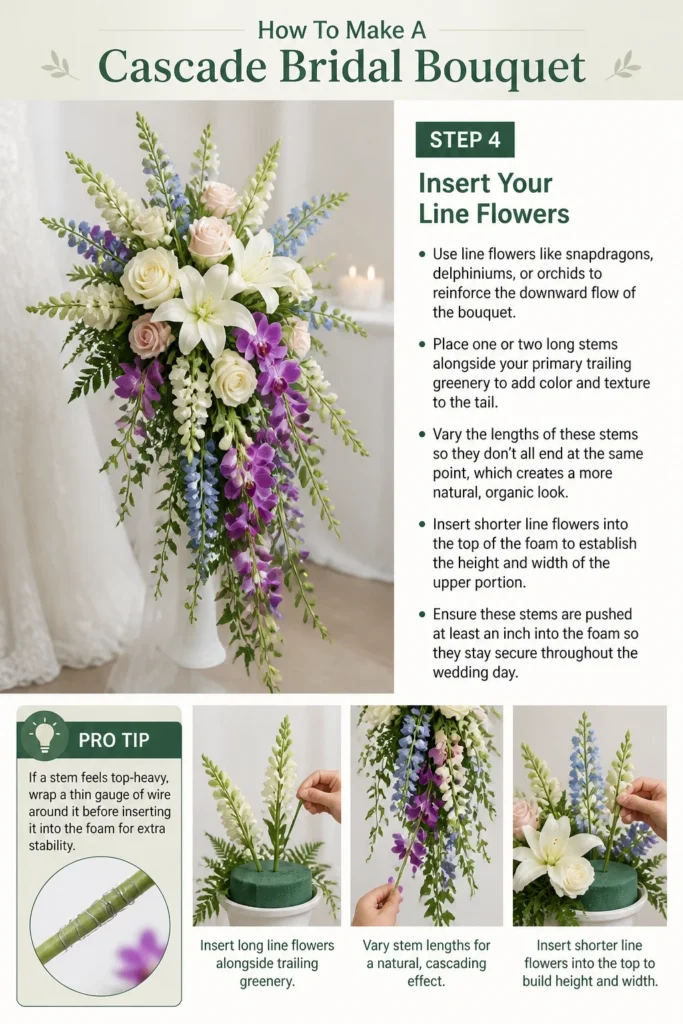
Place one or two long stems alongside your primary trailing greenery to add color and texture to the tail.
Vary the lengths of these stems so they don’t all end at the same point, which creates a more natural, organic look.
Insert shorter line flowers into the top of the foam to establish the height and width of the upper portion.
Ensure these stems are pushed at least an inch into the foam so they stay secure throughout the wedding day.
Pro Tip: If a stem feels top-heavy, wrap a thin gauge of wire around it before inserting it into the foam for extra stability.
Step 5: Position the Focal Flowers
Choose your largest blooms, such as roses, peonies, or lilies, to serve as the “heart” of the arrangement.
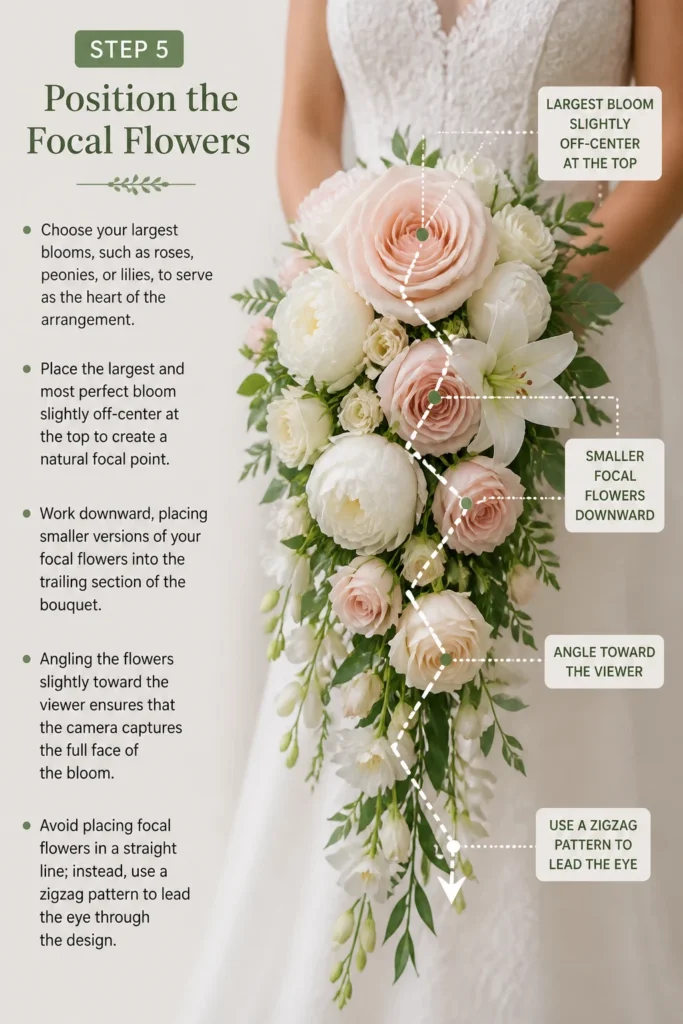
Place the largest and most perfect bloom slightly off-center at the top to create a natural focal point.
Work downward, placing smaller versions of your focal flowers into the trailing section of the bouquet.
Angling the flowers slightly toward the viewer ensures that the camera captures the full face of the bloom.
Avoid placing focal flowers in a straight line; instead, use a “zigzag” pattern to lead the eye through the design.
Step 6: Fill the Gaps with Secondary Blooms
Add medium-sized flowers like spray roses, carnations, or lisianthus to fill in the spaces between your focal points.
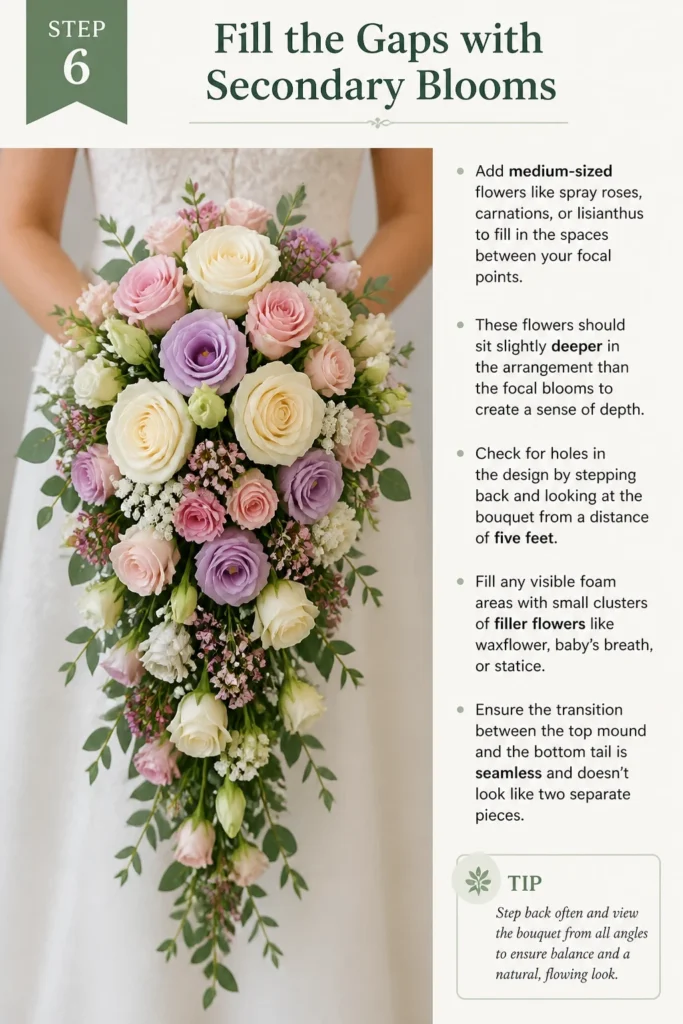
These flowers should sit slightly deeper in the arrangement than the focal blooms to create a sense of depth.
Check for “holes” in the design by stepping back and looking at the bouquet from a distance of five feet.
Fill any visible foam areas with small clusters of filler flowers like waxflower, baby’s breath, or statice.
Ensure the transition between the top “mound” and the bottom “tail” is seamless and doesn’t look like two separate pieces.
Step 7: Balance the Weight and Symmetry
Hold the bouquet by the handle to feel if it leans too heavily to one side or the other.
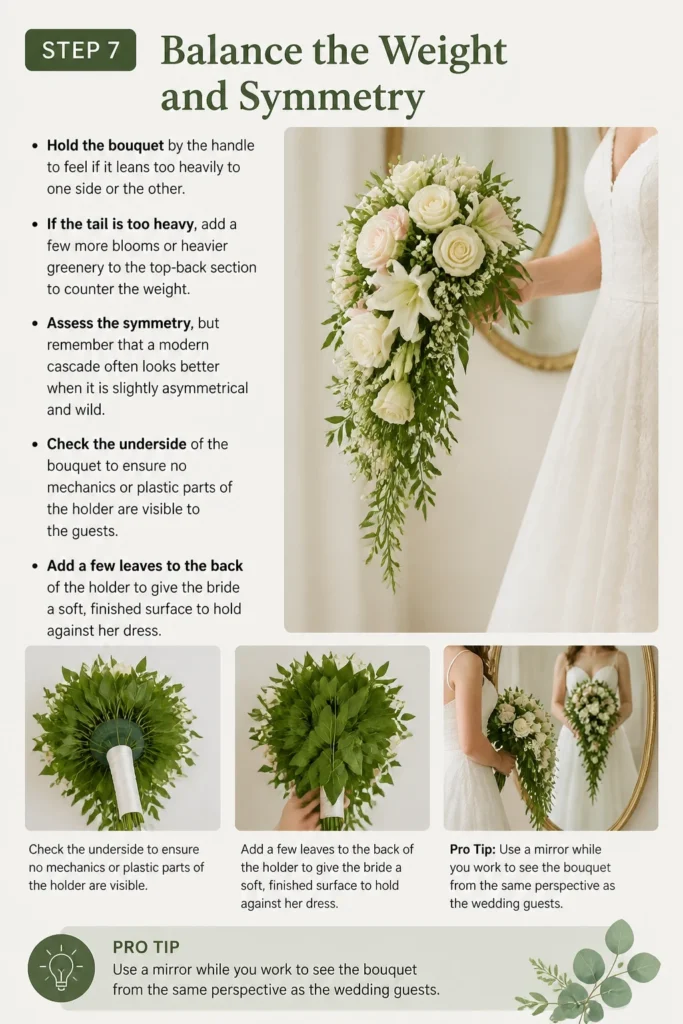
If the tail is too heavy, add a few more blooms or heavier greenery to the top-back section to counter the weight.
Assess the symmetry, but remember that a modern cascade often looks better when it is slightly asymmetrical and “wild.”
Check the underside of the bouquet to ensure no mechanics or plastic parts of the holder are visible to the guests.
Add a few leaves to the back of the holder to give the bride a soft, finished surface to hold against her dress.
Pro Tip: Use a mirror while you work to see the bouquet from the same perspective as the wedding guests.
Step 8: Secure the Stems with Adhesive
Apply floral adhesive to the base of any stems that feel loose or are positioned at a precarious downward angle.
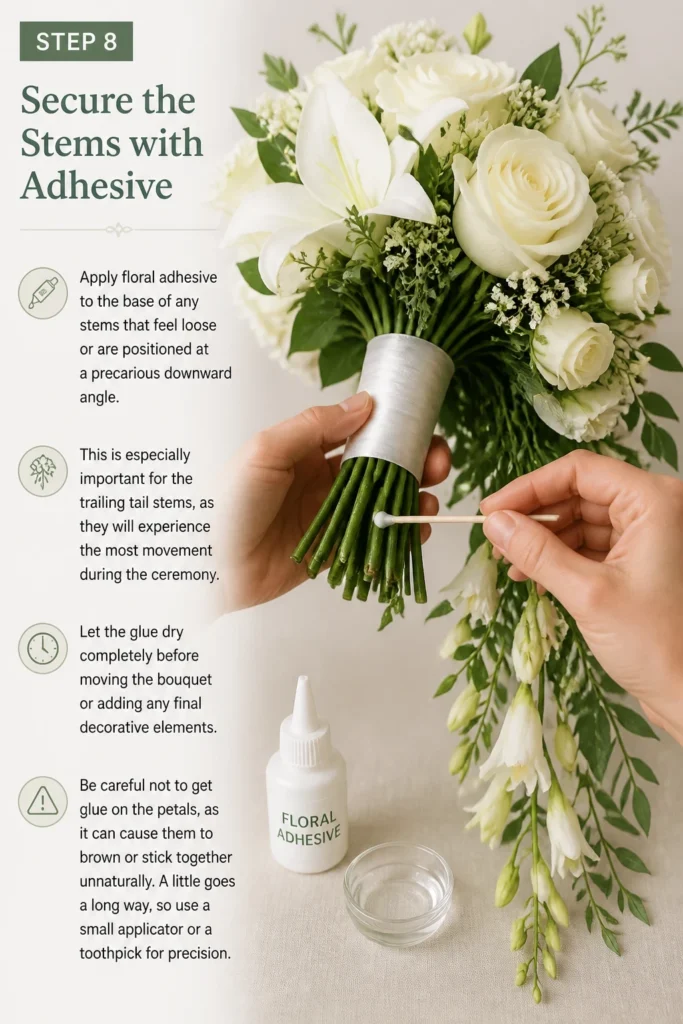
This is especially important for the trailing “tail” stems, as they will experience the most movement during the ceremony.
Let the glue dry completely before moving the bouquet or adding any final decorative elements.
Be careful not to get glue on the petals, as it can cause them to brown or stick together unnaturally.
A little goes a long way, so use a small applicator or a toothpick for precision.
Step 9: Finish the Handle
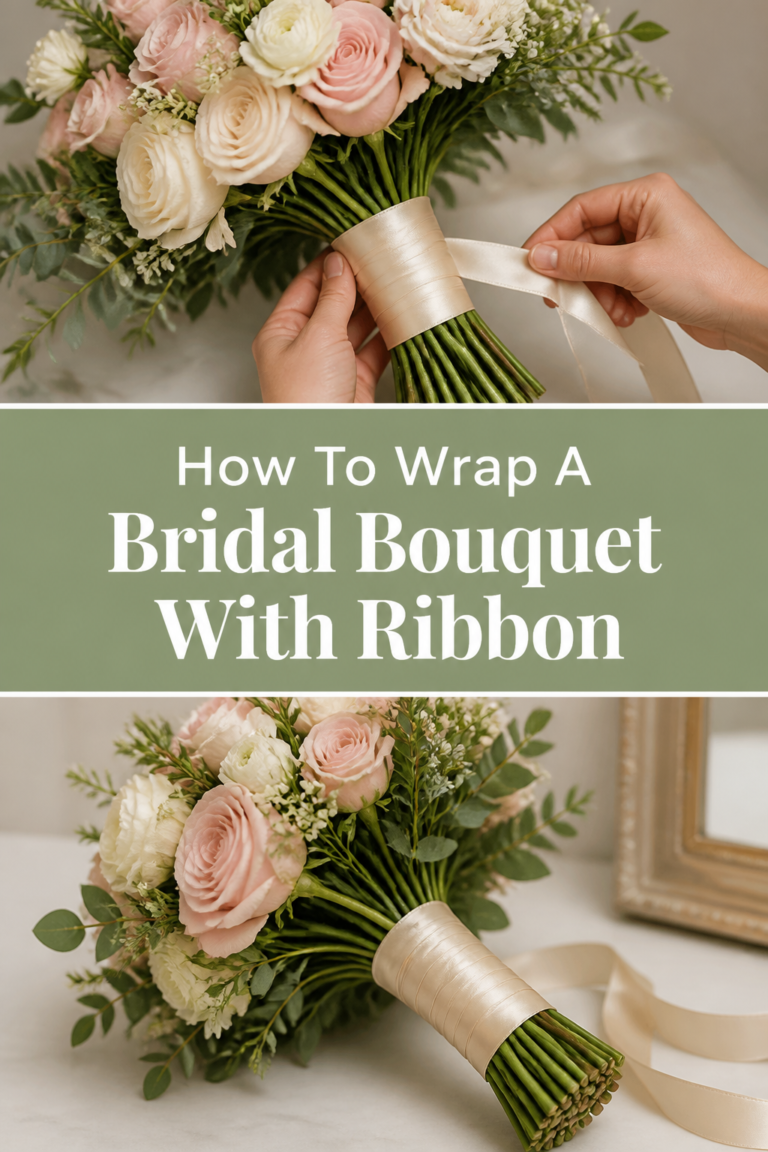
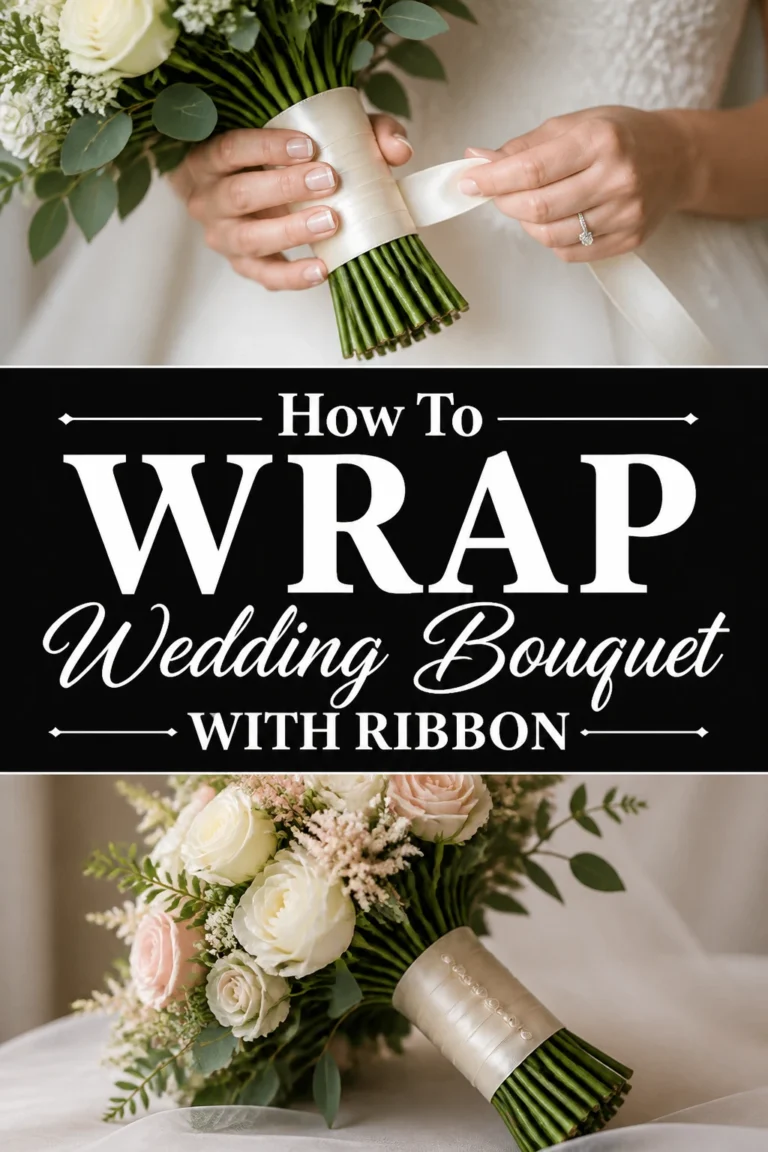
Wrap the plastic handle of the holder with a high-quality satin or velvet ribbon that matches the bridal gown.
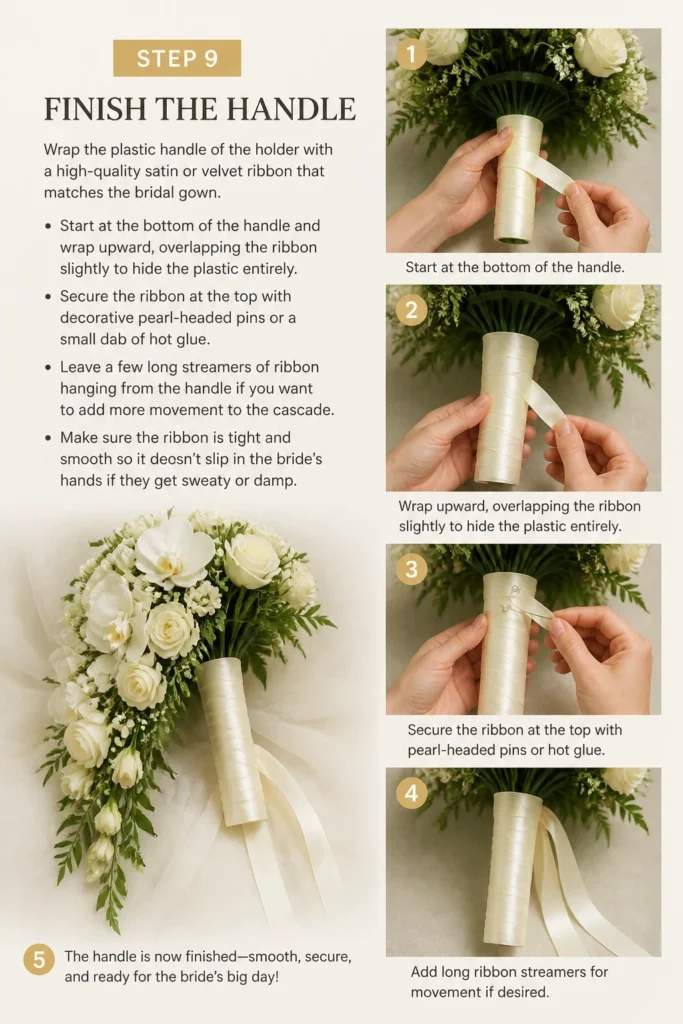
Start at the bottom of the handle and wrap upward, overlapping the ribbon slightly to hide the plastic entirely.
Secure the ribbon at the top with decorative pearl-headed pins or a small dab of hot glue.
Leave a few long streamers of ribbon hanging from the handle if you want to add more movement to the cascade.
Make sure the ribbon is tight and smooth so it doesn’t slip in the bride’s hands if they get sweaty or damp.
Step 10: Final Preservation and Mist
Spray the entire bouquet with a finishing sealer like Crowning Glory to lock in moisture and prevent wilting.
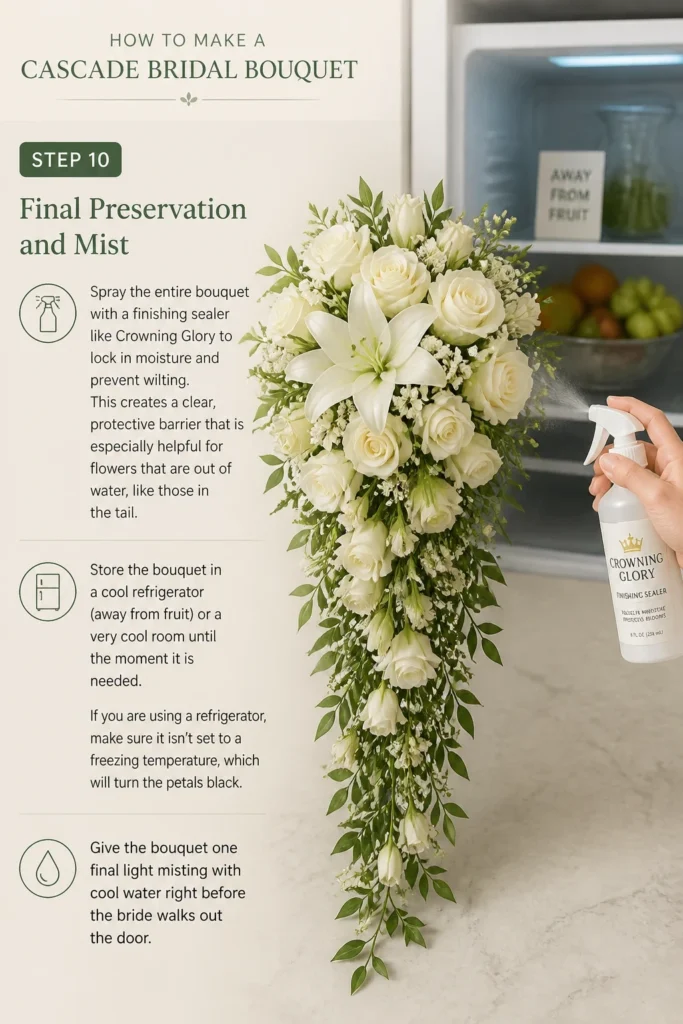
This creates a clear, protective barrier that is especially helpful for flowers that are out of water, like those in the tail.
Store the bouquet in a cool refrigerator (away from fruit) or a very cool room until the moment it is needed.
If you are using a refrigerator, make sure it isn’t set to a freezing temperature, which will turn the petals black.
Give the bouquet one final light misting with cool water right before the bride walks out the door.
Common Mistakes to Avoid
Using Top-Heavy Flowers in the Tail
One of the most frequent errors is placing a heavy, large-headed flower at the very tip of the cascade. This creates a “pendulum” effect that makes the bouquet swing awkwardly when the bride walks. Instead, use light, airy blooms or buds for the bottom-most points and keep the heavy weight near the handle.
Leaving the Foam Visible
If you can see the green floral foam from the side or the top, the bouquet will look unfinished and amateur. This often happens when designers focus only on the front of the arrangement. Use “collaring” greenery like salal or lemon leaf to hide the edges of the plastic cage and the foam base.
Ignoring the Bride’s Height
A cascade bouquet that is too long can overwhelm a petite bride and make her look shorter in photos. Conversely, a tiny cascade can look lost against a tall bride or a voluminous ballgown. Always tailor the length of the “tail” to the specific proportions of the person carrying it.
Troubleshooting
The Tail Stems Keep Falling Out
This usually happens because the stem wasn’t inserted deeply enough or the foam has been poked too many times in the same spot. Try re-inserting the stem at a slightly different angle and using floral wire to “hook” the stem into the plastic cage. Applying a bit of floral glue at the insertion point will provide a permanent bond.
The Flowers are Wilting Quickly
If the blooms look sad after only an hour, the foam might have a dry spot or the flowers weren’t properly hydrated. You can try to “revive” the bouquet by giving it a deep mist and placing it in a very cool, dark space for thirty minutes. For future builds, always ensure the foam is dripping wet before you start.
Key Takeaways
- Hydration is king: Always soak your foam and condition your flowers for at least 24 hours.
- Build the skeleton first: Use greenery to define the length and width before adding a single flower.
- Gravity is your guide: Work with the natural curve of the stems to create a graceful, flowing tail.
- Secure your work: Use floral glue and wire for the downward-facing stems to prevent “wardrobe malfunctions” during the walk.
- Scale matters: Adjust the size and length of the cascade to match the bride’s height and dress style.
- Seal the moisture: Use a professional finishing spray to keep the bouquet looking fresh for the duration of the event.
Frequently Asked Questions
Can I make a cascade bouquet without a foam holder?
Yes, you can create a hand-tied cascade bouquet, but it requires much more skill in stem placement and wiring. The foam holder provides a constant water source, which is vital for a cascade because many of the flowers are held at angles that don’t allow for traditional stems. For beginners, the holder is much more forgiving and reliable.
How far in advance can I make the bouquet?
It is best to assemble the bouquet the day before the wedding. This allows the flowers to “settle” into the foam and gives you time to fix any issues. If you make it too early, the foam may begin to dry out or the flowers may lose their peak vibrancy. Always keep it refrigerated or in a very cool spot overnight.
Which flowers are best for the “cascade” part?
Orchids, particularly Phalaenopsis or Dendrobium, are classic choices because of their natural drape. Jasmine vine, Ivy, and Sweet Peas also work beautifully for creating a delicate, trailing effect. Avoid stiff-stemmed flowers like Sunflowers or Zinnias for the tail, as they don’t flow naturally downward.
Our Top Recommended Finds
- Slanted Floral Foam Holder: Look for one with a reinforced cage to ensure the foam stays intact under the weight of the flowers.
- Crowning Glory Finishing Spray: This is the industry standard for keeping bouquets fresh and preventing petal browning.
- Ergonomic Floral Shears: A sharp, clean cut is essential for water uptake, and ergonomic handles will save your hands during a long build.
Mastering Your Floral Artistry
Now that you have the foundation for a stunning cascade bouquet, you can experiment with different textures and color palettes.
Consider learning about “wiring and taping” individual petals next, which is a great way to add even more intricate detail to your designs.
Gather your supplies and start practicing with grocery store greenery today to get a feel for the balance and flow of the cascade!
Wedding Planning
No fluff, no drama. Just easy weekly advice, planning shortcuts, and gentle reminders to help you actually enjoy your engagement.