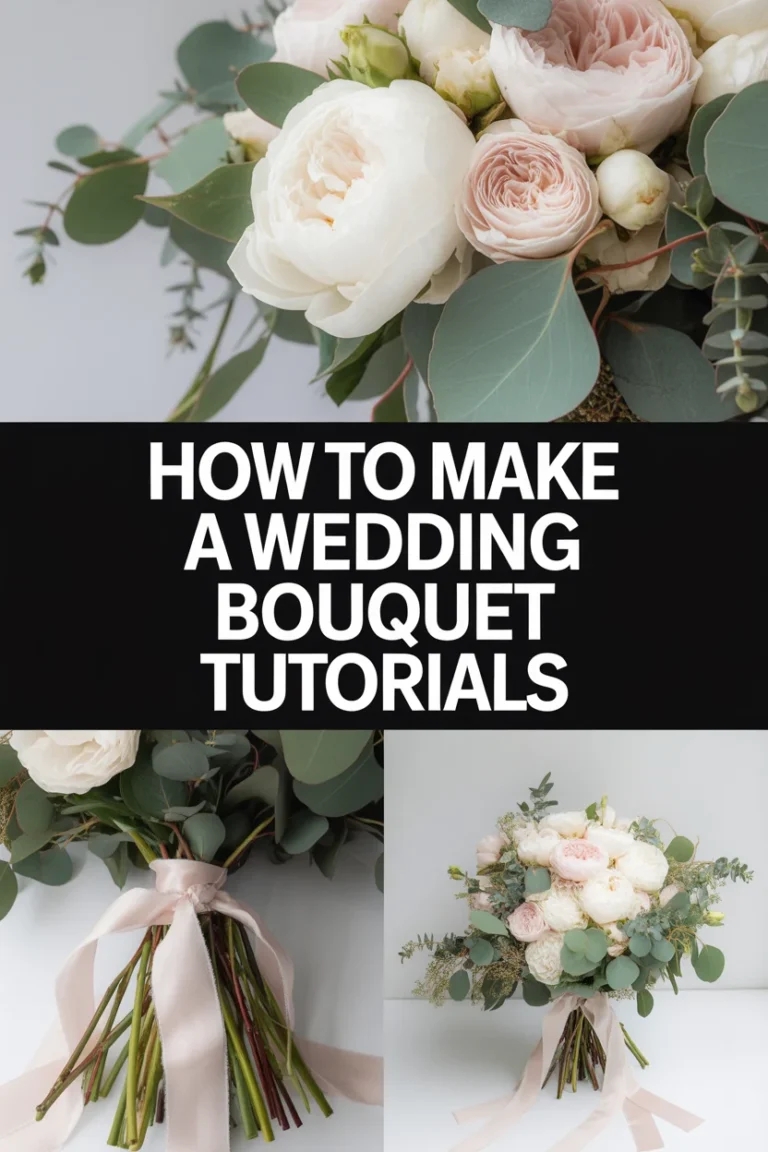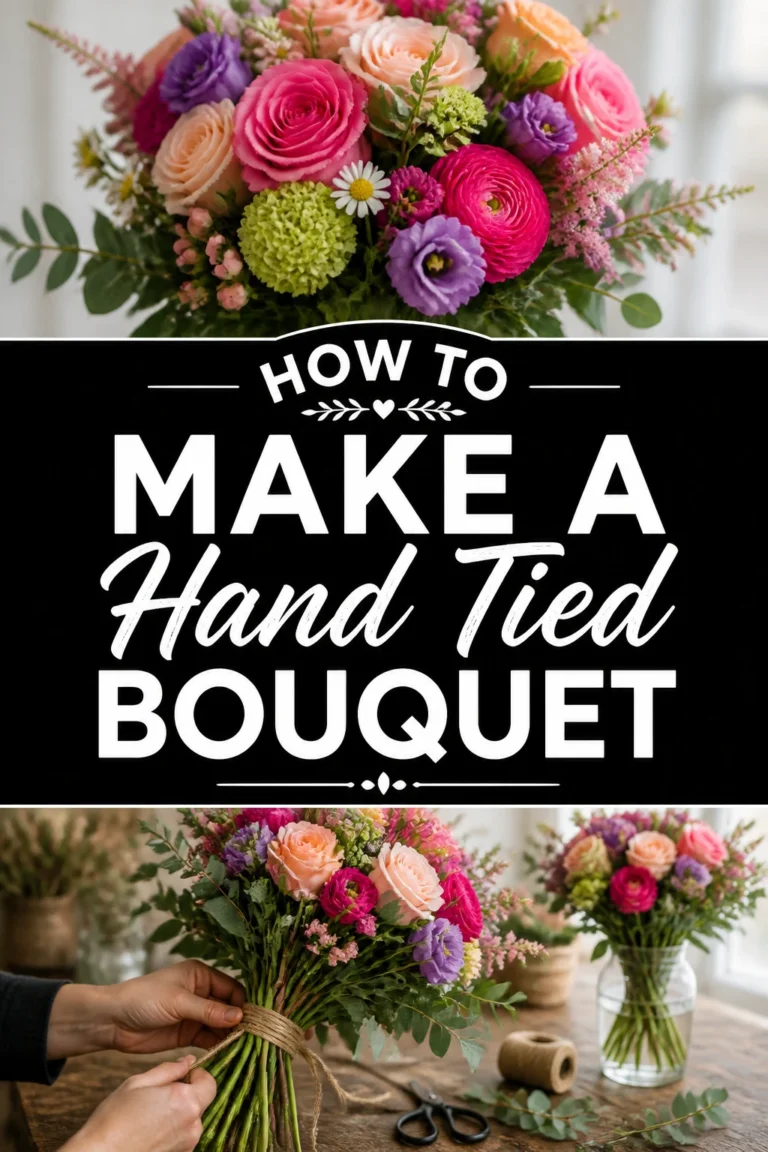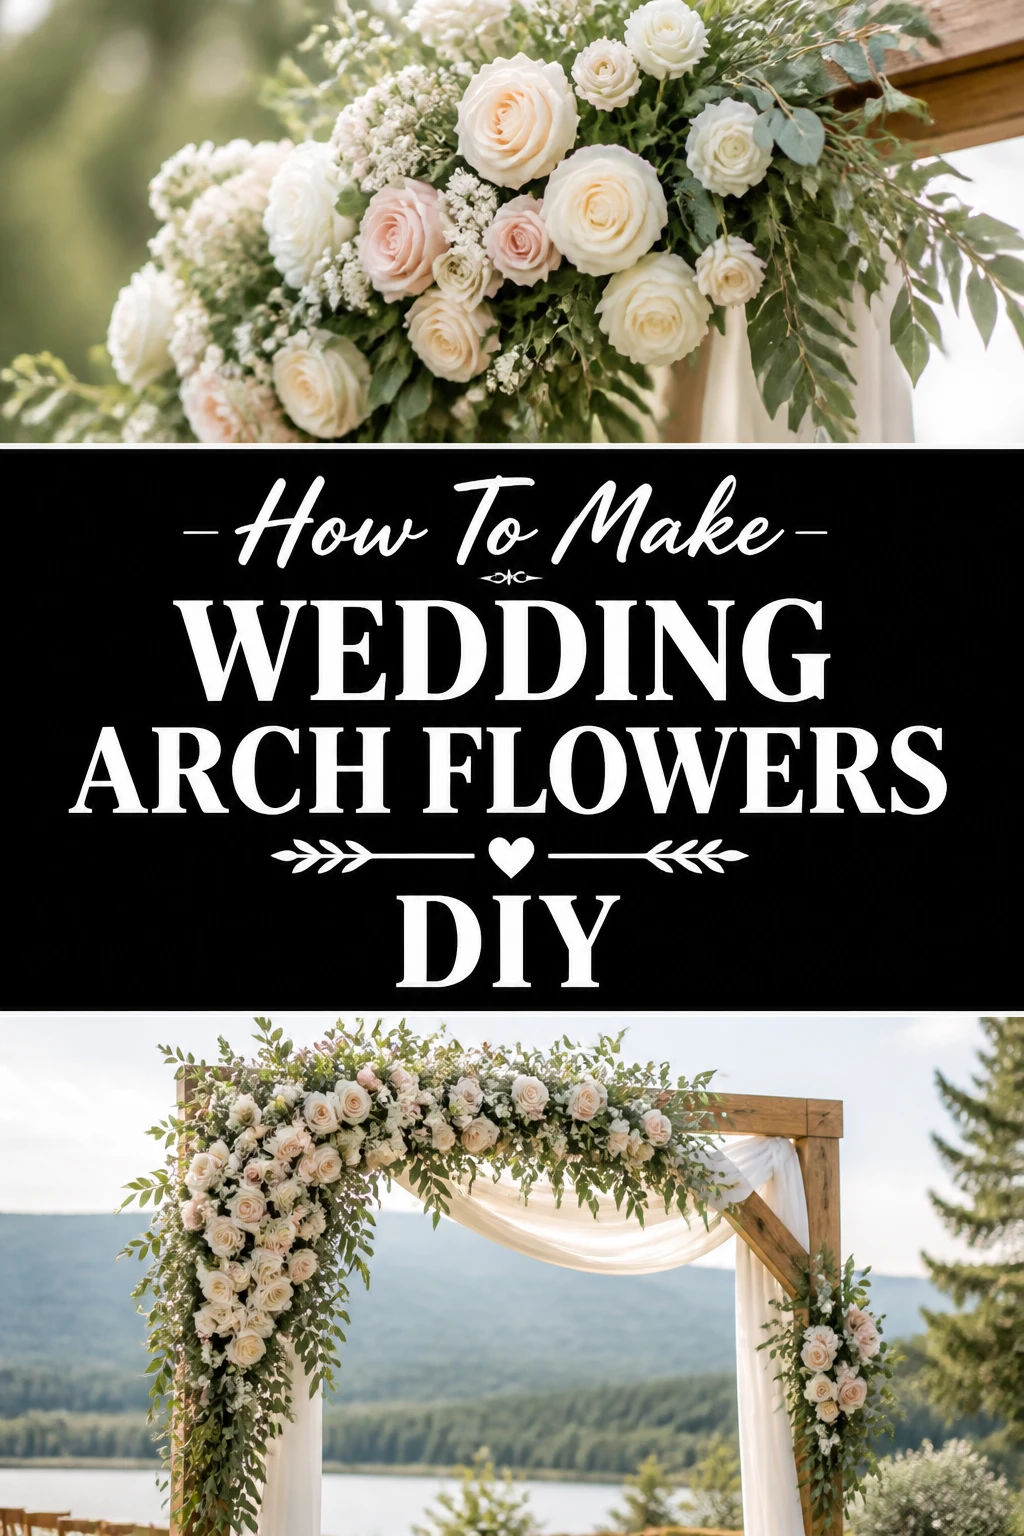
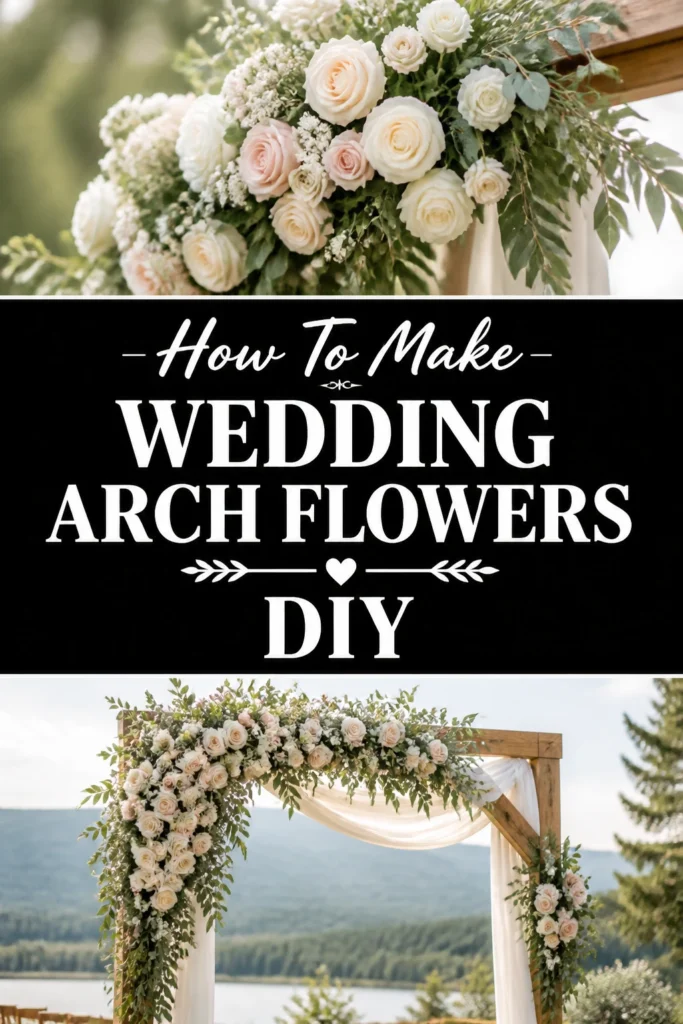
🌸 How To Make Wedding Arch Flowers DIY

Wedding Planning
No fluff, no drama. Just easy weekly advice, planning shortcuts, and gentle reminders to help you actually enjoy your engagement.
Your wedding arch is the backdrop for your most cherished photos and the frame for your “I dos.”
I remember constructing my first floral installation for a friend’s backyard ceremony and realizing how much money we saved by doing it ourselves.
This guide draws from years of floral design experience to help you create a professional-grade look without the professional price tag.
Quick Overview
Creating your own wedding arch flowers is a rewarding project that combines creativity with a personal touch for your big day.
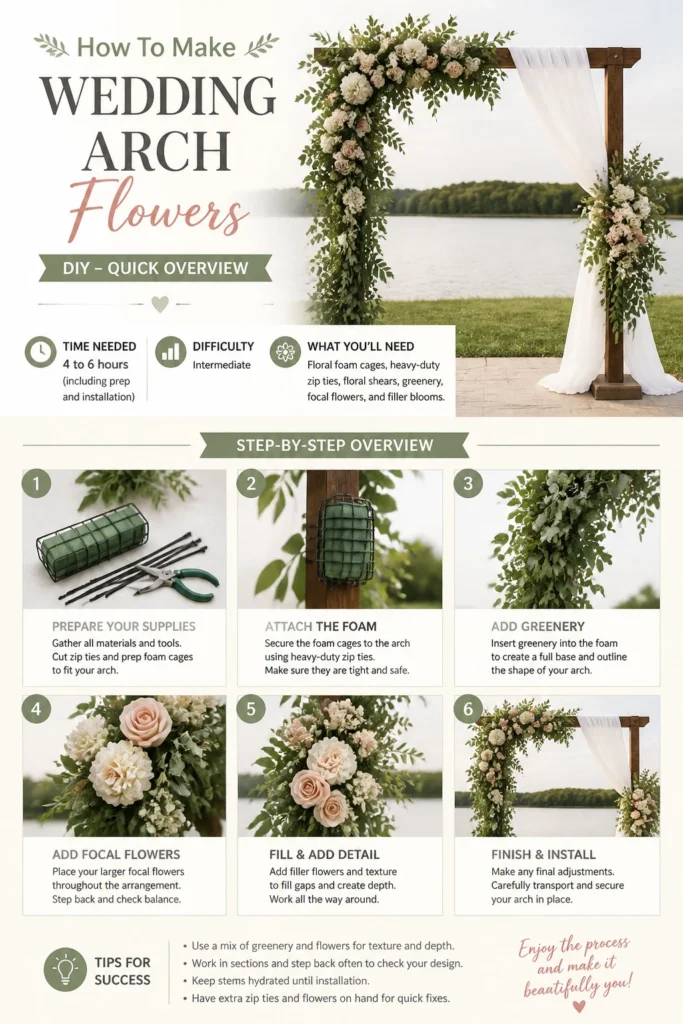
- Time needed: 4 to 6 hours (including prep and installation)
- Difficulty: Intermediate
- What you’ll need: Floral foam cages, heavy-duty zip ties, floral shears, greenery, focal flowers, and filler blooms.
Step 1: Choose Your Floral Color Palette and Style
Before you buy a single stem, you must decide on the overall aesthetic of your wedding arch.
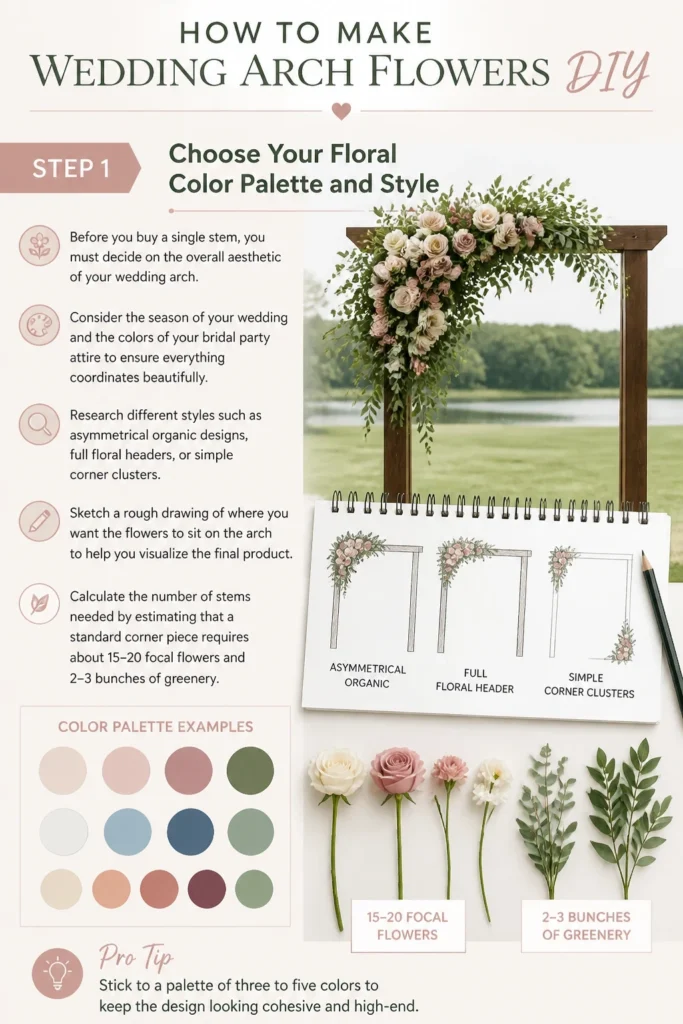
Consider the season of your wedding and the colors of your bridal party attire to ensure everything coordinates beautifully.
Research different styles such as asymmetrical organic designs, full floral headers, or simple corner clusters.
Sketch a rough drawing of where you want the flowers to sit on the arch to help you visualize the final product.
Calculate the number of stems needed by estimating that a standard corner piece requires about 15-20 focal flowers and 2-3 bunches of greenery.
Pro Tip: Stick to a palette of three to five colors to keep the design looking cohesive and high-end.
Step 2: Source and Prep Your Flowers
Ordering your flowers to arrive two days before the wedding gives them enough time to hydrate and open fully.
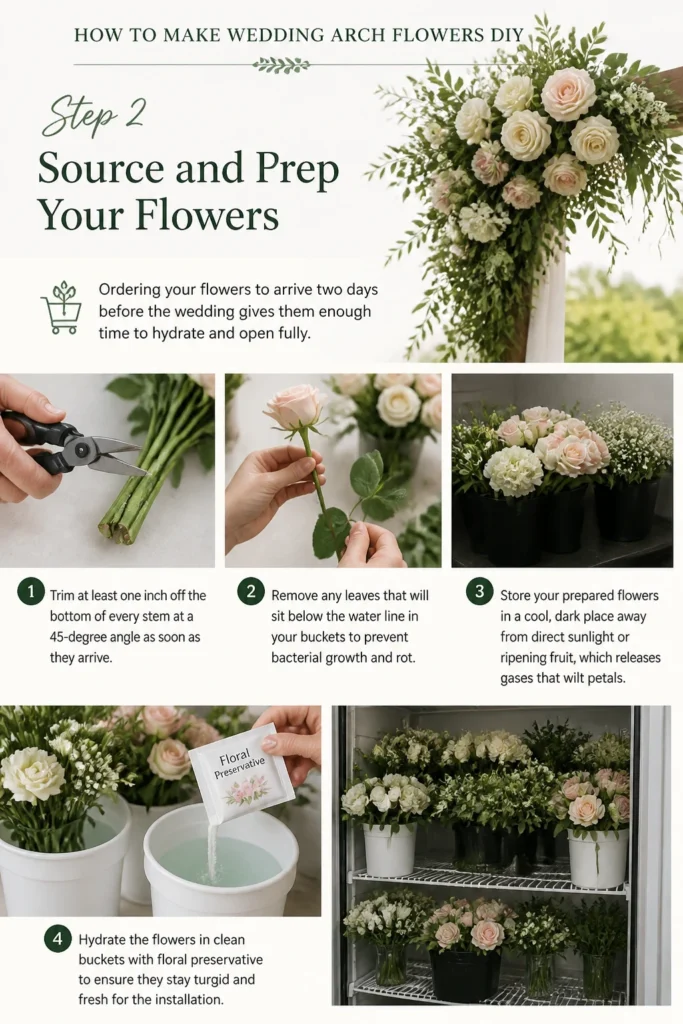
Trim at least one inch off the bottom of every stem at a 45-degree angle as soon as they arrive.
Remove any leaves that will sit below the water line in your buckets to prevent bacterial growth and rot.
Store your prepared flowers in a cool, dark place away from direct sunlight or ripening fruit, which releases gases that wilt petals.
Hydrate the flowers in clean buckets with floral preservative to ensure they stay turgid and fresh for the installation.
Step 3: Secure the Floral Foam Cages
Floral foam cages are the “bones” of your arrangement and provide a continuous water source for the blooms.
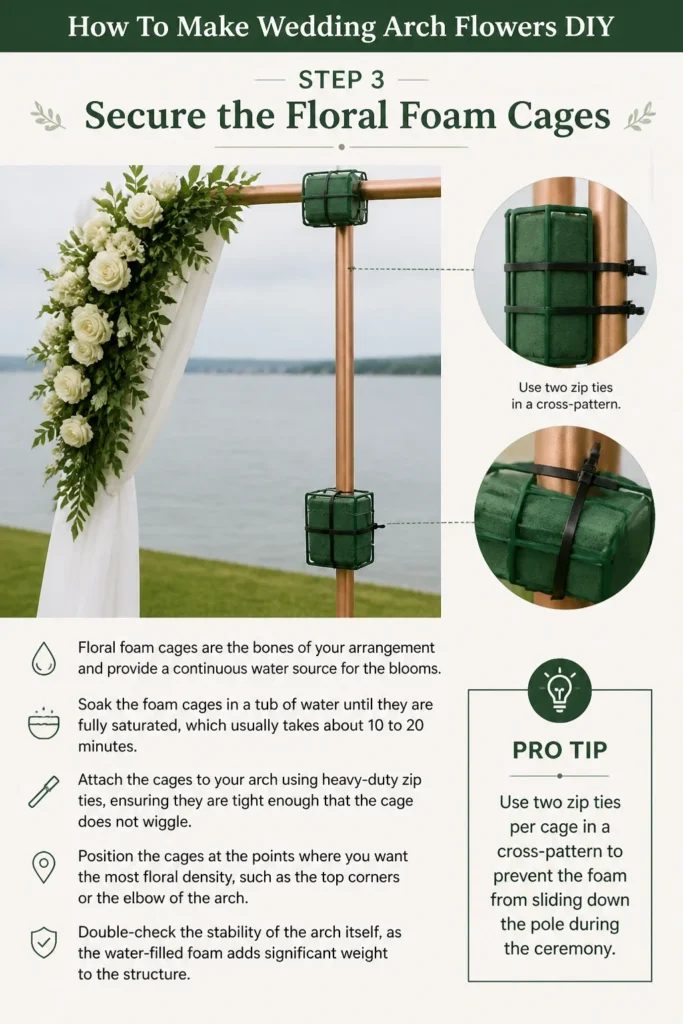
Soak the foam cages in a tub of water until they are fully saturated, which usually takes about 10 to 20 minutes.
Attach the cages to your arch using heavy-duty zip ties, ensuring they are tight enough that the cage does not wiggle.
Position the cages at the points where you want the most floral density, such as the top corners or the “elbow” of the arch.
Double-check the stability of the arch itself, as the water-filled foam adds significant weight to the structure.
Pro Tip: Use two zip ties per cage in a cross-pattern to prevent the foam from sliding down the pole during the ceremony.
Step 4: Establish the Greenery Foundation
Greenery provides the shape, size, and “movement” of your floral installation.
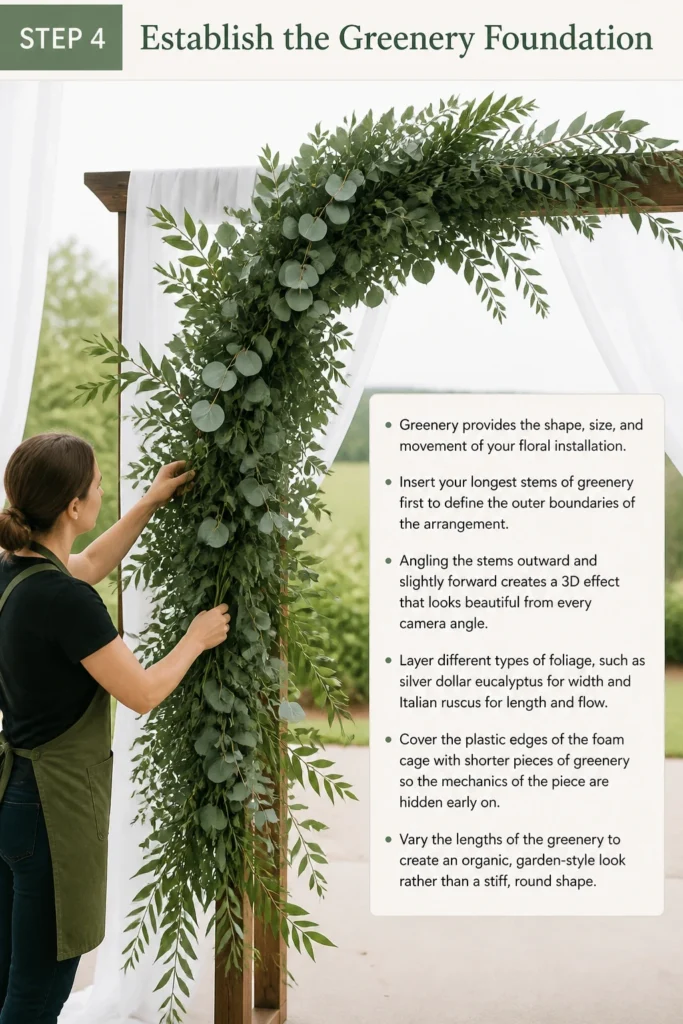
Insert your longest stems of greenery first to define the outer boundaries of the arrangement.
Angling the stems outward and slightly forward creates a 3D effect that looks beautiful from every camera angle.
Layer different types of foliage, such as silver dollar eucalyptus for width and Italian ruscus for length and flow.
Cover the plastic edges of the foam cage with shorter pieces of greenery so the mechanics of the piece are hidden early on.
Vary the lengths of the greenery to create an organic, garden-style look rather than a stiff, round shape.
Step 5: Place Your Focal Flowers
Focal flowers are the “stars of the show” and are typically the largest and most expensive blooms in your kit.
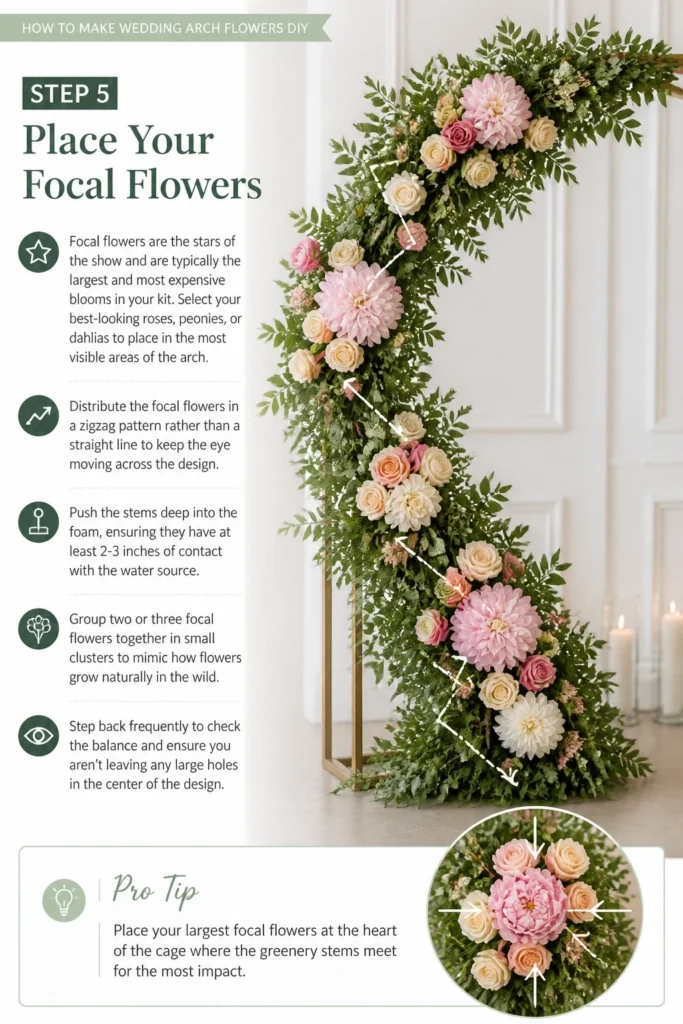
Select your best-looking roses, peonies, or dahlias to place in the most visible areas of the arch.
Distribute the focal flowers in a “zigzag” pattern rather than a straight line to keep the eye moving across the design.
Push the stems deep into the foam, ensuring they have at least 2-3 inches of contact with the water source.
Group two or three focal flowers together in small clusters to mimic how flowers grow naturally in the wild.
Step back frequently to check the balance and ensure you aren’t leaving any large “holes” in the center of the design.
Pro Tip: Place your largest focal flowers at the “heart” of the cage where the greenery stems meet for the most impact.
Step 6: Add Secondary Blooms and Textures
Secondary flowers are slightly smaller than focal blooms and help transition the eye from the large flowers to the greenery.
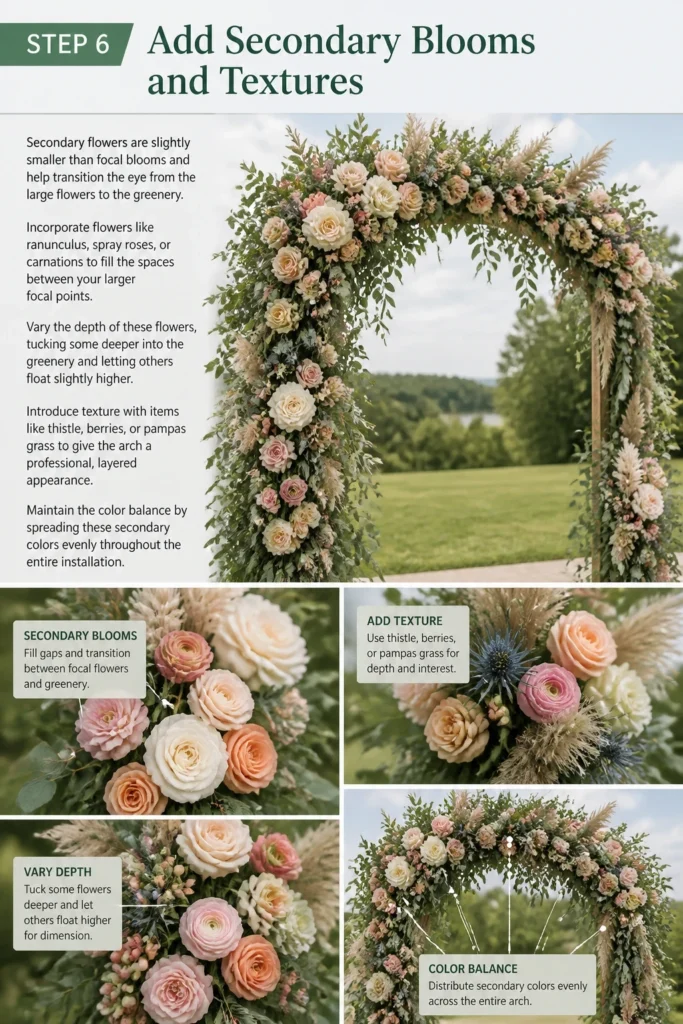
Incorporate flowers like ranunculus, spray roses, or carnations to fill the spaces between your larger focal points.
Vary the depth of these flowers, tucking some deeper into the greenery and letting others “float” slightly higher.
Introduce texture with items like thistle, berries, or pampas grass to give the arch a professional, layered appearance.
Maintain the color balance by spreading these secondary colors evenly throughout the entire installation.
Step 7: Fill Gaps with Delicate Accents
The final layer involves small, airy flowers that add a sense of whimsy and lightness to the arch.
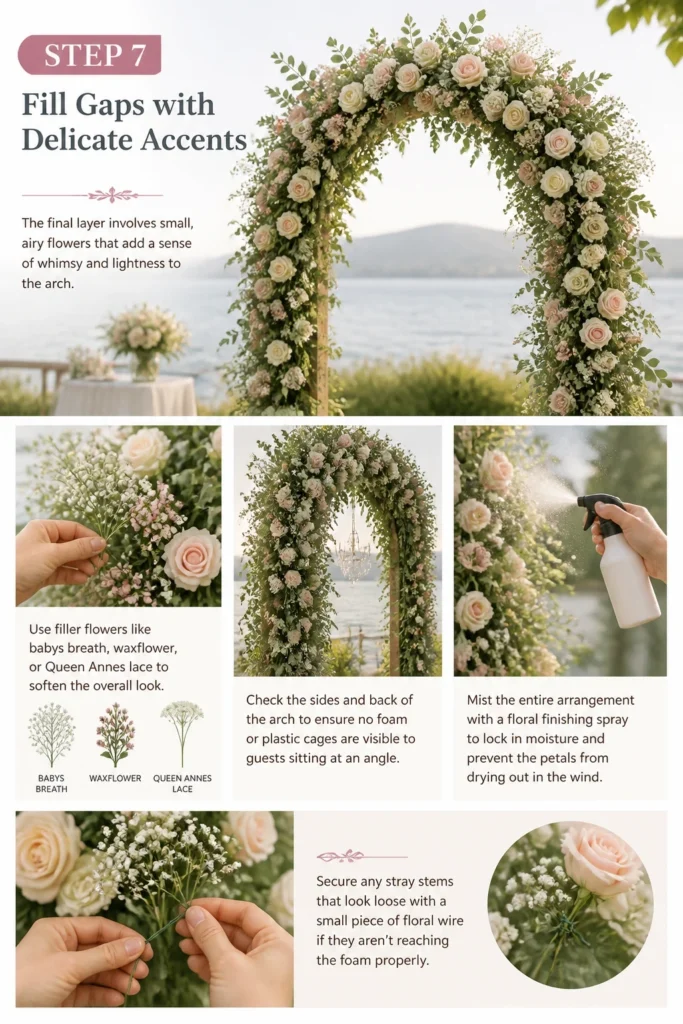
Use filler flowers like baby’s breath, waxflower, or Queen Anne’s lace to soften the overall look.
Check the sides and back of the arch to ensure no foam or plastic cages are visible to guests sitting at an angle.
Mist the entire arrangement with a floral finishing spray to lock in moisture and prevent the petals from drying out in the wind.
Secure any stray stems that look loose with a small piece of floral wire if they aren’t reaching the foam properly.
Common Mistakes to Avoid
Ignoring the Weight of the Water
Soaked floral foam is incredibly heavy. Many DIYers build a beautiful arrangement only to have the arch tip over because they didn’t weigh down the base of the frame with sandbags or heavy stones.
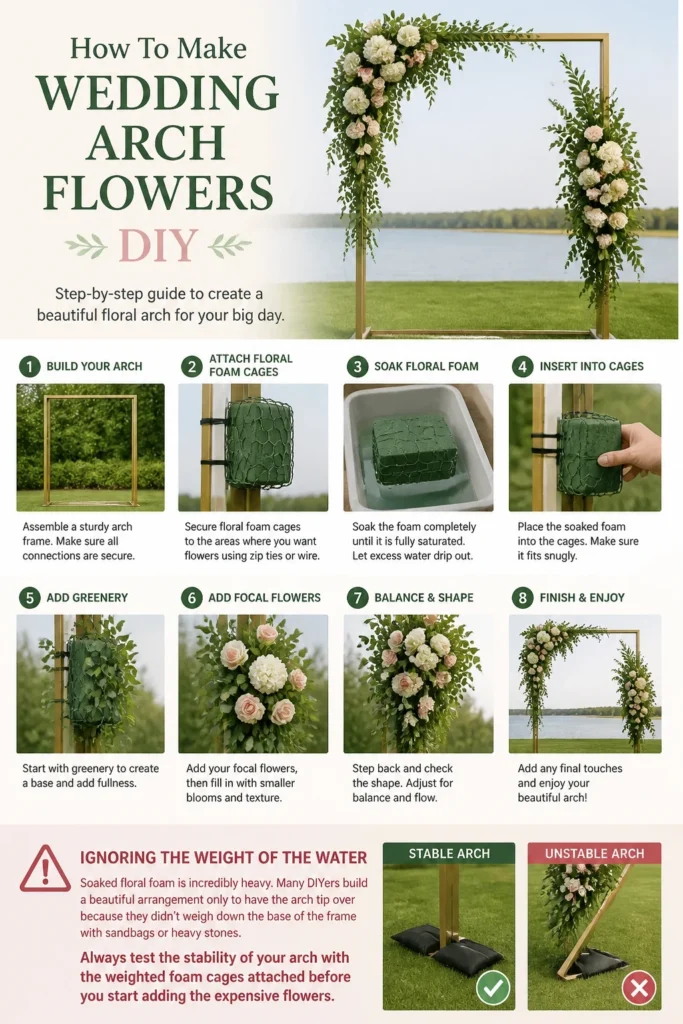
Always test the stability of your arch with the weighted foam cages attached before you start adding the expensive flowers.
Leaving the Back Exposed
While the front of the arch is the priority for photos, guests will often see the arch from the side or back as they walk to their seats.
Make sure to wrap greenery around the sides of the foam cages so the plastic mechanics aren’t an eyesore for your attendees.
Using Fragile Flowers in Direct Sun
Hydrangeas and certain types of lilies wilt almost instantly if they are out of water or in harsh, direct sunlight for hours.
If your wedding is outdoors in the heat, choose hardy flowers like roses, carnations, and dried elements that can withstand the temperature.
Cutting Stems Too Short
It is easy to cut a stem too short and realize it won’t reach the center of the foam cage. Once a stem is too short, it loses its ability to stay hydrated in a large installation.
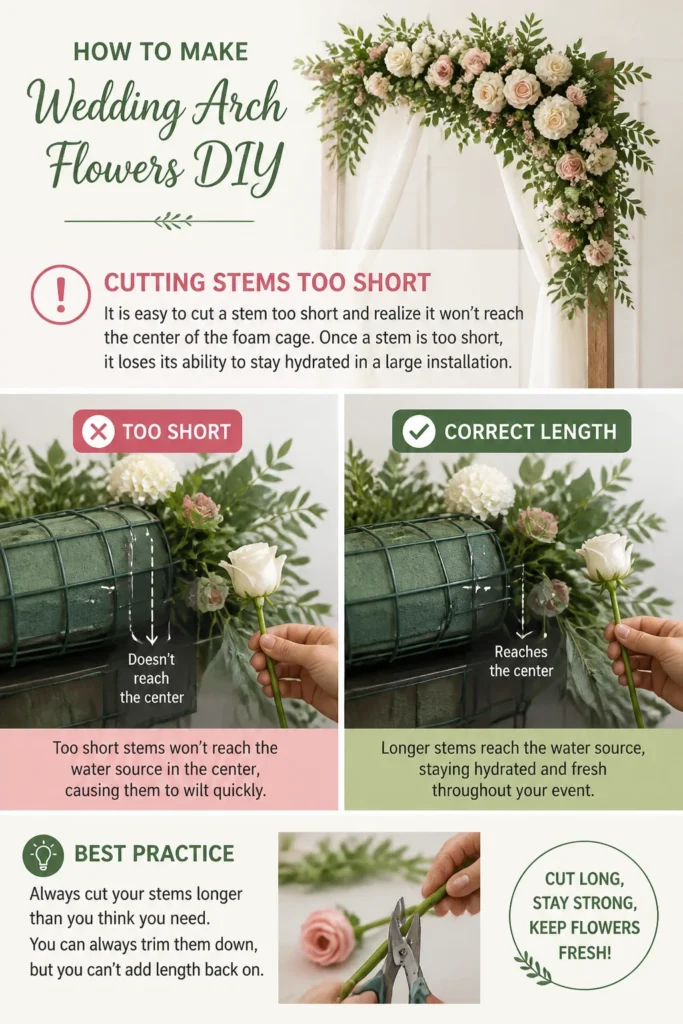
Always cut your stems longer than you think you need; you can always trim them down, but you can’t add length back on.
Troubleshooting
Flowers are Drooping or Wilting
If a specific flower looks sad, it likely isn’t making proper contact with the wet foam. Remove the stem, give it a fresh diagonal cut, and re-insert it into a new spot in the foam.
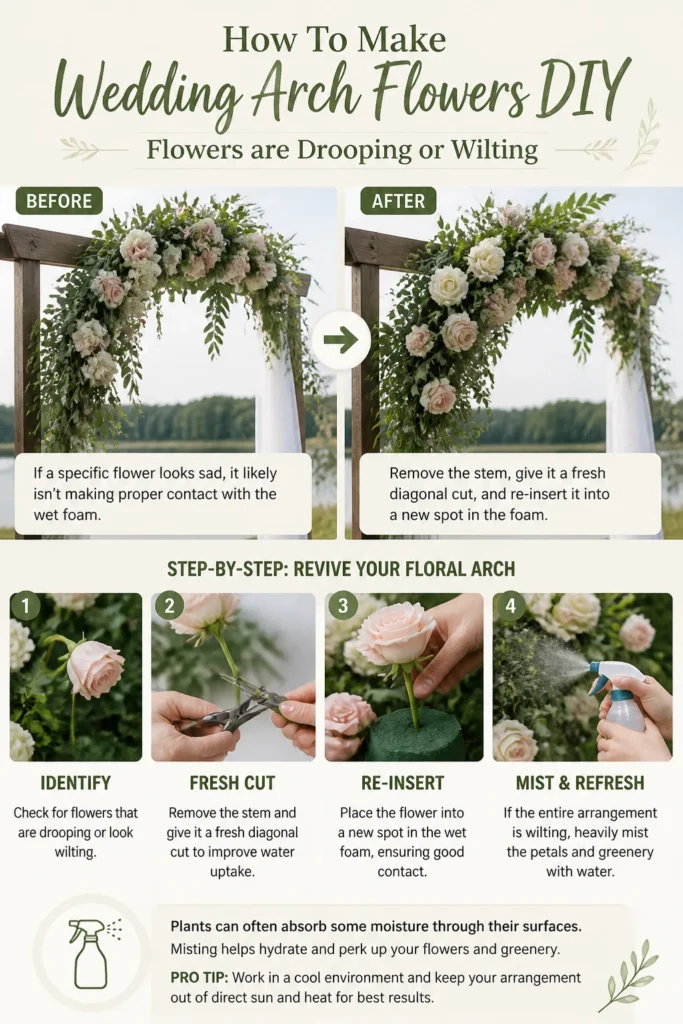
If the entire arrangement is wilting, use a spray bottle to heavily mist the petals and greenery, as plants can often absorb some moisture through their surfaces.
The Foam is Crumbling
Floral foam can crumble if you poke too many holes in the same spot. If your foam is falling apart, you can wrap the entire cage in a layer of chicken wire to hold the pieces together.
Try to be intentional with your placement so you aren’t “Swiss-cheesing” the foam by moving flowers repeatedly.
The Design Looks Flat
A flat-looking arch usually happens when all the flower heads are pushed to the same depth. Pull some stems out further so they “dance” in front of the others.
Adding long, trailing greenery like ivy or jasmine vine can also add the necessary depth and vertical interest to break up a flat surface.
Key Takeaways
- Hydration is king: Always use soaked floral foam cages to ensure your flowers last through the ceremony and reception.
- Secure mechanics: Use heavy-duty zip ties to prevent the floral arrangements from sliding or falling off the arch.
- Layering technique: Build your design in stages, starting with greenery, then focal flowers, then fillers.
- Stability check: Ensure your arch frame is weighted at the bottom to compensate for the weight of the wet foam and flowers.
- Prep early: Order flowers to arrive two days early so they have time to drink and open to their most beautiful state.
Frequently Asked Questions
How long will the flowers stay fresh on the arch?
If you use saturated floral foam cages, most hardy flowers like roses and greenery will stay fresh for 24 to 48 hours. However, in extreme heat or direct sun, this window may shrink to 6 to 10 hours, so it is best to assemble the arch as close to the ceremony time as possible.
Can I use silk flowers instead of real ones?
Yes, silk flowers are a great option for DIYers who want to build the arch days or weeks in advance. You can even mix high-quality silk greenery with real focal flowers to save money and reduce the weight of the installation.
How do I transport the flowers to the venue?
It is usually easiest to build the floral pieces on-site at the venue. If you must build them at home, create the arrangements in the foam cages, keep them in a cool vehicle, and zip-tie them to the arch once you arrive at the location.
What is the cheapest way to get greenery?
Buying greenery in bulk “grower’s bunches” from online wholesalers or local flower markets is the most cost-effective method. You can also look for hardy foliage in your own backyard, like magnolia leaves or boxwood, provided they are properly hydrated before use.
Our Top Recommended Finds
- Floral Foam Cages: Look for cages with a plastic backing and built-in eyelets for easy zip-tying to the arch.
- Professional Floral Shears: A sharp pair of bypass pruners will make clean cuts that allow stems to drink more water compared to standard kitchen scissors.
- Crowndation Finishing Spray: An anti-transpirant spray that seals the petals and prevents moisture loss, which is essential for outdoor weddings.
Bringing Your Floral Vision To Life
Creating your own wedding arch flowers is a beautiful way to put your personal stamp on your ceremony space.
Once you have mastered the arch, you might feel inspired to try your hand at DIY centerpieces or bridesmaid bouquets using the same color palette.
Start by ordering your supplies today so you can practice your technique on a small scale before the big day arrives.
Wedding Planning
No fluff, no drama. Just easy weekly advice, planning shortcuts, and gentle reminders to help you actually enjoy your engagement.