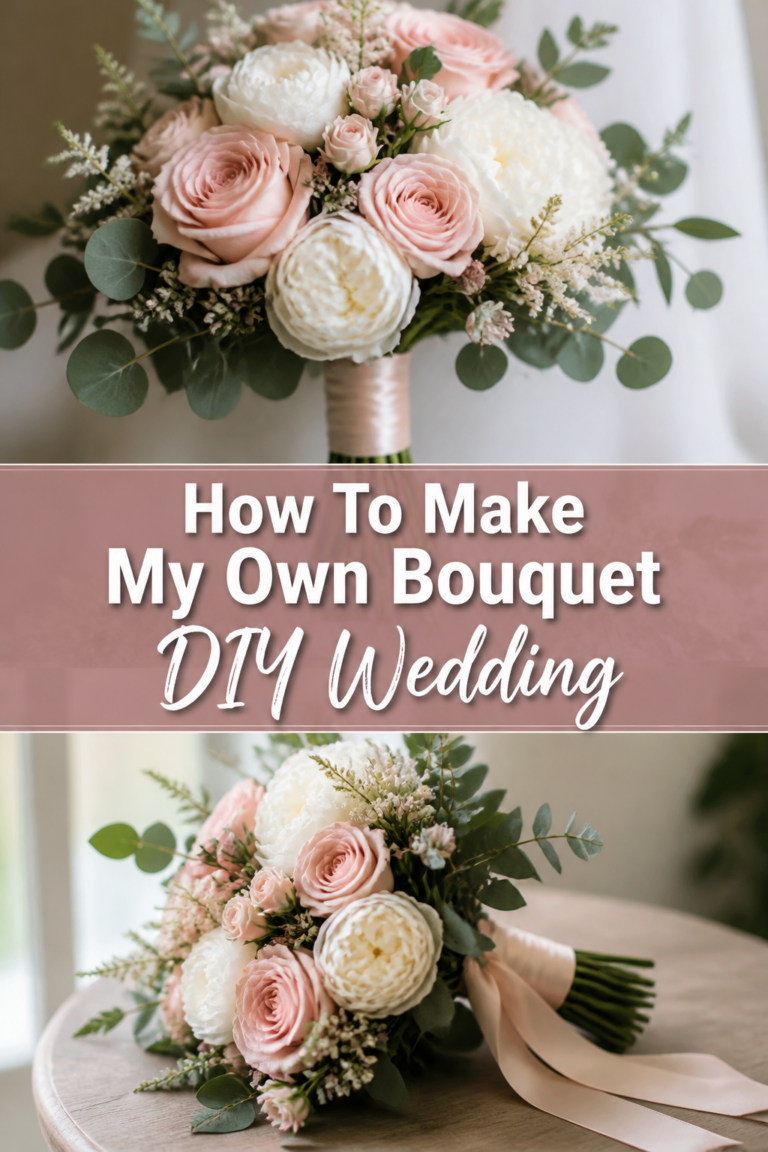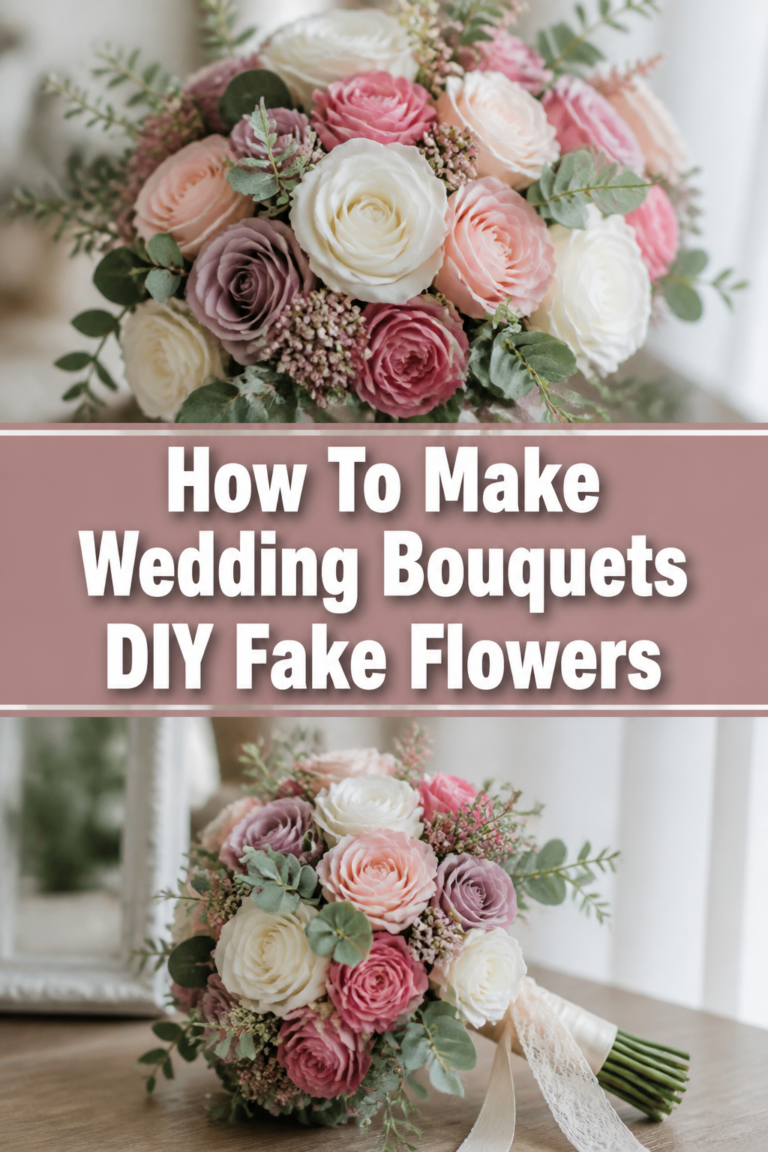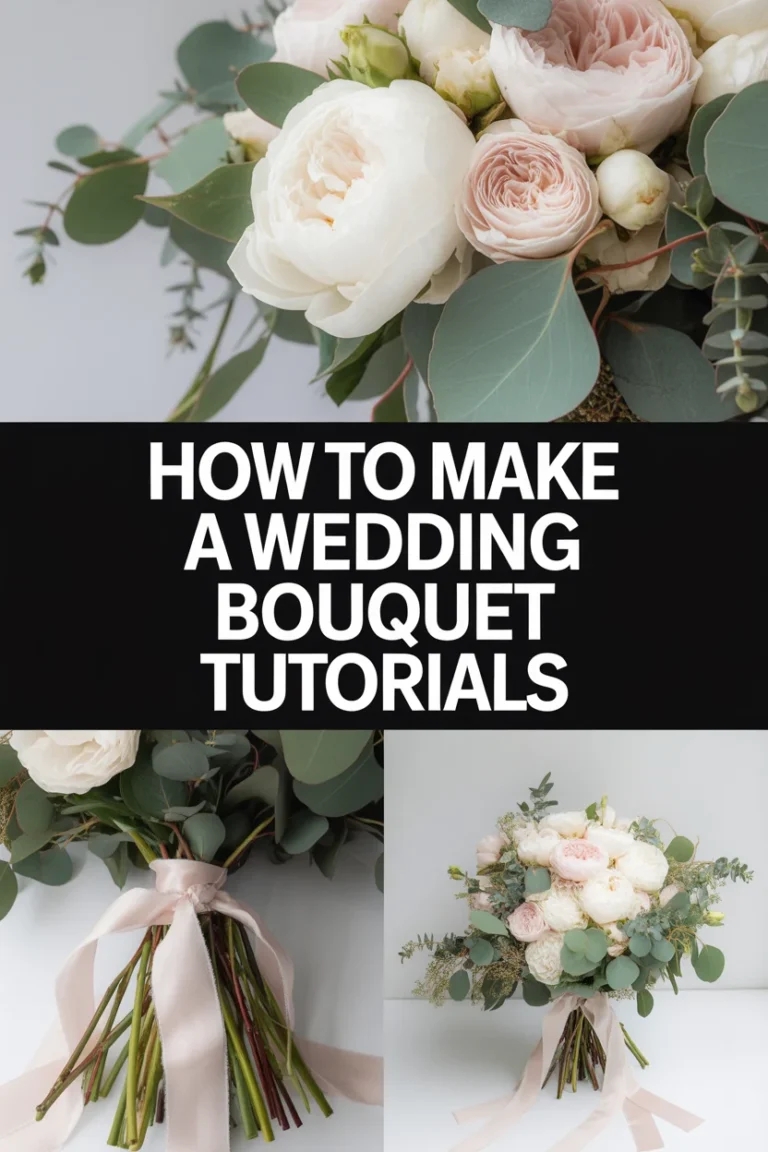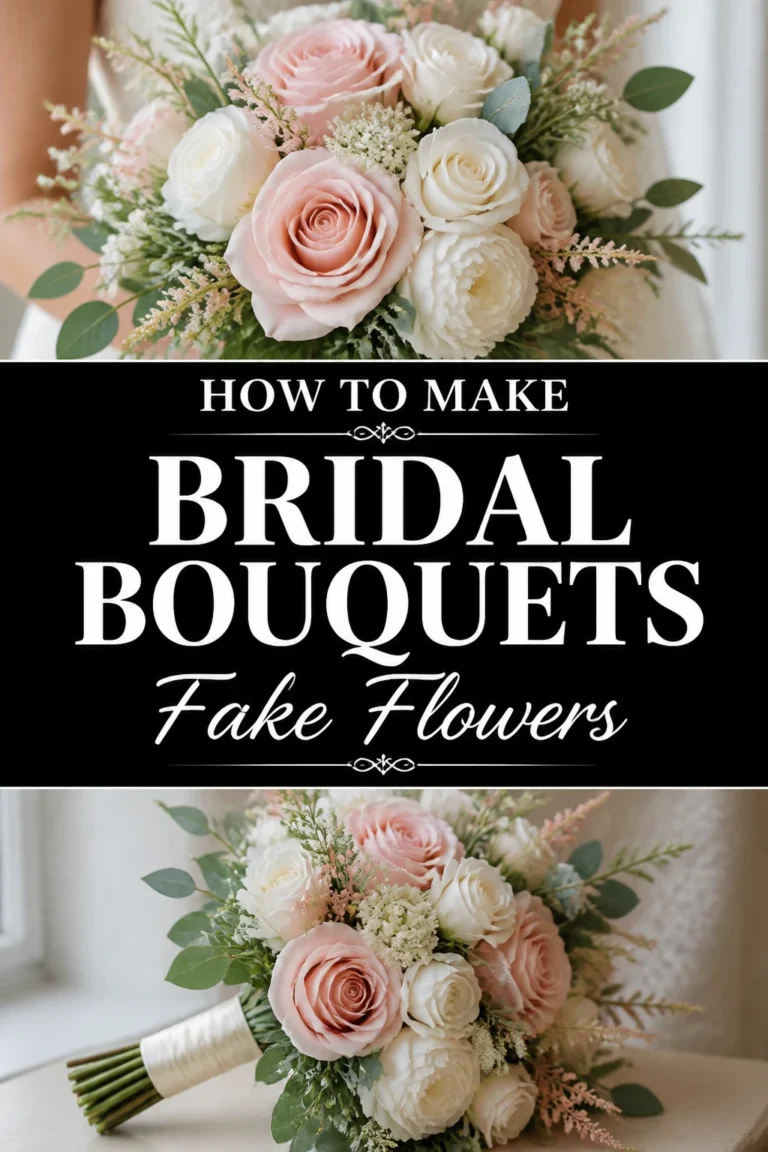
💐 How To Wrap Wedding Bouquet With Ribbon

Wedding Planning
No fluff, no drama. Just easy weekly advice, planning shortcuts, and gentle reminders to help you actually enjoy your engagement.
Learning to wrap a wedding bouquet with ribbon can seem daunting at first glance. I remember my first attempt, a cascade of silk roses for a friend’s backyard wedding, and the ribbon kept slipping!
Through practice and a few helpful tips from a seasoned florist, I discovered the secrets to a secure and elegant finish. This guide shares those exact techniques, ensuring your bouquet looks absolutely perfect on the big day.
Quick Overview
This guide will walk you through creating a beautifully wrapped bouquet handle, adding that essential touch of elegance to your wedding flowers. You’ll learn the techniques for a secure, comfortable, and visually stunning finish.
- Time needed: 30-60 minutes (depending on complexity and experience)
- Difficulty: Intermediate
- What you’ll need: Ribbon, floral tape, sharp scissors, pins, the bouquet
Step-by-Step Instructions
Step 1: Prepare Your Bouquet Handle
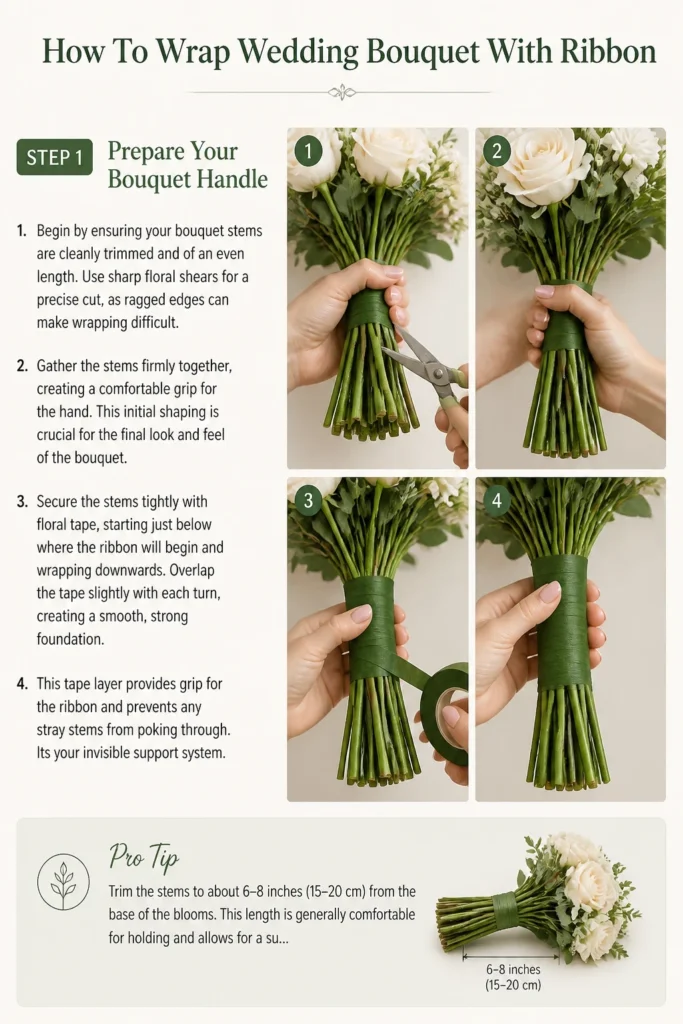
Begin by ensuring your bouquet stems are cleanly trimmed and of an even length. Use sharp floral shears for a precise cut, as ragged edges can make wrapping difficult.
Gather the stems firmly together, creating a comfortable grip for the hand. This initial shaping is crucial for the final look and feel of the bouquet.
Secure the stems tightly with floral tape, starting just below where the ribbon will begin and wrapping downwards. Overlap the tape slightly with each turn, creating a smooth, strong foundation.
This tape layer provides grip for the ribbon and prevents any stray stems from poking through. It’s your invisible support system.
Pro Tip: Trim the stems to about 6-8 inches (15-20 cm) from the base of the blooms. This length is generally comfortable for holding and allows for a substantial ribbon wrap.
Step 2: Choose Your Ribbon Wisely
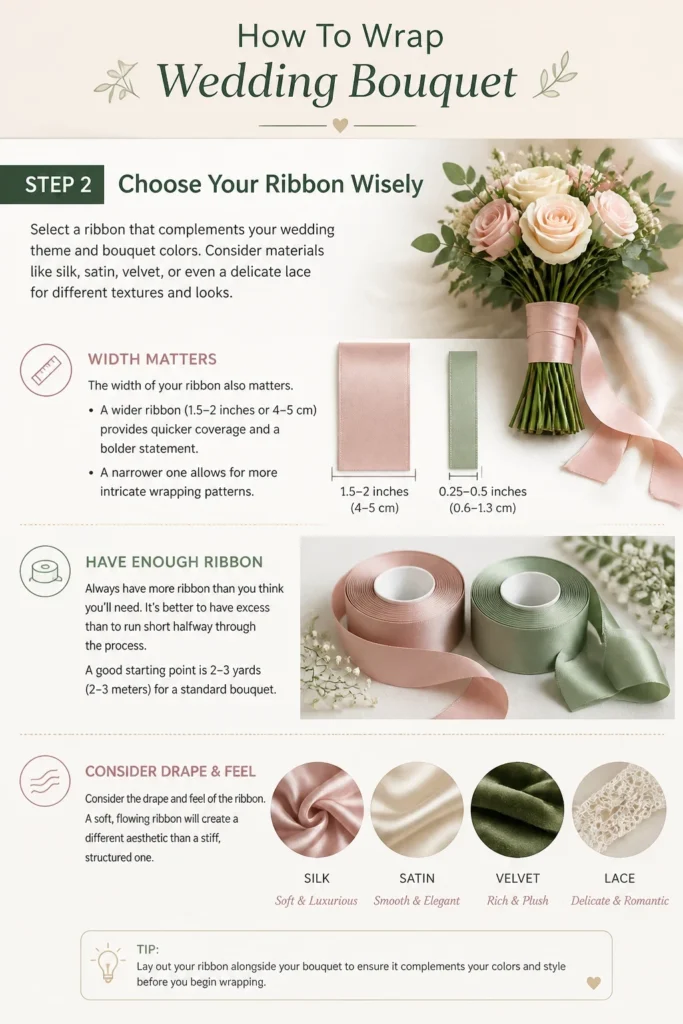
Select a ribbon that complements your wedding theme and bouquet colors. Consider materials like silk, satin, velvet, or even a delicate lace for different textures and looks.
The width of your ribbon also matters. A wider ribbon (1.5-2 inches or 4-5 cm) provides quicker coverage and a bolder statement, while a narrower one allows for more intricate wrapping patterns.
Always have more ribbon than you think you’ll need. It’s better to have excess than to run short halfway through the process. A good starting point is 2-3 yards (2-3 meters) for a standard bouquet.
Consider the drape and feel of the ribbon. A soft, flowing ribbon will create a different aesthetic than a stiff, structured one.
Step 3: Anchor the Ribbon Securely
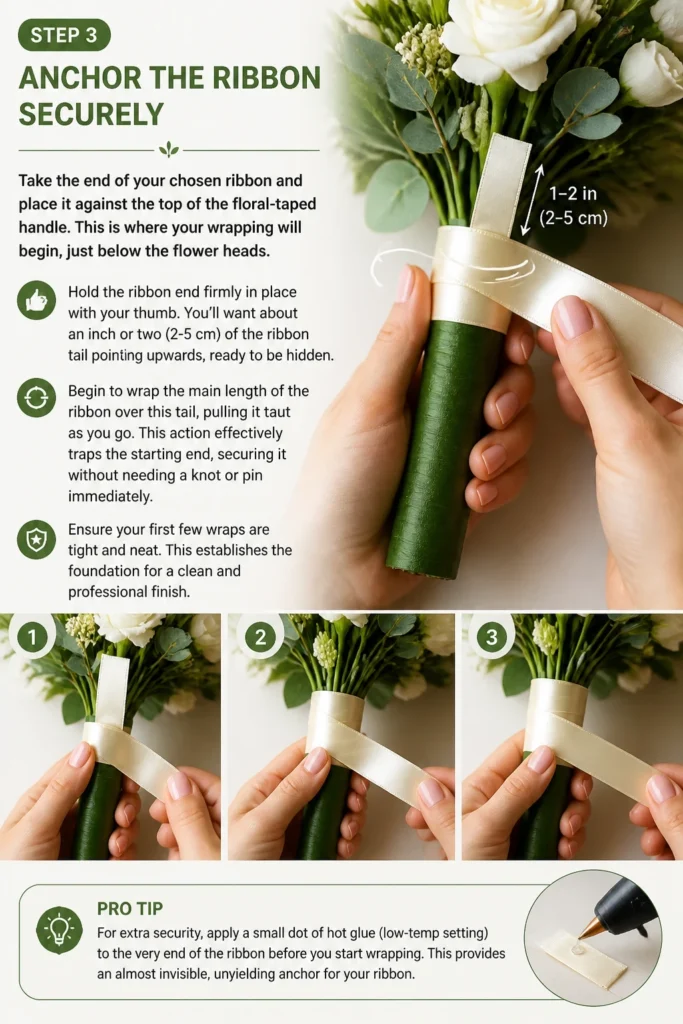
Take the end of your chosen ribbon and place it against the top of the floral-taped handle. This is where your wrapping will begin, just below the flower heads.
Hold the ribbon end firmly in place with your thumb. You’ll want about an inch or two (2-5 cm) of the ribbon tail pointing upwards, ready to be hidden.
Begin to wrap the main length of the ribbon over this tail, pulling it taut as you go. This action effectively “traps” the starting end, securing it without needing a knot or pin immediately.
Ensure your first few wraps are tight and neat. This establishes the foundation for a clean and professional finish.
Pro Tip: For extra security, apply a small dot of hot glue (low-temp setting) to the very end of the ribbon before you start wrapping. This provides an almost invisible, unyielding anchor.
Step 4: Wrap Downwards with Precision
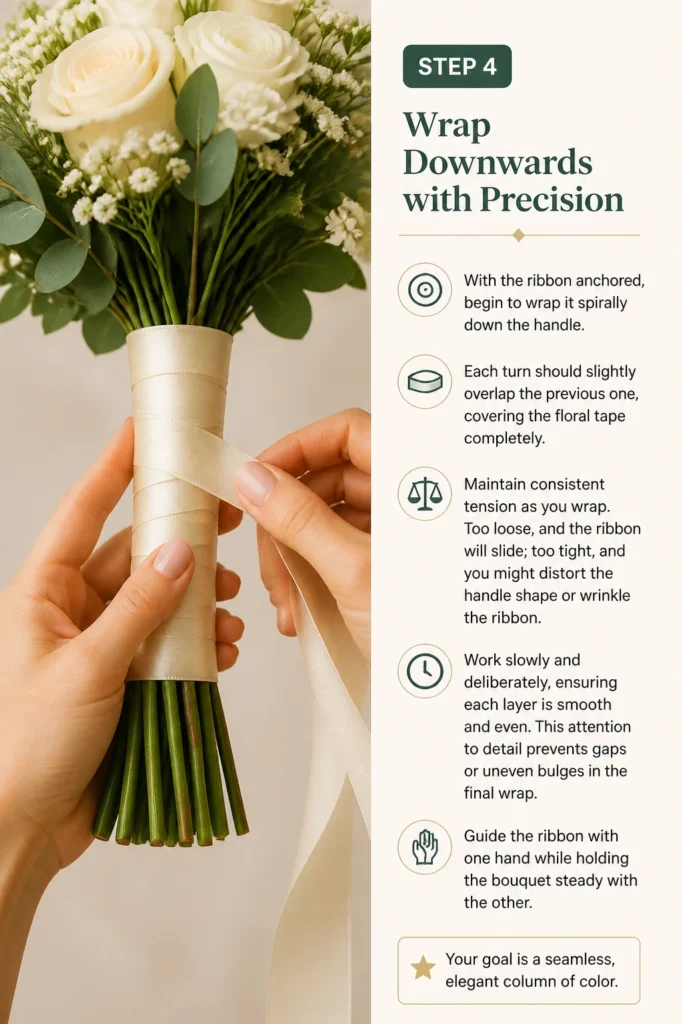
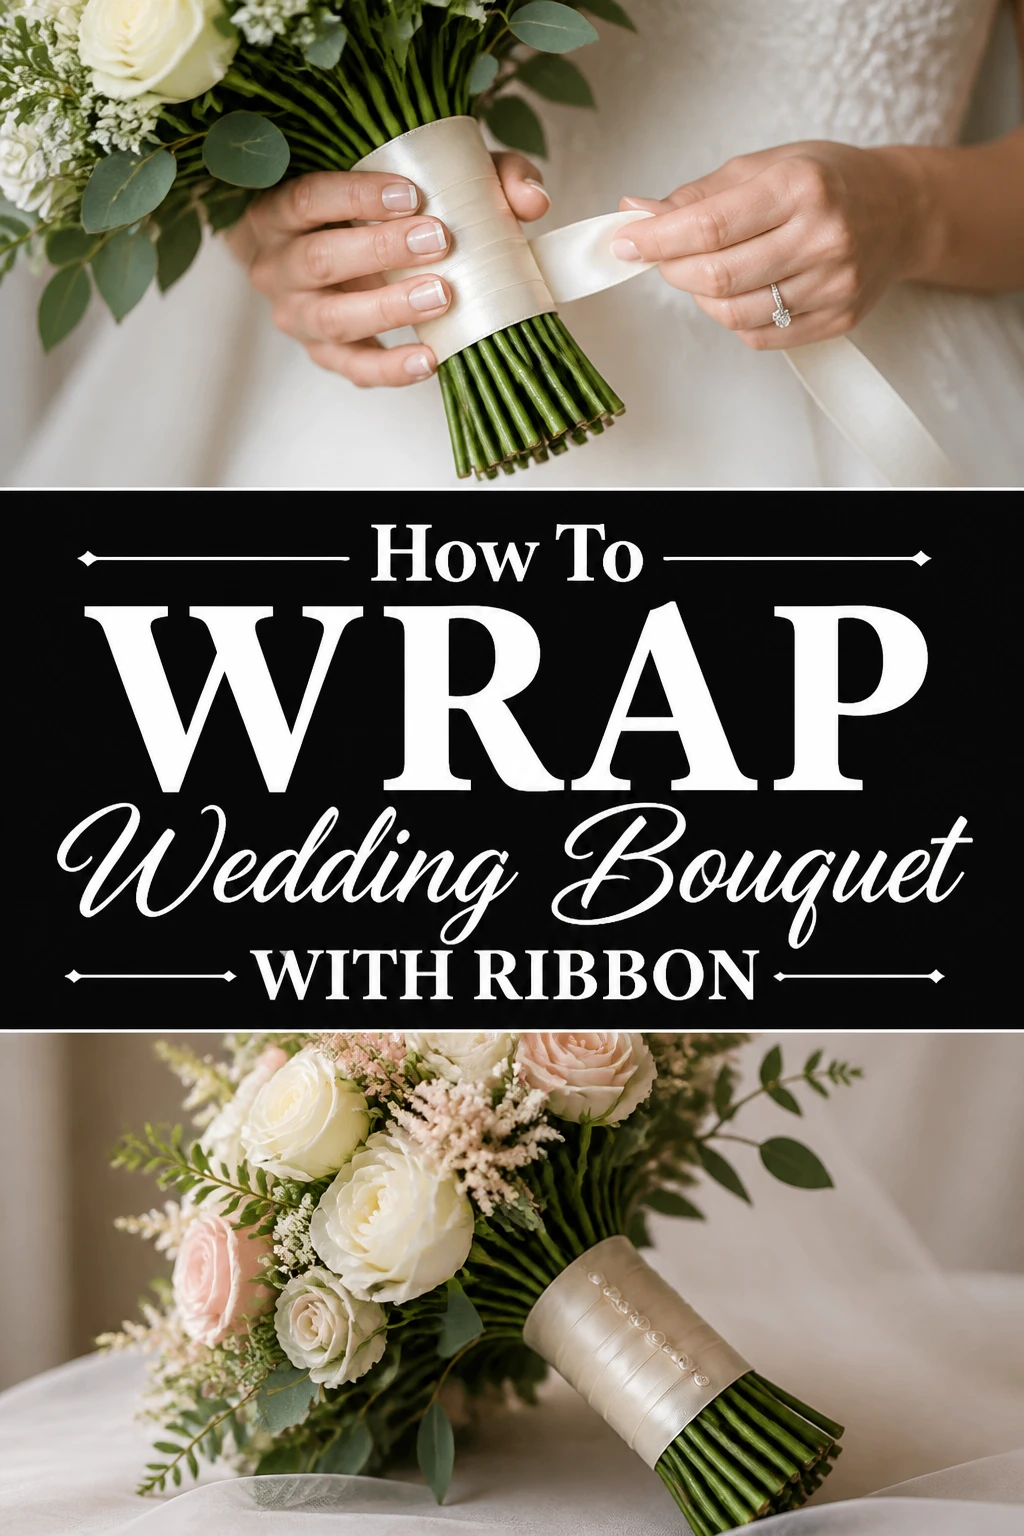
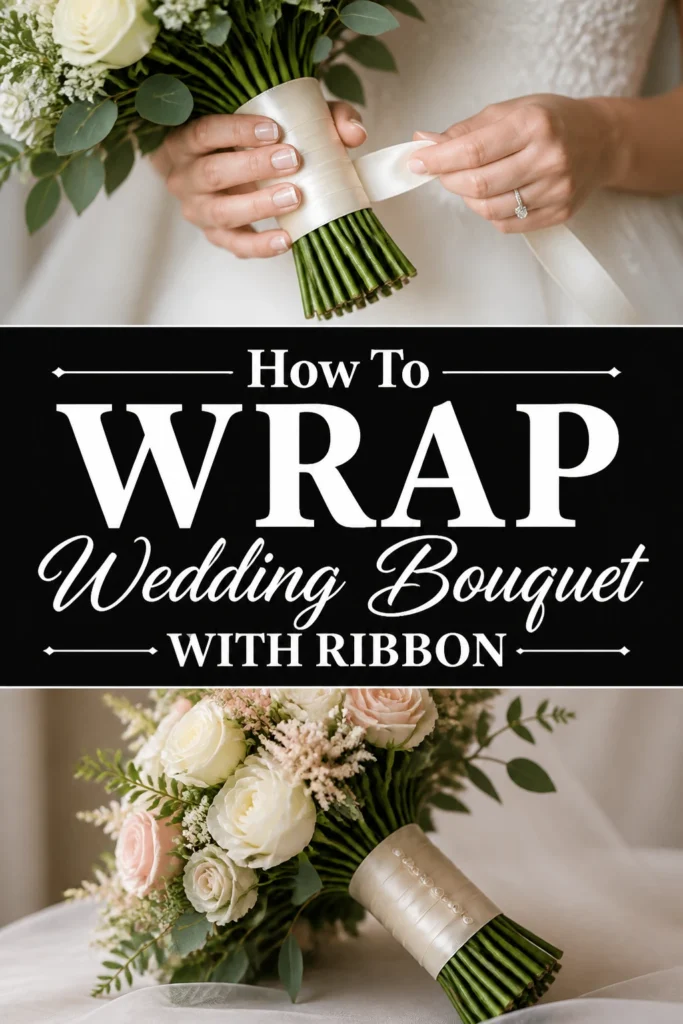
With the ribbon anchored, begin to wrap it spirally down the handle. Each turn should slightly overlap the previous one, covering the floral tape completely.
Maintain consistent tension as you wrap. Too loose, and the ribbon will slide; too tight, and you might distort the handle shape or wrinkle the ribbon.
Work slowly and deliberately, ensuring each layer is smooth and even. This attention to detail prevents gaps or uneven bulges in the final wrap.
Guide the ribbon with one hand while holding the bouquet steady with the other. Your goal is a seamless, elegant column of color.
Step 5: Create a Clean Finish at the Base
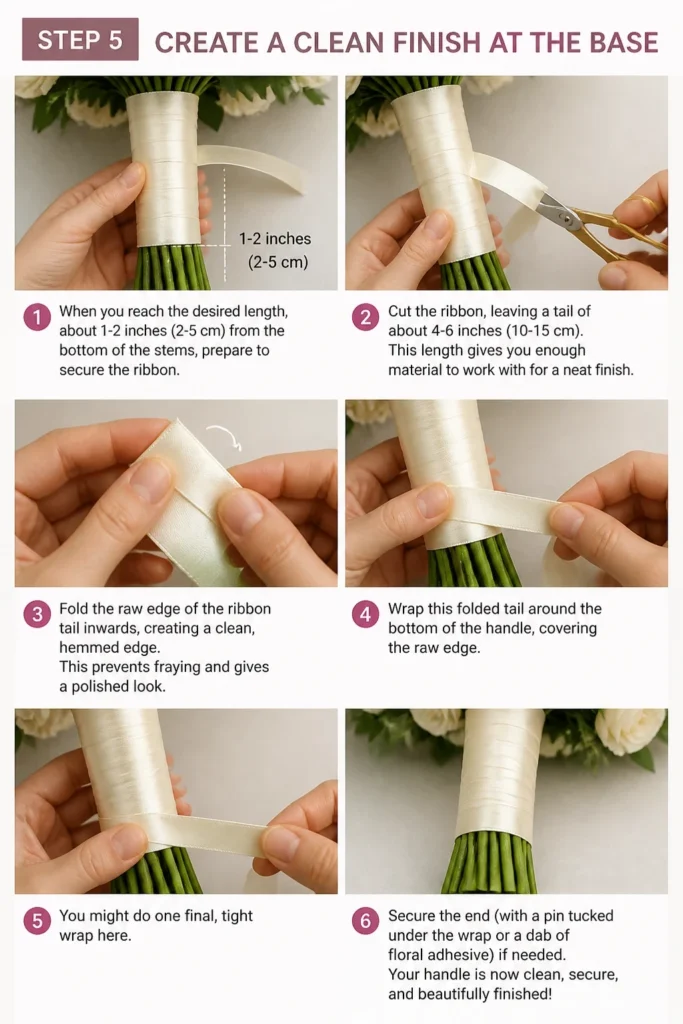
When you reach the desired length for your wrapped handle, typically about 1-2 inches (2-5 cm) from the bottom of the stems, prepare to secure the ribbon. You want enough wrapped area for a comfortable grip.
Cut the ribbon, leaving a tail of about 4-6 inches (10-15 cm). This length gives you enough material to work with for a neat finish.
Fold the raw edge of the ribbon tail inwards, creating a clean, hemmed edge. This prevents fraying and gives a polished look.
Wrap this folded tail around the bottom of the handle, covering the raw edge. You might do one or two final, tight wraps here.
Step 6: Secure the Ribbon with Pins
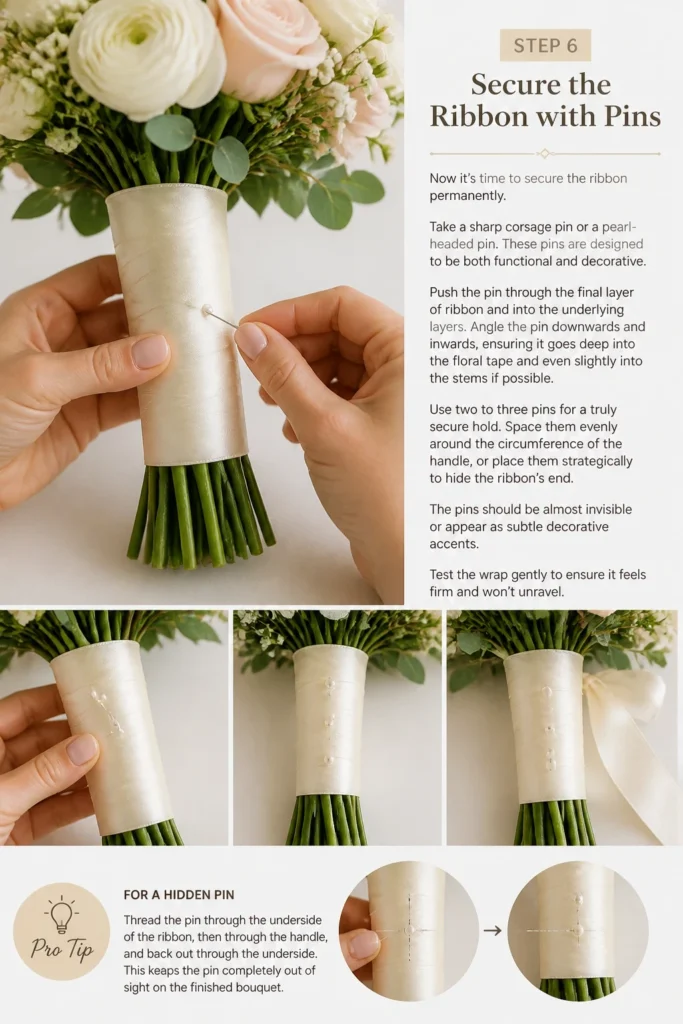
Now it’s time to secure the ribbon permanently. Take a sharp corsage pin or a pearl-headed pin. These pins are designed to be both functional and decorative.
Push the pin through the final layer of ribbon and into the underlying layers. Angle the pin downwards and inwards, ensuring it goes deep into the floral tape and even slightly into the stems if possible.
Use two to three pins for a truly secure hold. Space them evenly around the circumference of the handle, or place them strategically to hide the ribbon’s end.
The pins should be almost invisible or appear as subtle decorative accents. Test the wrap gently to ensure it feels firm and won’t unravel.
Pro Tip: For a hidden pin, thread the pin through the underside of the ribbon, then through the handle, and back out through the underside. This technique tucks the pin head out of sight.
Step 7: Add Decorative Accents (Optional)
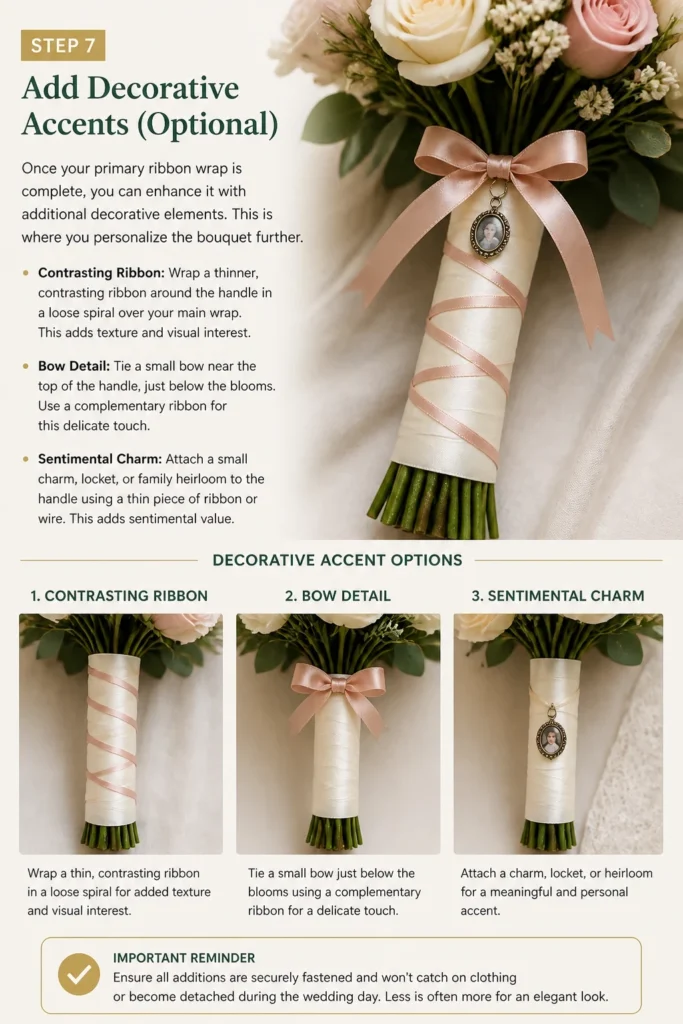
Once your primary ribbon wrap is complete, you can enhance it with additional decorative elements. This is where you personalize the bouquet further.
Consider wrapping a thinner, contrasting ribbon around the handle in a loose spiral over your main wrap. This adds texture and visual interest.
You could also tie a small bow near the top of the handle, just below the blooms. Use a complementary ribbon for this delicate touch.
Another option is to attach a small charm, locket, or family heirloom to the handle using a thin piece of ribbon or wire. This adds sentimental value.
Ensure any additions are securely fastened and won’t catch on clothing or become detached during the wedding day. Less is often more for an elegant look.
Step 8: Final Inspection and Adjustments
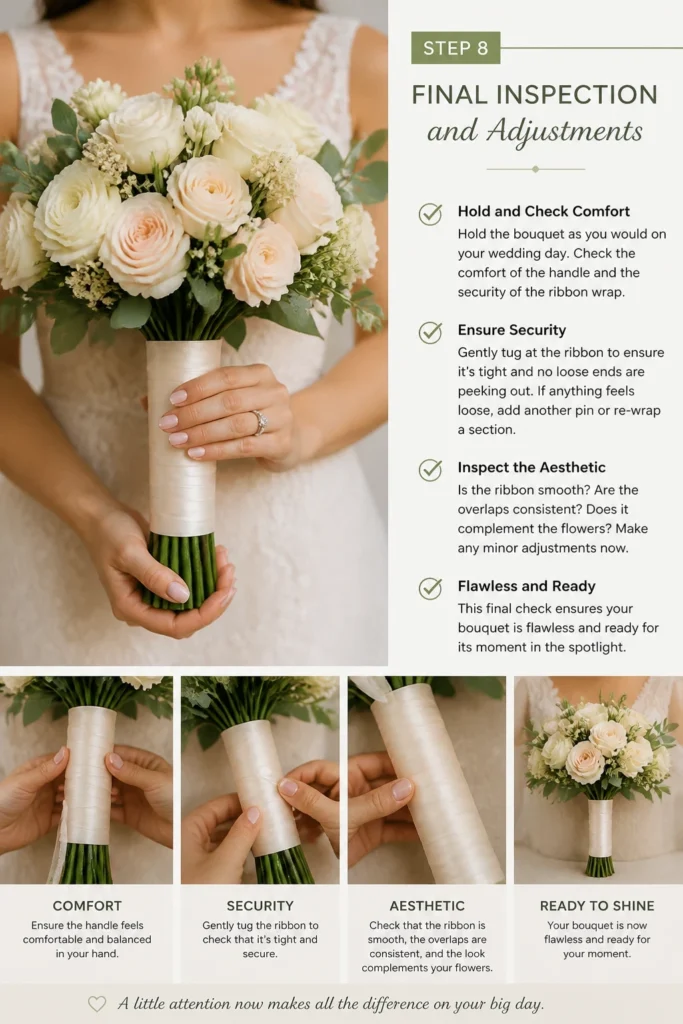
Hold the bouquet as you would on your wedding day. Check the comfort of the handle and the security of the ribbon wrap.
Gently tug at the ribbon to ensure it’s tight and no loose ends are peeking out. If anything feels loose, add another pin or re-wrap a section.
Inspect the overall aesthetic. Is the ribbon smooth? Are the overlaps consistent? Does it complement the flowers?
Make any minor adjustments now. This final check ensures your bouquet is flawless and ready for its moment in the spotlight.
Common Mistakes to Avoid
Inconsistent Tension
Wrapping the ribbon too loosely or too tightly in different sections will result in an uneven and unprofessional look. Loose sections can unravel, while overly tight areas might wrinkle the ribbon or distort the handle. Maintain steady, firm tension throughout the entire wrapping process for a smooth, consistent finish.
Using Too Little Ribbon
Running out of ribbon halfway through the wrap is a frustrating experience and can lead to an unsightly splice or a rushed finish. Always overestimate the amount of ribbon you’ll need. Having extra allows for mistakes and ensures you can complete the wrap seamlessly without interruption.
Exposed Floral Tape or Stems
The floral tape and raw stems should be completely hidden by the ribbon. Gaps in the wrapping or a too-short ribbon can expose these less attractive elements, detracting from the bouquet’s elegance. Ensure each wrap slightly overlaps the previous one, providing full coverage from top to bottom.
Poorly Secured Ends
If the beginning or end of your ribbon isn’t properly anchored, it can unravel during the event, creating a messy appearance. Relying solely on a knot or a single, weak pin is often insufficient. Use multiple pins, or a dab of floral adhesive, and ensure the ribbon is firmly trapped or secured into the handle.
Troubleshooting
Ribbon Keeps Slipping
If your ribbon struggles to stay in place, especially at the start, your initial anchor might not be strong enough. Ensure you’ve trapped the ribbon tail securely with the first few wraps. You can also apply a small dot of floral adhesive or low-temp hot glue to the very top of the handle before you begin wrapping, giving the ribbon something to grip.
Uneven Wrapping
An uneven wrap often stems from inconsistent tension or irregular overlapping. To fix this, carefully unwrap the section that looks uneven. Re-wrap it slowly, focusing on maintaining steady tension and ensuring each pass of the ribbon overlaps the previous one by a consistent amount. Practice makes perfect for a smooth, uniform appearance.
Pins Are Visible or Come Loose
Visible pins can detract from the elegance, and loose pins are a hazard. Ensure you’re using sharp, appropriate pins (like corsage pins) and angling them downwards and inwards, deep into the handle. For truly hidden pins, try the “under-and-through” technique where the pin enters and exits through the underside of the ribbon, tucking the head away.
Key Takeaways
- Always prepare your bouquet handle with floral tape for a secure base.
- Choose your ribbon width and material carefully to match your desired aesthetic.
- Maintain consistent tension throughout the wrapping process for a smooth finish.
- Secure both ends of the ribbon firmly using trapping techniques and multiple pins.
- Don’t be afraid to add optional decorative accents to personalize your bouquet.
- Perform a final inspection to catch and correct any imperfections before the big day.
Frequently Asked Questions
Can I use any type of ribbon?
While you can technically use many types of ribbon, some are better suited for bouquet wrapping. Silk, satin, and velvet offer a luxurious feel and drape beautifully. Avoid overly stiff ribbons that might be difficult to mold, or very delicate ones that could tear easily. Consider the ribbon’s texture and how it complements your flowers.
How do I prevent the ribbon from fraying?
To prevent fraying, always cut your ribbon with sharp scissors, which creates a cleaner edge. For added protection, you can gently singe the very edge of synthetic ribbons with a flame (briefly, from a distance) or apply a tiny drop of clear fabric glue to the raw edges before folding and securing them.
Should I wrap the entire stem?
It’s not usually necessary to wrap the entire length of the stems. The goal is to create a comfortable and aesthetically pleasing handle. Typically, you wrap enough to cover the grip area, usually 4-6 inches (10-15 cm) from just below the blooms. This leaves the very bottom of the stems exposed, which is practical for placing the bouquet in water.
Can I reuse the ribbon?
Technically, yes, if it’s carefully removed and remains in good condition. However, for a wedding bouquet, it’s generally recommended to use fresh, new ribbon to ensure it’s pristine and free from any creases or damage. The ribbon is a small detail that makes a big impact on the overall presentation.
Our Top Recommended Finds
- Double-Faced Satin Ribbon: Offers a luxurious sheen on both sides, ensuring a beautiful look no matter how it’s wrapped. It’s soft, drapes well, and comes in a vast array of colors.
- Floral Tape (Green or White): Essential for creating a strong, non-slip base for your ribbon. It’s waterproof and provides excellent grip for the ribbon to adhere to.
- Pearl Head Corsage Pins: These pins are sharp, sturdy, and feature a decorative pearl head that blends seamlessly or adds a subtle touch of elegance to your finished wrap.
Crafting Your Perfect Bouquet Finish
Wrapping your wedding bouquet with ribbon is more than just a functional step; it’s an opportunity to infuse personal style and elegance into your floral masterpiece. Each turn of the ribbon, each carefully placed pin, contributes to a cherished detail that will be captured in countless photographs.
Don’t let the thought of this task intimidate you. Embrace the process, take your time, and enjoy the creative journey. With these steps, you’re ready to transform your beautiful blooms into a truly stunning, handheld work of art. Take the first step today and start envisioning your perfect bouquet wrap!
Wedding Planning
No fluff, no drama. Just easy weekly advice, planning shortcuts, and gentle reminders to help you actually enjoy your engagement.