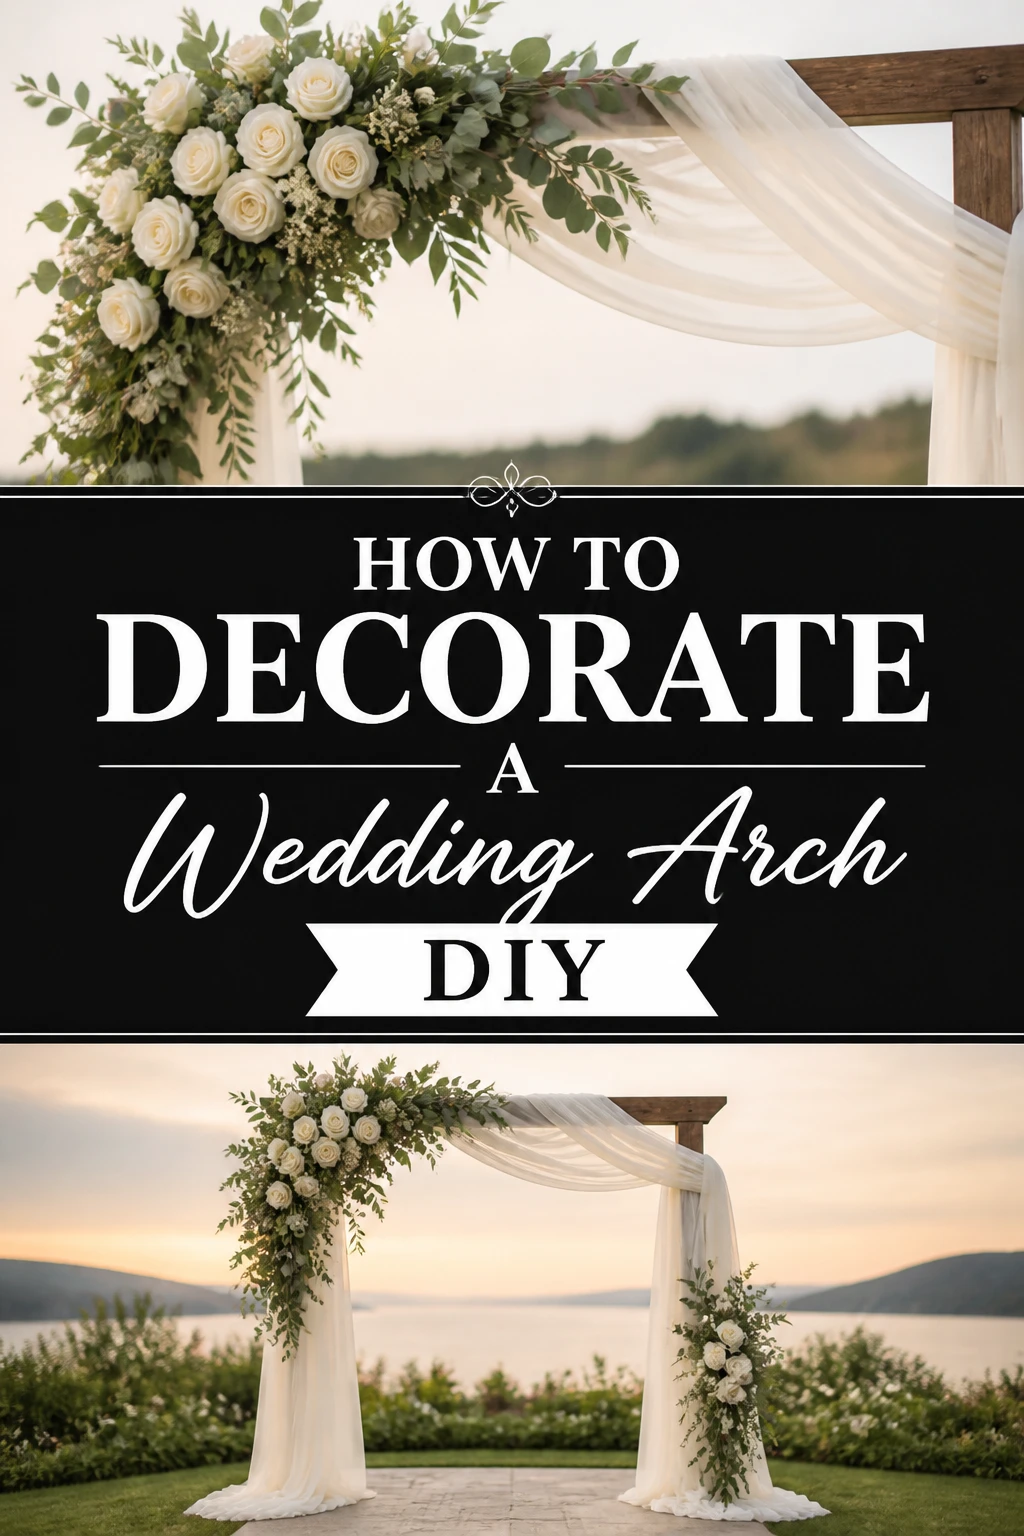
🌸 How To Decorate A Wedding Arch DIY

Wedding Planning
No fluff, no drama. Just easy weekly advice, planning shortcuts, and gentle reminders to help you actually enjoy your engagement.
Creating a beautiful wedding arch is a wonderful way to personalize your special day. It adds a unique touch that reflects your style and love story. I remember helping my sister craft her dream arch, and the joy of seeing it come to life was truly unforgettable.
This guide will walk you through every step, making the process fun and manageable. You’ll gain confidence to build a stunning focal point for your ceremony. Let’s make your wedding vision a reality.
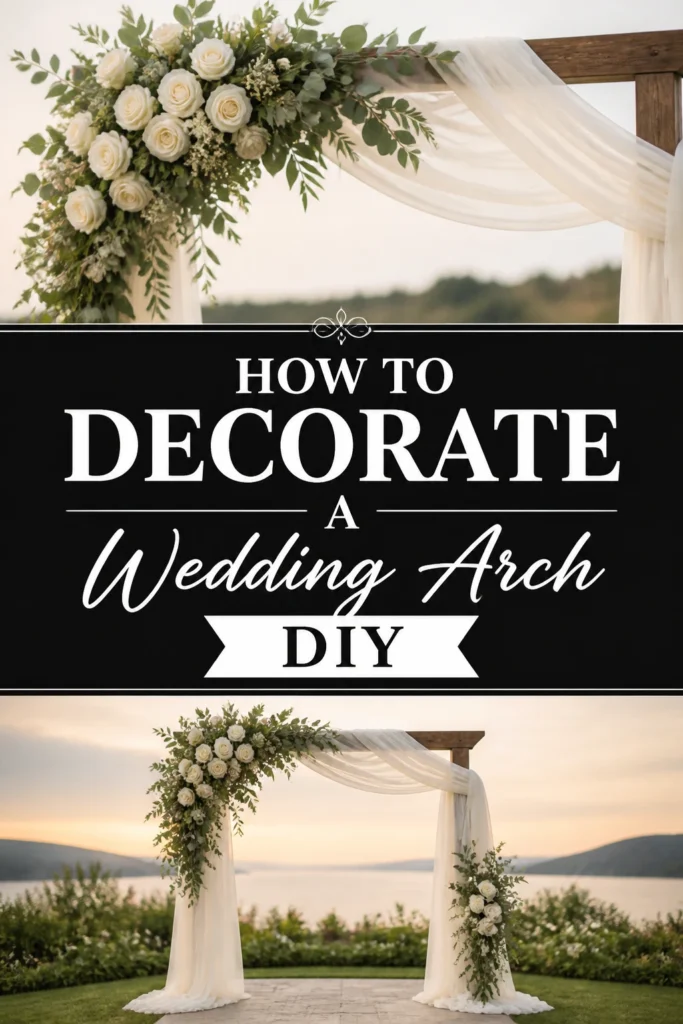
Quick Overview
Transforming a bare arch into a breathtaking backdrop is an achievable DIY project. You’ll create a memorable and personalized centerpiece for your wedding. This guide covers everything from planning to the final touches.
- Time needed: 4-8 hours (depending on complexity and materials)
- Difficulty: Intermediate
- What you’ll need: Arch frame, faux or fresh flowers/foliage, zip ties, floral wire, fabric drapes, measuring tape, wire cutters, scissors.
Step-by-Step Instructions
Step 1: Choose Your Arch Style and Materials
Begin by envisioning the overall look you desire. Consider your wedding theme, colors, and the venue’s existing aesthetic. This initial vision guides all your material choices.
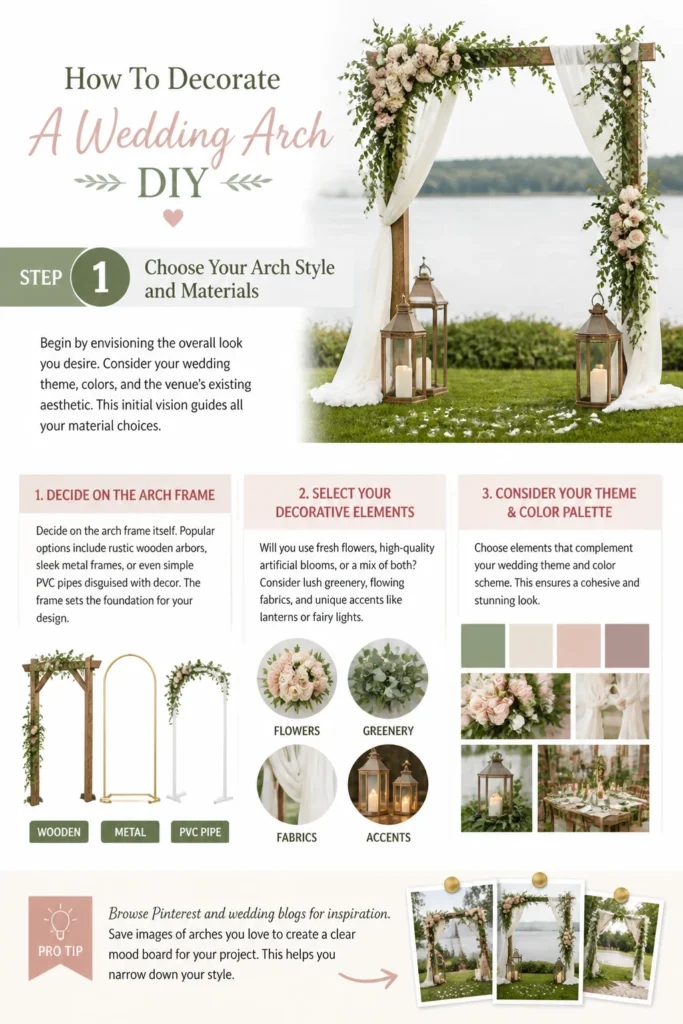
Decide on the arch frame itself. Popular options include rustic wooden arbors, sleek metal frames, or even simple PVC pipes disguised with decor. The frame sets the foundation for your design.
Select your decorative elements. Will you use fresh flowers, high-quality artificial blooms, or a mix of both? Consider lush greenery, flowing fabrics, and unique accents like lanterns or fairy lights.
Pro Tip: Browse Pinterest and wedding blogs for inspiration. Save images of arches you love to create a clear mood board for your project. This helps you narrow down your style.
Step 2: Gather Your Supplies
Make a comprehensive list of everything you’ll need before you start. This prevents multiple trips to the store and keeps your project on track. Measure your arch frame to estimate quantities of fabric and floral materials.
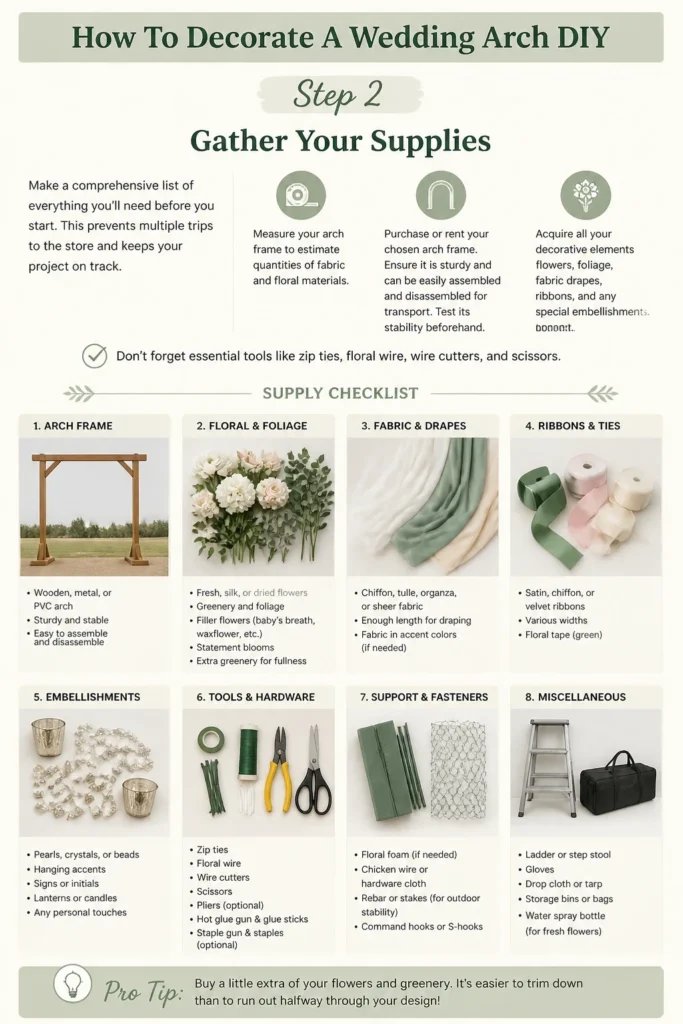
Purchase or rent your chosen arch frame. Ensure it is sturdy and can be easily assembled and disassembled for transport. Test its stability beforehand.
Acquire all your decorative elements: flowers, foliage, fabric drapes, ribbons, and any special embellishments. Don’t forget essential tools like zip ties, floral wire, wire cutters, and scissors.
Step 3: Prepare Your Arch Frame
Assemble your arch frame in a clear, spacious area. Follow the manufacturer’s instructions carefully to ensure it’s built correctly and securely. Double-check all connections.
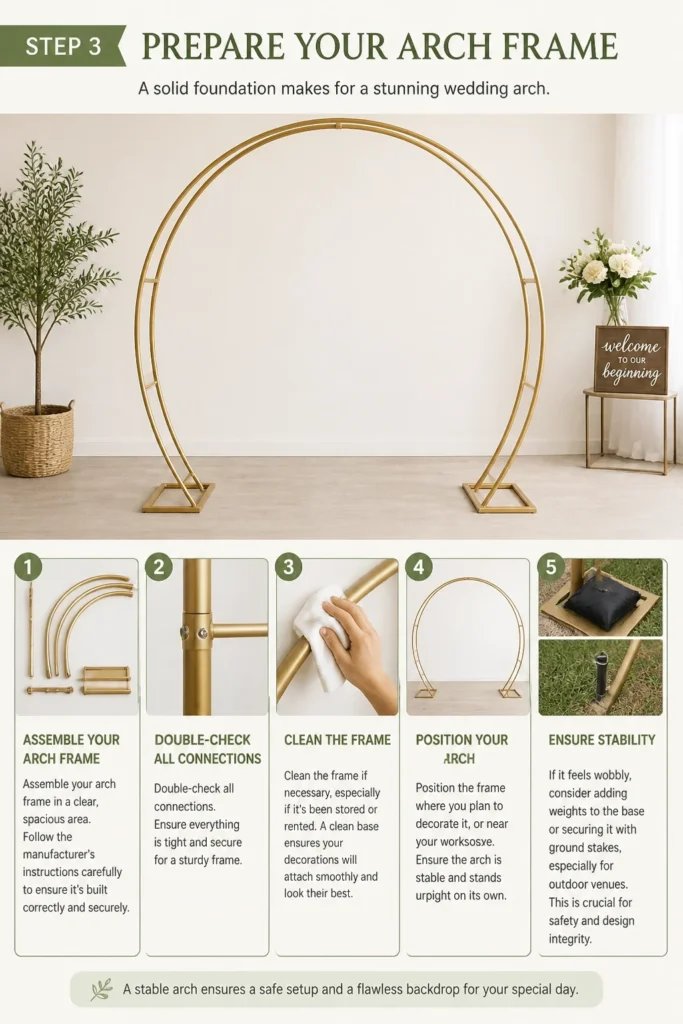
Clean the frame if necessary, especially if it’s been stored or rented. A clean base ensures your decorations will attach smoothly and look their best. Position the frame where you plan to decorate it, or near your workspace.
Ensure the arch is stable and stands upright on its own. If it feels wobbly, consider adding weights to the base or securing it with ground stakes, especially for outdoor venues. This is crucial for safety and design integrity.
Step 4: Attach Drape Fabric (Optional)
Draping fabric adds softness, romance, and a luxurious feel to your arch. Choose lightweight fabrics like chiffon, tulle, or organza in colors that complement your wedding palette. Measure the fabric to ensure it’s long enough for your desired drape.
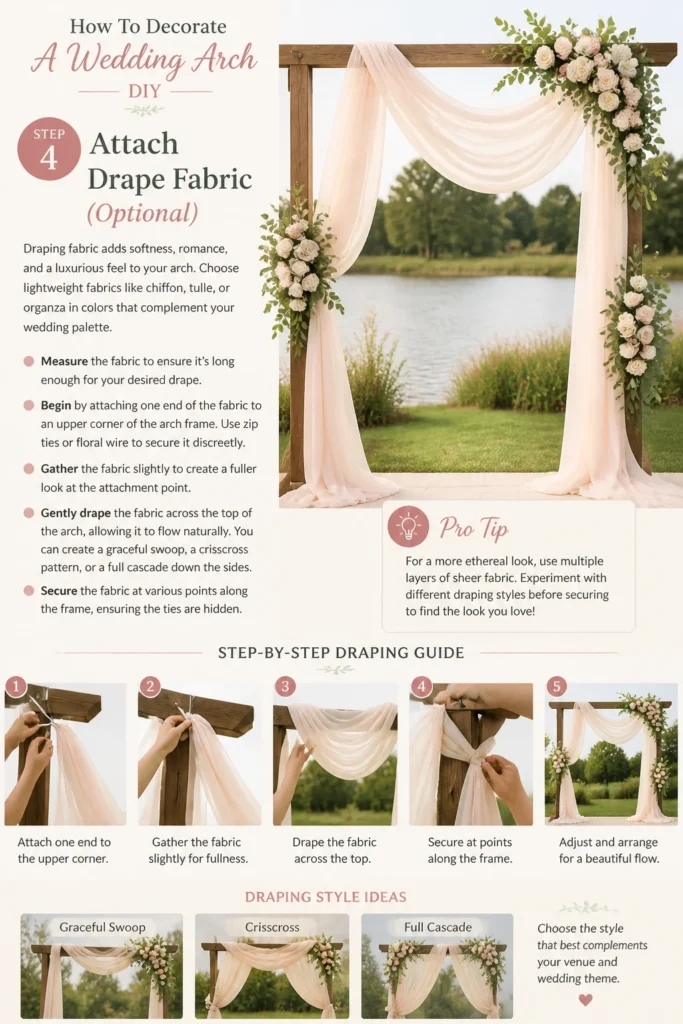
Begin by attaching one end of the fabric to an upper corner of the arch frame. Use zip ties or floral wire to secure it discreetly. Gather the fabric slightly to create a fuller look at the attachment point.
Gently drape the fabric across the top of the arch, allowing it to flow naturally. You can create a graceful swoop, a crisscross pattern, or a full cascade down the sides. Secure the fabric at various points along the frame, ensuring the ties are hidden.
Pro Tip: For a more ethereal look, use multiple layers of sheer fabric. Experiment with different draping techniques before permanently securing the fabric. Take photos to compare looks.
Step 5: Create Floral and Foliage Garlands
Pre-assembling your floral and foliage elements into garlands saves significant time on the wedding day. This step allows for careful arrangement and ensures a cohesive design. Gather your chosen flowers and greenery.
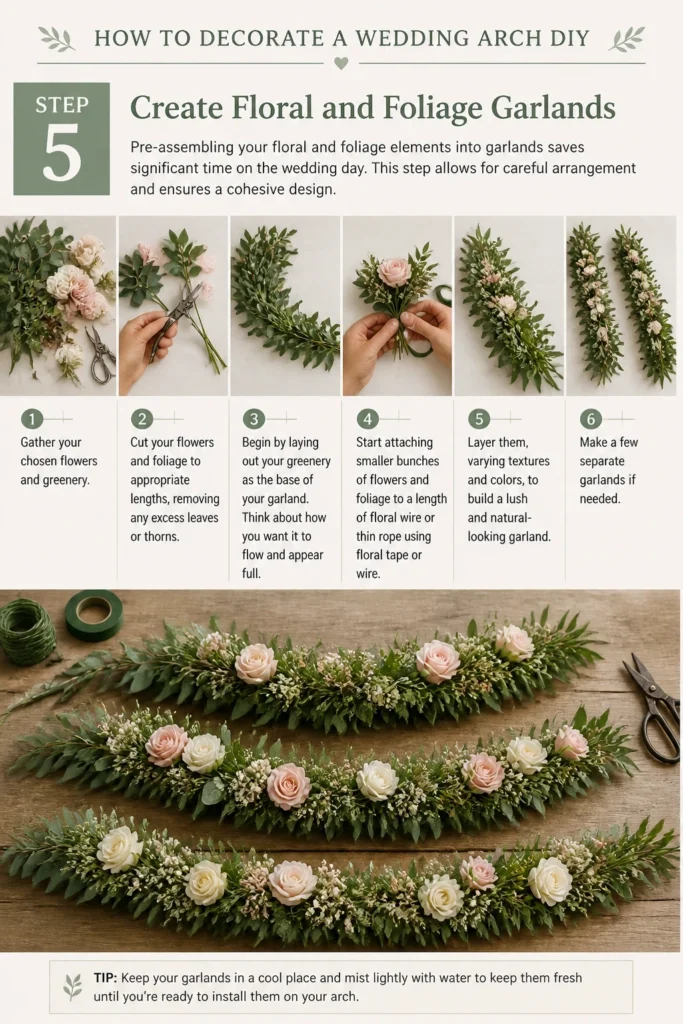
Cut your flowers and foliage to appropriate lengths, removing any excess leaves or thorns. Begin by laying out your greenery as the base of your garland. Think about how you want it to flow and appear full.
Start attaching smaller bunches of flowers and foliage to a length of floral wire or thin rope using floral tape or wire. Layer them, varying textures and colors, to build a lush and natural-looking garland. Make a few separate garlands if needed.
Step 6: Attach Garlands to the Arch
Once your garlands are complete, it’s time to attach them to the arch frame. This is where your design truly begins to take shape. Have a helper assist you with holding the garlands in place.
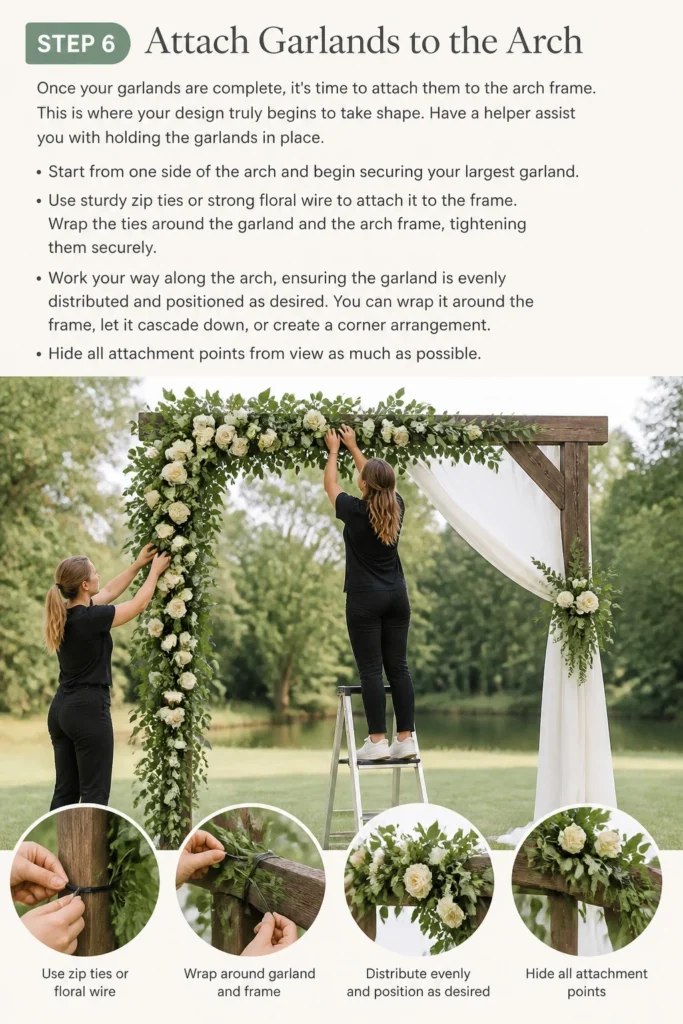
Start from one side of the arch and begin securing your largest garland. Use sturdy zip ties or strong floral wire to attach it to the frame. Wrap the ties around the garland and the arch frame, tightening them securely.
Work your way along the arch, ensuring the garland is evenly distributed and positioned as desired. You can wrap it around the frame, let it cascade down, or create a corner arrangement. Hide all attachment points from view as much as possible.
Step 7: Add Accent Flowers and Details
With the main garlands in place, you can now add smaller, more delicate accents. These details elevate your arch and bring out its unique charm. This is where your personal style truly shines.
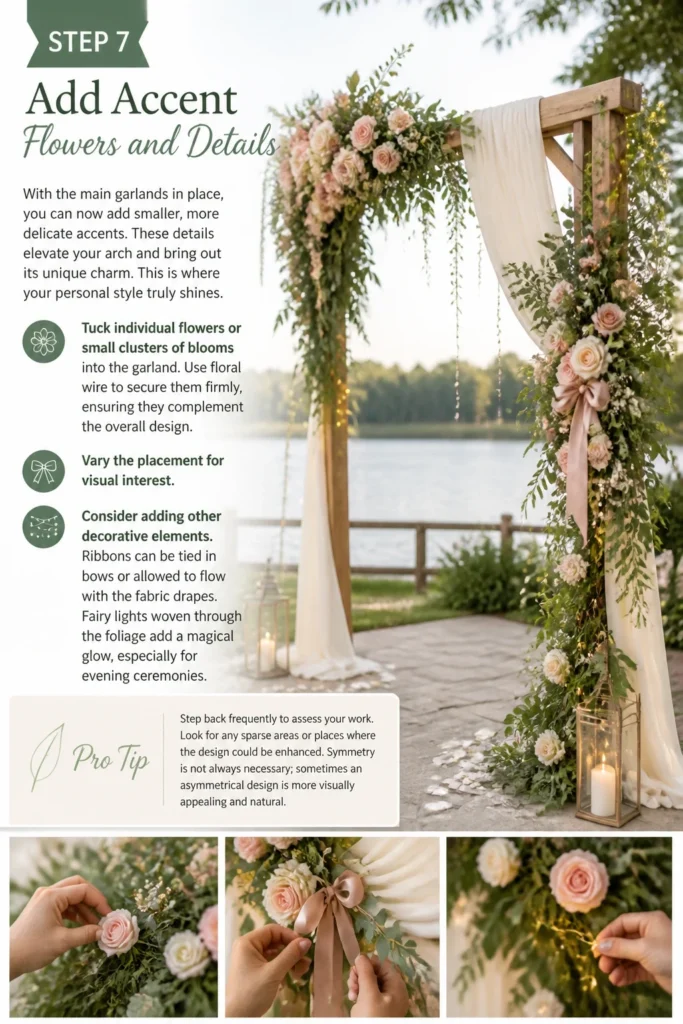
Tuck individual flowers or small clusters of blooms into the garland. Use floral wire to secure them firmly, ensuring they complement the overall design. Vary the placement for visual interest.
Consider adding other decorative elements. Ribbons can be tied in bows or allowed to flow with the fabric drapes. Fairy lights woven through the foliage add a magical glow, especially for evening ceremonies.
Pro Tip: Step back frequently to assess your work. Look for any sparse areas or places where the design could be enhanced. Symmetry is not always necessary; sometimes an asymmetrical design is more visually interesting.
Step 8: Refine and Secure Everything
This final stage is crucial for ensuring your arch looks perfect and stays that way throughout the event. Take a moment to review every aspect of your design.
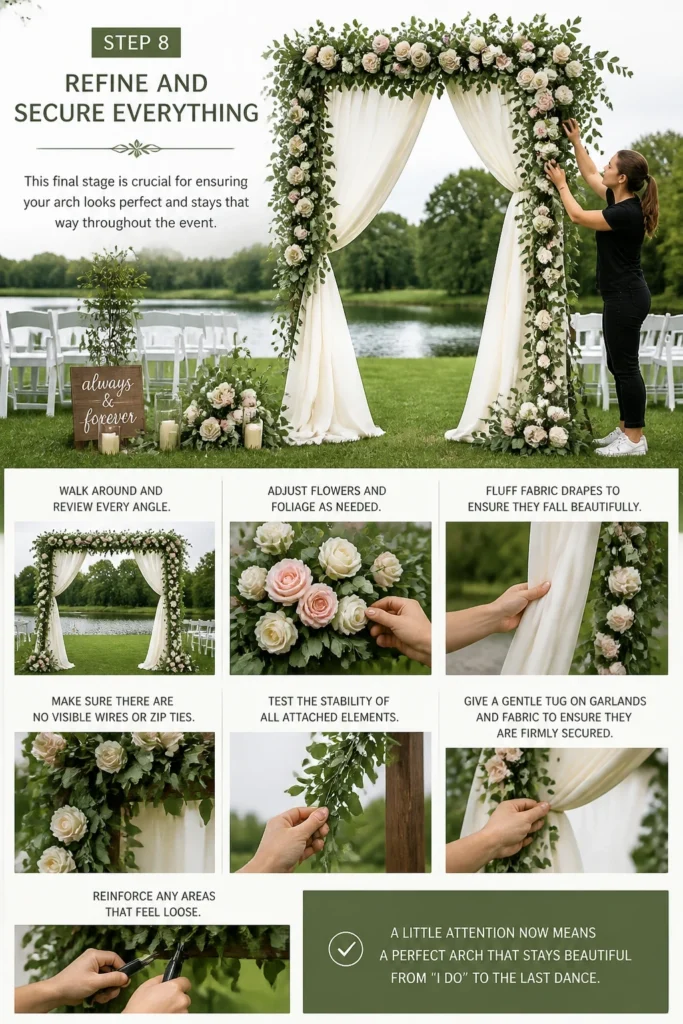
Walk around the entire arch, checking all angles. Adjust any flowers or foliage that look out of place. Fluff up fabric drapes to ensure they fall beautifully. Make sure there are no visible wires or zip ties.
Test the stability of all attached elements. Give a gentle tug on garlands and fabric to ensure they are firmly secured. Reinforce any areas that feel loose. This prevents last-minute mishaps.
Common Mistakes to Avoid
Overloading the Arch
It’s easy to get carried away with too many decorations, but an overloaded arch can look cluttered and heavy. This detracts from its elegance and can also make it unstable. Focus on balance and intentional placement rather than simply adding more. Choose a few key elements and let them shine, ensuring there’s still some negative space for visual appeal.
Forgetting Stability Checks
A beautiful arch means nothing if it topples over. Many DIY decorators focus solely on aesthetics and overlook the practicalities of stability. Always test your arch for wobbles and ensure it’s properly weighted or anchored, especially outdoors where wind can be a factor. Prioritize safety and structural integrity above all else.
Not Pre-Assembling Elements
Trying to attach individual flowers and fabric pieces directly to the arch on the wedding day is a recipe for stress and disarray. This takes far too long and makes precise placement difficult. Always pre-assemble garlands and drapes in sections beforehand. This makes on-site setup quick, efficient, and much less chaotic.
Troubleshooting
Arch Feels Unstable
If your assembled arch feels wobbly, it likely needs additional support. For outdoor settings, use sturdy ground stakes driven deep into the earth at the base of each leg. Indoors, consider sandbags or heavy decorative planters placed at the base to provide extra weight. Ensure all frame connections are tightly secured.
Flowers Wilting Quickly
Fresh flowers require hydration to stay vibrant. If they’re wilting too fast, you might have decorated too far in advance or not properly hydrated them. For fresh flowers, keep stems in water until the last possible moment. Use floral water tubes for individual blooms or opt for high-quality artificial flowers, which eliminate this concern entirely.
Design Looks Sparse or Unbalanced
Sometimes, after stepping back, the arch might look less full than intended or visually uneven. This often happens if you’ve concentrated too many elements in one area. Add filler greenery or smaller, inexpensive flowers to sparse spots to create volume. Adjust the placement of your main elements to achieve better balance and flow.
Key Takeaways
- Planning your arch style and gathering all supplies beforehand is crucial.
- Always ensure your arch frame is stable and securely assembled.
- Pre-assemble floral garlands and fabric drapes off the arch to save time.
- Use zip ties and floral wire discreetly to secure all decorations.
- Step back frequently to assess the design and make adjustments.
- Prioritize stability and safety, especially for outdoor setups.
Frequently Asked Questions
How far in advance can I decorate my wedding arch?
If using fresh flowers, aim to decorate the arch no more than 12-24 hours before the ceremony. Keep it in a cool, shaded area. For artificial flowers or foliage, you can decorate it days or even weeks in advance, storing it carefully until the event.
What if it rains on my wedding day?
Have a backup plan for unexpected weather. If your arch is outdoors, ensure it’s anchored securely against wind. If rain is forecast, consider a portable canopy over the arch, or have a plan to move the ceremony indoors to a location where the arch can still be featured.
Can I use artificial flowers for my arch?
Absolutely! High-quality artificial flowers and foliage are an excellent choice for a DIY arch. They are durable, won’t wilt, can be prepared far in advance, and are often more cost-effective. They also offer a wider range of colors and bloom types regardless of season.
Our Top Recommended Finds
- Heavy-Duty Floral Wire: Essential for securely attaching flowers and foliage without being visible.
- Green Zip Ties: Perfect for blending into foliage and providing strong, quick attachment points for garlands.
- Sheer Chiffon Fabric Drapes: Pre-cut and hemmed drapes save time and create a soft, romantic look instantly.
Craft Your Dream Arch
Crafting your own wedding arch is more than just a DIY project; it’s an act of love. You’re creating a meaningful backdrop for one of life’s most significant moments. The personal touch you bring will make it truly unforgettable.
Embrace the creative process and enjoy every step. Don’t be afraid to experiment with colors and textures. Start planning your design today and bring your vision to life.
Wedding Planning
No fluff, no drama. Just easy weekly advice, planning shortcuts, and gentle reminders to help you actually enjoy your engagement.