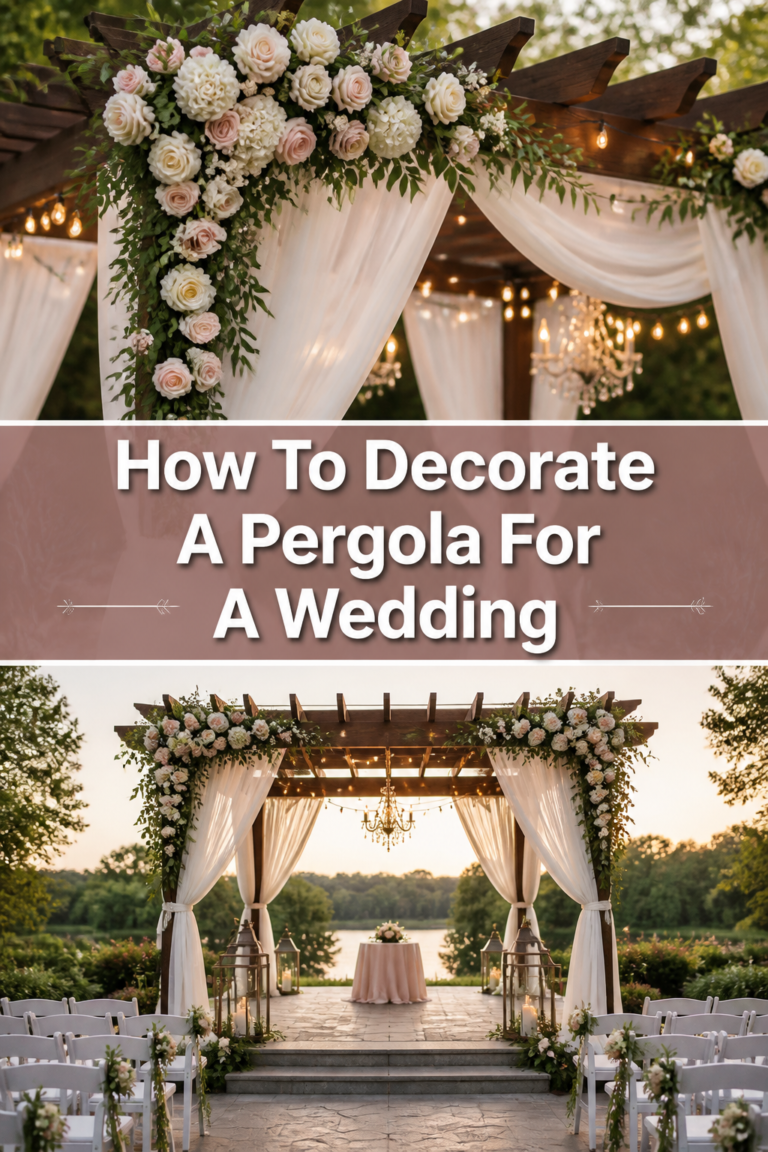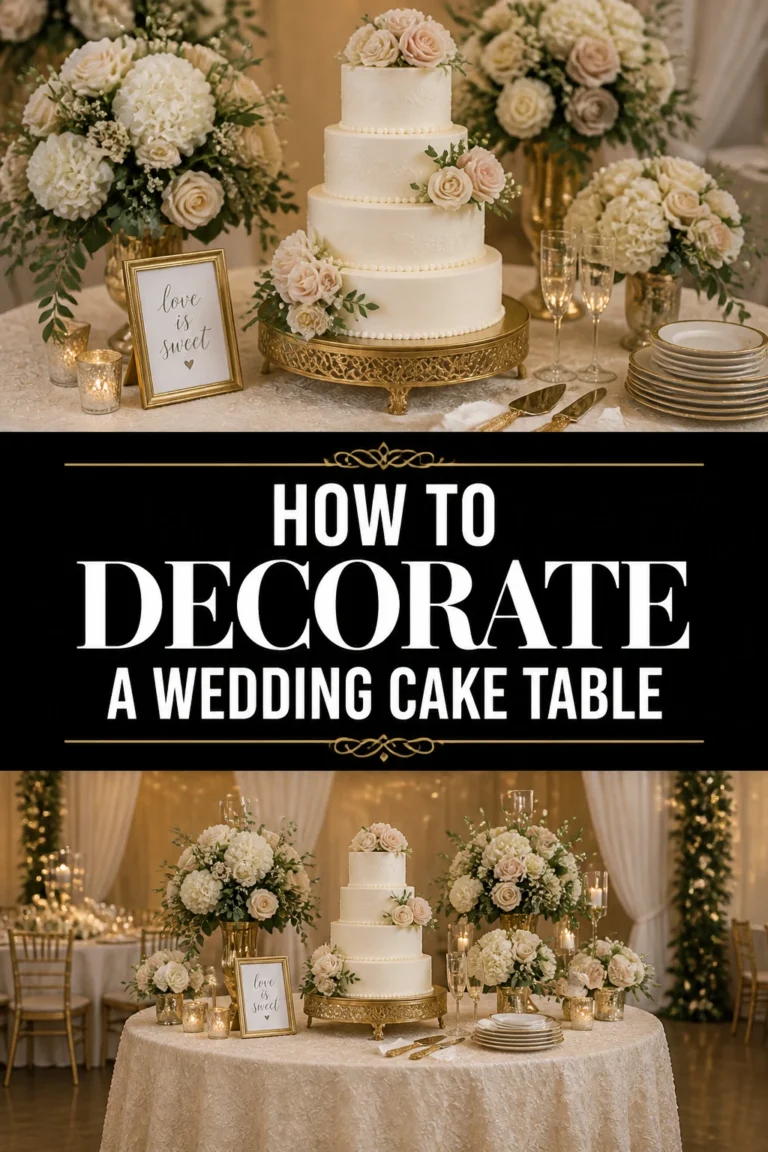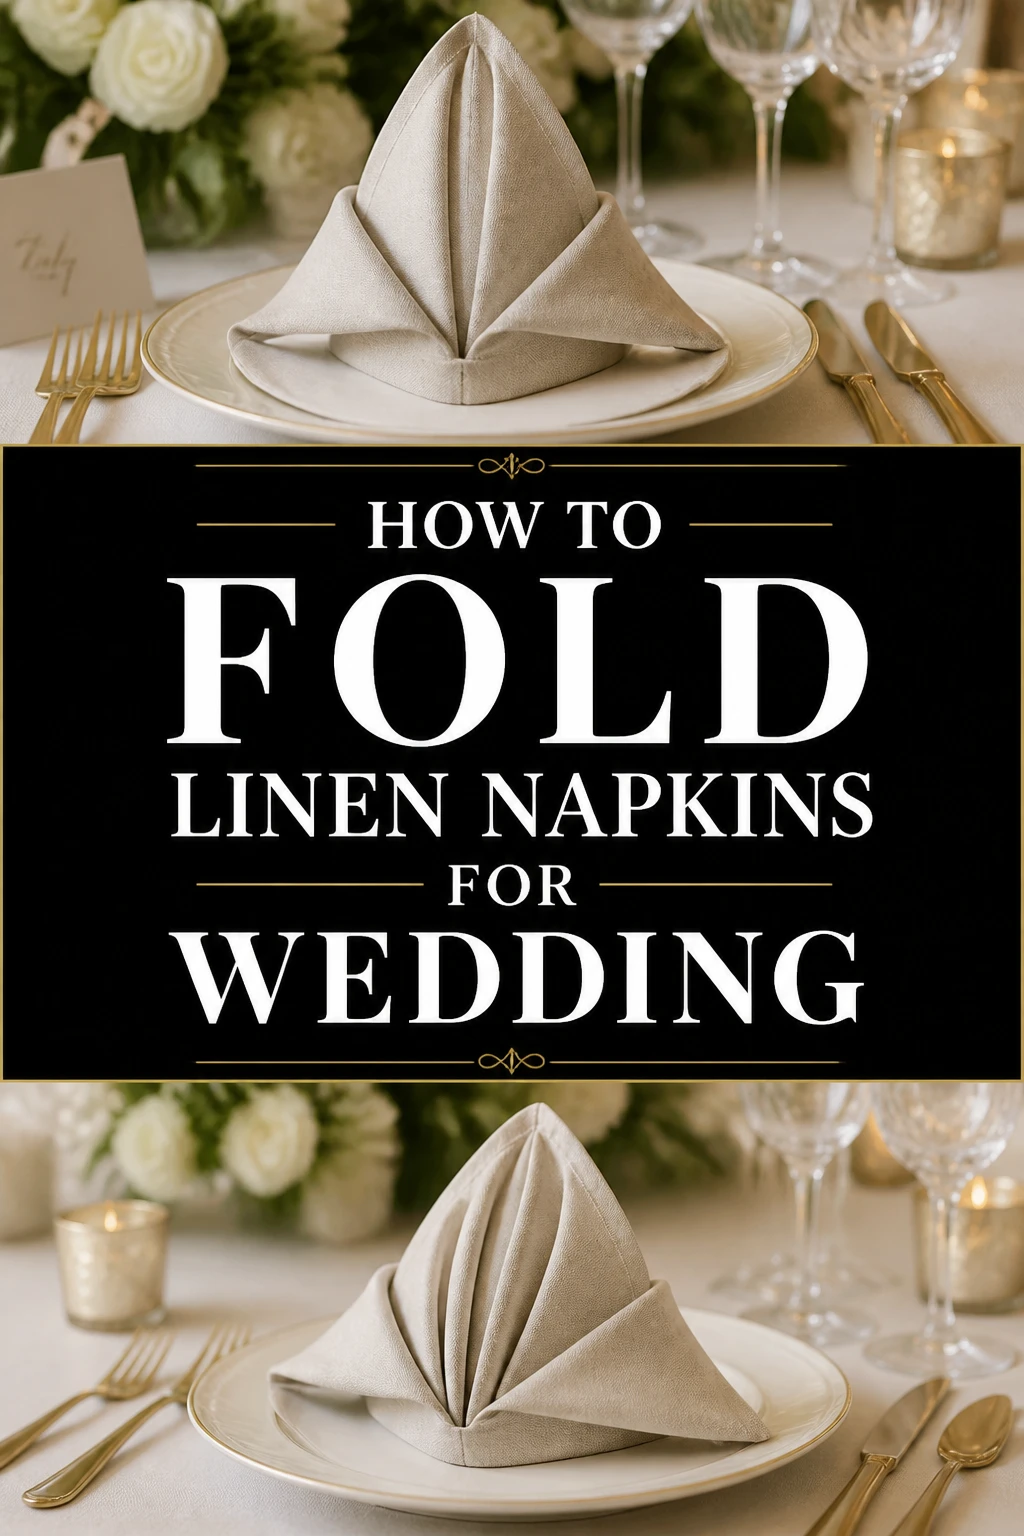
🔥 How To Fold Linen Napkins For Wedding

Wedding Planning
No fluff, no drama. Just easy weekly advice, planning shortcuts, and gentle reminders to help you actually enjoy your engagement.
I remember the quiet tension in the air as I helped my best friend set up her wedding reception just hours before the ceremony.
We had hundreds of beautiful, heavy linen napkins, but they looked like limp rags until we found the perfect folding technique.
Having styled dozens of events since then, I can tell you that the way you fold your linen is the secret to a high-end, professional tablescape.
Quick Overview
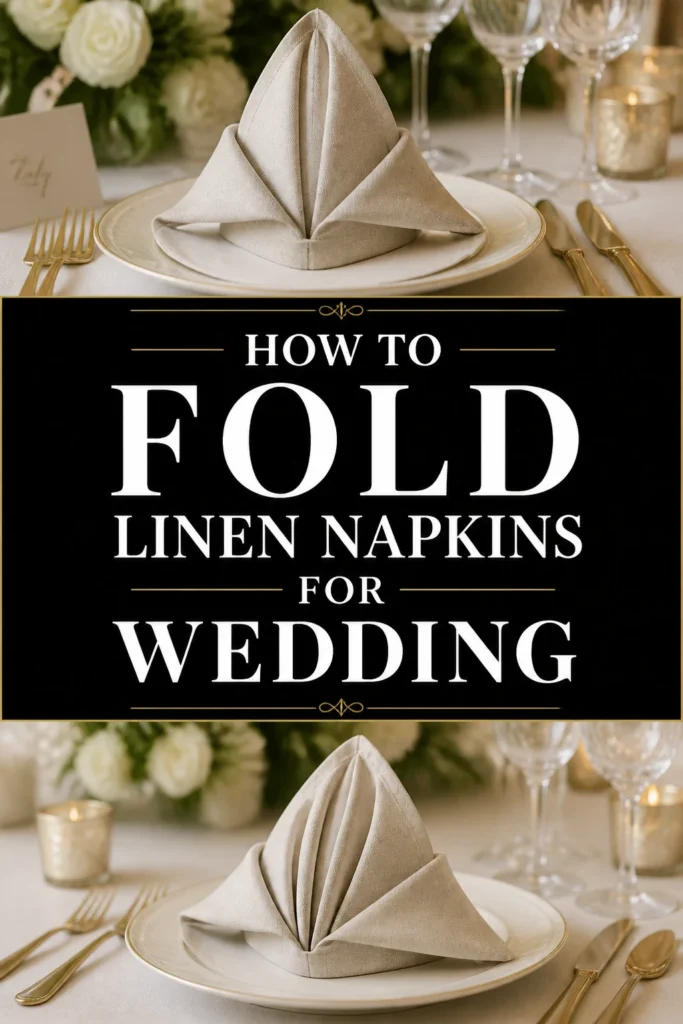
This guide will teach you how to master the “Triple Pocket Fold,” which is the gold standard for modern weddings because it holds menus and greenery perfectly.
- Time needed: 45-60 seconds per napkin once you find your rhythm.
- Difficulty: Beginner to Intermediate.
- What you’ll need: 20×20 inch linen napkins, a steam iron, spray starch, and a clean, flat surface.
Step 1: Prepare Your Surface and Fabric
Clear off a large dining table or a dedicated crafting station before you begin.
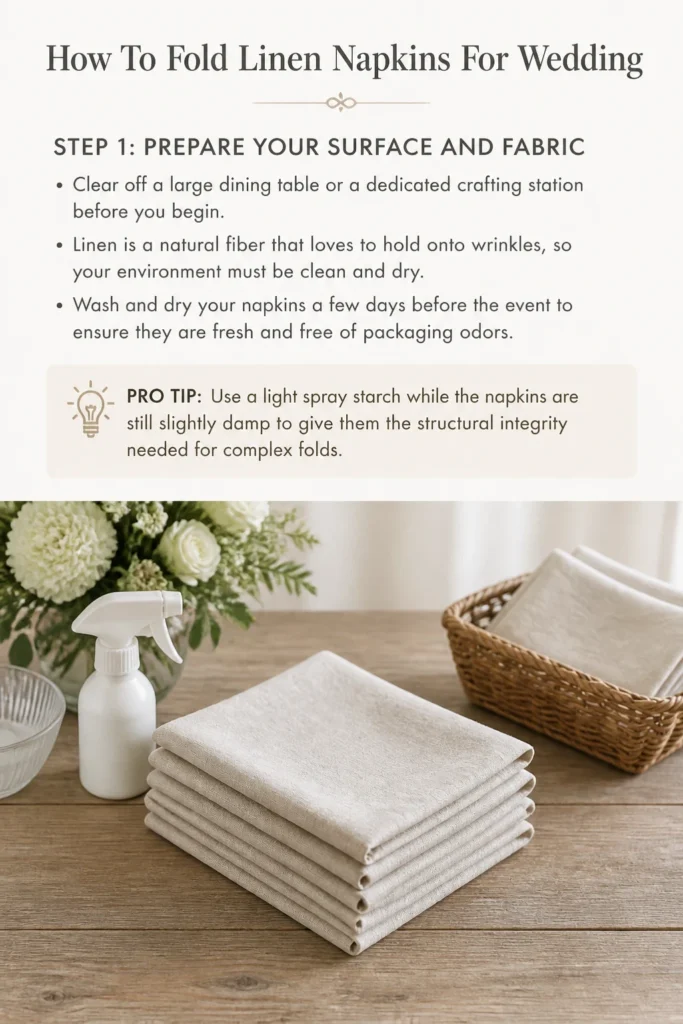
Linen is a natural fiber that loves to hold onto wrinkles, so your environment must be clean and dry.
Wash and dry your napkins a few days before the event to ensure they are fresh and free of packaging odors.
Pro Tip: Use a light spray starch while the napkins are still slightly damp to give them the structural integrity needed for complex folds.
Step 2: Iron Every Inch Flat
You cannot achieve a crisp, professional fold with fabric that has existing creases.
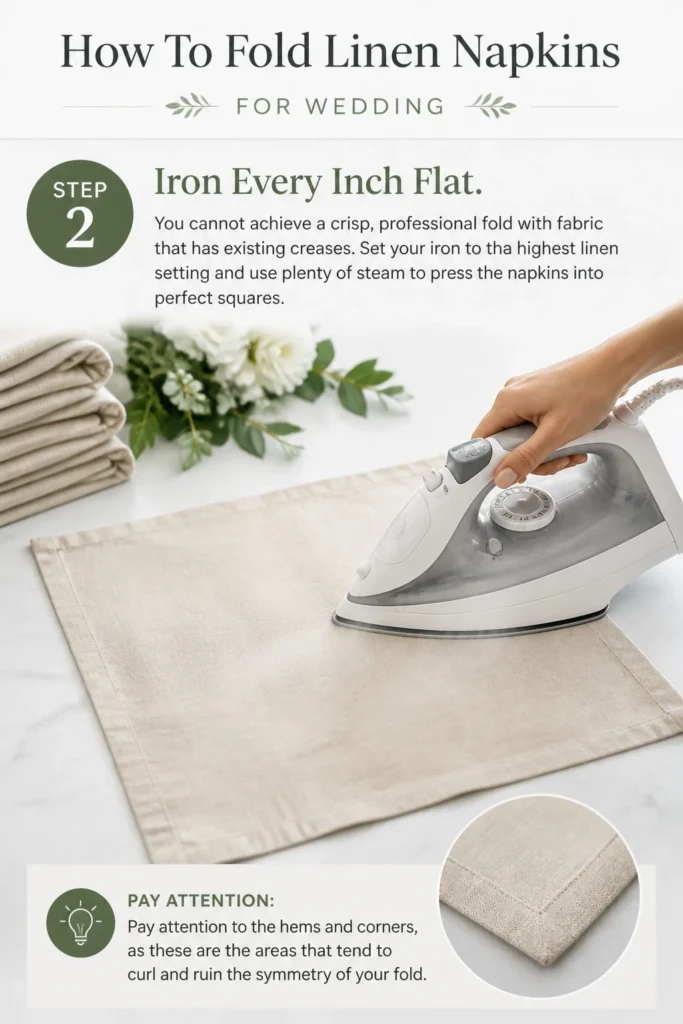
Set your iron to the highest linen setting and use plenty of steam to press the napkins into perfect squares.
Pay attention to the hems and corners, as these are the areas that tend to curl and ruin the symmetry of your fold.
Step 3: Lay the Napkin Flat and Face Down
Place the napkin on your table so the “wrong side” or the side with the hem visible is facing up toward you.
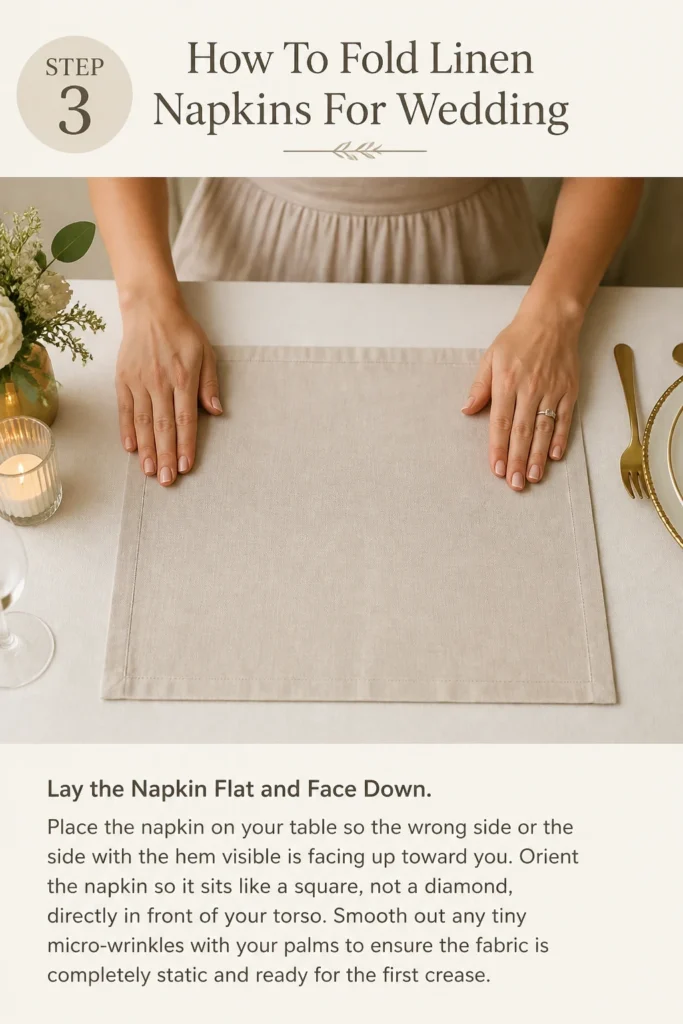
Orient the napkin so it sits like a square, not a diamond, directly in front of your torso.
Smooth out any tiny micro-wrinkles with your palms to ensure the fabric is completely static and ready for the first crease.
Step 4: Execute the First Horizontal Fold
Take the bottom edge of the napkin and bring it up to meet the top edge perfectly.
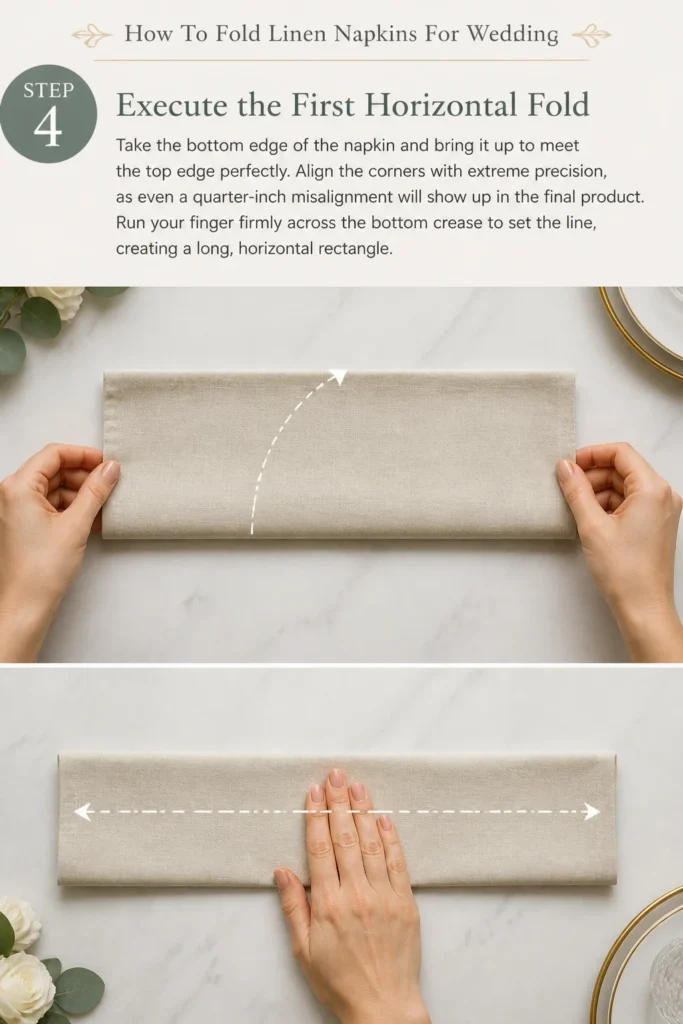
Align the corners with extreme precision, as even a quarter-inch misalignment will show up in the final product.
Run your finger firmly across the bottom crease to set the line, creating a long, horizontal rectangle.
Step 5: Create the Square Base
Take the right side of the rectangle and fold it over to the left side.
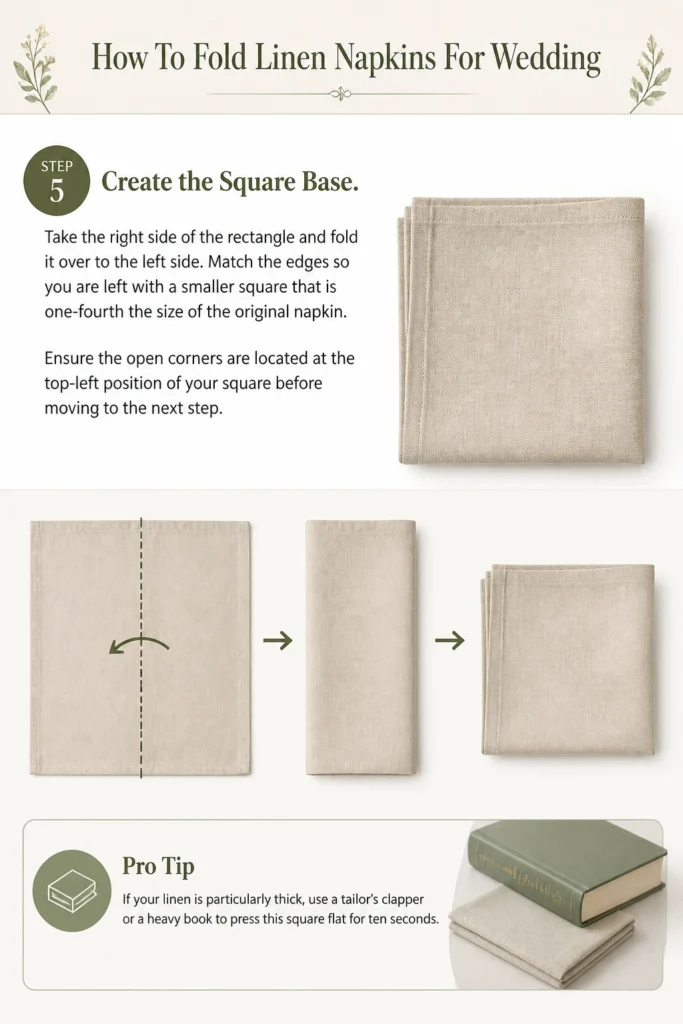
Match the edges so you are left with a smaller square that is one-fourth the size of the original napkin.
Ensure the open corners are located at the top-left position of your square before moving to the next step.
Pro Tip: If your linen is particularly thick, use a tailor’s clapper or a heavy book to press this square flat for ten seconds.
Step 6: Roll the First Diagonal Layer
Locate the top-most layer of fabric at the top-left corner and peel it back toward the bottom-right corner.
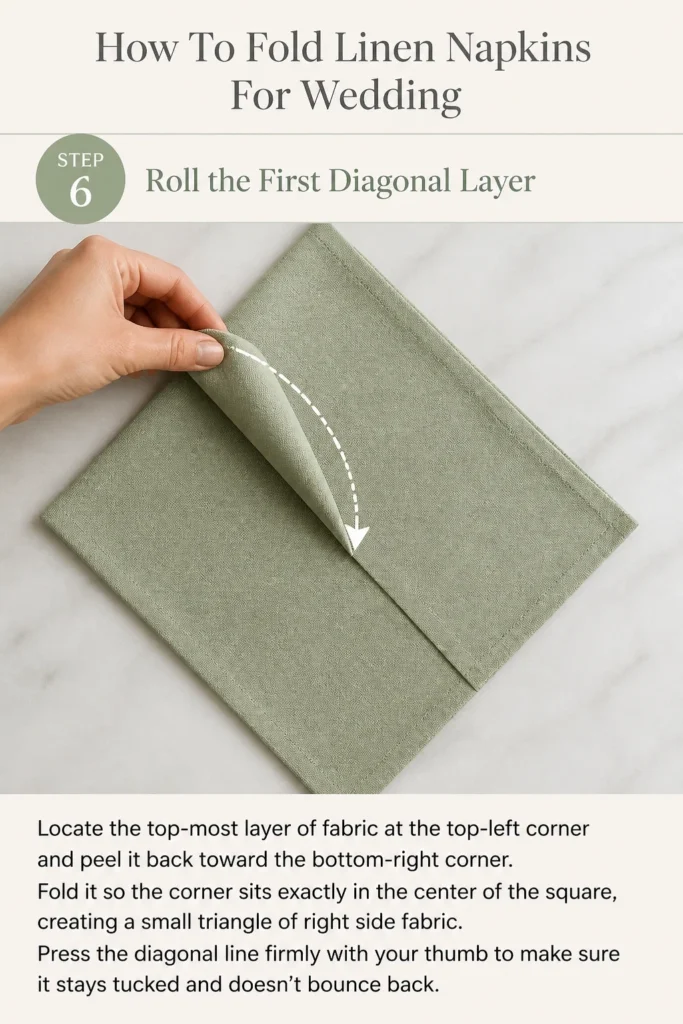
Fold it so the corner sits exactly in the center of the square, creating a small triangle of “right side” fabric.
Press the diagonal line firmly with your thumb to make sure it stays tucked and doesn’t bounce back.
Step 7: Create the Second Pocket Layer
Pick up the second layer of fabric from that same top-left corner and fold it toward the bottom-right.
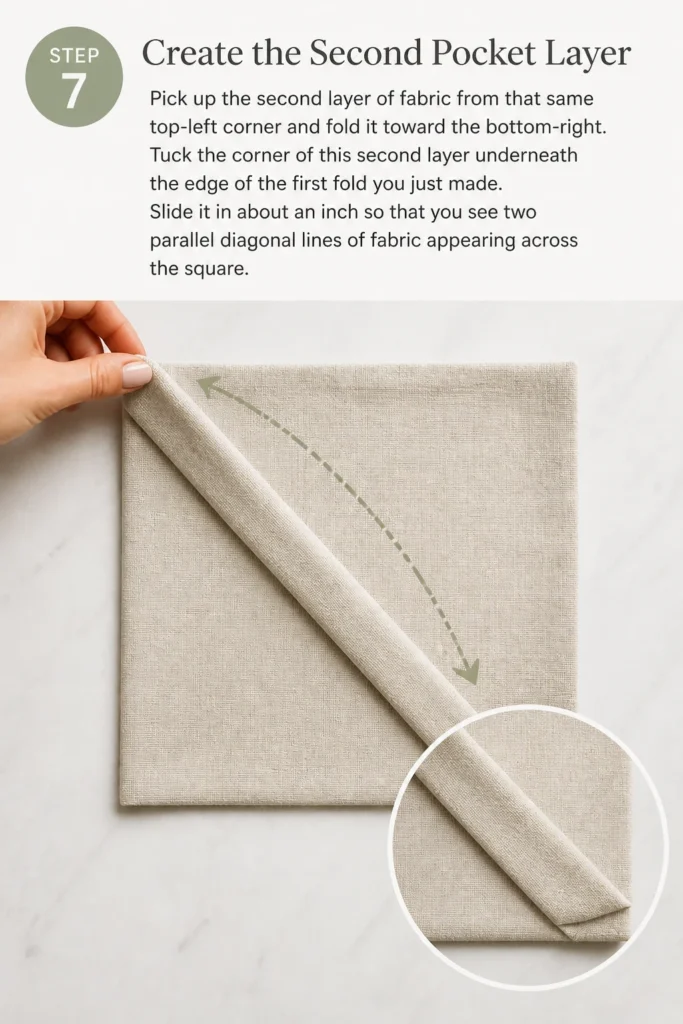
Tuck the corner of this second layer underneath the edge of the first fold you just made.
Slide it in about an inch so that you see two parallel diagonal lines of fabric appearing across the square.
Step 8: Form the Third Decorative Tier
Repeat the process with the third layer of fabric, folding it down toward the bottom-right corner.
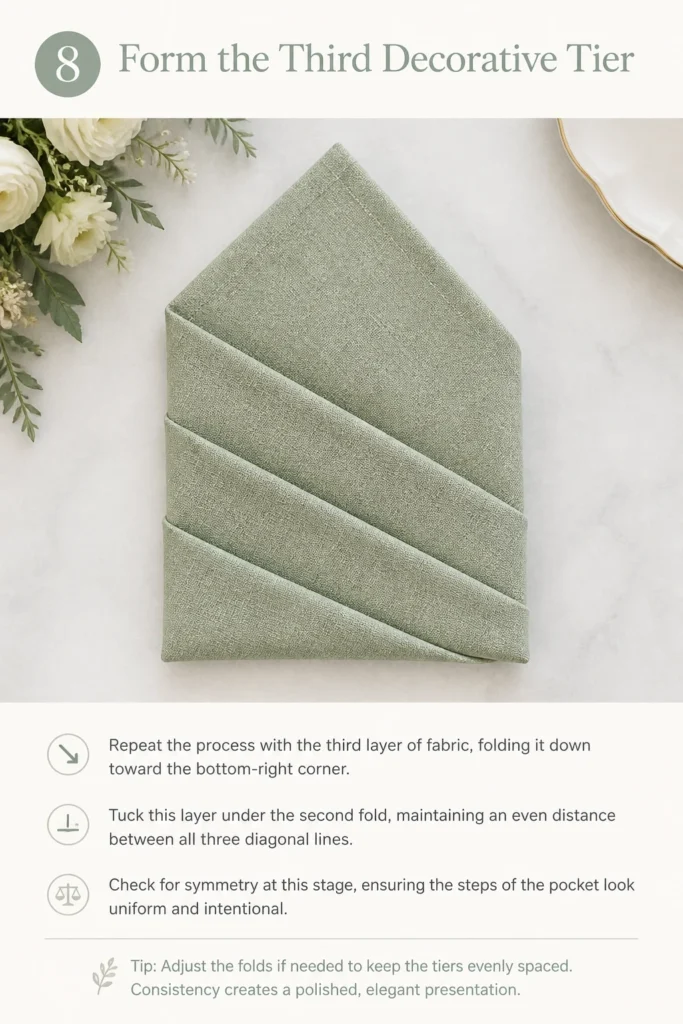
Tuck this layer under the second fold, maintaining an even distance between all three diagonal lines.
Check for symmetry at this stage, ensuring the “steps” of the pocket look uniform and intentional.
Step 9: Secure the Back and Sides
Carefully flip the entire napkin over so the pocket side is now face down on the table.
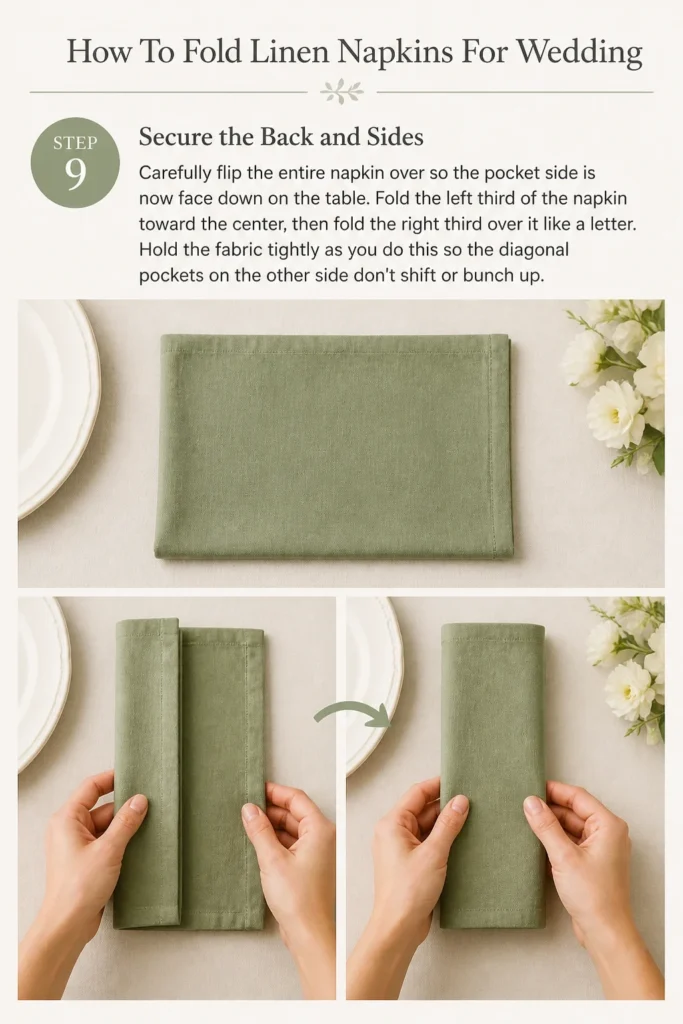
Fold the left third of the napkin toward the center, then fold the right third over it like a letter.
Hold the fabric tightly as you do this so the diagonal pockets on the other side don’t shift or bunch up.
Step 10: The Final Flip and Press
Turn the napkin back over to reveal your finished triple pocket design.
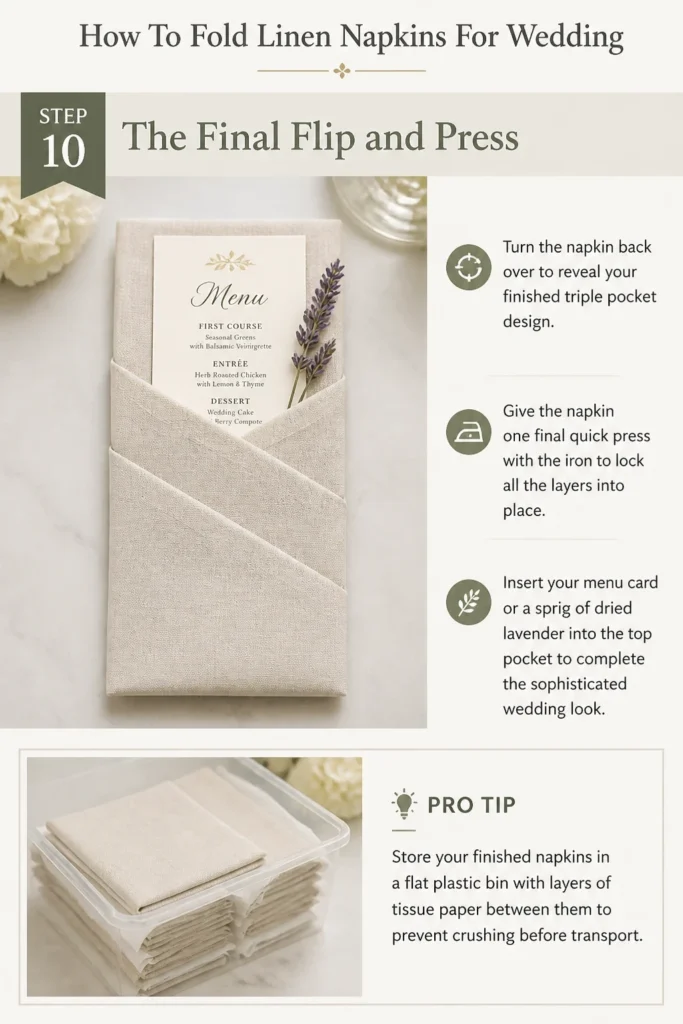
Give the napkin one final quick press with the iron to lock all the layers into place.
Insert your menu card or a sprig of dried lavender into the top pocket to complete the sophisticated wedding look.
Pro Tip: Store your finished napkins in a flat plastic bin with layers of tissue paper between them to prevent crushing before transport.
Common Mistakes to Avoid
Using Synthetic Fabric Blends
Polyester or high-synthetic blends do not hold a crease well and will often “spring” open after you fold them. Pure linen or high-percentage cotton-linen blends are essential for wedding folds that need to stay sharp throughout a long reception.
Ignoring the Fabric Grain
If you fold against the natural weave of the linen, the napkin will often look skewed or warped. Always try to align your folds with the vertical and horizontal threads of the fabric to maintain a perfectly straight silhouette.
Over-Starching the Linen
While starch is helpful, too much can make the linen feel brittle or even leave white flakes on dark-colored napkins. Use a fine mist from a distance and allow it to penetrate the fibers before applying the heat of the iron.
Folding Damp Napkins
If there is any moisture left in the fibers when you stack the napkins, they will develop a “musty” smell very quickly. Ensure every napkin is bone-dry and cooled down from the iron before placing it in a storage container.
Troubleshooting
The Pockets Are Uneven
This usually happens because the original napkin wasn’t a perfect square to begin with. Measure your napkins before you start; if they are slightly rectangular, you will need to adjust your initial folds to compensate for the extra fabric.
The Linen Keeps Sliding
Polished wood or glass tables can be very slippery for linen folding. Try placing a clean, thin cotton sheet or a large yoga mat over your workspace to provide a bit of “grip” while you are manipulating the fabric.
The Corners Are Frayed
Linen is prone to fraying if the hem isn’t high quality. If you notice loose threads, use a small pair of embroidery scissors to snip them cleanly rather than pulling them, which can cause the fabric to bunch.
Key Takeaways
- Always start with a freshly laundered and heavily steamed napkin for the best results.
- Precision in the first two folds determines the success of the entire design.
- The Triple Pocket fold is ideal for weddings as it serves a functional purpose for menus.
- Spray starch is your best friend when working with soft, floppy linen.
- Store finished napkins flat and never stack them too high to avoid crushing the bottom layers.
- Consistency is key; try to have the same person fold all the napkins for a uniform look.
Frequently Asked Questions
What size napkin is best for a wedding?
Standard dinner napkins for weddings are usually 20×20 inches or 22×22 inches. These sizes provide enough fabric to create intricate folds without the napkin looking too bulky on the dinner plate.
How far in advance can I fold my napkins?
You can safely fold your napkins up to three days before the wedding. Just make sure they are stored in a cool, dry place away from direct sunlight to prevent any fading or moisture buildup.
Should I use a napkin ring with a Triple Pocket fold?
Generally, the Triple Pocket fold is designed to stand alone on the plate. Adding a napkin ring can crush the pockets and make it difficult to insert a menu or cutlery, so it is best to choose one or the other.
Can I fold napkins that are not perfectly square?
It is much more difficult, but possible. You will need to fold over the excess edge during the first step to create a “faux square” before proceeding with the rest of the instructions.
Our Top Recommended Finds
- Heavyweight Pure Linen Napkins: Look for a GSM (grams per square meter) of 200 or higher for a luxurious feel that holds its shape.
- Professional Grade Spray Starch: A “heavy” or “extra crisp” formula works best for wedding linens that need to stand up through the night.
- Digital Steam Iron: Choose one with a dedicated linen setting to ensure the temperature is high enough to remove stubborn flax creases.
Mastering Your Wedding Tablescape
Now that you have mastered the art of the linen fold, you are ready to transform your reception space into something truly memorable.
The Triple Pocket fold is just the beginning of what you can achieve with a bit of patience and high-quality fabric.
Consider experimenting with different textures, such as stone-washed linen for a rustic look or crisp white damask for a formal black-tie affair.
Take your newly acquired skills and do a “mock-up” table setting today to see how your napkins interact with your plates and glassware.
With these techniques in your repertoire, your wedding tables will reflect the care and elegance that the occasion deserves.
Wedding Planning
No fluff, no drama. Just easy weekly advice, planning shortcuts, and gentle reminders to help you actually enjoy your engagement.