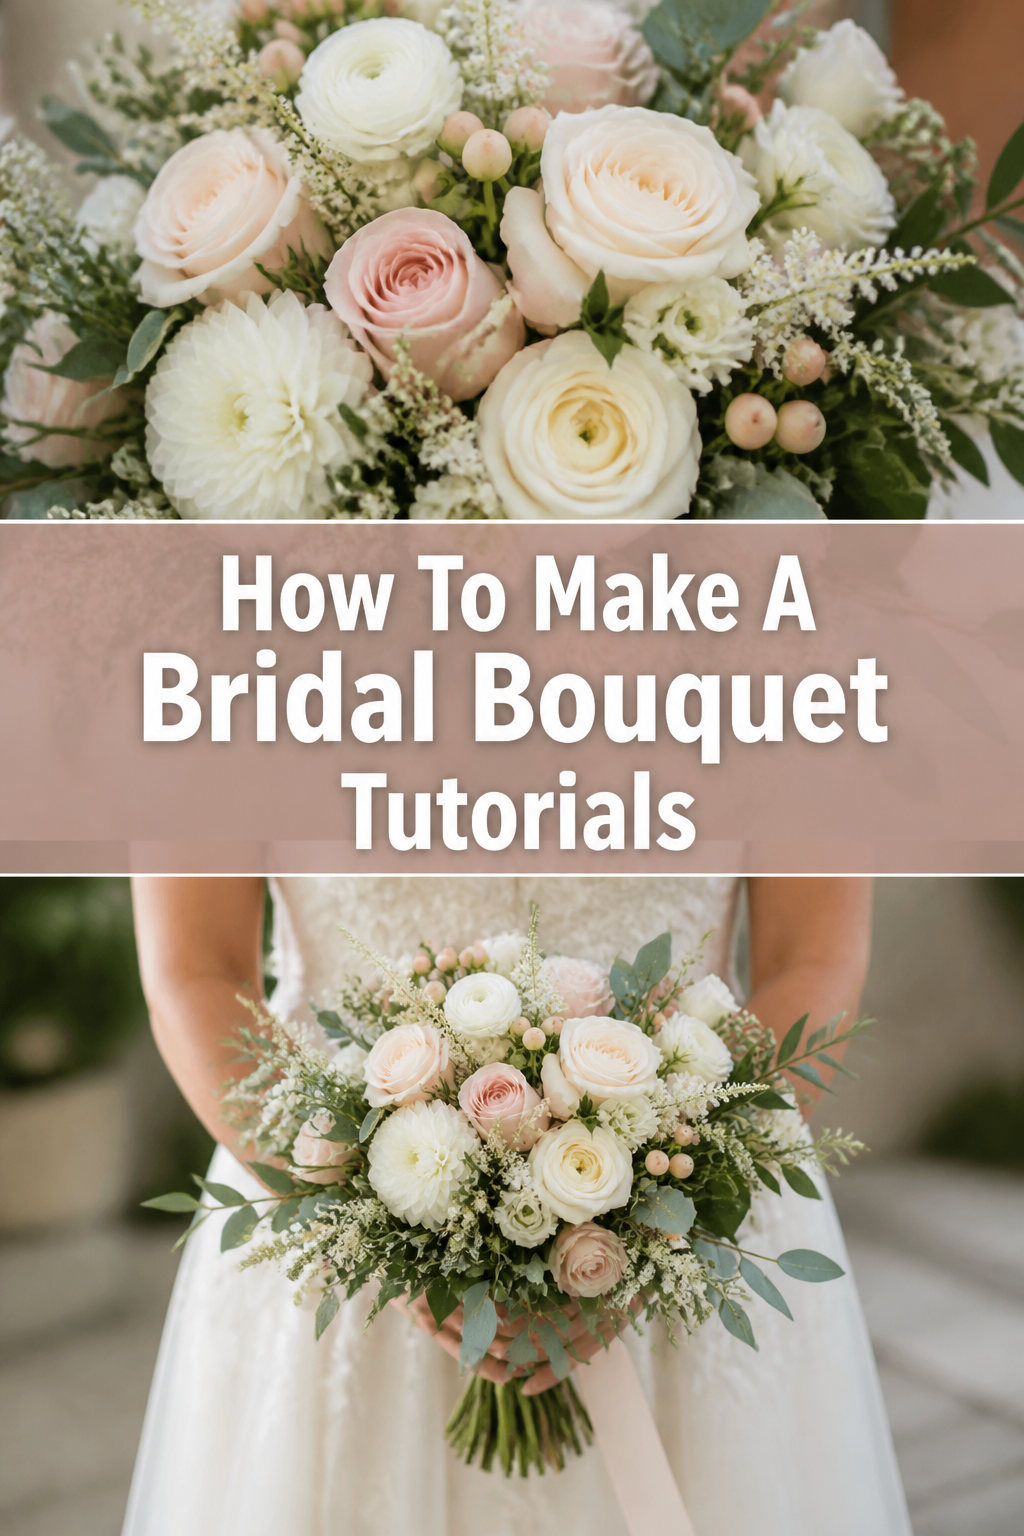
💐 How To Make A Bridal Bouquet Tutorials
Creating your own wedding flowers is a beautiful way to personalize your big day while saving a significant portion of your budget.
I remember the quiet joy of assembling my first hand-tied bouquet for a friend’s backyard ceremony, realizing that the process is just as meaningful as the final product.
This guide uses my years of floral design experience to help you craft a professional-looking arrangement with confidence and grace.
Quick Overview
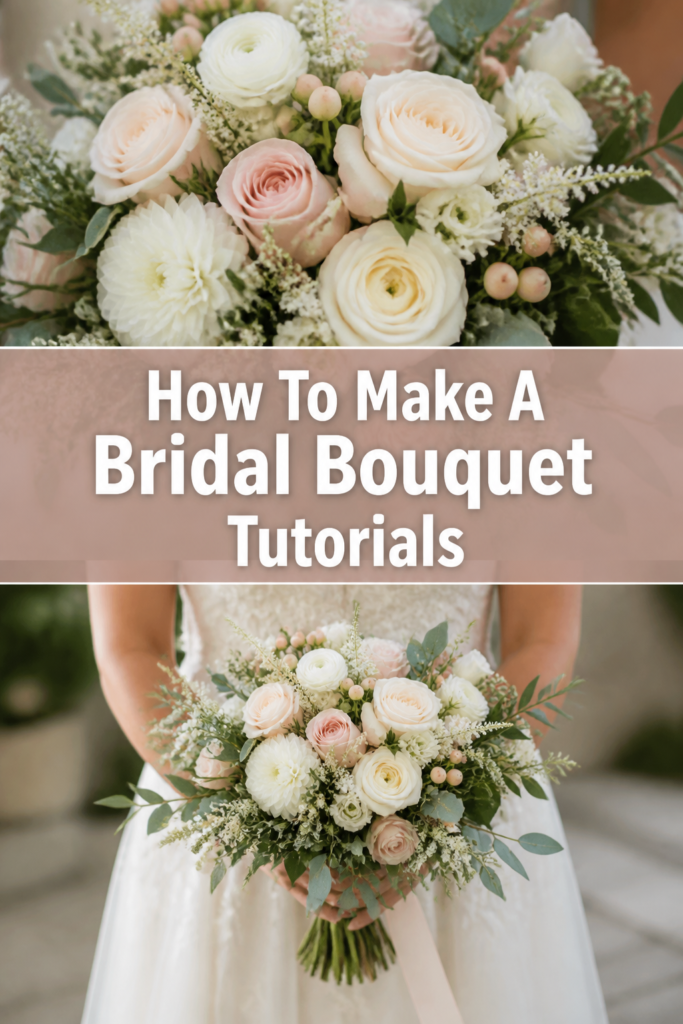
This tutorial will guide you through the process of selecting, prepping, and assembling a classic hand-tied bridal bouquet from scratch.
- Time needed: 60 to 90 minutes (plus overnight hydration)
- Difficulty: Intermediate
- What you’ll need: Focal flowers, filler flowers, greenery, floral shears, floral tape, ribbon, and pins.
Step-by-Step Instructions
Step 1: Choose Your Floral Palette
Select a color scheme that complements your wedding theme and the season of your nuptials.
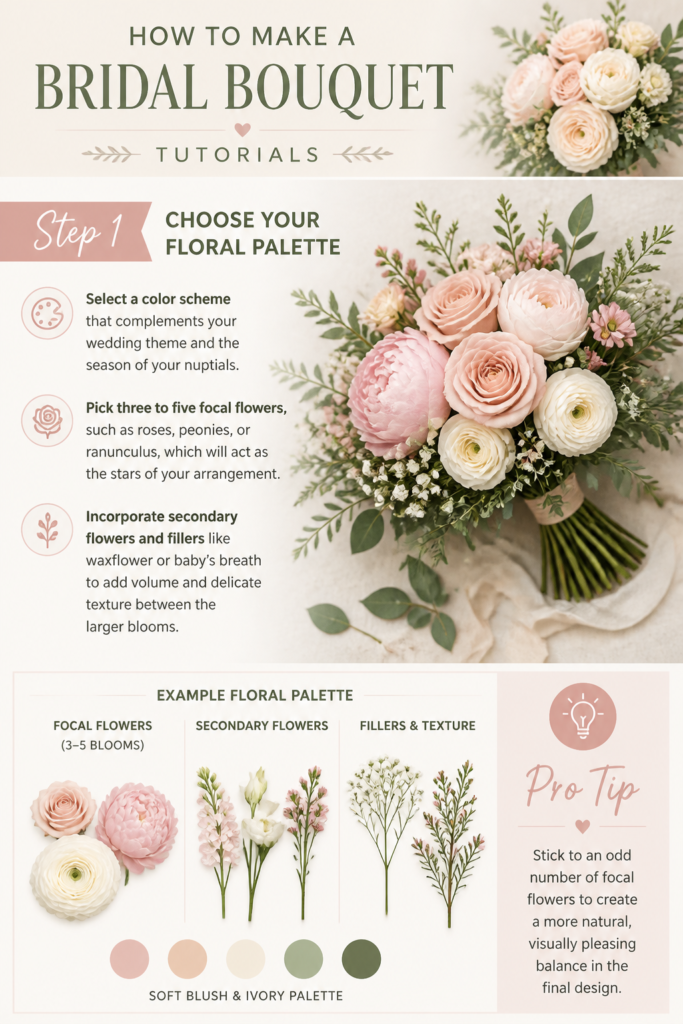
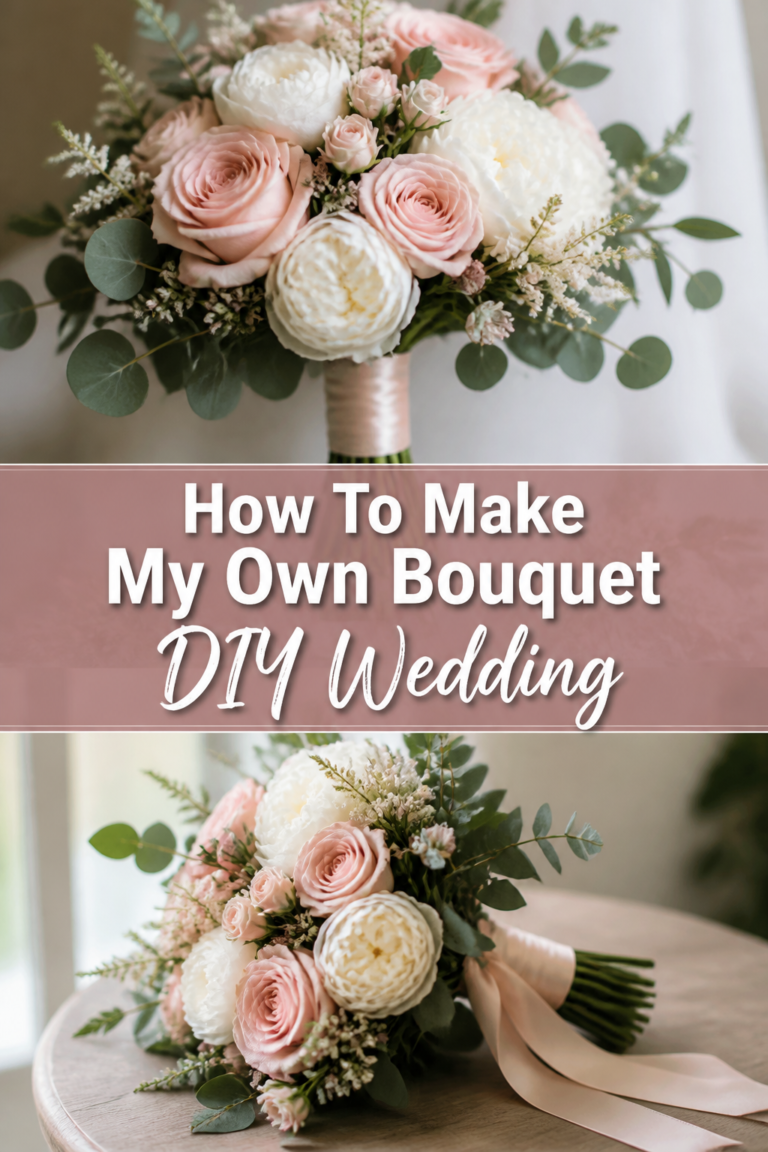
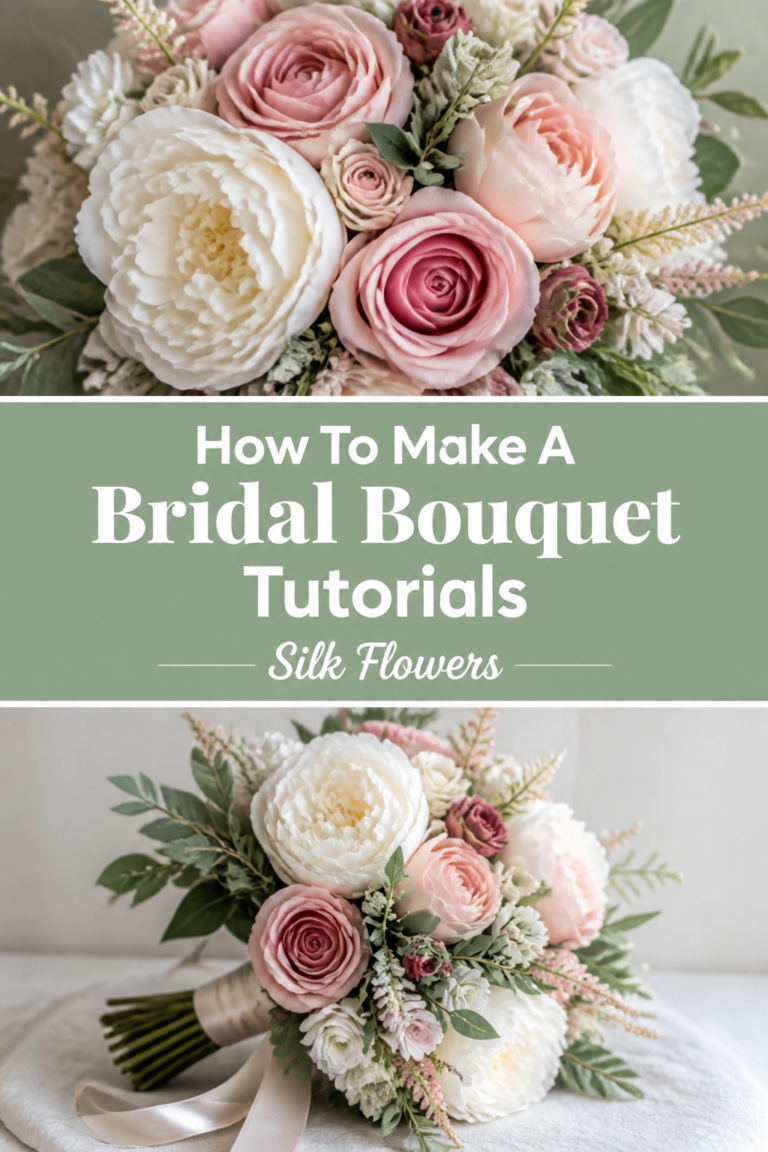
Pick three to five “focal” flowers, such as roses, peonies, or ranunculus, which will act as the stars of your arrangement.
Incorporate secondary flowers and “fillers” like waxflower or baby’s breath to add volume and delicate texture between the larger blooms.
Pro Tip: Stick to an odd number of focal flowers to create a more natural, visually pleasing balance in the final design.
Step 2: Prepare and Condition the Stems
Remove all foliage and thorns from the bottom two-thirds of every stem to ensure a clean handle and prevent bacteria growth in the water.
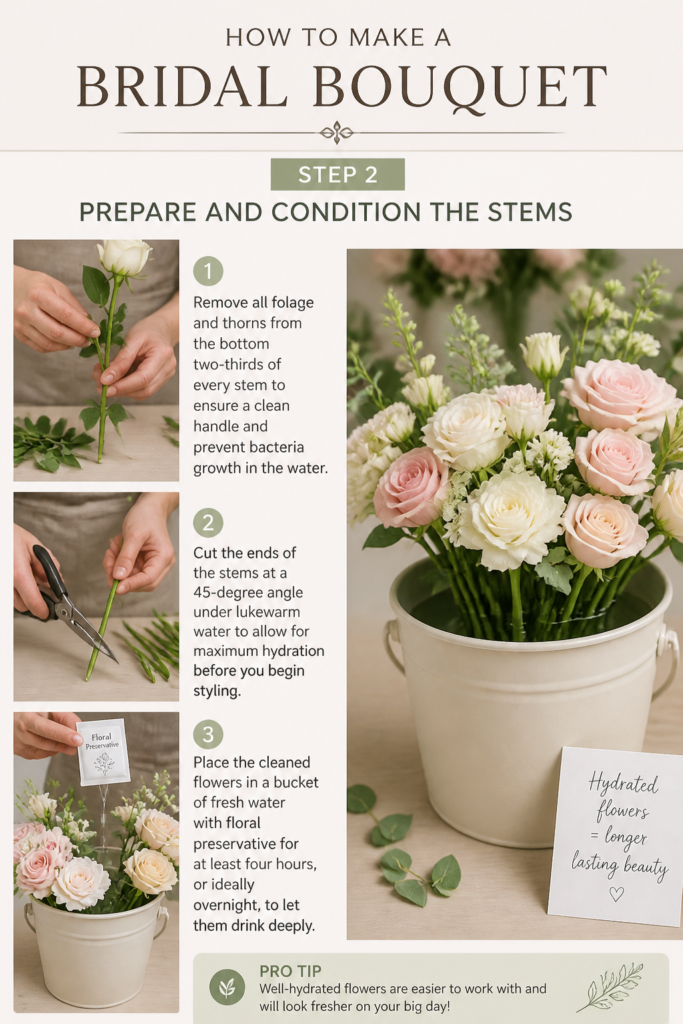
Cut the ends of the stems at a 45-degree angle under lukewarm water to allow for maximum hydration before you begin styling.
Place the cleaned flowers in a bucket of fresh water with floral preservative for at least four hours, or ideally overnight, to let them drink deeply.
Step 3: Establish the Greenery Base
Start by holding two or three stems of greenery, such as eucalyptus or ruscus, in your non-dominant hand to create a structural frame.
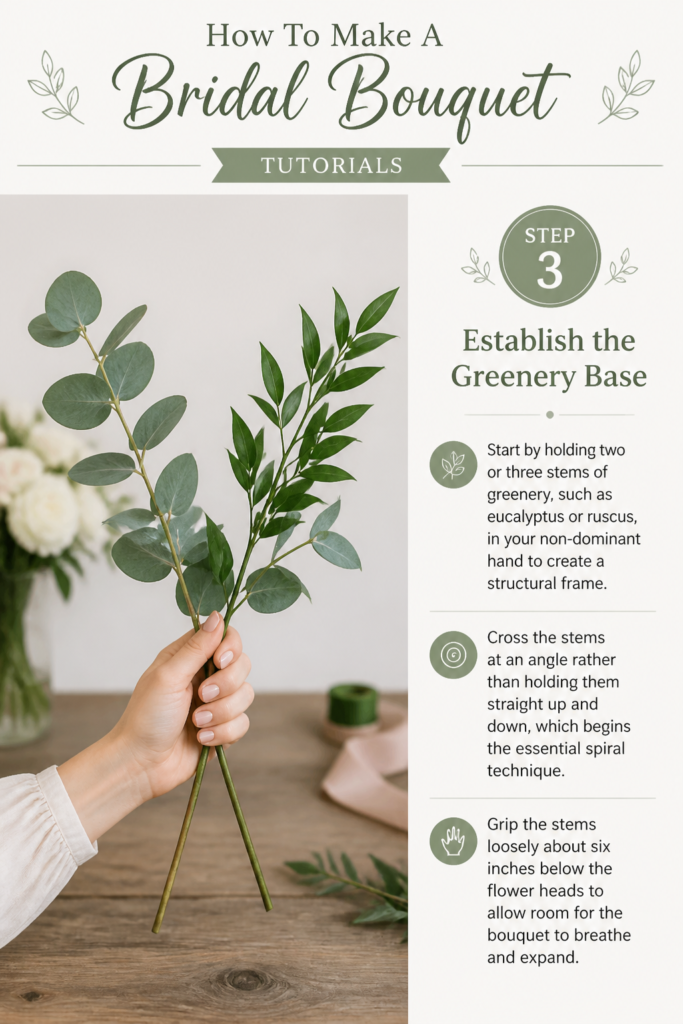
Cross the stems at an angle rather than holding them straight up and down, which begins the essential “spiral” technique.
Grip the stems loosely about six inches below the flower heads to allow room for the bouquet to breathe and expand.
Step 4: Place Your Focal Flowers
Insert your largest, most beautiful bloom into the center of the greenery base to serve as the anchor for the entire arrangement.
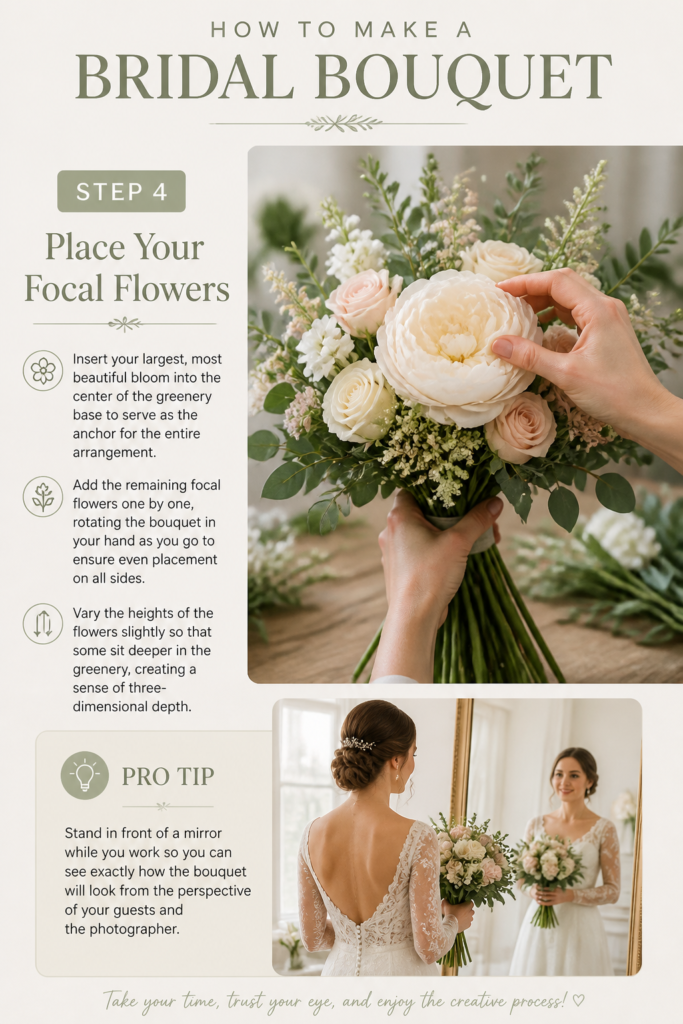
Add the remaining focal flowers one by one, rotating the bouquet in your hand as you go to ensure even placement on all sides.
Vary the heights of the flowers slightly so that some sit deeper in the greenery, creating a sense of three-dimensional depth.
Pro Tip: Stand in front of a mirror while you work so you can see exactly how the bouquet will look from the perspective of your guests and the photographer.
Step 5: Integrate Fillers and Textures
Tuck smaller filler flowers into the gaps between your focal blooms to hide the stems and add pops of contrasting color.
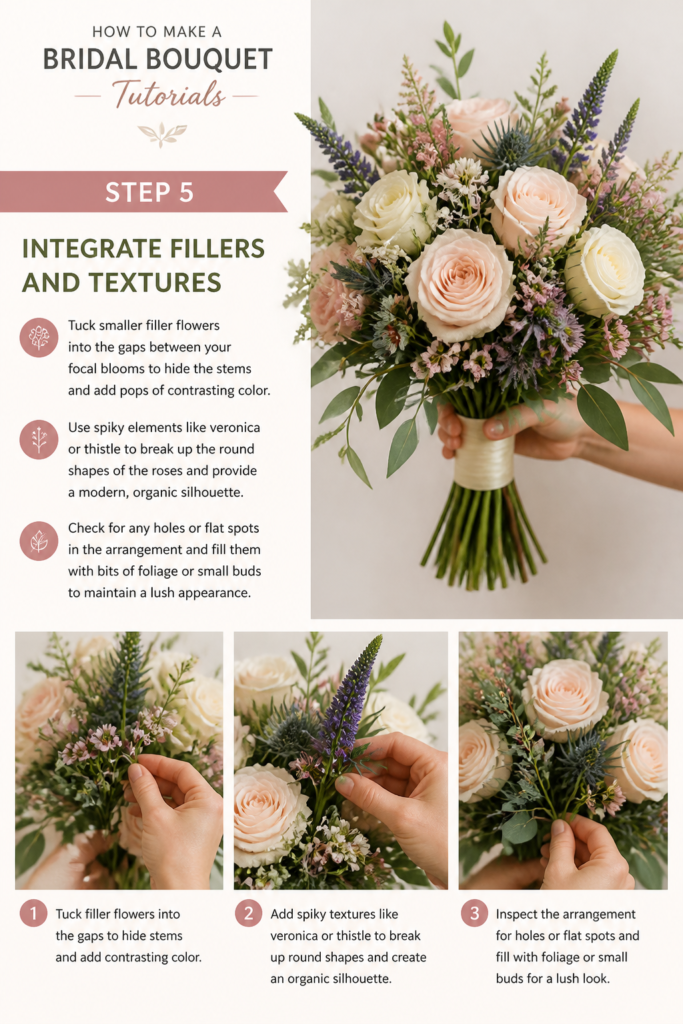
Use “spiky” elements like veronica or thistle to break up the round shapes of the roses and provide a modern, organic silhouette.
Check for any “holes” or flat spots in the arrangement and fill them with bits of foliage or small buds to maintain a lush appearance.
Step 6: Master the Spiral Technique
Angle every new stem you add in the same direction, crossing them over the existing stems at the point where your hand is gripping.
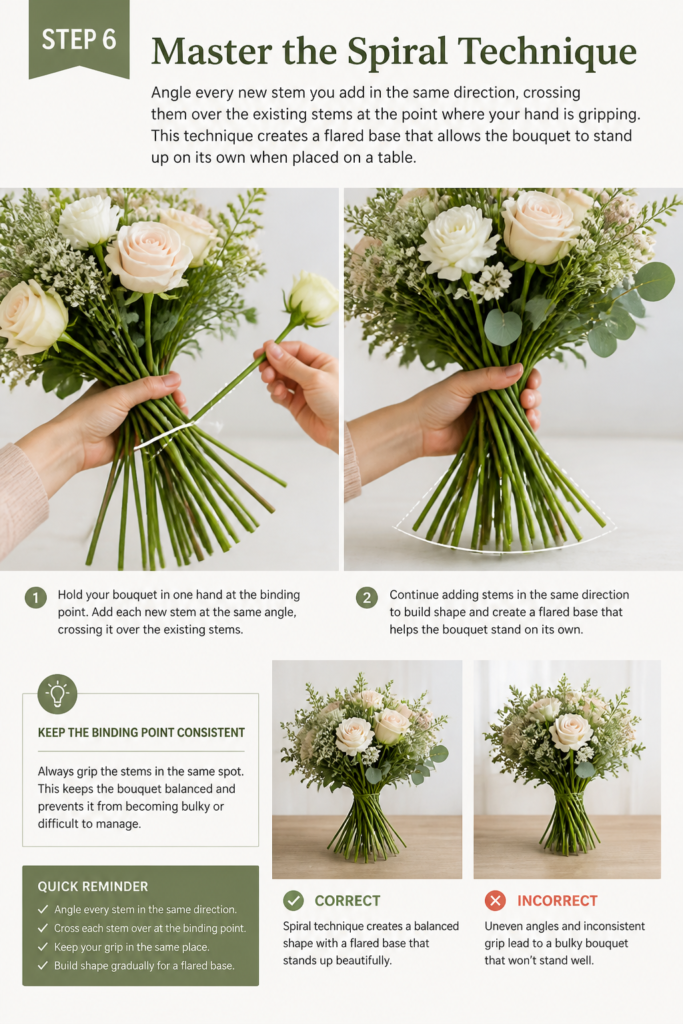
This technique creates a flared base that allows the bouquet to stand up on its own when placed on a table.
Ensure that the “binding point” (where you are holding the stems) remains consistent so the bouquet doesn’t become bulky or difficult to manage.
Step 7: Secure the Stems with Tape
Wrap waterproof floral tape around the binding point several times, pulling it tight so the adhesive activates and holds the stems firmly.
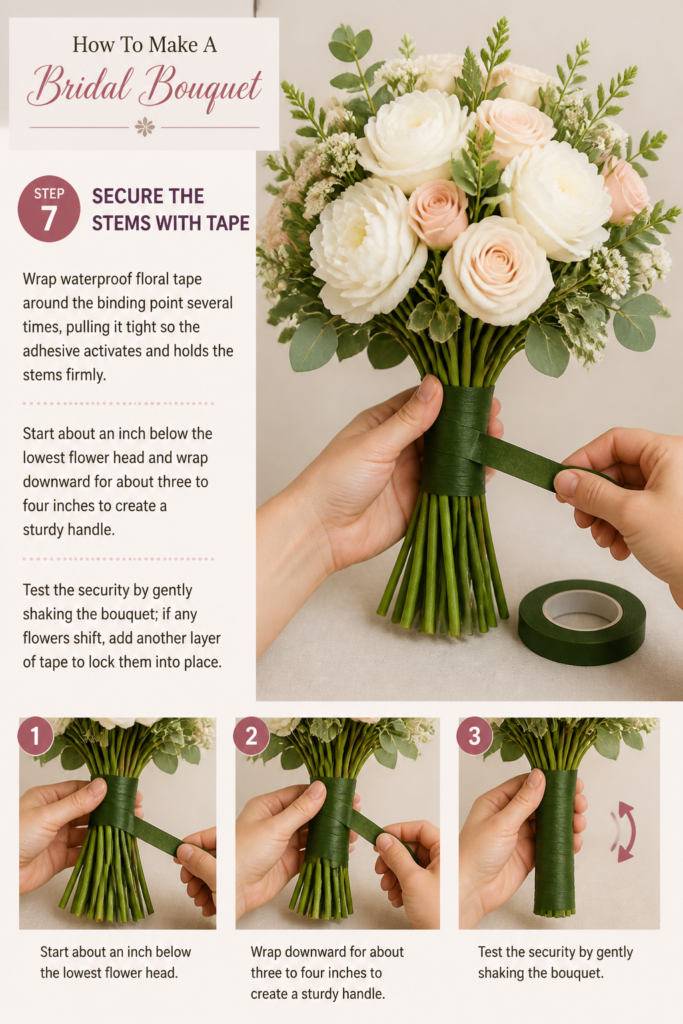
Start about an inch below the lowest flower head and wrap downward for about three to four inches to create a sturdy handle.
Test the security by gently shaking the bouquet; if any flowers shift, add another layer of tape to lock them into place.
Step 8: Trim the Handle to Size
Cut the bottom of the stems so the handle is approximately six to eight inches long, or roughly the width of two hands stacked.
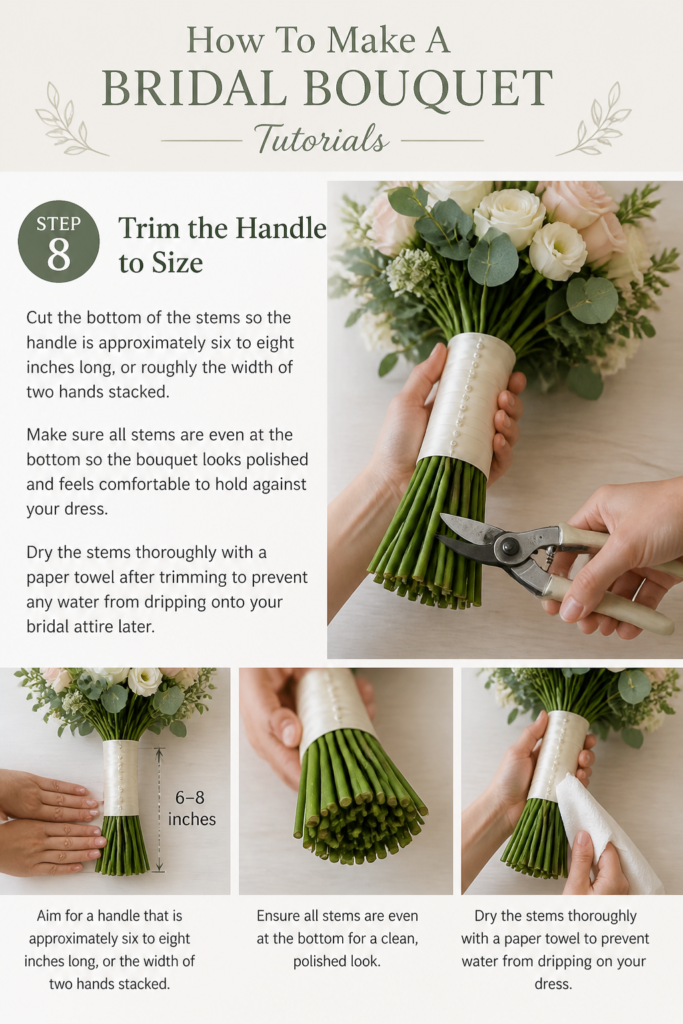
Make sure all stems are even at the bottom so the bouquet looks polished and feels comfortable to hold against your dress.
Dry the stems thoroughly with a paper towel after trimming to prevent any water from dripping onto your bridal attire later.
Step 9: Apply the Decorative Ribbon
Pin the end of your chosen ribbon to the top of the taped area and wrap it downward in overlapping layers to hide the floral tape completely.
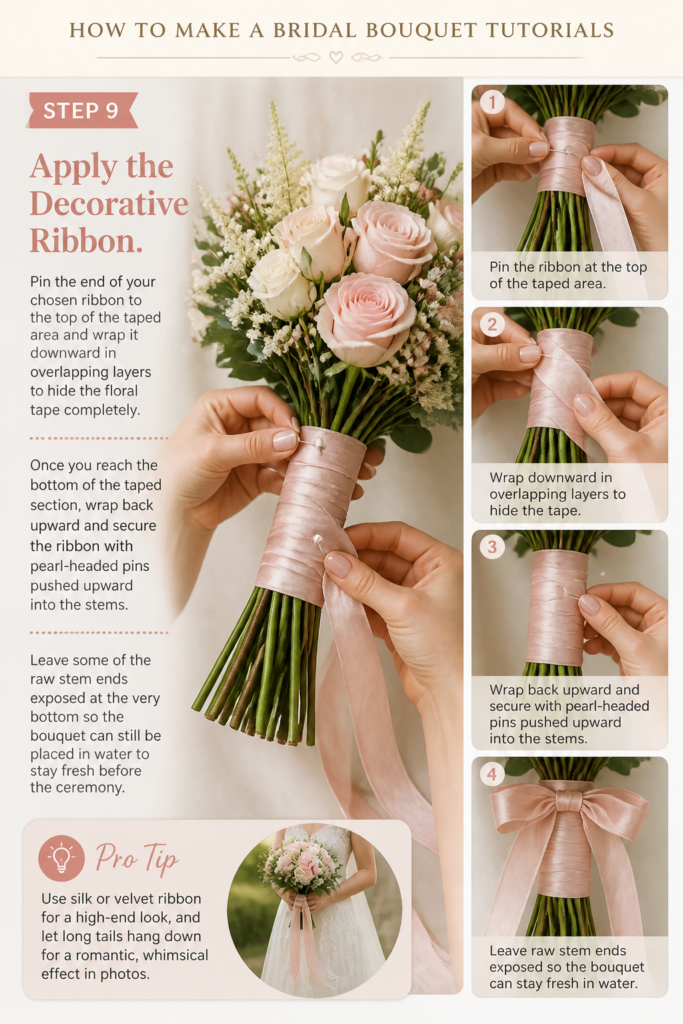
Once you reach the bottom of the taped section, wrap back upward and secure the ribbon with pearl-headed pins pushed upward into the stems.
Leave some of the raw stem ends exposed at the very bottom so the bouquet can still be placed in water to stay fresh before the ceremony.
Pro Tip: Use silk or velvet ribbon for a high-end look, and let long “tails” hang down for a romantic, whimsical effect in photos.
Step 10: Final Hydration and Storage
Place the finished bouquet in a clean vase with only an inch or two of water, ensuring the ribbon stays completely dry.
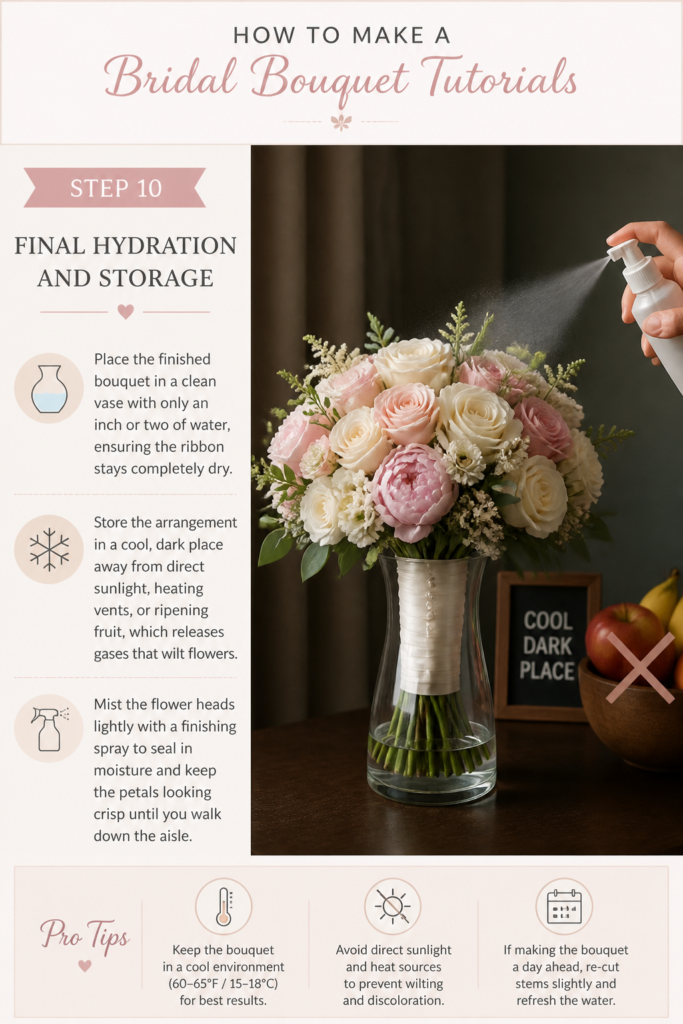
Store the arrangement in a cool, dark place away from direct sunlight, heating vents, or ripening fruit, which releases gases that wilt flowers.
Mist the flower heads lightly with a finishing spray to seal in moisture and keep the petals looking crisp until you walk down the aisle.
Common Mistakes to Avoid
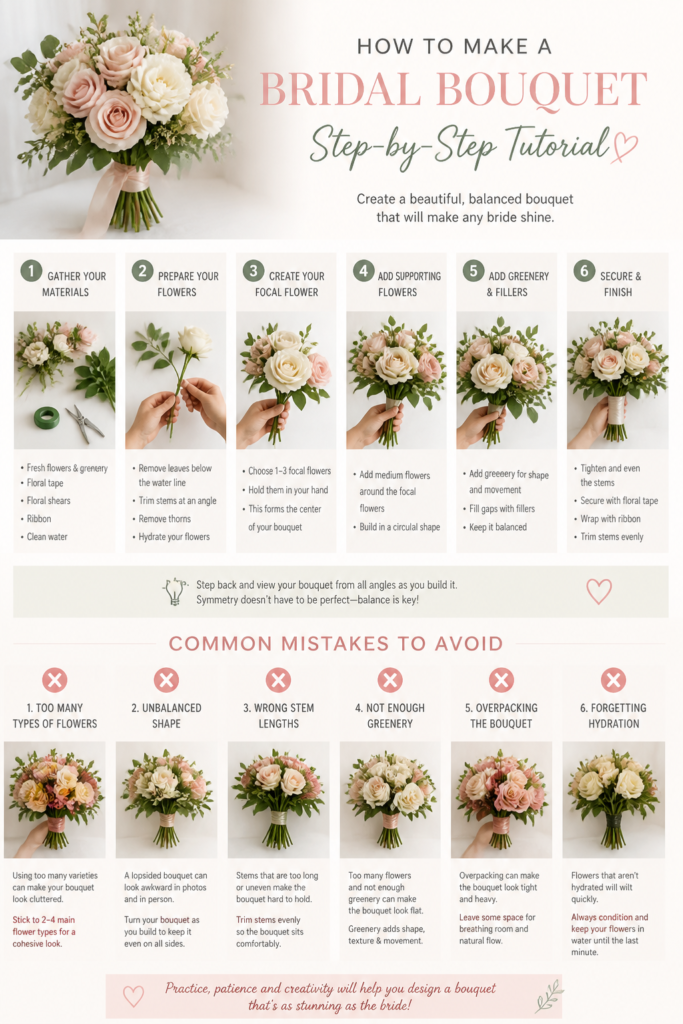
Using Fragile Flowers Without Support
Many brides choose delicate flowers like sweet peas or hydrangeas without realizing how quickly they wilt when out of water. These blooms require specific hydration techniques or “water picks” to stay upright throughout a long wedding day. If you choose thirsty flowers, you must keep them in a vase until the very moment you start your photos.
Creating an Oversized Arrangement
It is easy to get carried away and keep adding flowers until the bouquet becomes heavy and cumbersome. A bouquet that is too large can hide the beautiful details of your wedding dress and cause arm fatigue during the ceremony. Aim for a size that feels balanced with your frame and allows you to hold it naturally at hip level.
Forgetting to Strip the Lower Foliage
Leaving leaves on the stems below the binding point creates a bulky, messy handle that is difficult to wrap with ribbon. More importantly, submerged leaves rot quickly and create bacteria that will kill your flowers before the reception starts. Always take the time to strip every stem until it is completely smooth in the handle area.
Cutting the Stems Too Short Too Soon
Beginners often trim the stems to their final length before they have finished assembling the bouquet. This is a mistake because you lose the leverage needed to move flowers around within the grip. Keep your stems long during the entire assembly process and only perform the final trim once the tape is securely in place.
Troubleshooting
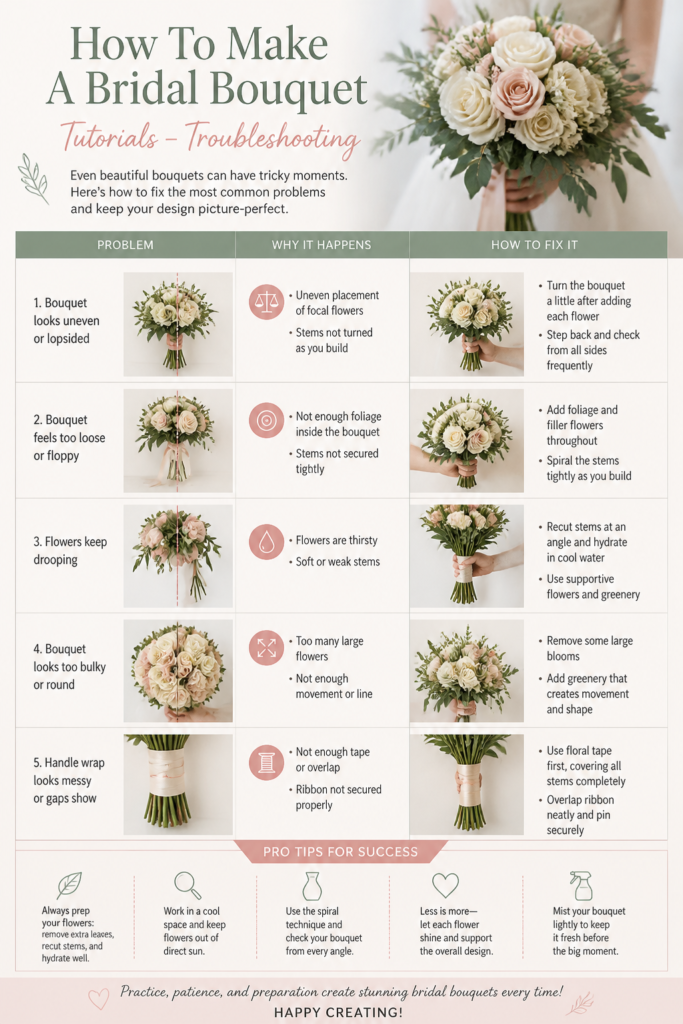
Drooping Flower Heads
If a heavy flower like a rose or peony begins to droop, it usually means the stem is weak or the flower is dehydrated. You can fix this by inserting a thin floral wire up through the stem and into the base of the flower head to provide internal support. Alternatively, try to nestle the drooping bloom between two sturdier flowers to prop it up naturally.
The Bouquet Feels Loose or Wobbly
A wobbly bouquet is usually the result of not wrapping the floral tape tightly enough or having a binding point that is too low. To fix this, add a few more stems of greenery to fill the gaps and re-wrap the binding point with fresh tape, pulling it firmly as you go. Make sure your grip is high enough toward the flower heads to maintain control over the shape.
Brown Edges on Petals
Brown or bruised edges often occur from over-handling the flowers or exposure to heat. Carefully peel away the outermost “guard petals” of roses to reveal the pristine bloom underneath. If the browning is widespread, the flower may be past its prime, and it is best to replace it with a fresh stem from your leftover supply.
Key Takeaways
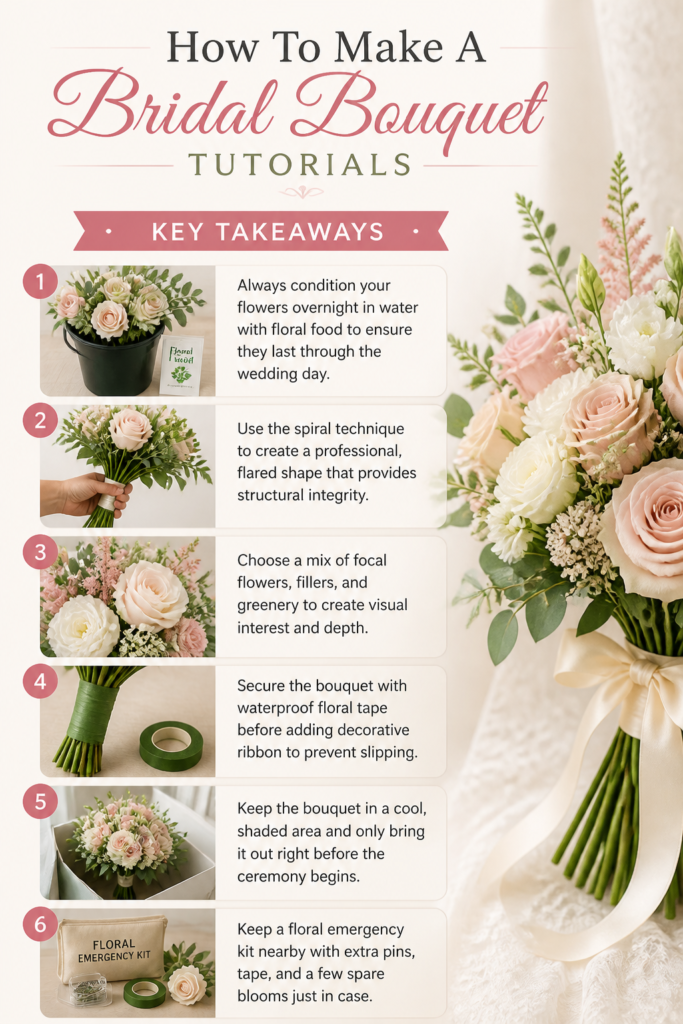
- Always condition your flowers overnight in water with floral food to ensure they last through the wedding day.
- Use the spiral technique to create a professional, flared shape that provides structural integrity.
- Choose a mix of focal flowers, fillers, and greenery to create visual interest and depth.
- Secure the bouquet with waterproof floral tape before adding decorative ribbon to prevent slipping.
- Keep the bouquet in a cool, shaded area and only bring it out right before the ceremony begins.
- Keep a “floral emergency kit” nearby with extra pins, tape, and a few spare blooms just in case.
Frequently Asked Questions
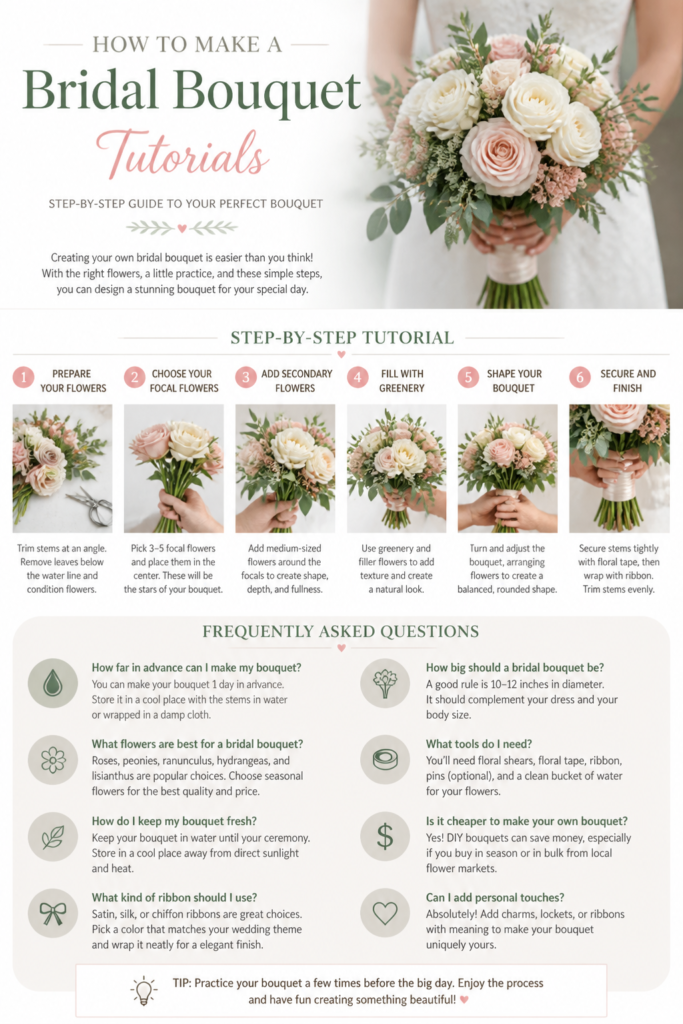
How many days before the wedding should I make my bouquet?
It is best to assemble your bridal bouquet one day before the wedding. This allows the flowers to settle into their shape while remaining fresh. If you make it too early, the blooms may begin to wilt, but making it on the morning of the wedding can add unnecessary stress to your schedule.
Can I make a professional bouquet with grocery store flowers?
Yes, you can absolutely create a stunning arrangement using flowers from a local market or grocery store. The key is to select the freshest bunches available and use the conditioning techniques mentioned in this guide. Focus on choosing a cohesive color palette and removing any damaged petals to elevate the look of affordable blooms.
What is the best way to hold a bridal bouquet?
Most brides tend to hold their bouquet too high, near their chest, which can look tense in photographs. You should hold the bouquet at your belly button or hip level with your elbows slightly bent and relaxed. This position shows off the flowers and the bodice of your dress while creating a more elegant silhouette.
How do I stop the ribbon from getting wet?
The best method is to leave the bottom inch of the stems exposed below the ribbon wrap. When you place the bouquet in a vase of water, only fill the container with an inch of liquid. This ensures the stems can drink without the water ever touching or soaking into the decorative fabric of the handle.
Our Top Recommended Finds
- Professional Grade Floral Shears: High-quality shears provide a clean, sharp cut that prevents crushing the stems, allowing for better water intake.
- Waterproof Floral Tape: This tape is essential because it maintains its grip even if it gets slightly damp during the assembly or storage process.
- Pearl-Headed Floral Pins: These pins are both functional and decorative, securing your ribbon while adding a touch of classic elegance to the handle.
Start Your Floral Design Journey
Now that you understand the fundamental techniques of bouquet construction, you are ready to start practicing with seasonal blooms.
Consider creating a small “toss bouquet” or a few bridesmaid arrangements first to build your muscle memory before tackling the main bridal piece.
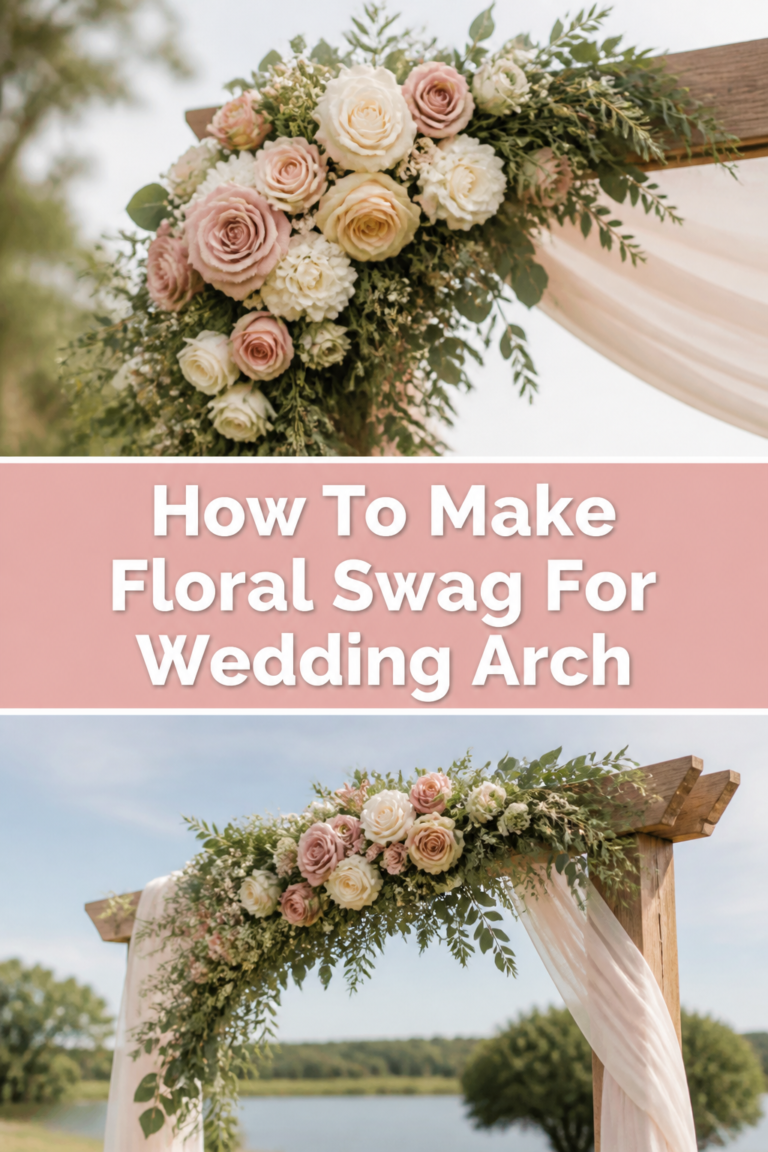
Once you master the hand-tied method, you can explore more advanced topics like creating matching boutonnieres or large-scale floral installations for your reception.
Take your first step today by visiting a local flower market to see which textures and scents inspire your creative vision.