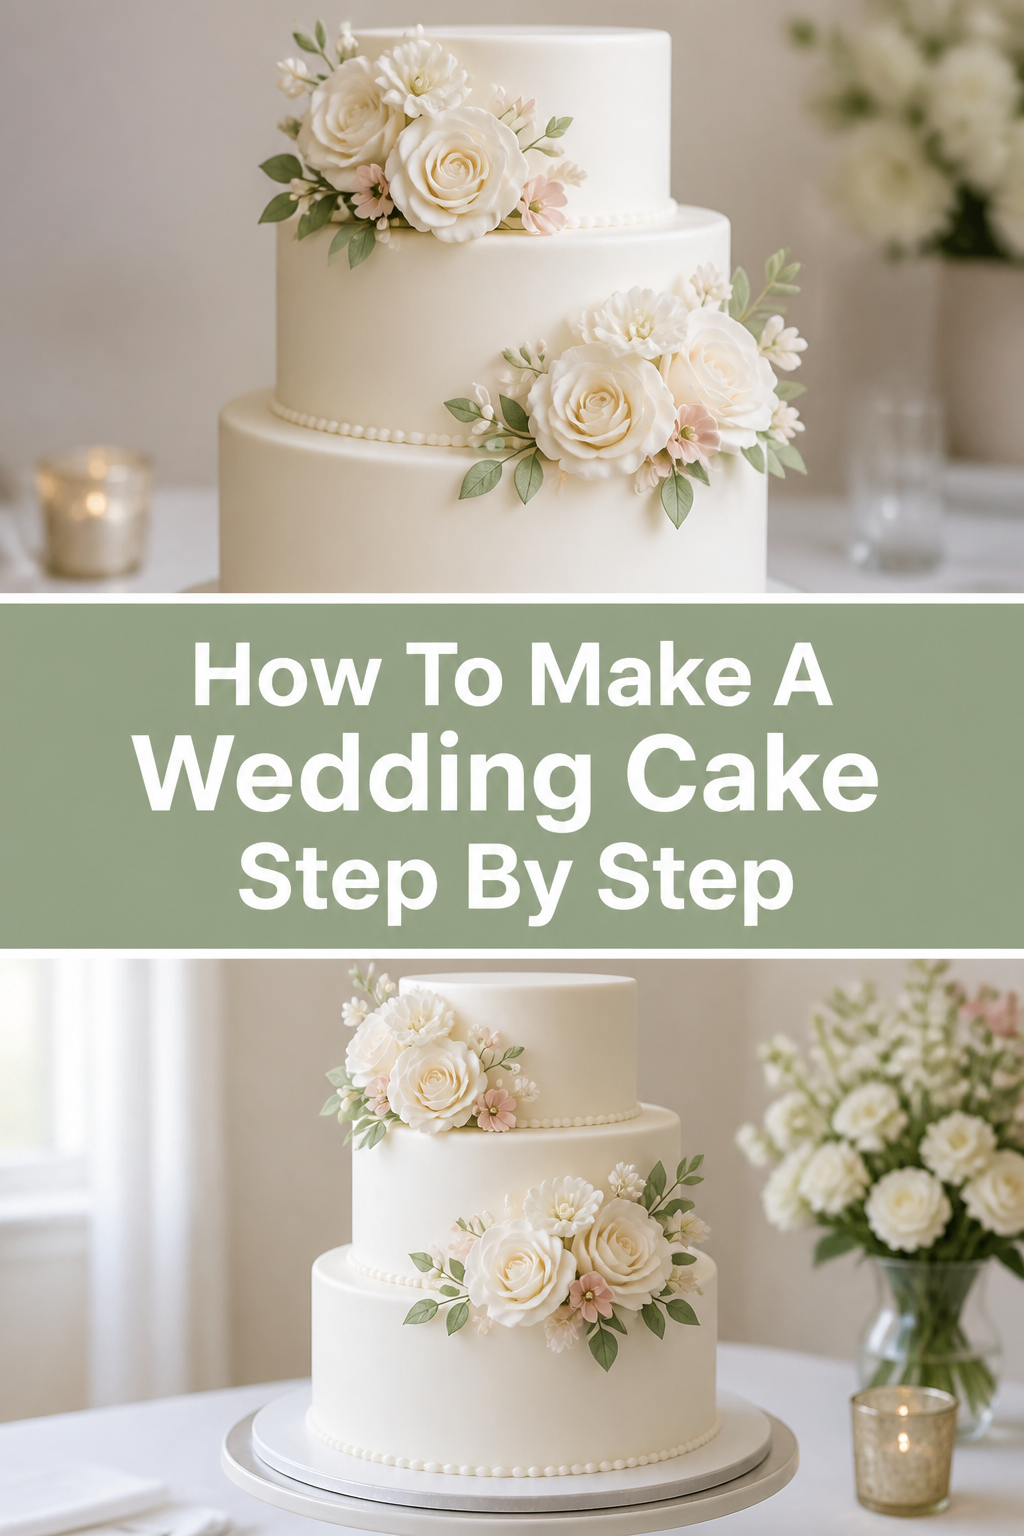
🎂 How To Make A Wedding Cake Step By Step
I still remember the nervous energy I felt when I tackled my very first wedding cake for a close friend’s summer nuptials.
The pressure of creating a centerpiece for such a significant life event can feel overwhelming for any home baker.
After years of perfecting my techniques and navigating several “cake emergencies,” I have developed a reliable system that guarantees a beautiful, stable, and delicious result every time.

Quick Overview
Making a wedding cake is a multi-day project that requires patience, precision, and a bit of bravery when it comes time to stack the layers.
- Time needed: 3 to 4 days (including baking, cooling, and decorating)
- Difficulty: Intermediate
- What you’ll need: Multiple cake pans, a heavy-duty stand mixer, cardboard cake rounds, support dowels, a rotating cake turntable, and an offset spatula.
Step-by-Step Instructions
Step 1: Create a Detailed Plan and Timeline
Success starts long before you crack the first egg, as a wedding cake requires a strict schedule to manage the workload.
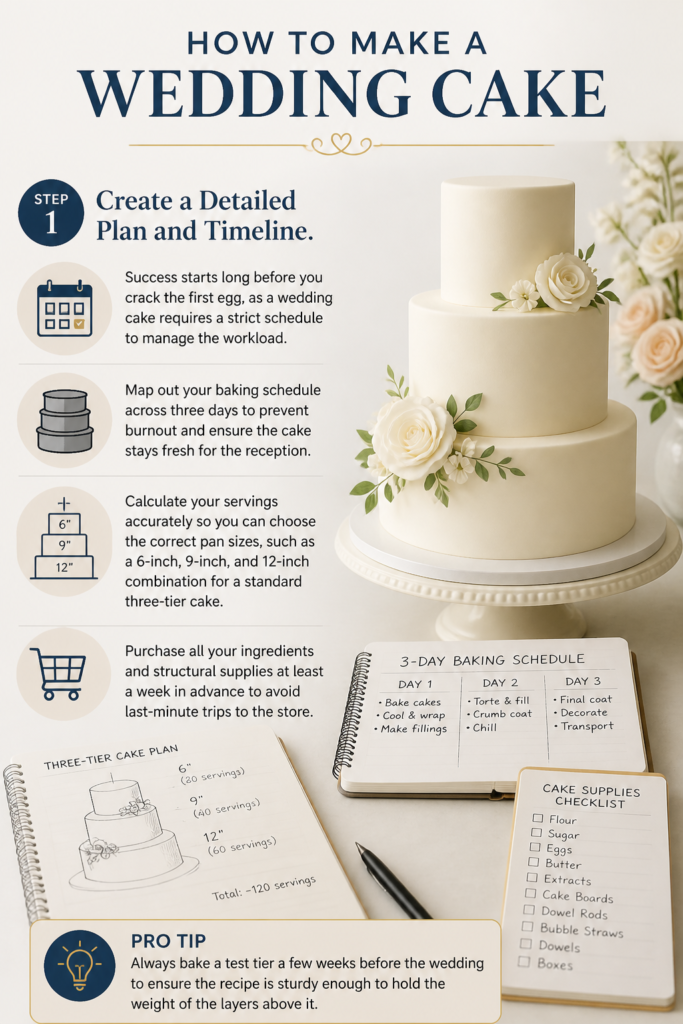
Map out your baking schedule across three days to prevent burnout and ensure the cake stays fresh for the reception.
Calculate your servings accurately so you can choose the correct pan sizes, such as a 6-inch, 9-inch, and 12-inch combination for a standard three-tier cake.
Purchase all your ingredients and structural supplies at least a week in advance to avoid last-minute trips to the store.
Pro Tip: Always bake a “test tier” a few weeks before the wedding to ensure the recipe is sturdy enough to hold the weight of the layers above it.
Step 2: Bake the Cake Tiers
A wedding cake needs to be dense enough to support its own weight but moist enough to taste wonderful.
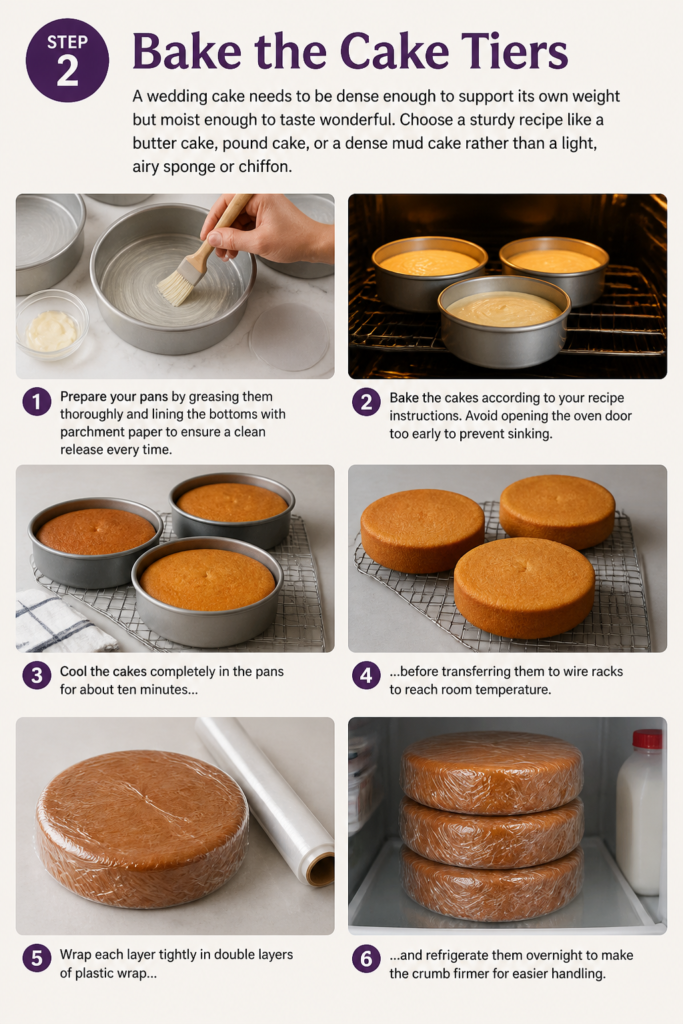
Choose a sturdy recipe like a butter cake, pound cake, or a dense mud cake rather than a light, airy sponge or chiffon.
Prepare your pans by greasing them thoroughly and lining the bottoms with parchment paper to ensure a clean release every time.
Cool the cakes completely in the pans for about ten minutes before transferring them to wire racks to reach room temperature.
Wrap each layer tightly in double layers of plastic wrap and refrigerate them overnight to make the crumb firmer for easier handling.
Step 3: Prepare the Frosting and Fillings
The frosting is the glue that holds everything together and the canvas for your final design.
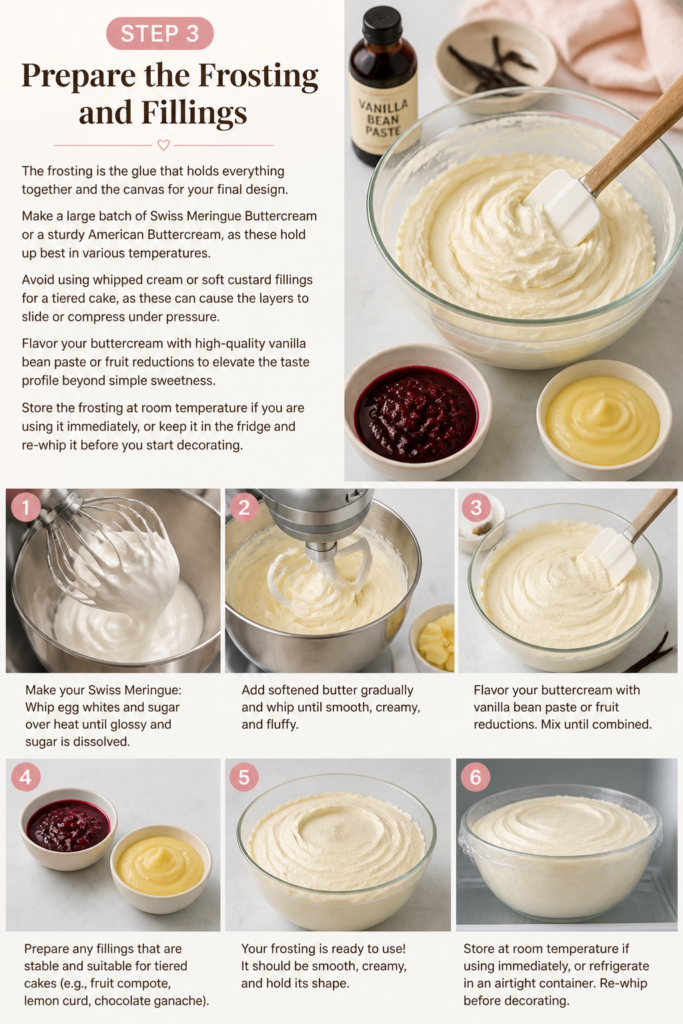
Make a large batch of Swiss Meringue Buttercream or a sturdy American Buttercream, as these hold up best in various temperatures.
Avoid using whipped cream or soft custard fillings for a tiered cake, as these can cause the layers to slide or compress under pressure.
Flavor your buttercream with high-quality vanilla bean paste or fruit reductions to elevate the taste profile beyond simple sweetness.
Store the frosting at room temperature if you are using it immediately, or keep it in the fridge and re-whip it before you start decorating.
Step 4: Level and Fill the Layers
Flat layers are the foundation of a stable cake, so do not skip the leveling process.
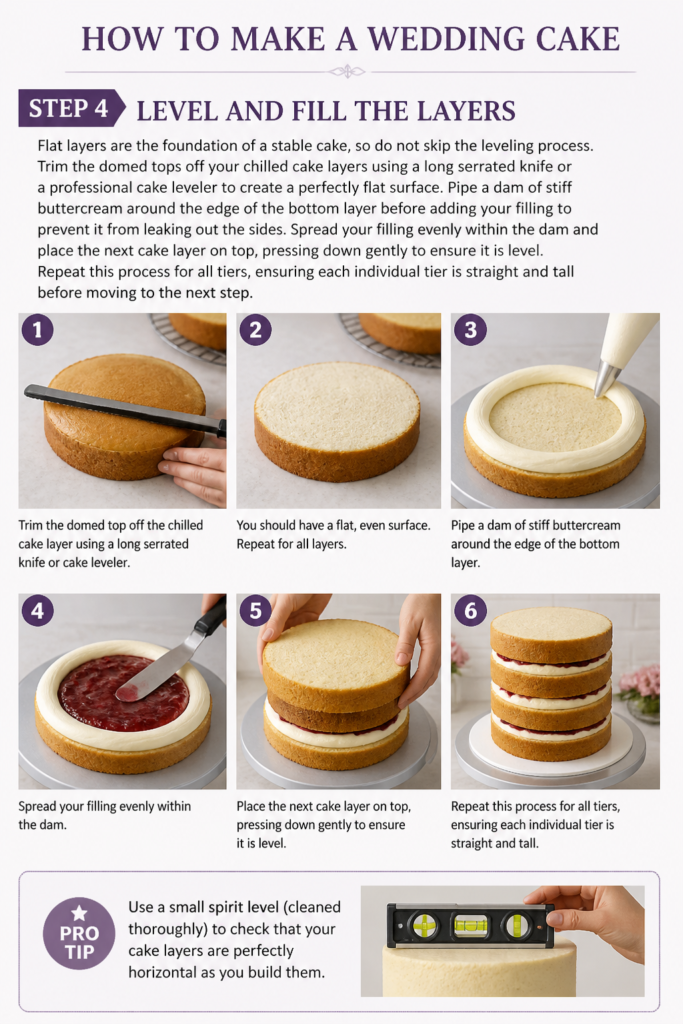
Trim the domed tops off your chilled cake layers using a long serrated knife or a professional cake leveler to create a perfectly flat surface.
Pipe a “dam” of stiff buttercream around the edge of the bottom layer before adding your filling to prevent it from leaking out the sides.
Spread your filling evenly within the dam and place the next cake layer on top, pressing down gently to ensure it is level.
Repeat this process for all tiers, ensuring each individual tier is straight and tall before moving to the next step.
Pro Tip: Use a small spirit level (cleaned thoroughly) to check that your cake layers are perfectly horizontal as you build them.
Step 5: Apply the Crumb Coat
The crumb coat is a thin layer of frosting that seals in loose crumbs and provides a smooth base for the final look.
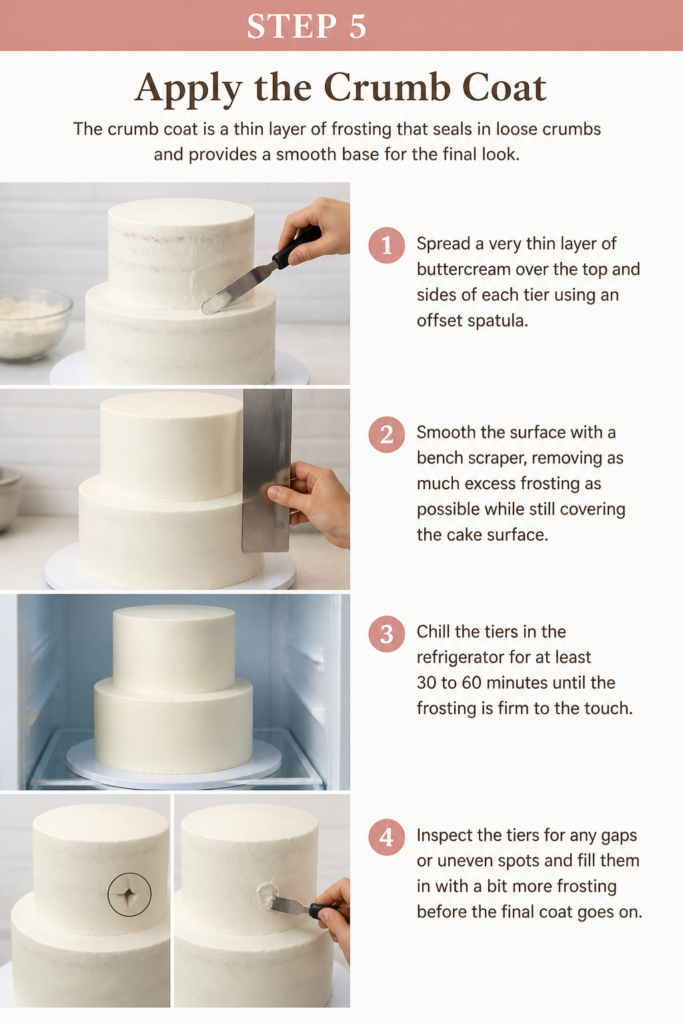
Spread a very thin layer of buttercream over the top and sides of each tier using an offset spatula.
Smooth the surface with a bench scraper, removing as much excess frosting as possible while still covering the cake surface.
Chill the tiers in the refrigerator for at least 30 to 60 minutes until the frosting is firm to the touch.
Inspect the tiers for any gaps or uneven spots and fill them in with a bit more frosting before the final coat goes on.
Step 6: Apply the Final Frosting Coat
This is where your cake starts to look like a professional wedding masterpiece.
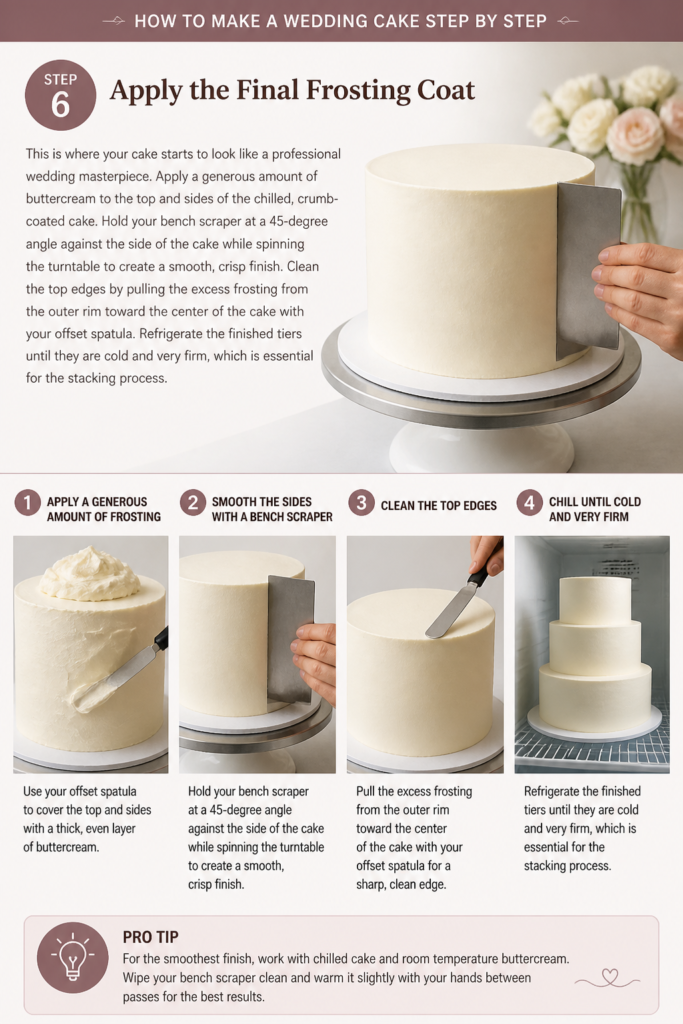
Apply a generous amount of buttercream to the top and sides of the chilled, crumb-coated cake.
Hold your bench scraper at a 45-degree angle against the side of the cake while spinning the turntable to create a smooth, crisp finish.
Clean the top edges by pulling the excess frosting from the outer rim toward the center of the cake with your offset spatula.
Refrigerate the finished tiers until they are cold and very firm, which is essential for the stacking process.
Step 7: Support and Stack the Tiers
Proper internal support is the only thing preventing your cake from collapsing under its own weight.
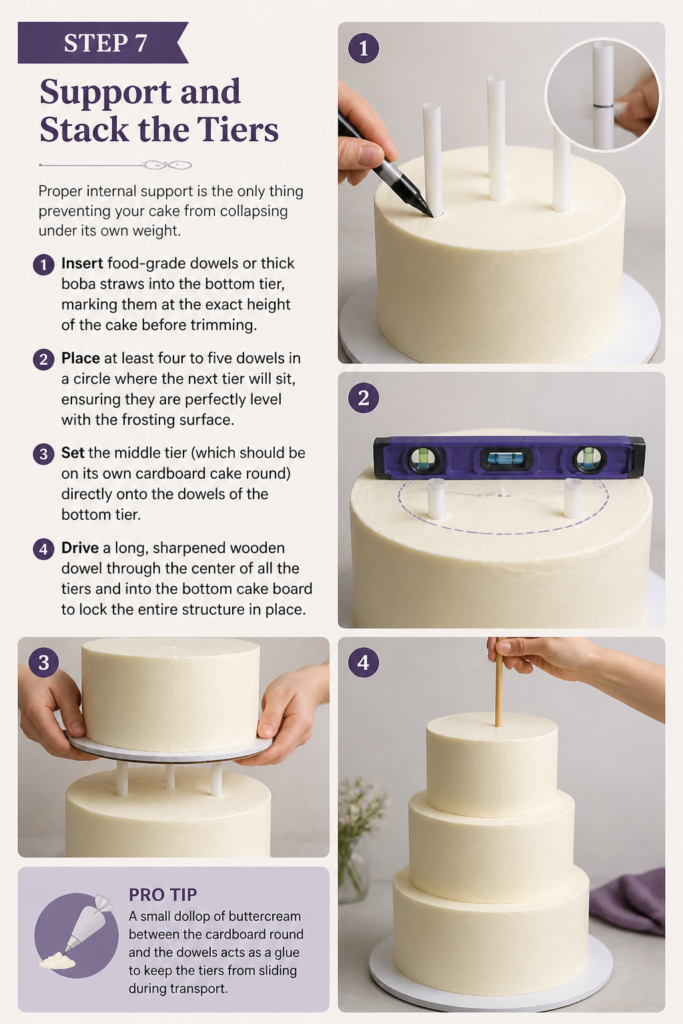
Insert food-grade dowels or thick boba straws into the bottom tier, marking them at the exact height of the cake before trimming.
Place at least four to five dowels in a circle where the next tier will sit, ensuring they are perfectly level with the frosting surface.
Set the middle tier (which should be on its own cardboard cake round) directly onto the dowels of the bottom tier.
Drive a long, sharpened wooden dowel through the center of all the tiers and into the bottom cake board to lock the entire structure in place.
Pro Tip: A small dollop of buttercream between the cardboard round and the dowels acts as a glue to keep the tiers from sliding during transport.
Step 8: Final Decorating and Finishing Touches
Now that the cake is structurally sound, you can focus on the aesthetic details.
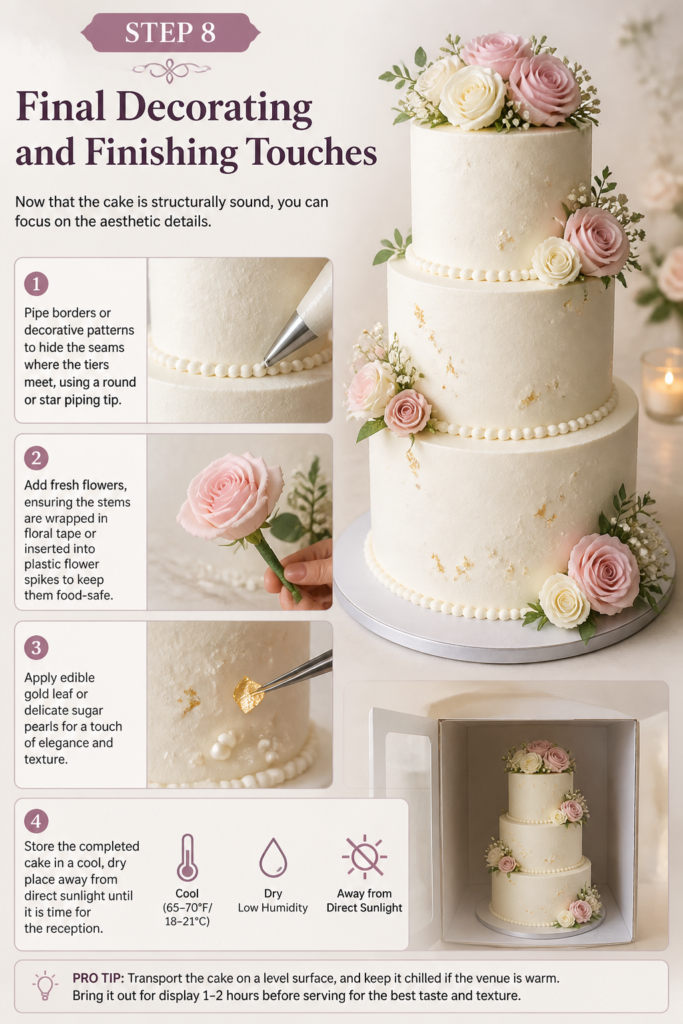
Pipe borders or decorative patterns to hide the seams where the tiers meet, using a round or star piping tip.
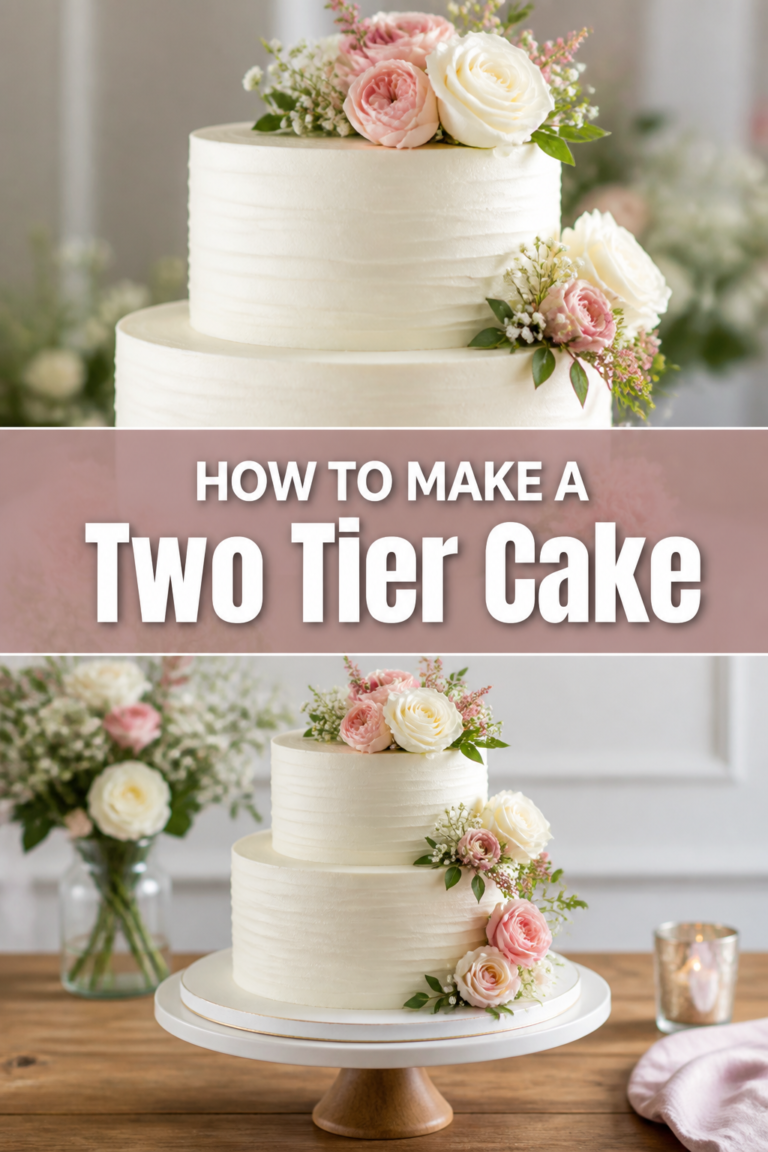
Add fresh flowers, ensuring the stems are wrapped in floral tape or inserted into plastic flower spikes to keep them food-safe.
Apply edible gold leaf or delicate sugar pearls for a touch of elegance and texture.
Store the completed cake in a cool, dry place away from direct sunlight until it is time for the reception.
Common Mistakes to Avoid
Using a Soft or Fluffy Recipe
While a light sponge cake is delicious for a tea party, it lacks the structural integrity needed for a multi-tiered wedding cake. The weight of the upper tiers will compress a soft cake, leading to leaning, bulging, or a total collapse. Stick to recipes specifically designed for stacking, which usually contain a higher ratio of fat and sugar to create a denser crumb.
Neglecting the Internal Support System
Many beginners assume that the cake layers are strong enough to sit on top of each other without help. This is a recipe for disaster, as the bottom tier will eventually give way under the pressure. Every tier except the top one must have dowels or supports to carry the weight of the layers above it directly to the base board.
Frosting a Warm Cake
Patience is the most important ingredient in wedding cake assembly. If you attempt to apply buttercream to a cake that hasn’t fully cooled to the core, the frosting will melt and slide off. This creates a greasy mess that is impossible to smooth over and can compromise the stability of the entire structure.
Troubleshooting
The Cake is Leaning to One Side
A leaning cake is usually caused by unevenly leveled layers or dowels that were cut to different lengths. If you catch this early, you can sometimes gently shim the lower side with a small piece of cardboard or extra frosting under the cake board. If the lean is significant, you may need to unstack the tiers and re-trim the dowels to ensure they are perfectly flush with the cake surface.
Bulging Frosting Between Layers
This often happens when the filling is too soft or when the cake hasn’t had enough time to settle before the final coat of frosting is applied. To fix this, use a bench scraper to smooth out the bulge and then chill the cake immediately. In the future, always pipe a very stiff buttercream dam and let the filled cake sit under a light weight for an hour before frosting the exterior.
Key Takeaways
- Schedule your work over several days to ensure you are never rushing through critical steps like cooling or chilling.
- Prioritize structure by using dense cake recipes and a robust internal dowel system to prevent the cake from sinking.
- Level every layer with precision, as even a slight tilt at the bottom will be magnified as you add more tiers.
- Chill the cake at every stage, especially before stacking and transporting, to keep the buttercream firm and the layers secure.
- Use high-quality tools like a heavy metal turntable and a sharp bench scraper to achieve that professional, smooth finish.
Frequently Asked Questions
Can I make the cake layers in advance?
Yes, you can bake the cake layers up to a month in advance. Once they have cooled completely, wrap them tightly in several layers of plastic wrap and freeze them. Thaw them in the refrigerator overnight while still wrapped to keep the moisture inside the cake.
How do I transport a tiered wedding cake safely?
The safest way to transport a wedding cake is to keep it as cold as possible so the frosting acts as a structural shell. Place the cake on a non-slip mat on the flat floor of your vehicle, rather than on a seat. Drive slowly, avoid sudden turns, and ensure the air conditioning is on full blast to prevent the buttercream from softening.
How much frosting do I need for a three-tier cake?
For a standard three-tier cake (6, 9, and 12 inches), you will likely need between 12 and 15 cups of buttercream. It is always better to have too much frosting than to run out halfway through the final coat. Leftover buttercream can be frozen for several months and used for future projects.
Should I use real flowers or sugar flowers?
Real flowers are often more cost-effective and provide a beautiful, organic look, but they must be prepared carefully to be food-safe. Sugar flowers are edible and won’t wilt in the heat, but they require significant time and skill to create. If using real flowers, always check that the variety is non-toxic and hasn’t been treated with heavy pesticides.
Our Top Recommended Finds
- Heavy-Duty Cast Iron Turntable: A weighted base provides the stability needed for heavy tiers and ensures a smooth, consistent spin for frosting.
- Professional Cake Leveler: This tool uses a wire blade to cut perfectly level tops every time, which is much more accurate than using a knife by hand.
- Food-Grade Plastic Dowels: These are easier to cut than wooden dowels and provide excellent vertical support for heavy cakes.
Bringing Your Vision To Life
Building a wedding cake is a labor of love that combines culinary skill with structural engineering.
By following a strict timeline and focusing on the internal supports, you can create a professional-quality cake that will be the talk of the reception.
If you enjoyed learning about the mechanics of stacking, you might want to explore our guides on advanced piping techniques or the art of working with fondant.
Start by choosing your flavor profile today and baking a small trial batch to build your confidence for the big day.