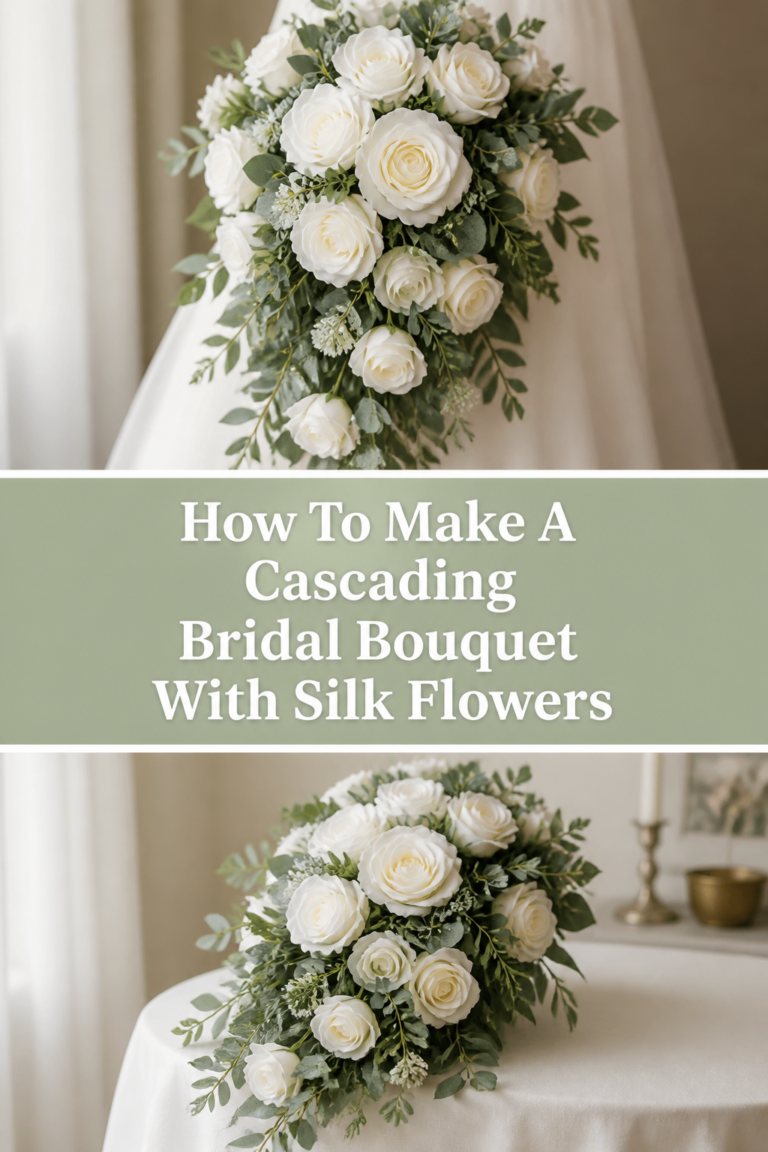
How To Make A Bridal Bouquet With Artificial Flowers
I remember the first time I helped a friend design her wedding flowers using high-quality silk stems.
She was worried they would look “fake,” but once we finished, the bouquet was so stunning that guests actually leaned in to smell the roses.
This guide draws on years of hands-on experience to help you create a professional, everlasting keepsake that looks breathtaking in photos and stays perfect all day long.

Quick Overview
Creating your own bridal bouquet is a rewarding way to personalize your wedding while saving a significant portion of your budget.
- Time needed: 1.5 to 3 hours
- Difficulty: Intermediate
- What you’ll need: Artificial focal flowers, filler flowers, greenery, floral tape, wire cutters, ribbon, and pearl pins.
Step-by-Step Instructions
Step 1: Choose Your Aesthetic And Palette
Select a color palette that complements your wedding theme and the season of your celebration.
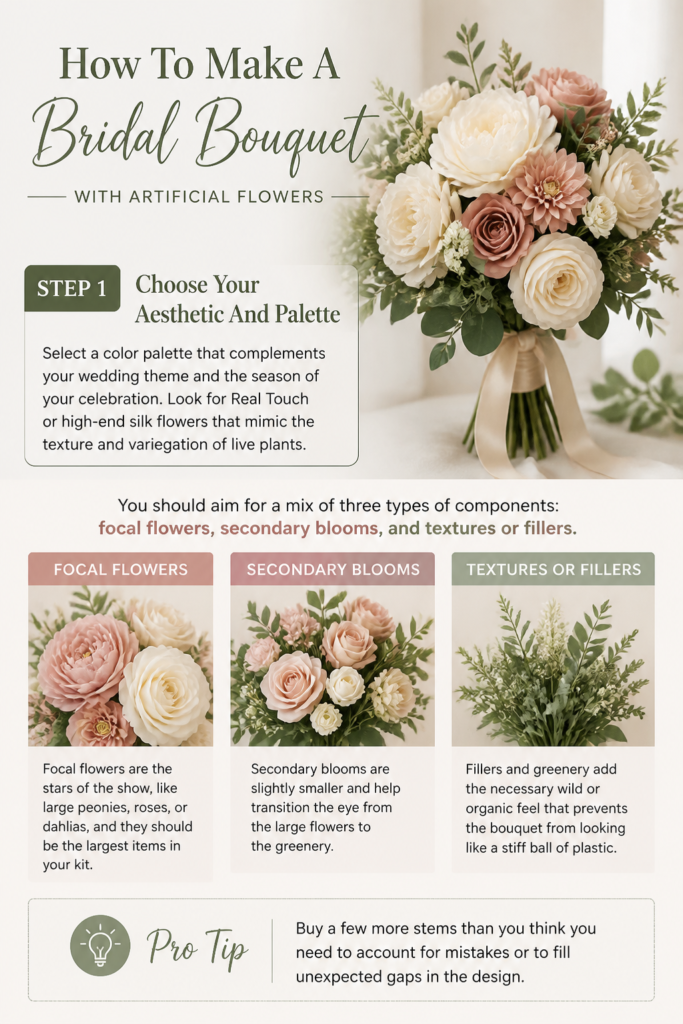
Look for “Real Touch” or high-end silk flowers that mimic the texture and variegation of live plants.
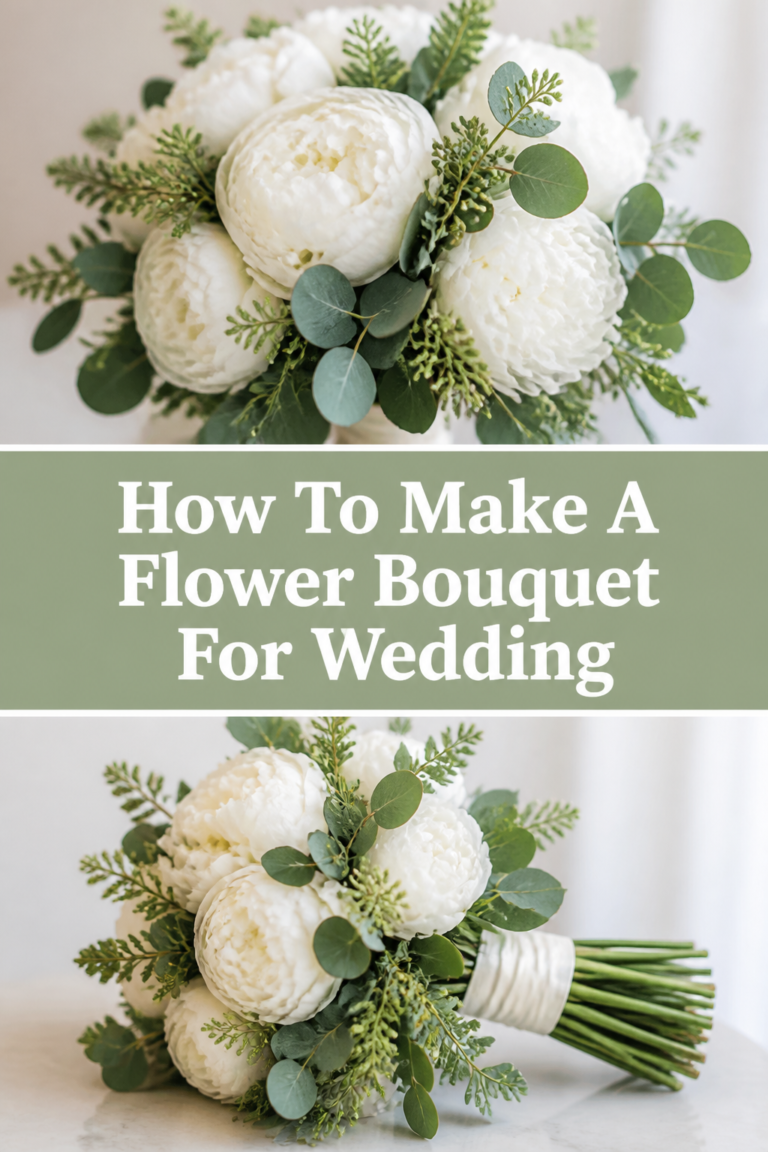
You should aim for a mix of three types of components: focal flowers, secondary blooms, and textures or fillers.
Focal flowers are the stars of the show, like large peonies, roses, or dahlias, and they should be the largest items in your kit.
Secondary blooms are slightly smaller and help transition the eye from the large flowers to the greenery.
Fillers and greenery add the necessary “wild” or “organic” feel that prevents the bouquet from looking like a stiff ball of plastic.
Pro Tip: Buy a few more stems than you think you need to account for mistakes or to fill unexpected gaps in the design.
Step 2: Prepare Your Stems For Styling
Unpack all your flowers and greenery, removing any price tags or plastic sleeves that might be attached.
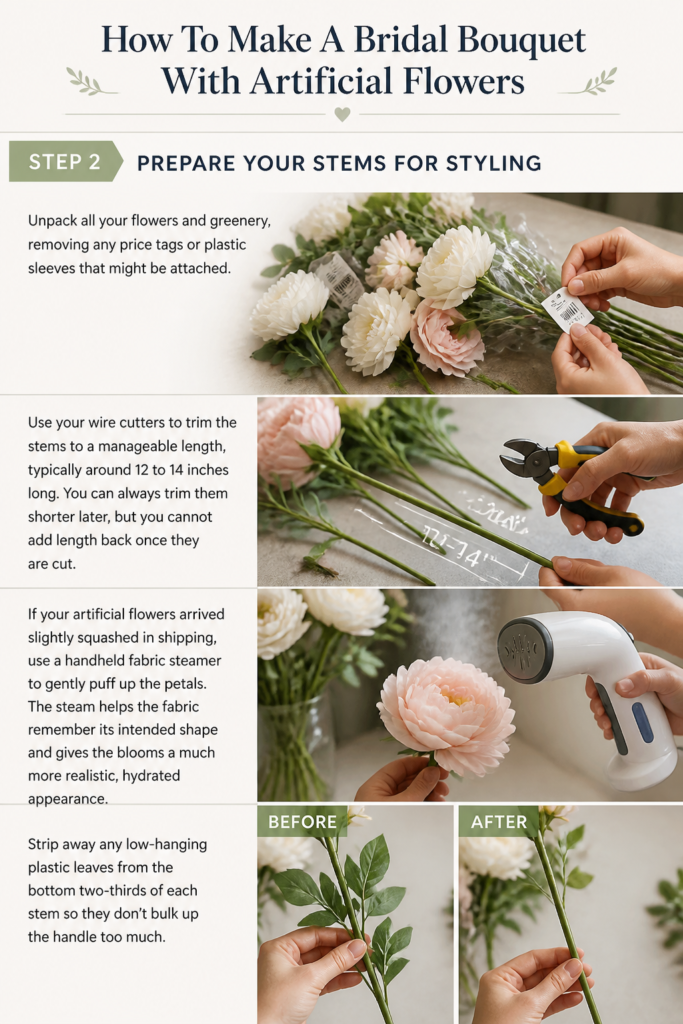
Use your wire cutters to trim the stems to a manageable length, typically around 12 to 14 inches long.
You can always trim them shorter later, but you cannot add length back once they are cut.
If your artificial flowers arrived slightly squashed in shipping, use a handheld fabric steamer to gently puff up the petals.
The steam helps the fabric “remember” its intended shape and gives the blooms a much more realistic, hydrated appearance.
Strip away any low-hanging plastic leaves from the bottom two-thirds of each stem so they don’t bulk up the handle too much.
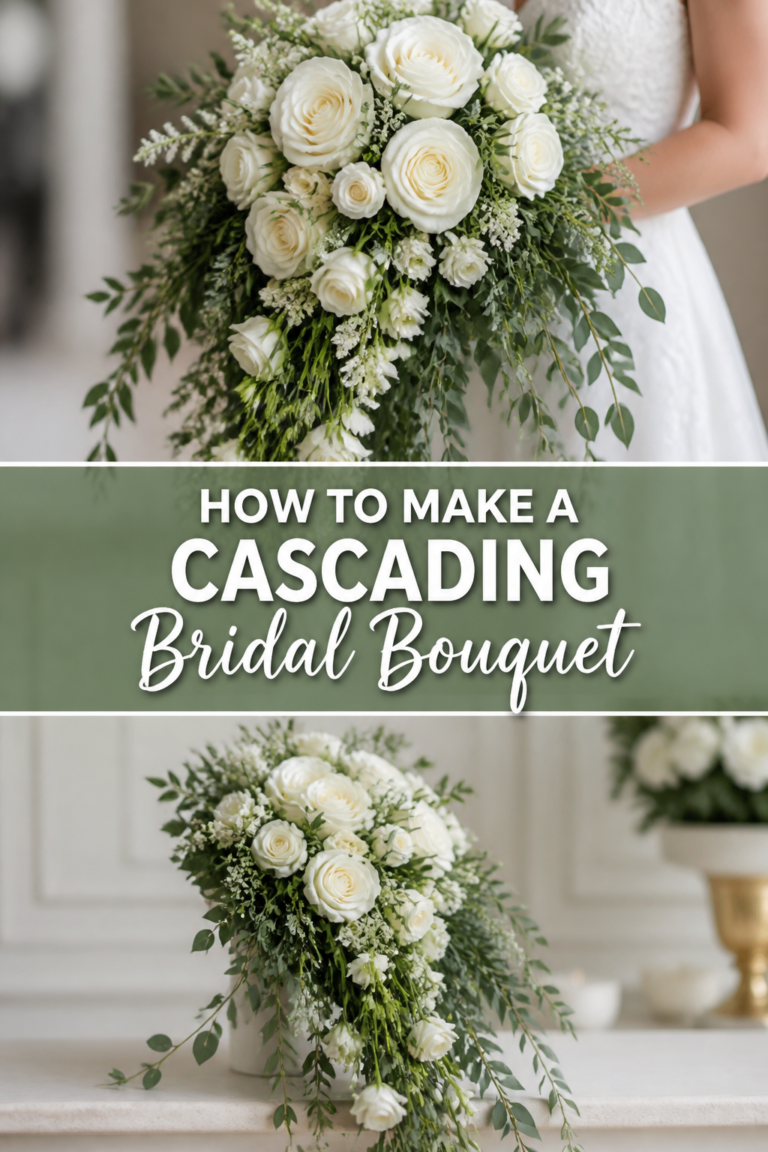
Step 3: Establish Your Focal Foundation
Pick three or four of your largest focal flowers to serve as the heart of the bouquet.
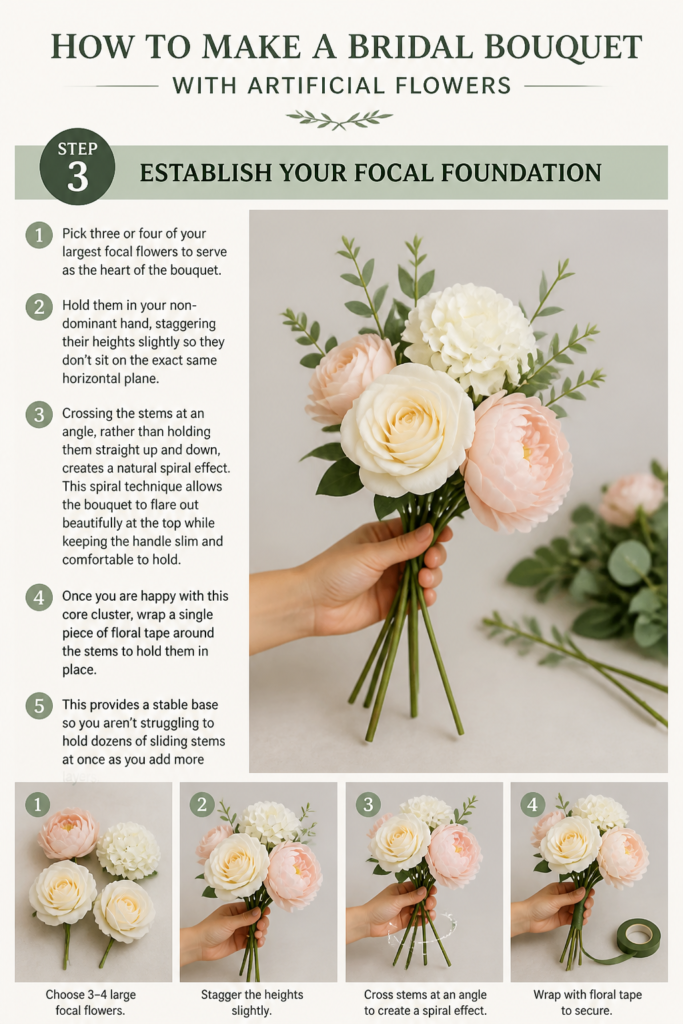
Hold them in your non-dominant hand, staggering their heights slightly so they don’t sit on the exact same horizontal plane.
Crossing the stems at an angle, rather than holding them straight up and down, creates a natural “spiral” effect.
This spiral technique allows the bouquet to flare out beautifully at the top while keeping the handle slim and comfortable to hold.
Once you are happy with this core cluster, wrap a single piece of floral tape around the stems to hold them in place.
This provides a stable base so you aren’t struggling to hold dozens of sliding stems at once as you add more layers.
Step 4: Incorporate Secondary Blooms
Rotate the bouquet slowly in your hand as you begin adding your secondary flowers around the focal core.
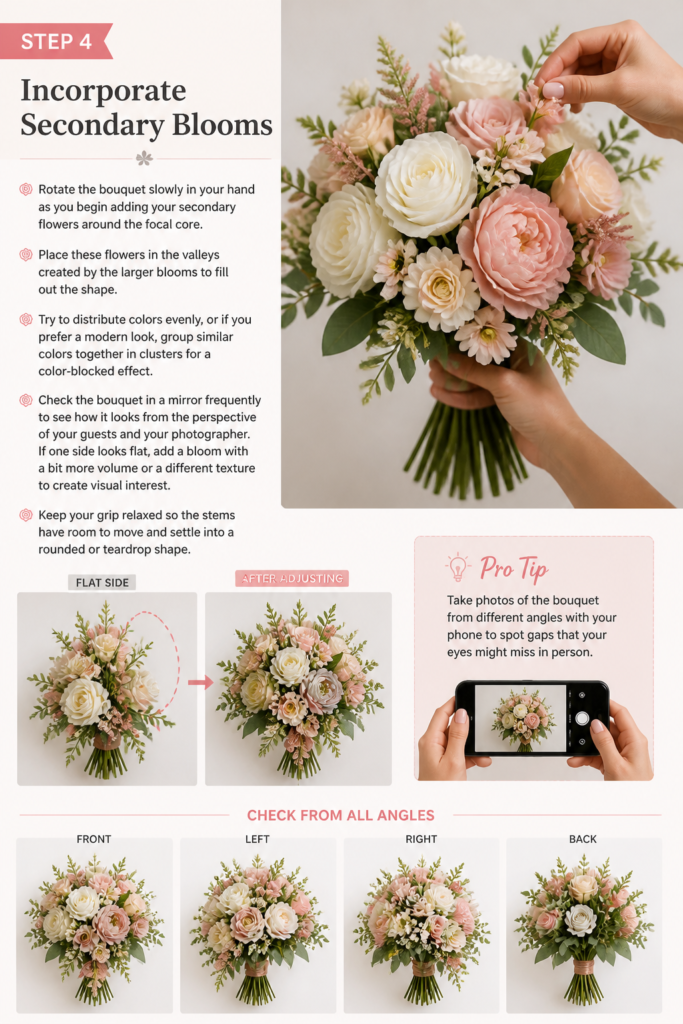
Place these flowers in the “valleys” created by the larger blooms to fill out the shape.
Try to distribute colors evenly, or if you prefer a modern look, group similar colors together in “clusters” for a color-blocked effect.
Check the bouquet in a mirror frequently to see how it looks from the perspective of your guests and your photographer.
If one side looks flat, add a bloom with a bit more volume or a different texture to create visual interest.
Keep your grip relaxed so the stems have room to move and settle into a rounded or teardrop shape.
Pro Tip: Take photos of the bouquet from different angles with your phone to spot gaps that your eyes might miss in person.
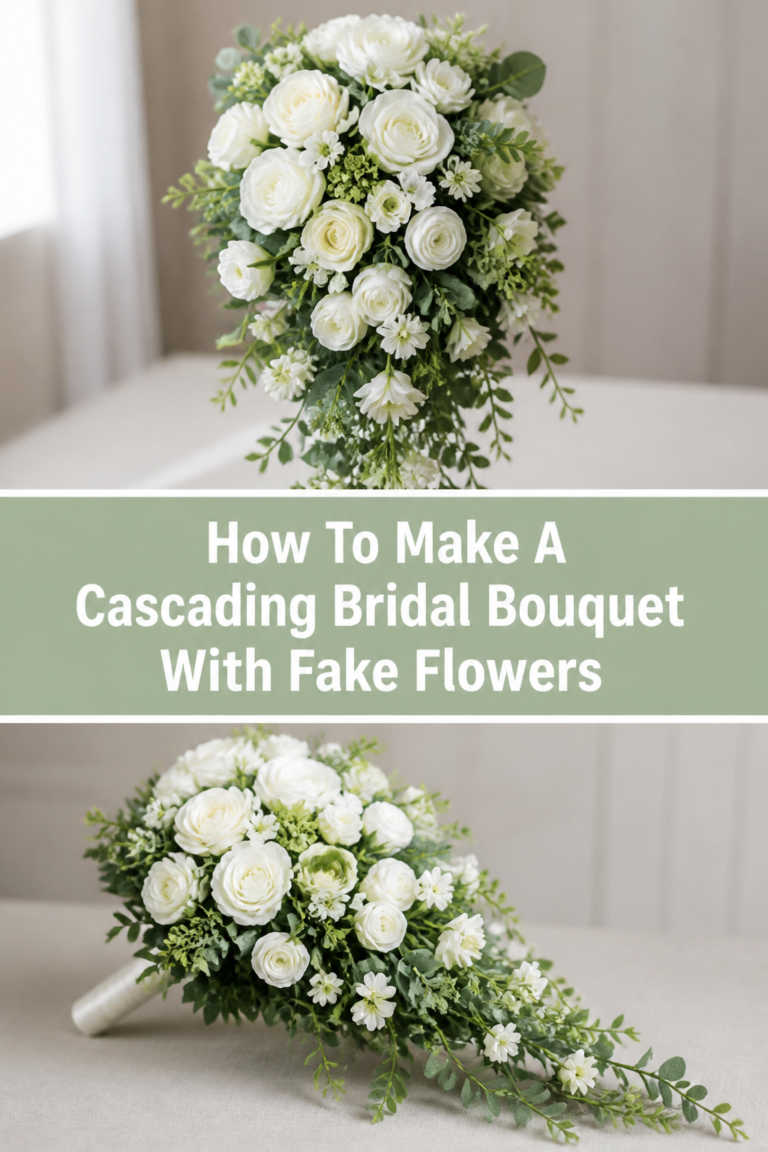
Step 5: Add Texture With Greenery
Tuck bits of greenery, such as eucalyptus, ferns, or lamb’s ear, between the flowers and around the outer edge.
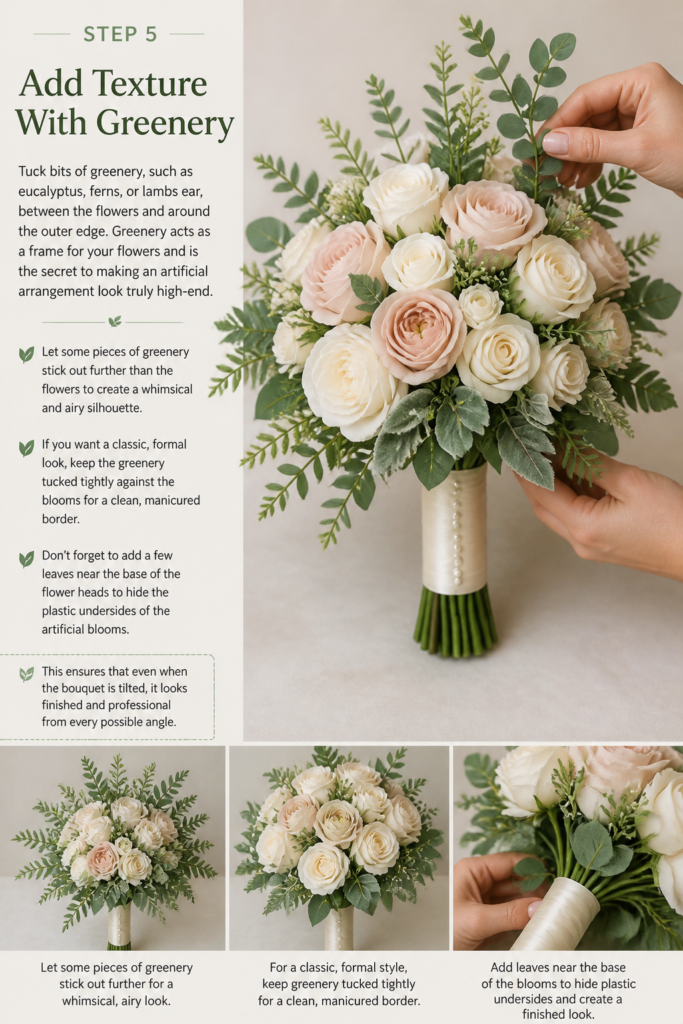
Greenery acts as a frame for your flowers and is the secret to making an artificial arrangement look truly high-end.
Let some pieces of greenery stick out further than the flowers to create a “whimsical” and airy silhouette.
If you want a classic, formal look, keep the greenery tucked tightly against the blooms for a clean, manicured border.
Don’t forget to add a few leaves near the base of the flower heads to hide the plastic undersides of the artificial blooms.
This ensures that even when the bouquet is tilted, it looks finished and professional from every possible angle.
Step 6: Secure The Structural Core
Wrap floral tape tightly around the stems, starting about an inch below the bottom of the flower heads.
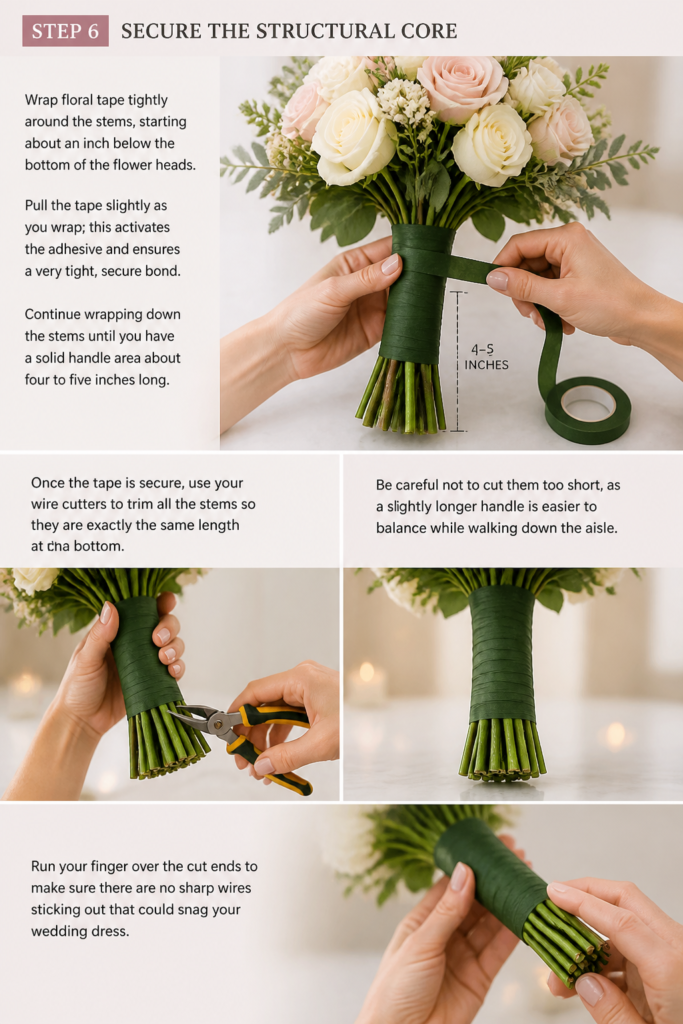
Pull the tape slightly as you wrap; this “activates” the adhesive and ensures a very tight, secure bond.
Continue wrapping down the stems until you have a solid handle area about four to five inches long.
Once the tape is secure, use your wire cutters to trim all the stems so they are exactly the same length at the bottom.
Be careful not to cut them too short, as a slightly longer handle is easier to balance while walking down the aisle.
Run your finger over the cut ends to make sure there are no sharp wires sticking out that could snag your wedding dress.
Step 7: Finish With A Decorative Wrap
Cover the green floral tape with a decorative ribbon that matches your wedding colors or bridal gown.
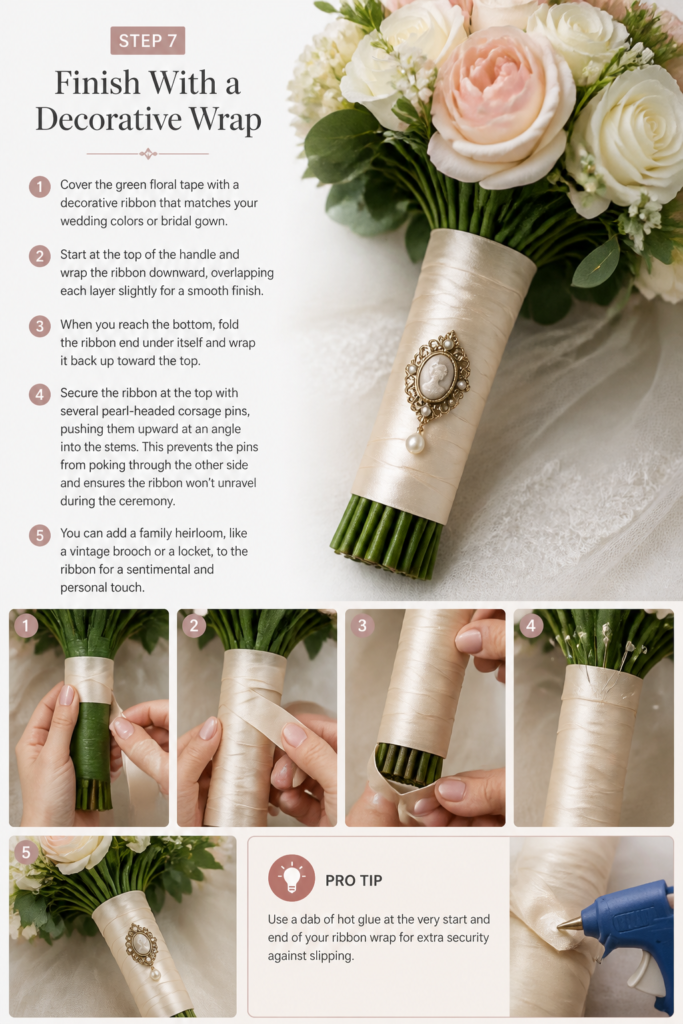
Start at the top of the handle and wrap the ribbon downward, overlapping each layer slightly for a smooth finish.
When you reach the bottom, fold the ribbon end under itself and wrap it back up toward the top.
Secure the ribbon at the top with several pearl-headed corsage pins, pushing them upward at an angle into the stems.
This prevents the pins from poking through the other side and ensures the ribbon won’t unravel during the ceremony.
You can add a family heirloom, like a vintage brooch or a locket, to the ribbon for a sentimental and personal touch.
Pro Tip: Use a dab of hot glue at the very start and end of your ribbon wrap for extra security against slipping.
Common Mistakes to Avoid
The Perfectly Round “Lollipop” Look
Many beginners try to make the bouquet perfectly symmetrical and circular, which can look unnatural and dated.
Real flowers have variations in height and direction, so try to mimic that by placing some blooms deeper and others more forward.
Breaking the “perfect circle” with a few sprigs of greenery or a stray bud makes the arrangement feel much more organic and expensive.
Neglecting The Back Of The Bouquet
It is easy to focus only on the front, but the bride will be seen from all sides during the ceremony and photos.
Make sure there are no “bald spots” or exposed plastic stems visible from the sides or the back.
Even if the back is simpler than the front, it should still look intentional and fully finished with greenery or smaller filler flowers.
Using Low-Quality Plastic Stems
Not all artificial flowers are created equal, and using cheap, shiny plastic stems can ruin the entire aesthetic.
If you have a beautiful flower head on a very fake-looking stem, consider wrapping the entire stem in floral tape or ribbon.
Investing in a few high-quality “anchor” flowers will elevate the look of the cheaper fillers you might use to bulk out the size.
Troubleshooting
The Bouquet Feels Unstable Or Loose
If the flowers are shifting around in your hand, your floral tape wrap isn’t tight enough or you haven’t used enough of it.
Unwrap the ribbon and add another layer of floral tape, making sure to stretch the tape as you go to engage the adhesive.
Ensure you are wrapping the tape around the “choke point” where all the stems naturally cross to provide maximum stability.
The Flower Heads Keep Drooping
Some artificial flowers have heavy heads and thin wire stems that can’t support the weight, causing them to flop over.
You can reinforce these stems by “sistering” them with a piece of thicker floral wire and wrapping them together with tape.
This gives the stem the necessary rigidity to stay upright exactly where you placed it in the arrangement.
Key Takeaways
- Select a variety of flower sizes, including focal blooms, secondary flowers, and greenery.
- Use the spiral technique when holding stems to create a natural, flared shape.
- Steam your silk flowers before assembly to remove creases and add a realistic volume.
- Secure the structure with stretched floral tape before adding the decorative ribbon wrap.
- Check your progress in a mirror and via photos to ensure there are no gaps or flat spots.
- Trim stem ends carefully to avoid snagging your dress or scratching your hands.
Frequently Asked Questions
How far in advance can I make my artificial bridal bouquet?
One of the best parts about faux flowers is that you can make them months in advance.
Store the finished bouquet in a cool, dry place away from direct sunlight to prevent the colors from fading over time.
Cover it loosely with a clean pillowcase or a silk bag to keep dust from settling into the petals before the big day.
Can I mix real flowers with artificial flowers in my bouquet?
You can certainly mix them, but you must be careful about the water requirements of the live stems.
If you use real flowers, you will need to assemble the bouquet much closer to the wedding date and use water tubes for the live elements.
Most brides find it easier to stick to 100% artificial to avoid the logistical stress of keeping real stems hydrated.
How do I clean dust off my bouquet if I made it too early?
If your bouquet catches some dust, use a hair dryer on the “cool” and “low” setting to gently blow the particles away.
For more stubborn dust, a soft-bristled makeup brush can be used to carefully wipe individual petals without damaging the fabric.
Avoid using water or cleaning sprays, as these can cause the dyes in the silk flowers to bleed or spot.
Our Top Recommended Finds
- Heavy-Duty Wire Cutters: Essential for cutting through the thick metal cores found in high-quality artificial stems.
- Self-Adhesive Floral Tape: This tape is the “glue” that holds your design together; look for a brand that is known for its stretch and grip.
- Pearl-Headed Corsage Pins: These add a classic, elegant finish to your ribbon wrap while keeping everything securely in place.
Your Everlasting Keepsake Awaits
Now that you have the skills to build a professional-grade bouquet, you can start experimenting with different textures and styles.
You might want to try making matching boutonnieres for the groomsmen or smaller posies for your bridesmaids using the same techniques.
Take that first step today by gathering your favorite flower inspirations and ordering a few sample stems to see how they look in person.