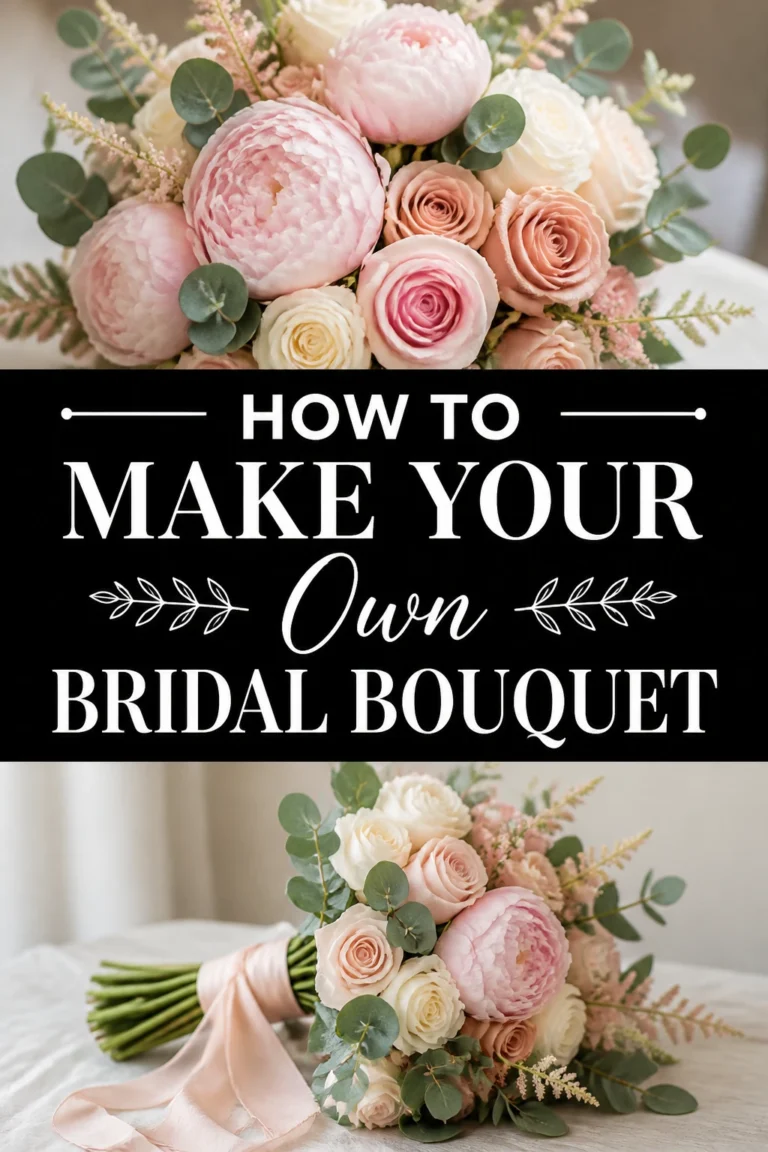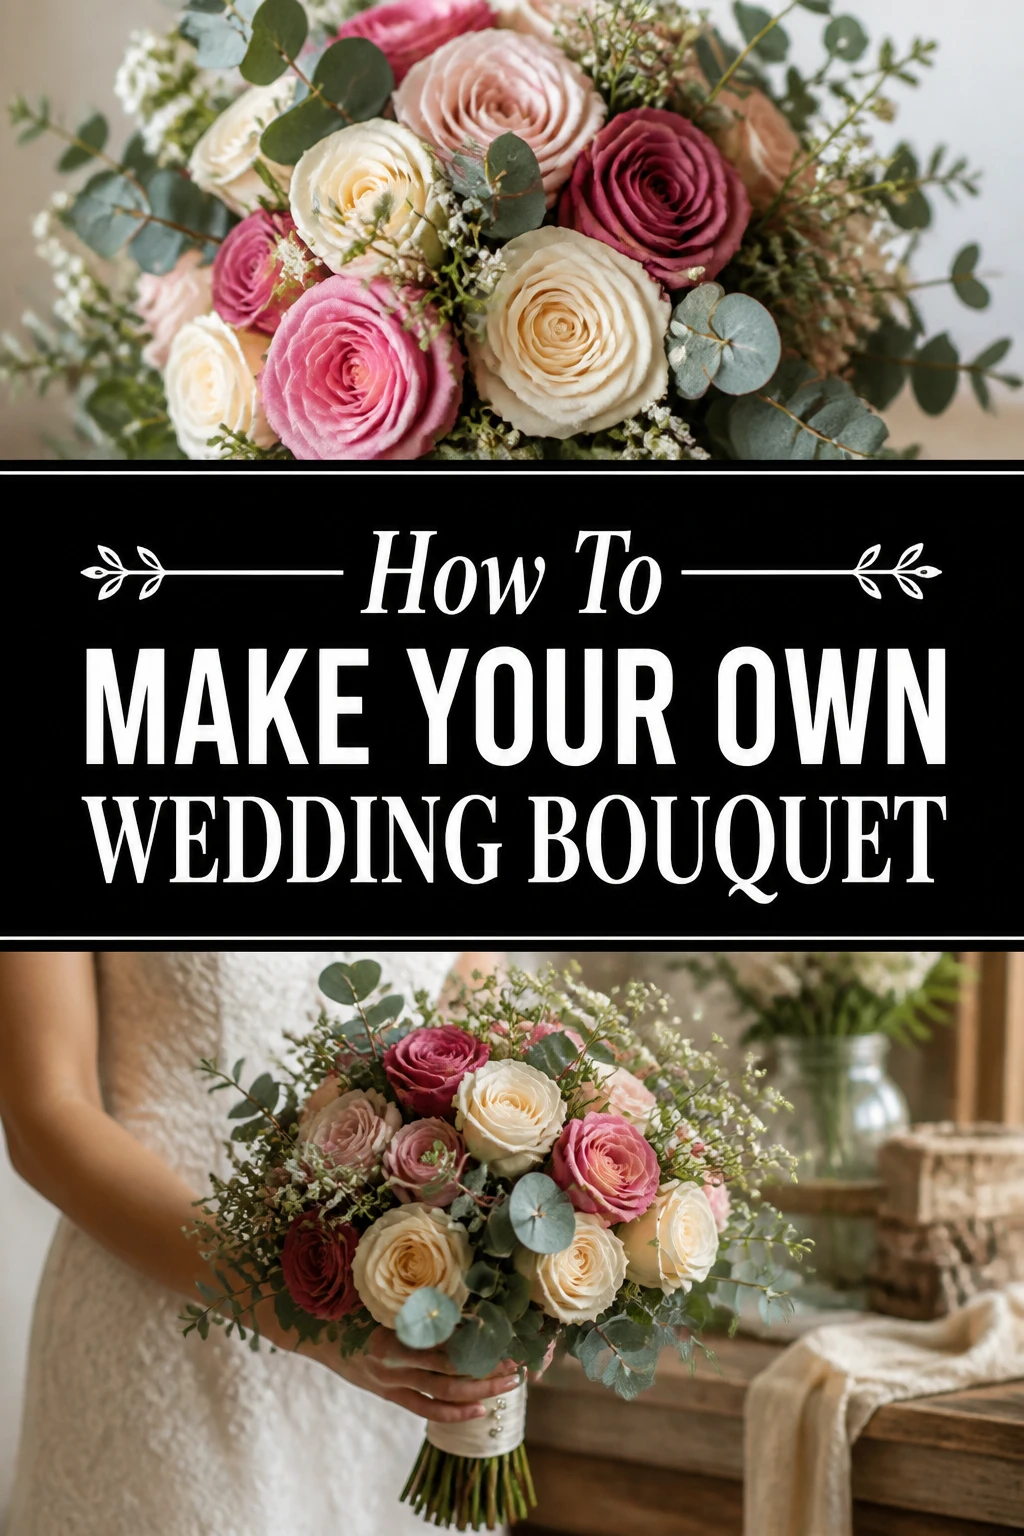
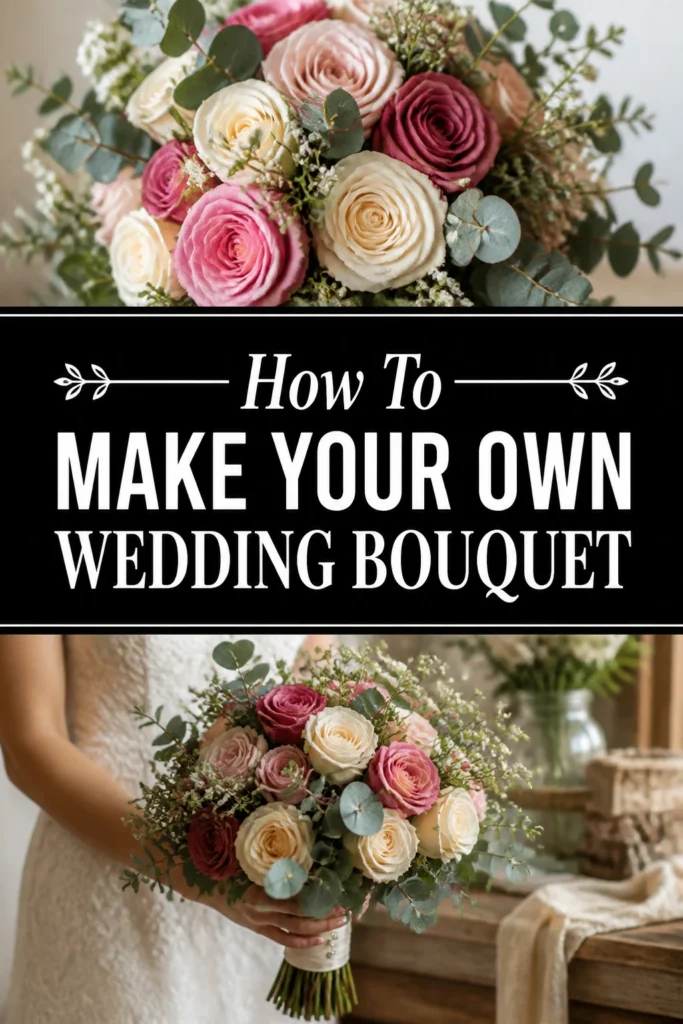
💐 How To Make Your Own Wedding Bouquet

Wedding Planning
No fluff, no drama. Just easy weekly advice, planning shortcuts, and gentle reminders to help you actually enjoy your engagement.
Creating your own wedding bouquet is a truly special endeavor.
I remember the immense joy and pride I felt crafting a unique arrangement for a dear friend’s big day.
This guide will share all the practical steps and insider tips I learned, helping you design a stunning bouquet with confidence and ease.
Quick Overview
You’re about to embark on a rewarding creative journey, culminating in a beautiful, personalized centerpiece for your wedding day.
This guide will walk you through everything from selecting your blooms to the final elegant wrap.
- Time needed: 2-4 hours for preparation and assembly, plus shopping time.
- Difficulty: Intermediate (requires patience and attention to detail).
- What you’ll need: Fresh flowers, floral shears, floral tape, ribbon, pins, a bucket of water.
Step-by-Step Instructions
Step 1: Envision Your Dream Bouquet
Before buying a single flower, take time to visualize your ideal bouquet. Consider your wedding dress style, your overall theme, and the color palette of your event.
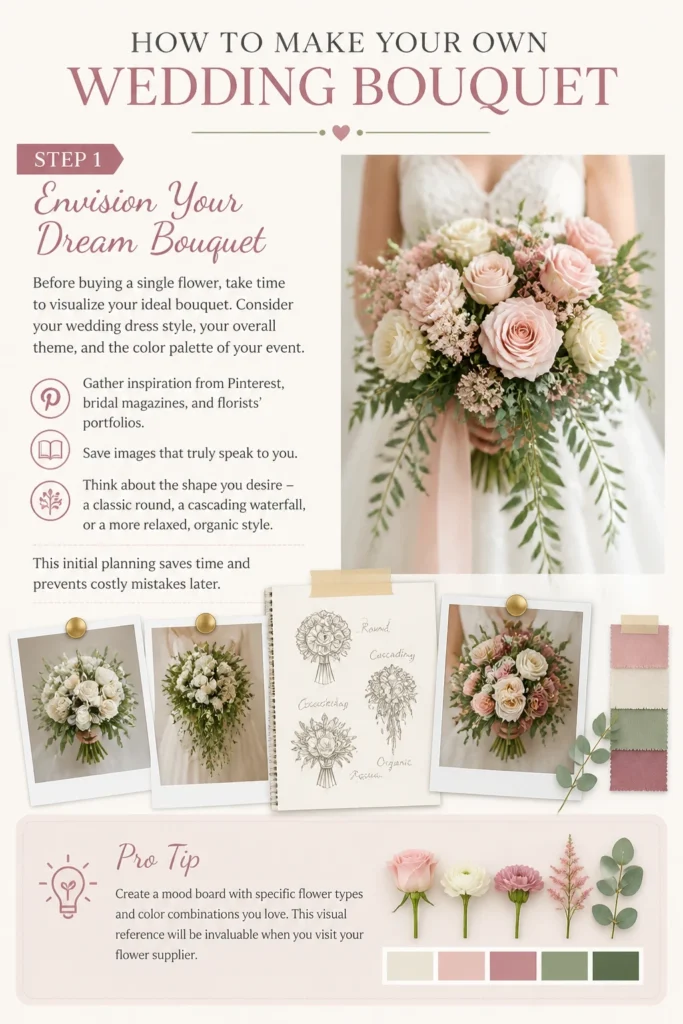
Gather inspiration from Pinterest, bridal magazines, and florists’ portfolios. Save images that truly speak to you.
Think about the shape you desire – a classic round, a cascading waterfall, or a more relaxed, organic style. This initial planning saves time and prevents costly mistakes later.
Pro Tip: Create a mood board with specific flower types and color combinations you love. This visual reference will be invaluable when you visit your flower supplier.
Step 2: Select and Source Your Flowers
Choosing the right flowers is crucial for both aesthetics and longevity. Opt for varieties that are in season, as they will be fresher, more affordable, and readily available.
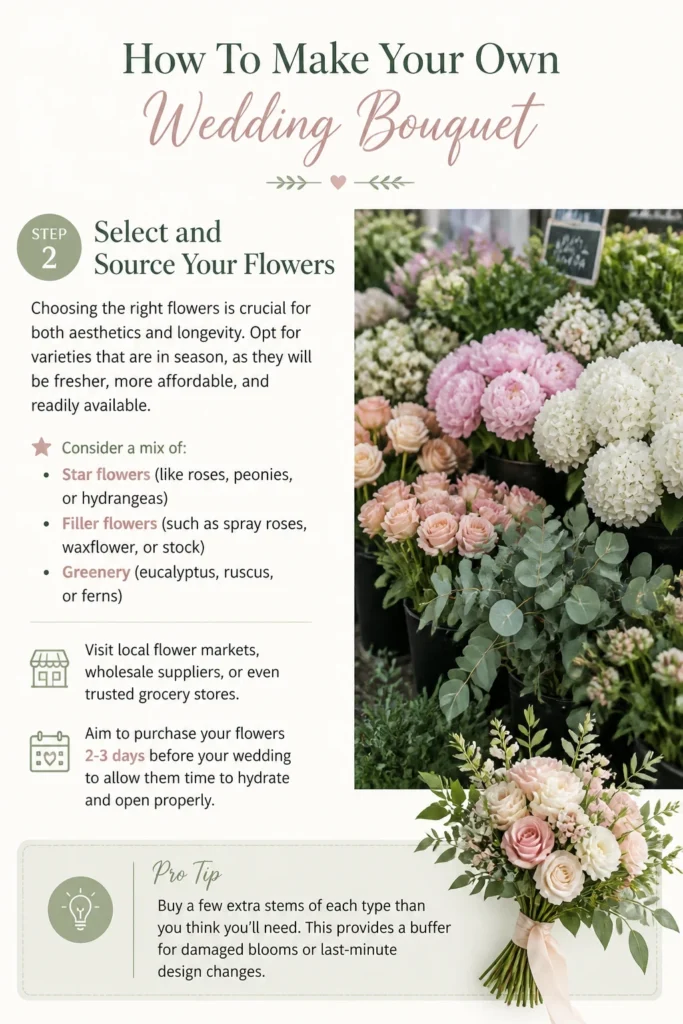
Consider a mix of “star” flowers (like roses, peonies, or hydrangeas), “filler” flowers (such as spray roses, waxflower, or stock), and “greenery” (eucalyptus, ruscus, or ferns).
Visit local flower markets, wholesale suppliers, or even trusted grocery stores. Aim to purchase your flowers 2-3 days before your wedding to allow them time to hydrate and open properly.
Pro Tip: Buy a few extra stems of each type than you think you’ll need. This provides a buffer for damaged blooms or last-minute design changes.
Step 3: Prepare Your Blooms for Assembly
Once you bring your flowers home, proper preparation is key to their freshness. Fill clean buckets with cool water and a floral food solution.
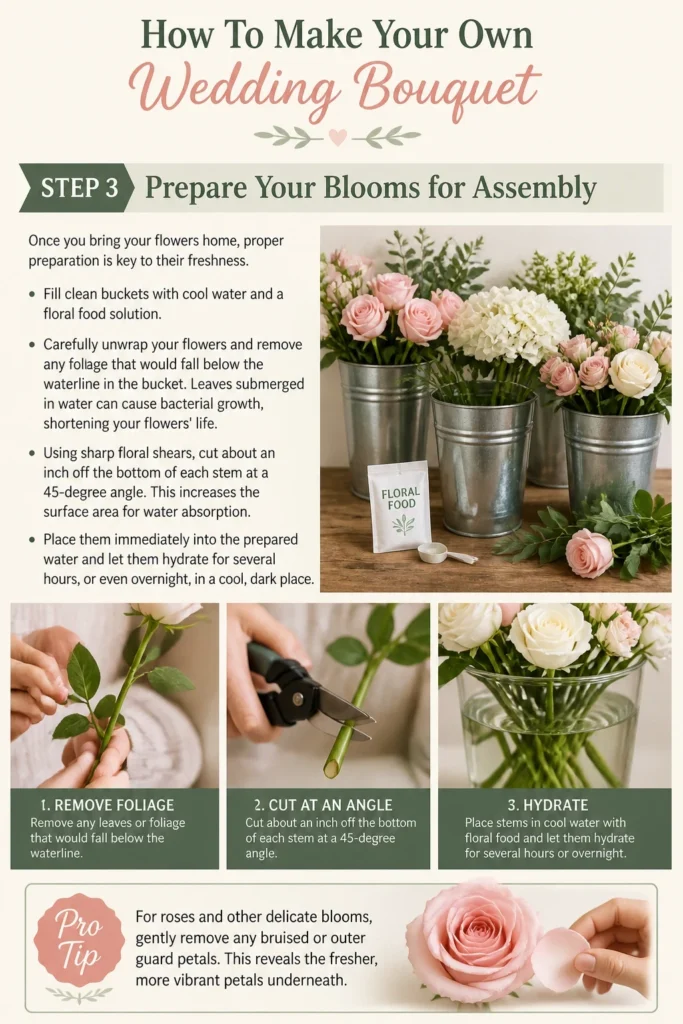
Carefully unwrap your flowers and remove any foliage that would fall below the waterline in the bucket. Leaves submerged in water can cause bacterial growth, shortening your flowers’ life.
Using sharp floral shears, cut about an inch off the bottom of each stem at a 45-degree angle. This increases the surface area for water absorption. Place them immediately into the prepared water and let them hydrate for several hours, or even overnight, in a cool, dark place.
Pro Tip: For roses and other delicate blooms, gently remove any bruised or outer “guard” petals. This reveals the fresher, more vibrant petals underneath.
Step 4: Gather Your Tools and Workspace
Set up a clean, clear workspace that allows you to move freely. Lay down a protective sheet or newspaper to catch debris.
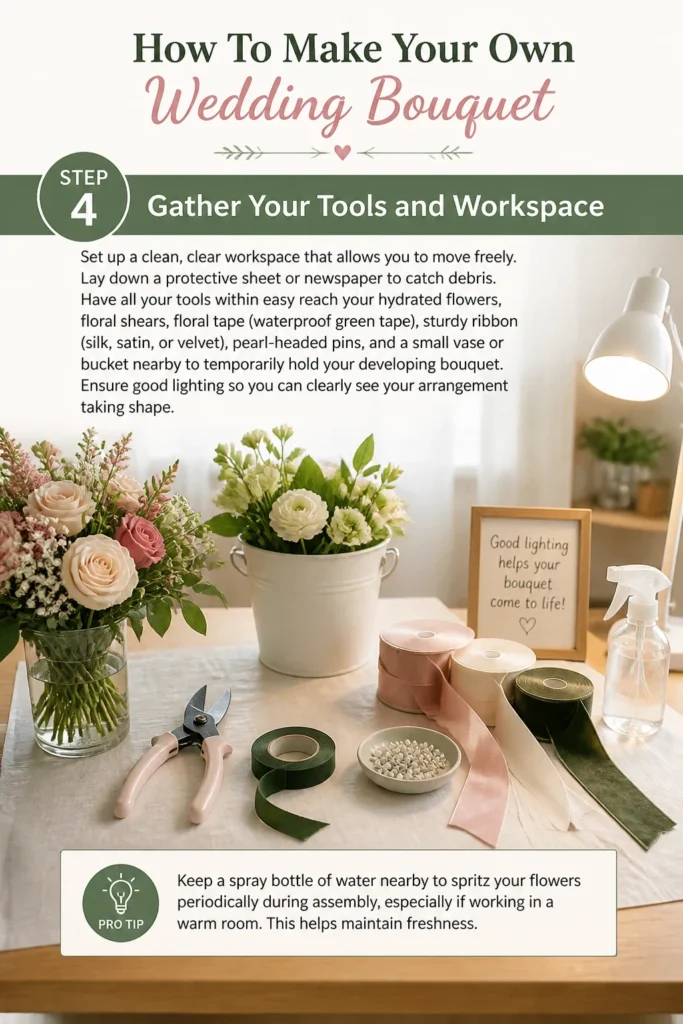
Have all your tools within easy reach: your hydrated flowers, floral shears, floral tape (waterproof green tape), sturdy ribbon (silk, satin, or velvet), pearl-headed pins, and a small vase or bucket nearby to temporarily hold your developing bouquet.
Ensure good lighting so you can clearly see your arrangement taking shape.
Pro Tip: Keep a spray bottle of water nearby to spritz your flowers periodically during assembly, especially if working in a warm room. This helps maintain freshness.
Step 5: Begin Building Your Bouquet (The Spiral Technique)
Start with 3-5 of your largest “star” flowers for the center of your bouquet. Hold them loosely in your non-dominant hand.
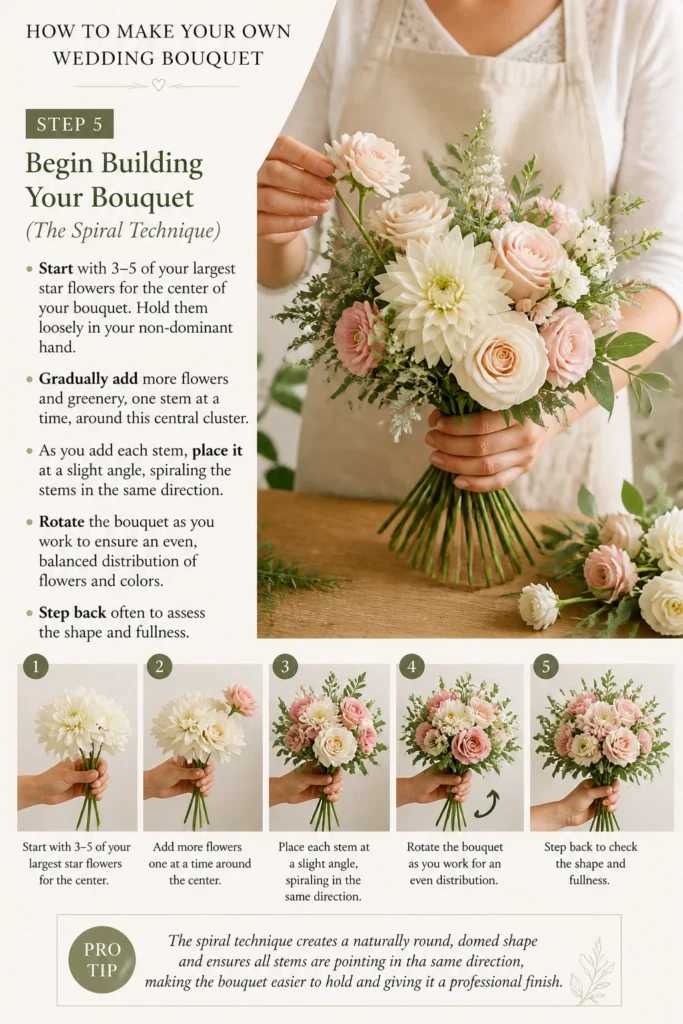
Gradually add more flowers and greenery, one stem at a time, around this central cluster. As you add each stem, place it at a slight angle, spiraling the stems in the same direction.
Rotate the bouquet as you work to ensure an even, balanced distribution of flowers and colors. Step back often to assess the shape and fullness.
Pro Tip: The spiral technique creates a naturally round, domed shape and ensures all stems are pointing in the same direction, making the bouquet easier to hold and giving it a professional finish.
Step 6: Refine the Shape and Add Greenery
Continue adding flowers and greenery, filling in any gaps and ensuring a pleasing balance of textures and colors. Use greenery strategically to frame your blooms and add depth.
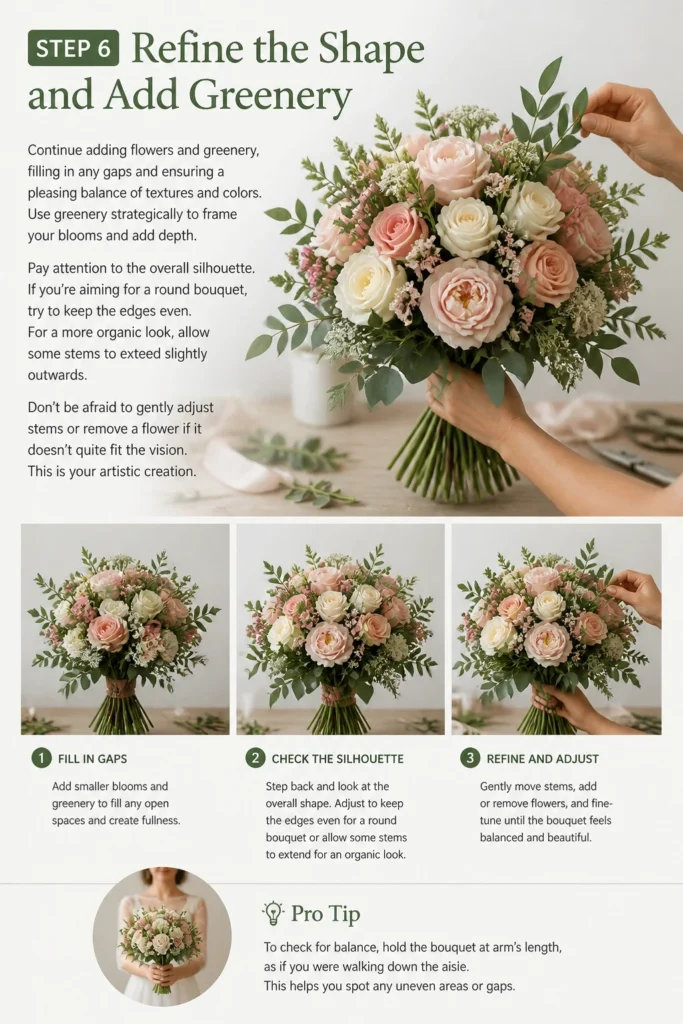
Pay attention to the overall silhouette. If you’re aiming for a round bouquet, try to keep the edges even. For a more organic look, allow some stems to extend slightly outwards.
Don’t be afraid to gently adjust stems or remove a flower if it doesn’t quite fit the vision. This is your artistic creation.
Pro Tip: To check for balance, hold the bouquet at arm’s length, as if you were walking down the aisle. This helps you spot any uneven areas or gaps.
Step 7: Secure the Stems with Floral Tape
Once you are happy with the arrangement, firmly grasp the bouquet at the point where you want the ribbon wrap to begin (usually just below the blooms).
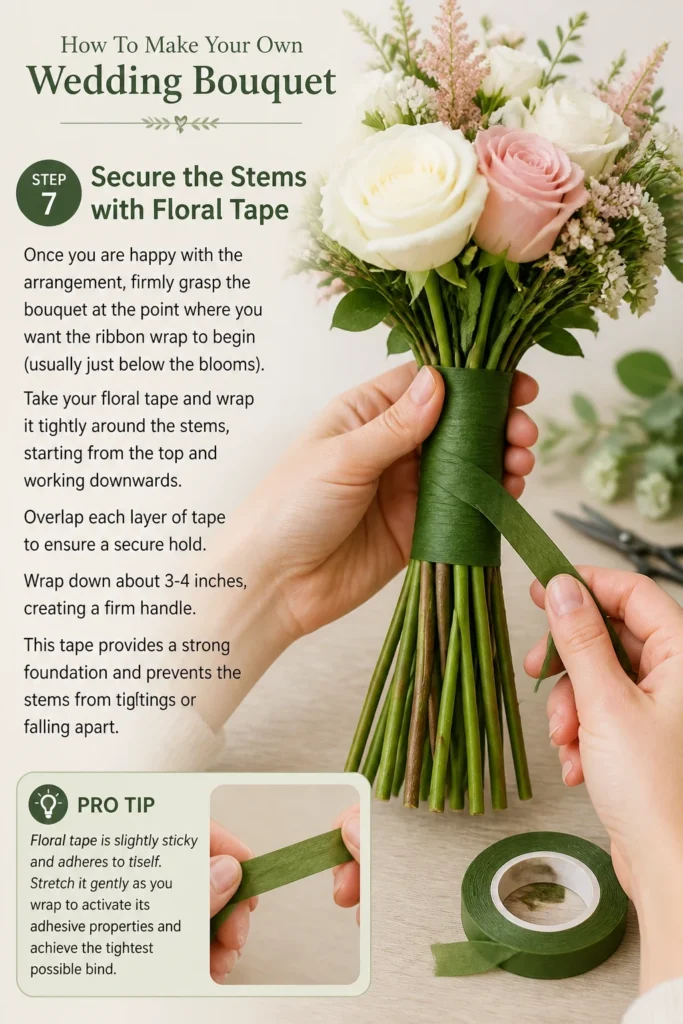
Take your floral tape and wrap it tightly around the stems, starting from the top and working downwards. Overlap each layer of tape to ensure a secure hold.
Wrap down about 3-4 inches, creating a firm handle. This tape provides a strong foundation and prevents the stems from shifting or falling apart.
Pro Tip: Floral tape is slightly sticky and adheres to itself. Stretch it gently as you wrap to activate its adhesive properties and achieve the tightest possible bind.
Step 8: Trim the Stems and Add the Ribbon Wrap
With the floral tape securely in place, use your sharp floral shears to trim all the stems to a uniform length. Aim for a comfortable handle length, typically 6-8 inches from the base of the blooms.
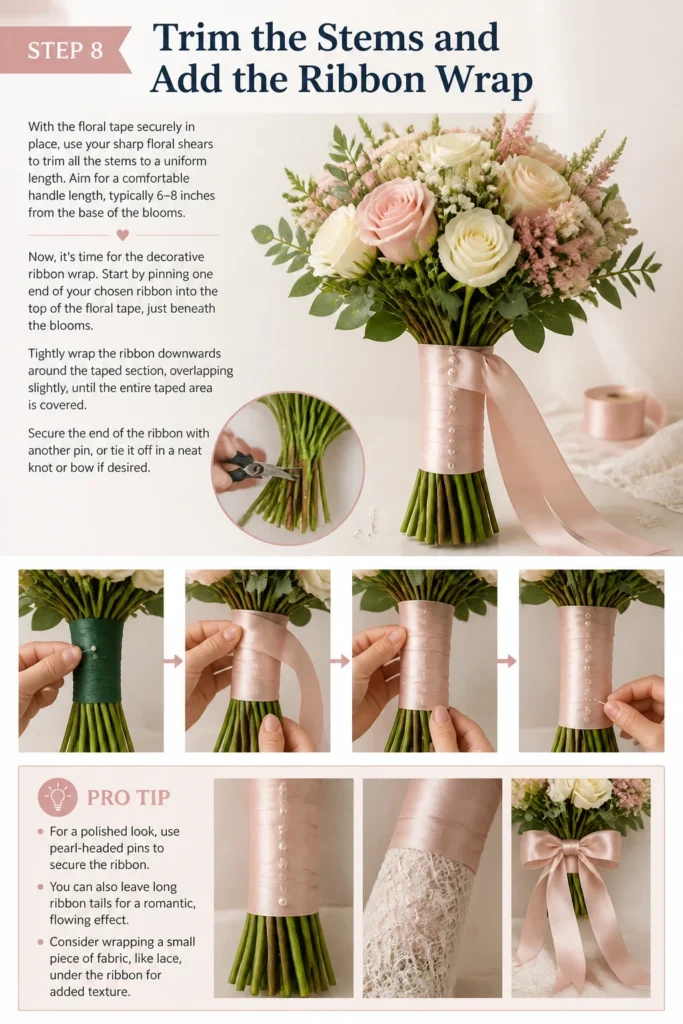
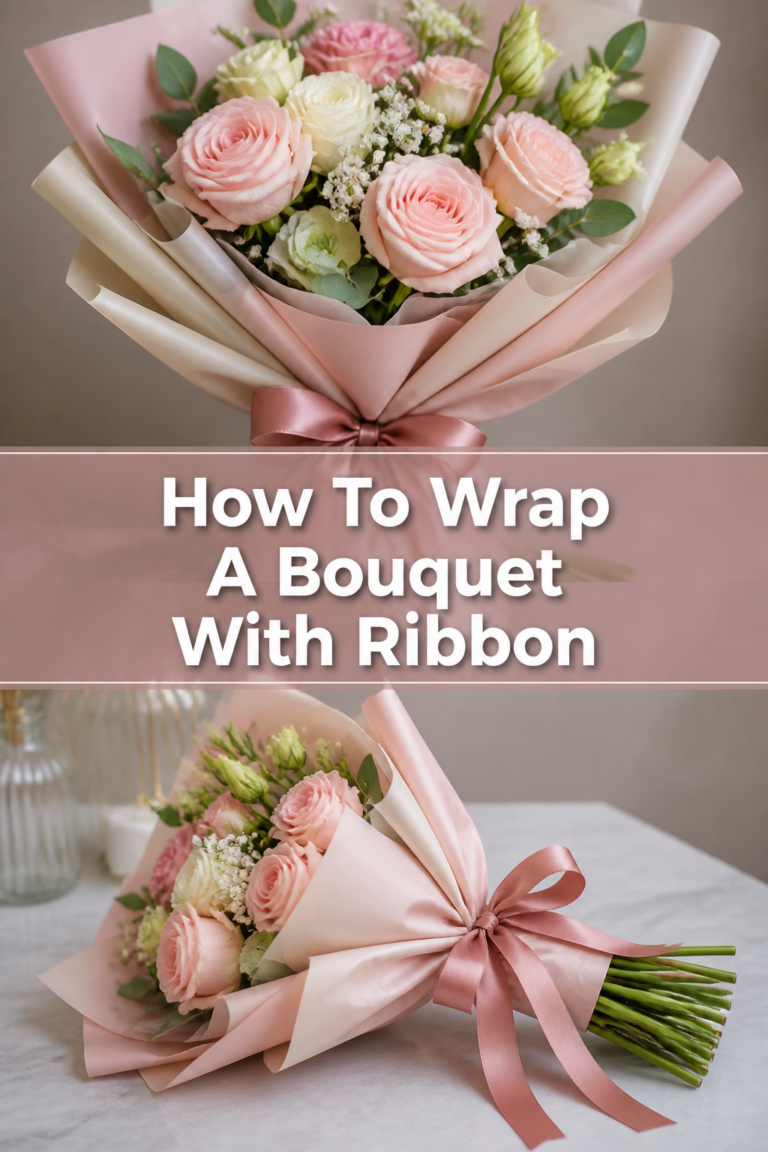
Now, it’s time for the decorative ribbon wrap. Start by pinning one end of your chosen ribbon into the top of the floral tape, just beneath the blooms.
Tightly wrap the ribbon downwards around the taped section, overlapping slightly, until the entire taped area is covered. Secure the end of the ribbon with another pin, or tie it off in a neat knot or bow if desired.
Pro Tip: For a polished look, use pearl-headed pins to secure the ribbon. You can also leave long ribbon tails for a romantic, flowing effect. Consider wrapping a small piece of fabric, like lace, under the ribbon for added texture.
Step 9: Hydrate and Store Your Finished Bouquet
Your beautiful bouquet is now complete! To keep it fresh until the wedding, immediately place the trimmed stems into a vase or bucket containing about 2-3 inches of fresh water.
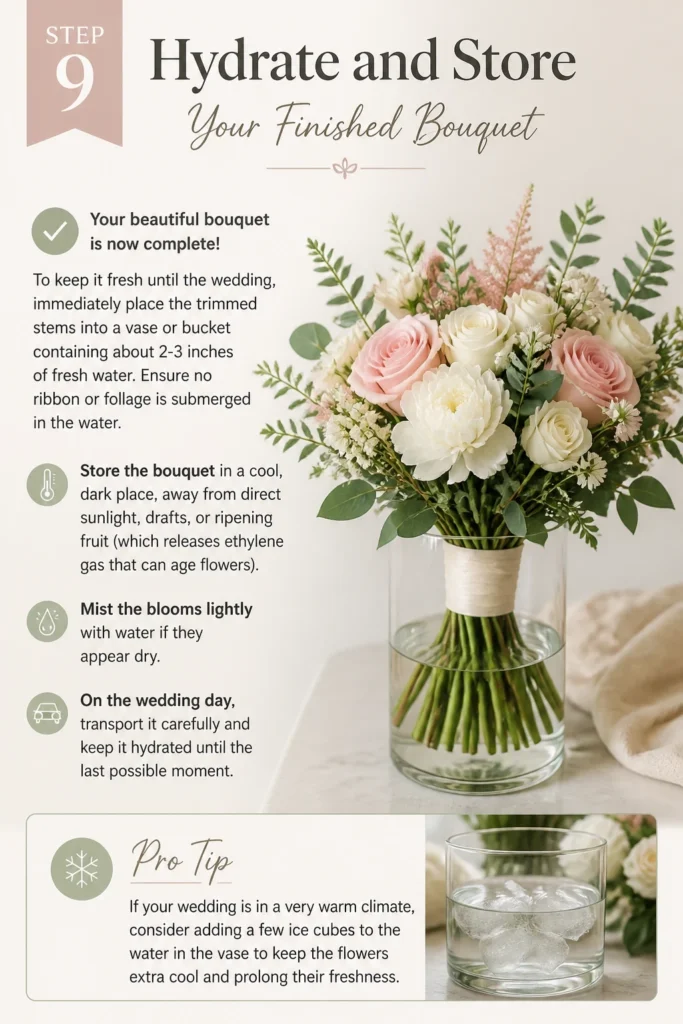
Ensure no ribbon or foliage is submerged in the water. Store the bouquet in a cool, dark place, away from direct sunlight, drafts, or ripening fruit (which releases ethylene gas that can age flowers).
Mist the blooms lightly with water if they appear dry. On the wedding day, transport it carefully and keep it hydrated until the last possible moment.
Pro Tip: If your wedding is in a very warm climate, consider adding a few ice cubes to the water in the vase to keep the flowers extra cool and prolong their freshness.
Common Mistakes to Avoid
Overstuffing Your Bouquet
A common pitfall is trying to include too many flowers. An overly large or dense bouquet can look messy and be incredibly heavy to carry throughout the day. Focus on quality over quantity, allowing each bloom to breathe and shine.
Instead, select a thoughtful variety of flowers and greenery, giving them space to create a visually appealing, balanced arrangement. A lighter bouquet is also much more comfortable.
Ignoring Proper Stem Preparation
Many DIY brides forget the critical step of conditioning their flowers. Simply cutting stems and placing them in water isn’t enough. Failing to remove submerged foliage and making clean, angled cuts drastically reduces the lifespan of your blooms.
Always re-cut stems, remove all lower leaves, and provide ample hydration time. This ensures your bouquet looks vibrant and fresh from ceremony to reception.
Inconsistent Spiral Technique
The spiral technique is fundamental for a well-structured bouquet. If you add stems haphazardly or in different directions, the bouquet will feel unstable, look lopsided, and be difficult to hold comfortably.
Practice the spiral technique with some inexpensive flowers or even just greenery first. Consistent angling of stems in the same direction provides a strong, balanced foundation.
Waiting Until the Last Minute
Attempting to create your bouquet just hours before the wedding can lead to immense stress and rushed results. Flowers need time to hydrate, and you need time to design without pressure.
Plan to assemble your bouquet 1-2 days before the wedding. This allows for any unexpected issues, gives the flowers time to settle, and ensures you can enjoy the process rather than feeling overwhelmed.
Troubleshooting
Bouquet Feels Unbalanced or Heavy
If your bouquet feels awkward or heavy, it might be due to uneven stem distribution or too many heavy-headed flowers on one side. Gently untape the stems if necessary and re-evaluate the weight distribution.
Try repositioning some of the heavier blooms towards the center or adding more lighter greenery to balance the weight. Ensure your spiral technique is consistent, as this naturally creates balance.
Flowers Are Wilting Prematurely
Wilting often indicates a lack of water or improper conditioning. Double-check that all foliage below the waterline was removed and that stems were cut at an angle.
Place the bouquet (or individual wilting stems) into a bucket of cool, deep water for an hour or two. Sometimes, a quick refresh can revive them. Ensure the storage area is cool and away from drafts.
Ribbon Wrap Keeps Slipping
A slipping ribbon usually means the floral tape underneath wasn’t applied tightly enough, or the ribbon itself isn’t secured properly. The floral tape provides the essential grip.
Remove the ribbon, re-tape the handle section more tightly, stretching the tape as you go. When re-wrapping the ribbon, use two pearl-headed pins at the start and end of the wrap, pushing them securely into the taped handle.
Key Takeaways
- Planning your bouquet’s style and sourcing fresh, in-season flowers are your first crucial steps.
- Properly conditioning your flowers by cutting stems and removing lower leaves significantly extends their life.
- Mastering the spiral technique is essential for a well-structured, comfortable-to-hold bouquet.
- Securely taping the stems provides a strong foundation before adding your decorative ribbon.
- Always give yourself ample time for both preparation and assembly to minimize stress.
- Store your finished bouquet in cool, fresh water away from direct light to maintain its beauty.
Frequently Asked Questions
When should I assemble my wedding bouquet?
It’s best to assemble your bouquet 1-2 days before your wedding. This allows the flowers to fully hydrate and open, and it gives you time to make any minor adjustments without last-minute pressure. Store it properly in water in a cool place.
How do I transport my bouquet on the wedding day?
Transport your bouquet in a tall vase or bucket with a few inches of water at the bottom. Secure the vase in a box or a non-slip mat in your car to prevent it from tipping over. Keep it upright and away from direct sunlight during transit.
What type of flowers last longest in a bouquet?
Hardier flowers like roses, carnations, chrysanthemums, protea, and most types of greenery tend to last well out of water. Delicate blooms like hydrangeas or gardenias might need extra care and hydration right up until the ceremony.
Can I make my bouquet the week before the wedding?
While some very hardy flowers might survive, it’s generally not recommended to make your bouquet a full week in advance. Most fresh flowers will start to decline in appearance after 3-4 days, even with proper care. Stick to the 1-2 day window for optimal freshness.
Our Top Recommended Finds
- High-Quality Floral Shears: Essential for clean cuts that help flowers absorb water efficiently. A sharp pair makes all the difference.
- Waterproof Floral Tape: This green, stretchy tape is the unsung hero, providing a strong, discreet bind for your stems. It activates with stretching.
- Premium Silk or Satin Ribbon: The final touch that elevates your bouquet. Choose a ribbon that complements your wedding colors and adds luxurious texture.
Crafting Your Unforgettable Moment
Making your own wedding bouquet is more than just a DIY project; it’s an act of love, creativity, and personal expression. Each carefully chosen bloom and thoughtfully placed stem tells a part of your unique story.
Imagine the pride you’ll feel walking down the aisle, holding a bouquet crafted by your own hands, knowing every detail reflects your vision. This guide has given you the tools and confidence to create something truly beautiful and deeply meaningful.
Now, take a deep breath, gather your inspiration, and start planning your floral masterpiece. Your wedding day is an extraordinary chapter, and your bouquet will be a cherished symbol of its beauty. Enjoy every moment of the creative process!
Wedding Planning
No fluff, no drama. Just easy weekly advice, planning shortcuts, and gentle reminders to help you actually enjoy your engagement.