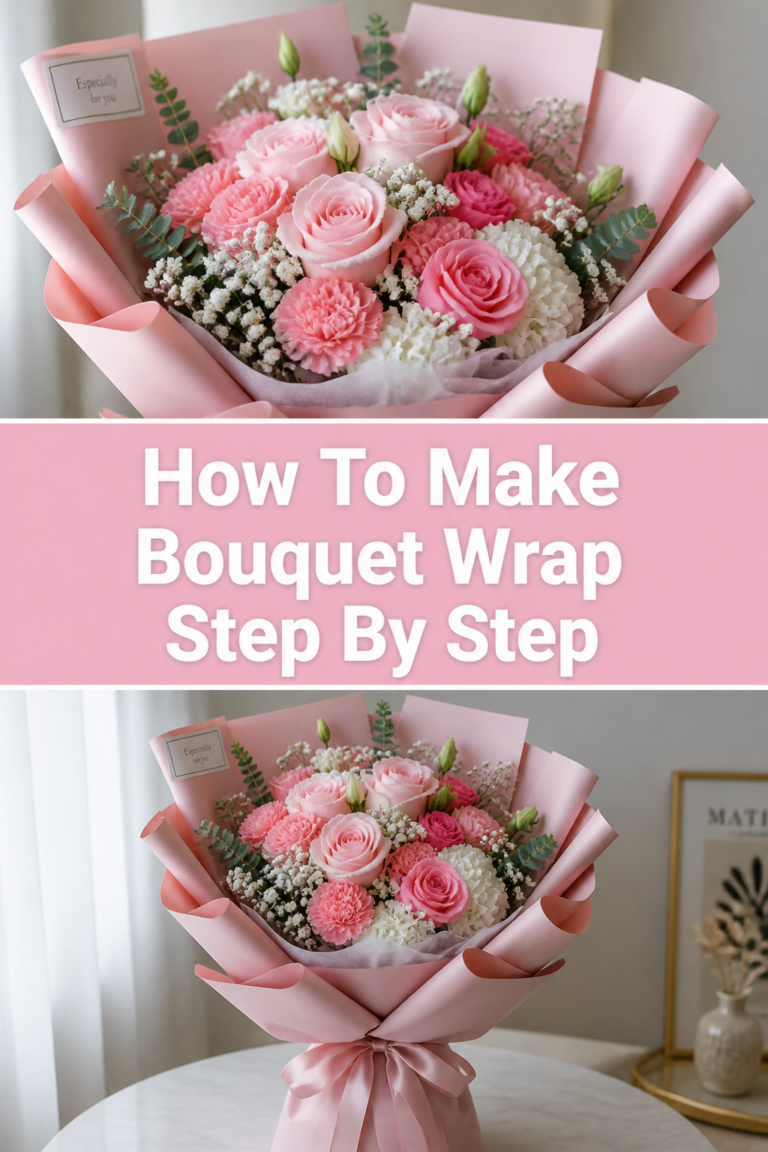
💐 How To Make A Flower Bouquet For Wedding
Creating your own wedding bouquet is an incredibly personal and rewarding experience.
I’ve seen the joy it brings firsthand, adding a unique touch that store-bought arrangements simply can’t replicate.
This guide shares practical, easy-to-follow steps to help you craft a stunning bridal bouquet with confidence.

Quick Overview
This guide will walk you through the entire process of designing and assembling a beautiful, sturdy wedding bouquet, perfect for your special day.
You’ll learn how to select flowers, prepare them, arrange them professionally, and add the final touches.
- Time needed: 3-5 hours (including flower prep, arrangement, and finishing)
- Difficulty: Intermediate
- What you’ll need: Fresh flowers, floral shears, floral tape, floral wire, ribbon, pins, a bucket of water, and a clean workspace.
Step-by-Step Instructions
Step 1: Plan Your Vision and Select Your Flowers
Begin by envisioning the style and color palette for your wedding bouquet. Consider the overall theme of your wedding, your dress, and the season.
Gather inspiration from magazines, Pinterest, or online florists to define your desired aesthetic.
Next, choose your flowers carefully. Aim for a mix of “star” flowers (focal points), “filler” flowers (to add volume), and “greenery” (for texture and shape).
Select varieties that are in season for freshness and cost-effectiveness, ensuring they complement each other in size, shape, and hue.
Pro Tip: Opt for flowers known for their longevity, such as roses, ranunculus, peonies, or hydrangeas, especially if your wedding day involves a lot of movement or heat.
Step 2: Procure and Prepare Your Blooms
Order your flowers from a reputable florist or flower market a few days before you plan to assemble the bouquet. This ensures maximum freshness.
When your flowers arrive, immediately “process” them. Remove any foliage that would fall below the waterline in a vase.
Using sharp floral shears, cut about an inch off the bottom of each stem at a 45-degree angle. This allows the stems to drink water more efficiently.
Place all your prepared flowers into clean buckets filled with fresh, cool water, ideally with floral food, and let them hydrate for several hours or overnight in a cool, dark place.
Step 3: Gather Your Tools and Create Your Workspace
Lay out all your necessary tools on a clean, flat surface. This includes your floral shears, floral tape, floral wire (if needed for delicate stems), ribbon, and pearl-headed pins.
Having everything within reach will make the assembly process smoother and more enjoyable.
Ensure you have a comfortable spot to work, perhaps with a mirror nearby to check your progress from different angles.
A bucket of water should also be handy to temporarily place stems or finished sections if you need a break.
Step 4: Start with Your Core Flowers
Begin building your bouquet by selecting your largest or most prominent “star” flowers. Choose 2-3 of these to form the central point of your bouquet.
Hold these stems securely in one hand, slightly fanning them out to create a rounded base.
Rotate the bouquet slightly as you add each new stem. This ensures a balanced, symmetrical shape.
Maintain a comfortable, firm grip on the stems as you build, but avoid crushing them.
Pro Tip: For a more natural, garden-style bouquet, allow some flowers to extend slightly further than others, creating a relaxed, organic silhouette.
Step 5: Incorporate Filler Flowers and Greenery
Once your core is established, begin adding smaller “filler” flowers around the central blooms. These fill gaps and add texture.
Think about varying heights and depths to create visual interest.
Next, weave in your chosen greenery. Use it to frame your flowers, add lushness, and help define the overall shape of the bouquet.
Greenery like eucalyptus, ruscus, or ferns can add beautiful movement and contrast.
Continue to add flowers and greenery, rotating the bouquet and stepping back frequently to assess its balance and shape.
Aim for a pleasing dome or cascade, depending on your desired style, ensuring all sides look cohesive.
Step 6: Secure the Bouquet’s Structure
Once you are satisfied with the arrangement and fullness of your bouquet, it’s time to secure the stems.
Using floral tape, tightly wrap the stems starting from just below the lowest bloom and working your way down about 3-4 inches.
Overlap the tape slightly with each revolution to ensure a strong, secure bind. This prevents flowers from shifting or falling out.
The floral tape provides a firm foundation for the decorative ribbon wrap.
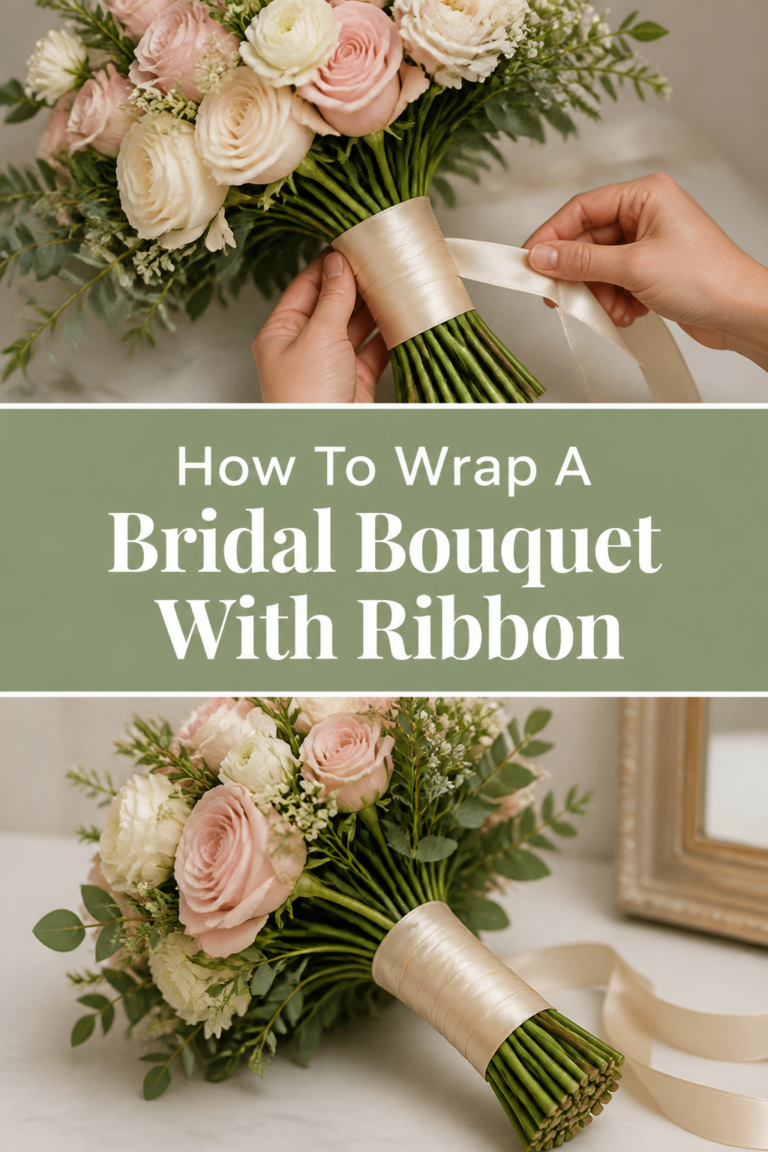
Step 7: Trim Stems and Add the Finishing Ribbon
With the floral tape securely in place, use your floral shears to trim all the stems to a uniform length. A common length is about 6-8 inches from the base of the blooms, but adjust for comfort.
Ensure the cut is clean and even for a professional finish.
Now, take your chosen ribbon and begin wrapping it tightly over the floral tape, starting from the top.
Overlap the ribbon neatly, working your way down the taped section, and then back up again if you desire a thicker wrap.
Secure the end of the ribbon with a few pearl-headed pins, pushing them discreetly into the wrapped stems.
You can also create a small bow or leave the ends flowing for an elegant touch.
Step 8: Final Inspection and Storage
Give your finished bouquet a final look-over. Check for any loose stems, uneven areas, or stray leaves.
Gently adjust any elements to perfect the shape and ensure all flowers are positioned beautifully.
Mist the bouquet lightly with water, especially if it’s a hot day, and store it in a cool, dark place until the wedding ceremony.
If possible, place the stems in a shallow vase of water to keep the flowers hydrated for as long as possible.
Common Mistakes to Avoid
Overstuffing the Bouquet
A common pitfall is trying to use too many flowers, resulting in a dense, heavy, and often shapeless bouquet. This can make the bouquet difficult to hold and detract from the beauty of individual blooms.
Instead, focus on balance and allowing each flower to have its moment. Use fewer, well-placed stems to create an elegant, airy feel.
Ignoring Stem Hydration
Forgetting to properly hydrate your flowers before and after assembly can lead to wilting before the wedding even begins. Flowers need a constant water source to look their best.
Always cut stems at an angle and place them in water immediately. Store the finished bouquet with stems in water in a cool place until it’s time to walk down the aisle.
Inconsistent Stem Lengths
Leaving stems at varying, unkempt lengths can make the bouquet look messy and unprofessional. It also makes it harder to hold comfortably.
After securing the bouquet with floral tape, trim all stems to a uniform, comfortable length. This creates a neat, polished finish.
Forgetting Floral Tape
Relying solely on ribbon to hold your bouquet together is a recipe for disaster. Ribbon alone is not strong enough to secure the weight and movement of the flowers.
Always use floral tape first to create a strong, stable structure for the bouquet. The ribbon then serves as a beautiful decorative cover.
Troubleshooting
Bouquet Feels Loose/Flowers Are Shifting
If your bouquet feels unstable or flowers are moving out of place, the floral tape likely wasn’t wrapped tightly enough. It’s crucial for structural integrity.
Carefully unwrap the ribbon and re-tape the stems more firmly, overlapping each rotation of the tape. Ensure the bind is snug but doesn’t crush the stems.
Flowers Are Wilting Prematurely
Wilting often indicates insufficient hydration or exposure to heat. Check if your flowers were properly conditioned upon arrival and stored in a cool environment.
For slightly wilted flowers, you can try re-cutting the stems and submerging the entire flower head (if appropriate for the type) in cool water for 30 minutes to an hour. Always keep the bouquet in a cool, dark place until needed.
Bouquet Looks Unbalanced
An unbalanced bouquet can result from adding too many flowers to one side or not rotating the bouquet as you build it. It might appear heavier on one side or have an odd shape.
Gently remove a few stems from the heavier side or strategically add a few small fillers to the lighter side. Always step back and view the bouquet from all angles during assembly to catch imbalances early.
Key Takeaways
- Plan meticulously: Define your style, choose seasonal flowers, and gather all tools before starting.
- Prioritize hydration: Properly process and hydrate your flowers immediately upon arrival to ensure longevity.
- Build in layers: Start with core blooms, then add fillers and greenery, rotating constantly for balance.
- Secure firmly: Use floral tape as the primary structural support before adding decorative ribbon.
- Trim uniformly: Cut all stems to an even, comfortable length for a professional and comfortable hold.
- Store carefully: Keep the finished bouquet in a cool, dark place with stems in water until the wedding.
Frequently Asked Questions
How far in advance can I make my wedding bouquet?
It’s best to assemble your bouquet no more than 1-2 days before the wedding. This ensures the flowers are at their freshest and most vibrant. Proper conditioning and storage are crucial if made in advance.
What’s the best way to keep my bouquet fresh on the wedding day?
Keep the bouquet in a cool, shaded area as much as possible. If there’s a long gap between photos and the ceremony, you can briefly place the stems in a shallow vase of water. Mist the blooms lightly with water if needed, avoiding delicate petals.
Can I mix fresh flowers with silk flowers?
While technically possible, it’s generally not recommended for a bridal bouquet. The textures, weights, and natural movements of fresh and silk flowers are very different, which can make the arrangement look disjointed. Stick to either all fresh or all high-quality silk for a cohesive look.
How do I choose the right size for my bouquet?
The ideal size often depends on your height, your dress style, and the overall scale of your wedding. A good rule of thumb is that the bouquet should complement, not overpower, your figure and gown. Practice holding different sizes of mock bouquets to find what feels comfortable and looks proportionate.
Your Beautiful Bouquet Awaits
Crafting your wedding bouquet is more than just arranging flowers; it’s infusing your special day with a piece of your heart.
The satisfaction of holding something you created will be an unforgettable part of your cherished memories.
Don’t just dream about your perfect bouquet—take these steps and bring it to life.
Embrace the process, trust your artistic eye, and prepare to walk down the aisle with a truly unique, handmade masterpiece.