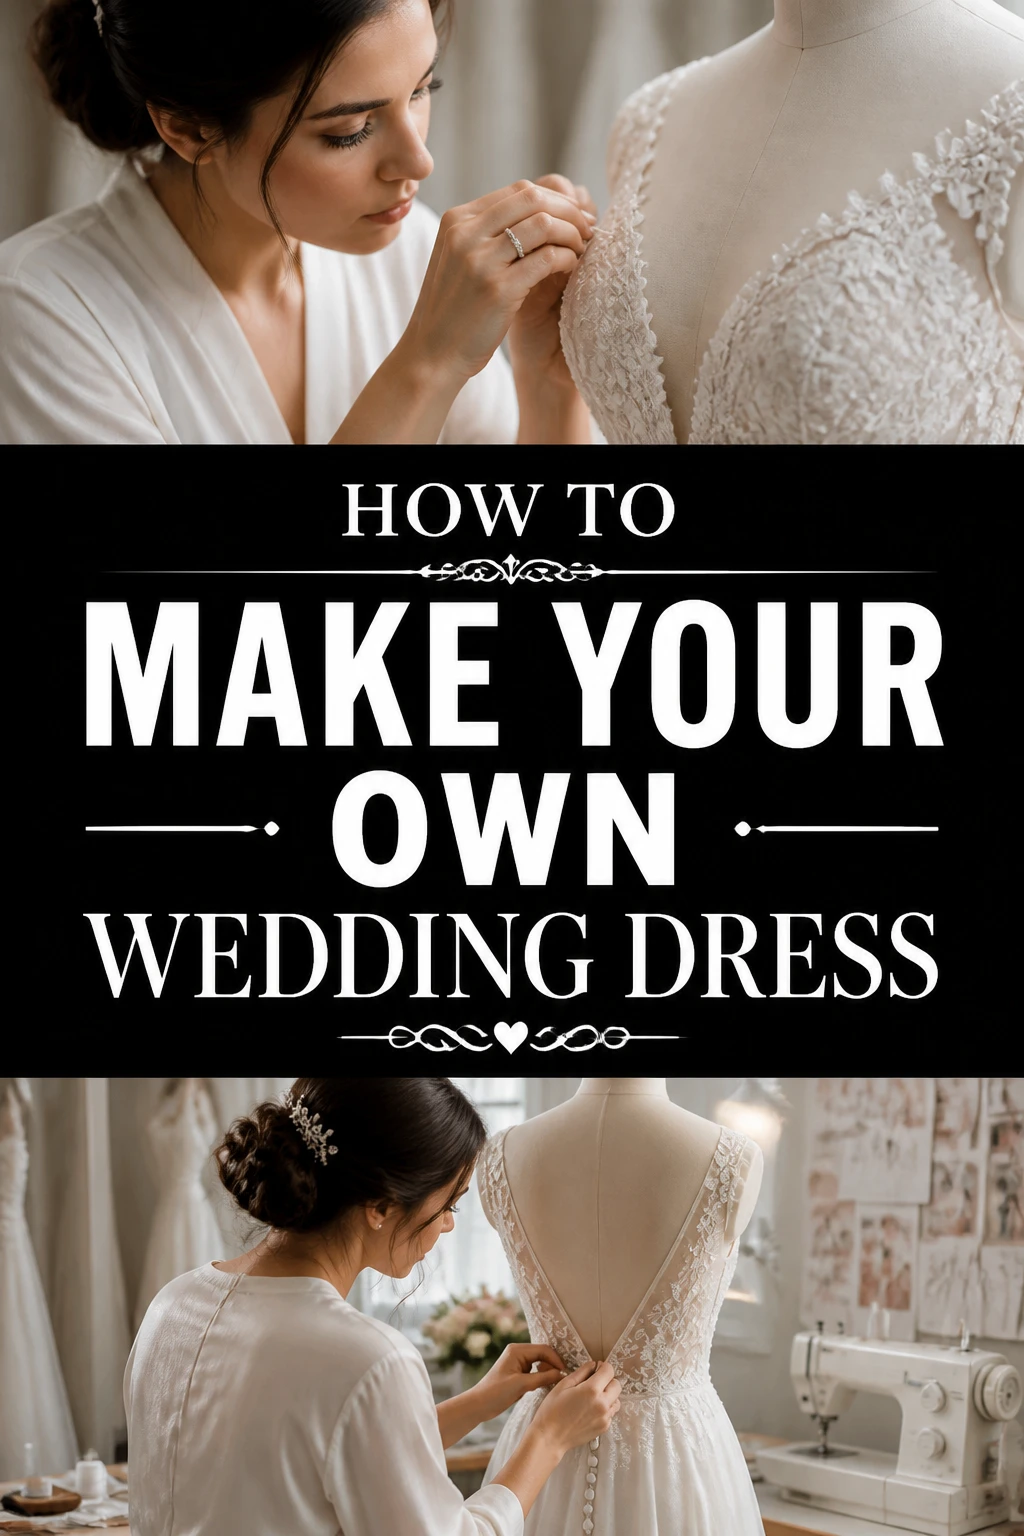
👰♀️ How To Make Your Own Wedding Dress

Wedding Planning
No fluff, no drama. Just easy weekly advice, planning shortcuts, and gentle reminders to help you actually enjoy your engagement.
Creating your own wedding dress is a deeply personal journey. I remember the immense pride and joy I felt seeing my vision come to life stitch by stitch. This guide draws on that experience, offering you a clear path to crafting your dream gown.
It’s a beautiful way to infuse your personality into one of the most significant garments you’ll ever wear. You absolutely have the creativity and skill within you to make this happen.
Quick Overview
Embark on a truly unique adventure by designing and sewing your very own wedding dress. This comprehensive guide will walk you through every critical stage, from initial inspiration to the final, perfect stitch. You’ll gain the confidence to create a gown that perfectly reflects your style and story.
- Time needed: 6-12 months (depending on complexity and experience)
- Difficulty: Intermediate to Advanced (requires basic sewing skills)
- What you’ll need: Sewing machine, fabric, pattern, notions, dress form, measuring tools.
Step-by-Step Instructions
Step 1: Envision Your Dream Gown
Begin by gathering inspiration from every source imaginable. Look at magazines, Pinterest boards, and real wedding photos. Consider your wedding venue, theme, and personal style.
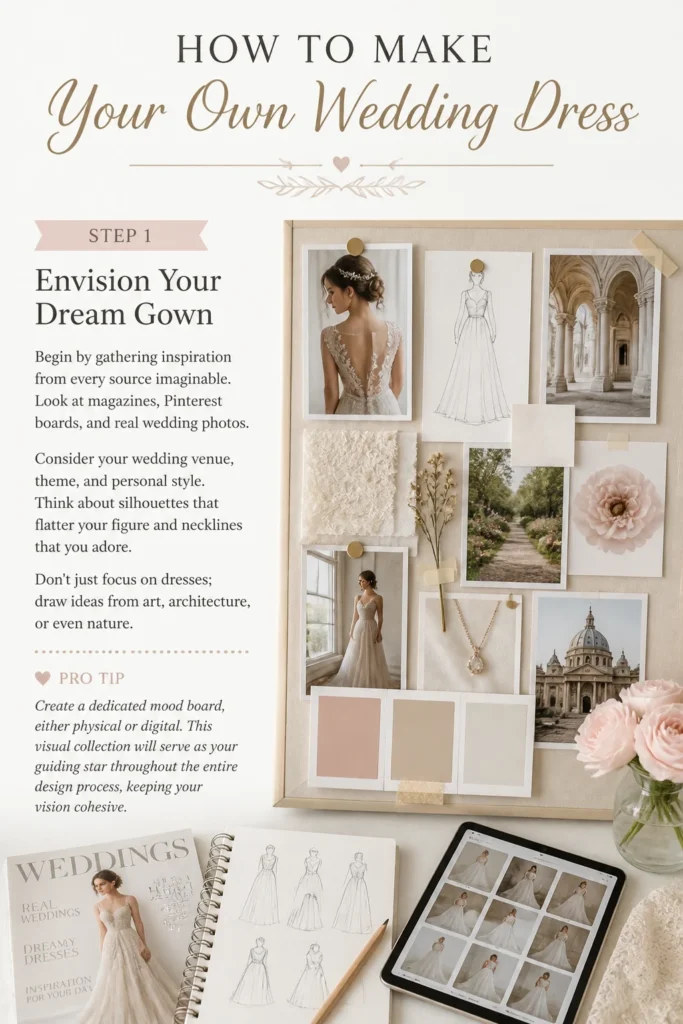
Think about silhouettes that flatter your figure and necklines that you adore. Don’t just focus on dresses; draw ideas from art, architecture, or even nature. This initial phase is all about dreaming big and collecting visual cues.
Pro Tip: Create a dedicated mood board, either physical or digital. This visual collection will serve as your guiding star throughout the entire design process, keeping your vision cohesive.
Step 2: Sketch and Refine Your Design
Once you have a wealth of inspiration, start sketching your ideas. You don’t need to be an artist; simple stick figures or basic outlines are perfectly fine. Focus on translating your mood board into a tangible design.
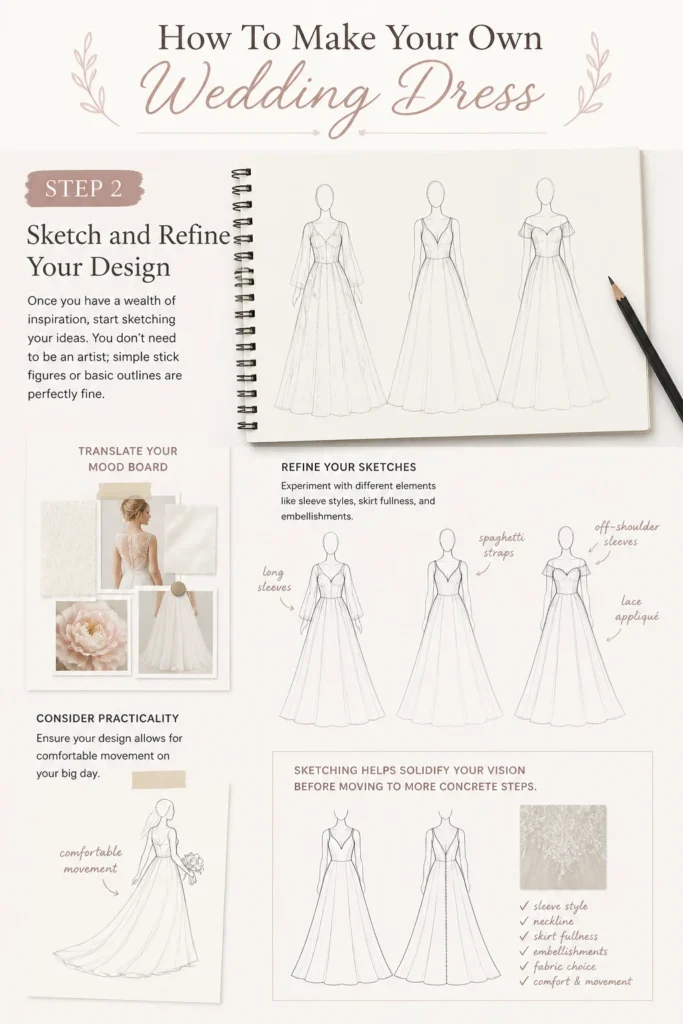
Refine your sketches, experimenting with different elements like sleeve styles, skirt fullness, and embellishments. Consider the practicality of your design, ensuring it allows for comfortable movement on your big day. Sketching helps solidify your vision before moving to more concrete steps.
Step 3: Choose Your Pattern and Fabric
Select a commercial sewing pattern that closely matches your refined design. It’s often easier to adapt an existing pattern than to draft one from scratch, especially for beginners. Look for patterns with similar basic silhouettes.
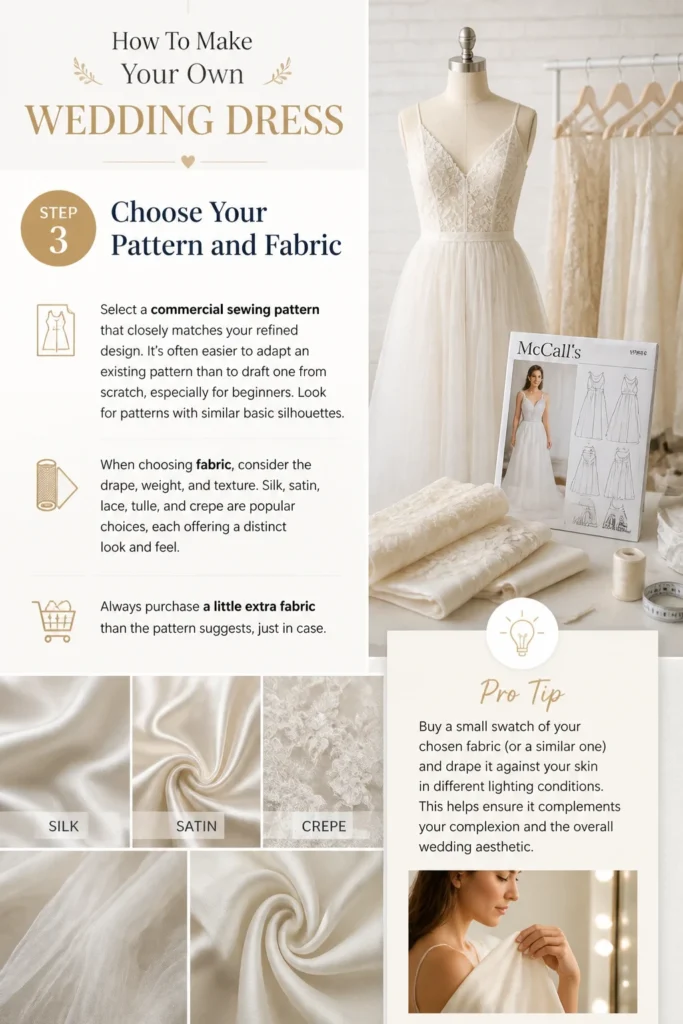
When choosing fabric, consider the drape, weight, and texture. Silk, satin, lace, tulle, and crepe are popular choices, each offering a distinct look and feel. Always purchase a little extra fabric than the pattern suggests, just in case.
Pro Tip: Buy a small swatch of your chosen fabric (or a similar one) and drape it against your skin in different lighting conditions. This helps ensure it complements your complexion and the overall wedding aesthetic.
Step 4: Create a Muslin Mock-Up
Construct a mock-up of your dress using inexpensive fabric, often called muslin or calico. This crucial step allows you to test the pattern’s fit and make any necessary alterations before cutting into your precious wedding fabric. Sew the muslin exactly as you would the actual dress, including darts, seams, and closures.
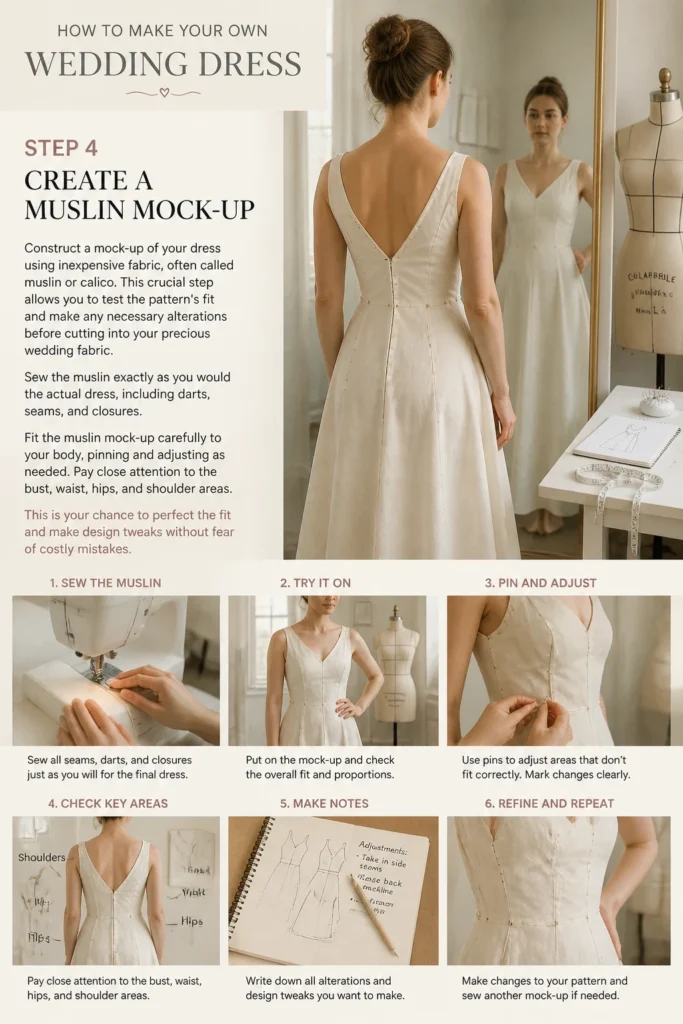
Fit the muslin mock-up carefully to your body, pinning and adjusting as needed. Pay close attention to the bust, waist, hips, and shoulder areas. This is your chance to perfect the fit and make design tweaks without fear of costly mistakes.
Step 5: Cut and Prepare Your Wedding Fabric
Once your muslin mock-up fits perfectly, transfer all alterations to your paper pattern pieces. Carefully lay out your wedding fabric according to the pattern’s grain lines and cutting instructions. Use sharp fabric shears to cut out all pieces precisely.
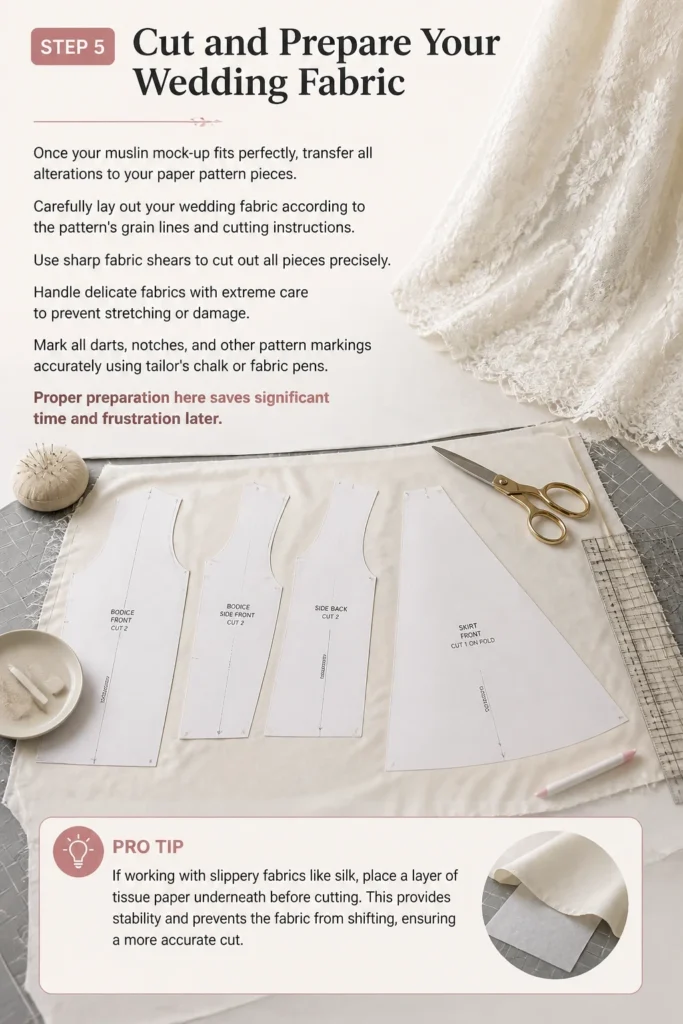
Handle delicate fabrics with extreme care to prevent stretching or damage. Mark all darts, notches, and other pattern markings accurately using tailor’s chalk or fabric pens. Proper preparation here saves significant time and frustration later.
Pro Tip: If working with slippery fabrics like silk, place a layer of tissue paper underneath before cutting. This provides stability and prevents the fabric from shifting, ensuring a more accurate cut.
Step 6: Begin Construction and Embellishment
Start sewing your dress, following the pattern instructions step by step. Work slowly and meticulously, pressing each seam as you go. This creates a professional, crisp finish. Assemble the bodice, skirt, and any other main components.
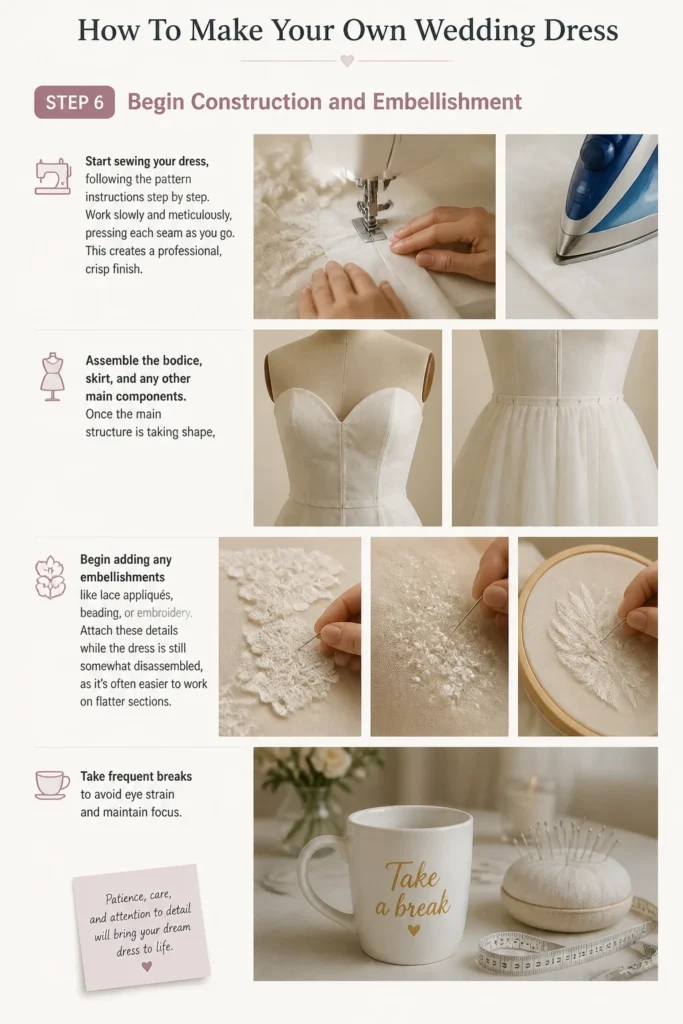
Once the main structure is taking shape, begin adding any embellishments like lace appliqués, beading, or embroidery. Attach these details while the dress is still somewhat disassembled, as it’s often easier to work on flatter sections. Take frequent breaks to avoid eye strain and maintain focus.
Step 7: Fit, Hem, and Finish
Conduct multiple fittings throughout the construction process, especially as you attach major components. Pin the dress onto your body or a dress form for these checks. Adjust seams and darts as needed to ensure the perfect fit.
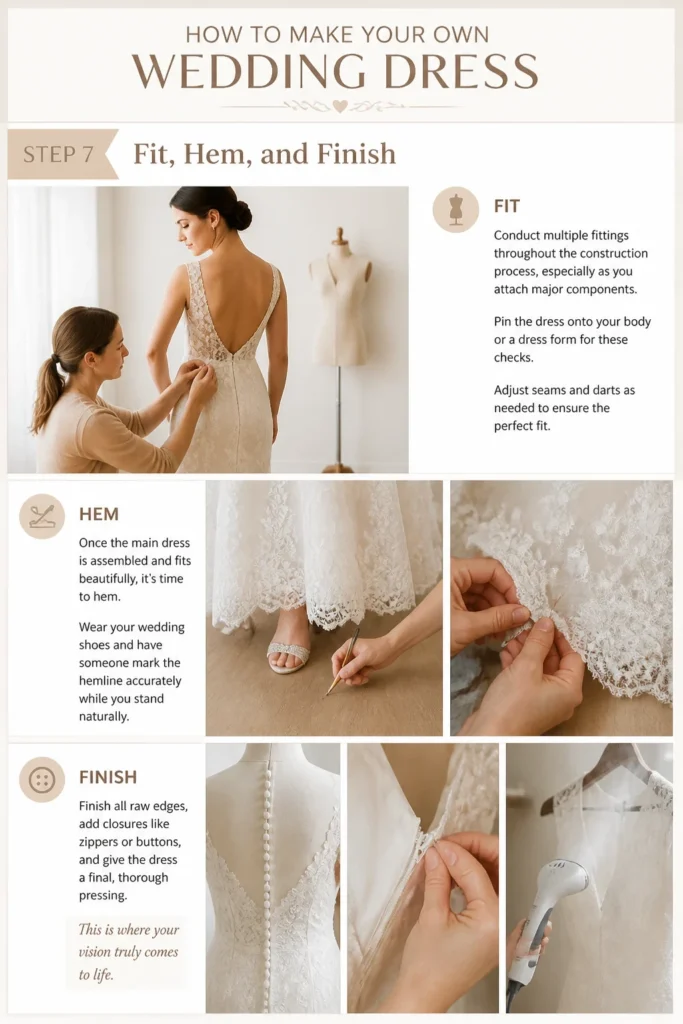
Once the main dress is assembled and fits beautifully, it’s time to hem. Wear your wedding shoes and have someone mark the hemline accurately while you stand naturally. Finish all raw edges, add closures like zippers or buttons, and give the dress a final, thorough pressing. This is where your vision truly comes to life.
Common Mistakes to Avoid
Rushing the Process
Many brides get excited and try to complete their dress too quickly. This often leads to errors, frustration, and a less-than-perfect finish. Take your time with each step, especially the fitting and pressing stages. Patience is truly a virtue when sewing a wedding dress; it ensures quality and reduces stress.
Skipping the Muslin Mock-Up
Ignoring the muslin mock-up is a critical error that can lead to a poorly fitting dress and wasted expensive fabric. The mock-up is your practice run, allowing you to perfect the fit and make design changes without consequence. Invest the time in this step; it’s invaluable.
Underestimating Fabric and Notions
It’s easy to miscalculate how much fabric, lining, interfacing, or even thread you’ll need. Always buy a little extra of everything, especially for special occasion fabrics that might be hard to reorder. Running out mid-project can cause significant delays and added stress.
Not Pressing Seams
Failing to press seams after each stitching step is a common oversight. Pressing isn’t just about removing wrinkles; it helps to meld the stitches into the fabric, creating crisp, flat, and professional-looking seams. A well-pressed garment looks infinitely better than one that isn’t.
Troubleshooting
Fabric Puckering at Seams
If your fabric is puckering along the seams, it’s often due to incorrect tension or an unsuitable needle. First, try adjusting your sewing machine’s tension settings. You might also need a finer needle, such as a sharp or microtex needle, especially for delicate fabrics like silk or chiffon. Test on a scrap piece first.
Zipper Rippling
A rippling zipper can be frustrating, but it’s usually fixable. This often happens if the zipper tape stretches during insertion or if the fabric is too lightweight for the zipper’s weight. Try applying fusible interfacing to the seam allowance where the zipper will be sewn. Also, ensure you’re easing the fabric evenly as you sew the zipper in place.
Dress Doesn’t Hang Right
If your dress isn’t hanging correctly, it could be an issue with grain line, fabric choice, or an uneven hem. Double-check that your pattern pieces were cut precisely on the fabric’s grain. Also, ensure the fabric you chose has the appropriate drape for your design. For an uneven hem, re-mark it while wearing your wedding shoes and standing straight, then carefully re-hem.
Key Takeaways
- Start Early: Give yourself ample time (6-12 months) to design, sew, and fit your dress without undue pressure.
- Design Thoughtfully: Use mood boards and sketches to refine your vision before committing to a pattern or fabric.
- Embrace the Muslin: A mock-up is non-negotiable for achieving a perfect fit and testing your design.
- Choose Wisely: Select fabrics and patterns that align with your design, skill level, and wedding day vision.
- Be Meticulous: Precision in cutting, sewing, and pressing makes all the difference in the final outcome.
- Fit Regularly: Frequent fittings ensure the dress evolves perfectly with your body and design adjustments.
Frequently Asked Questions
Can a beginner really make their own wedding dress?
While challenging, a determined beginner with some basic sewing experience can make a simpler wedding dress. Start with a less complex design, choose a forgiving fabric, and dedicate plenty of time to learning and practicing. Don’t be afraid to take a local sewing class for extra support.
How much does it typically cost to make a wedding dress?
The cost varies widely depending on your fabric choices, embellishments, and pattern complexity. You can save money compared to buying a designer gown, but high-quality silks and laces can still be expensive. Expect to spend anywhere from a few hundred to over a thousand dollars on materials.
What’s the best fabric for a DIY wedding dress?
There isn’t one “best” fabric; it depends on your desired look and skill level. Satin and crepe are beautiful but can be challenging to work with. Taffeta holds shape well, while lace and tulle are great for overlays. Consider a mid-weight fabric for your first project, as it’s often easier to handle.
How do I choose the right sewing machine?
For a wedding dress, you’ll want a reliable machine that can handle various fabric weights. A good quality domestic machine with a strong motor and various stitch options is usually sufficient. Look for features like adjustable presser foot pressure and a free arm for easier sewing of sleeves and tight curves.
Crafting Your Legacy: The Final Stitch
Making your own wedding dress is more than just sewing; it’s an act of love, dedication, and personal expression. This garment will hold countless memories, a tangible symbol of your journey to your special day. You’re not just creating a dress; you’re weaving your story into every seam.
Now that you have the roadmap, the next step is to embrace the process. Start gathering your inspiration, sketch your dreams, and prepare to embark on this incredible creative adventure. Your unique wedding dress is waiting to be brought to life by your own hands.
Wedding Planning
No fluff, no drama. Just easy weekly advice, planning shortcuts, and gentle reminders to help you actually enjoy your engagement.