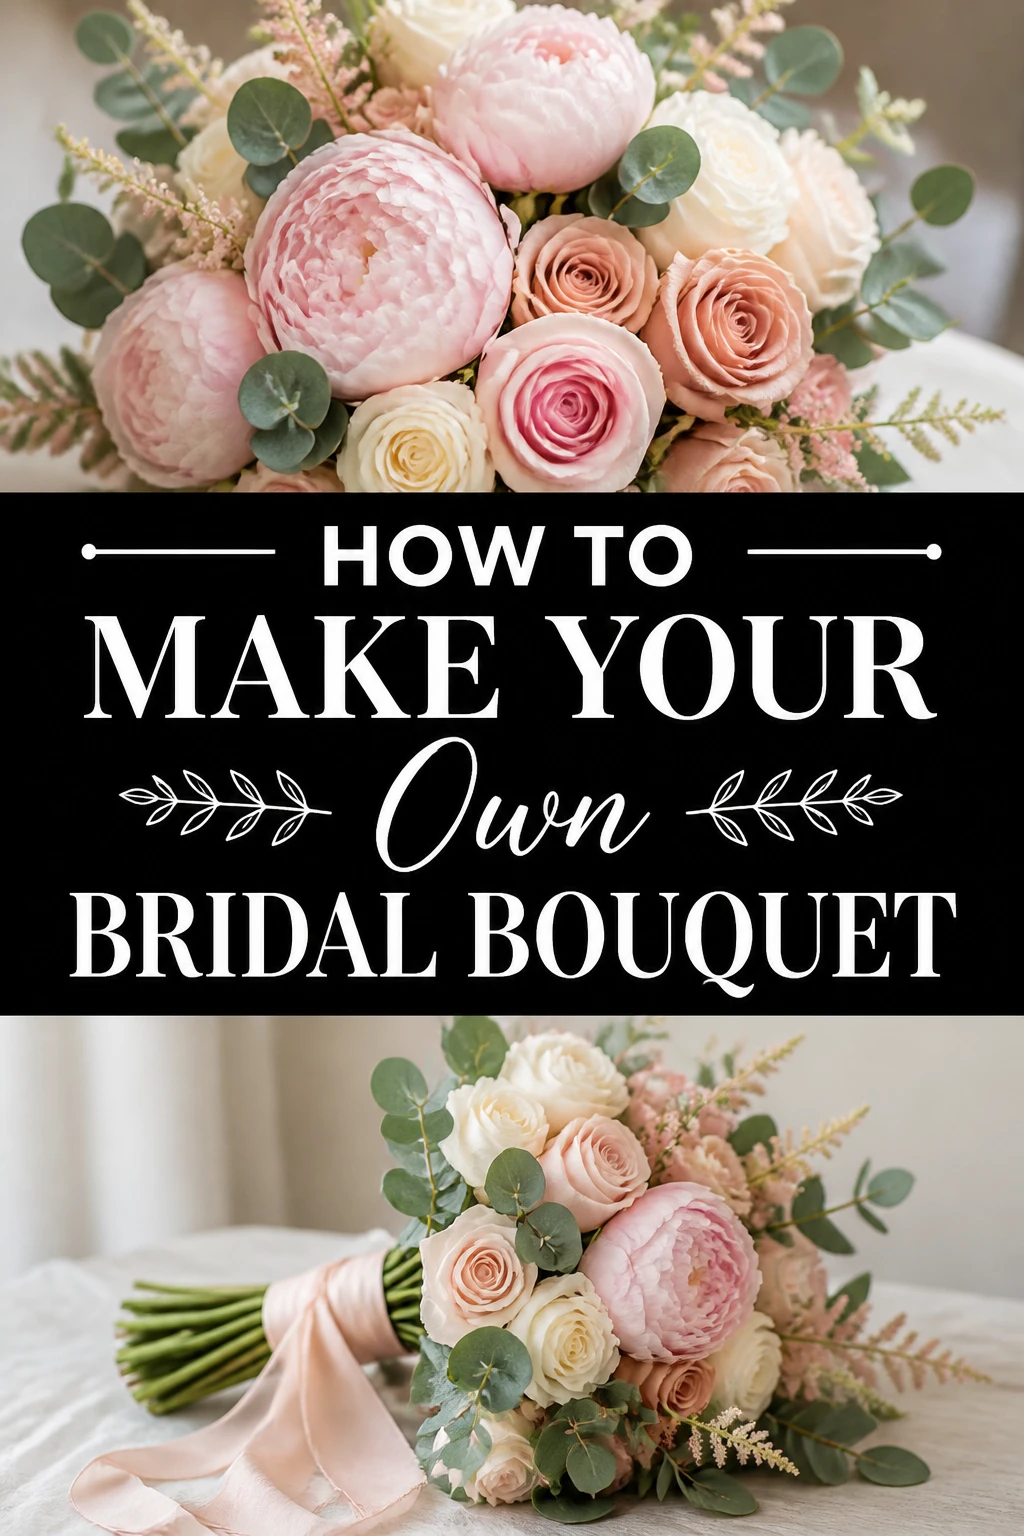
💐 How To Make Your Own Bridal Bouquet

Wedding Planning
No fluff, no drama. Just easy weekly advice, planning shortcuts, and gentle reminders to help you actually enjoy your engagement.
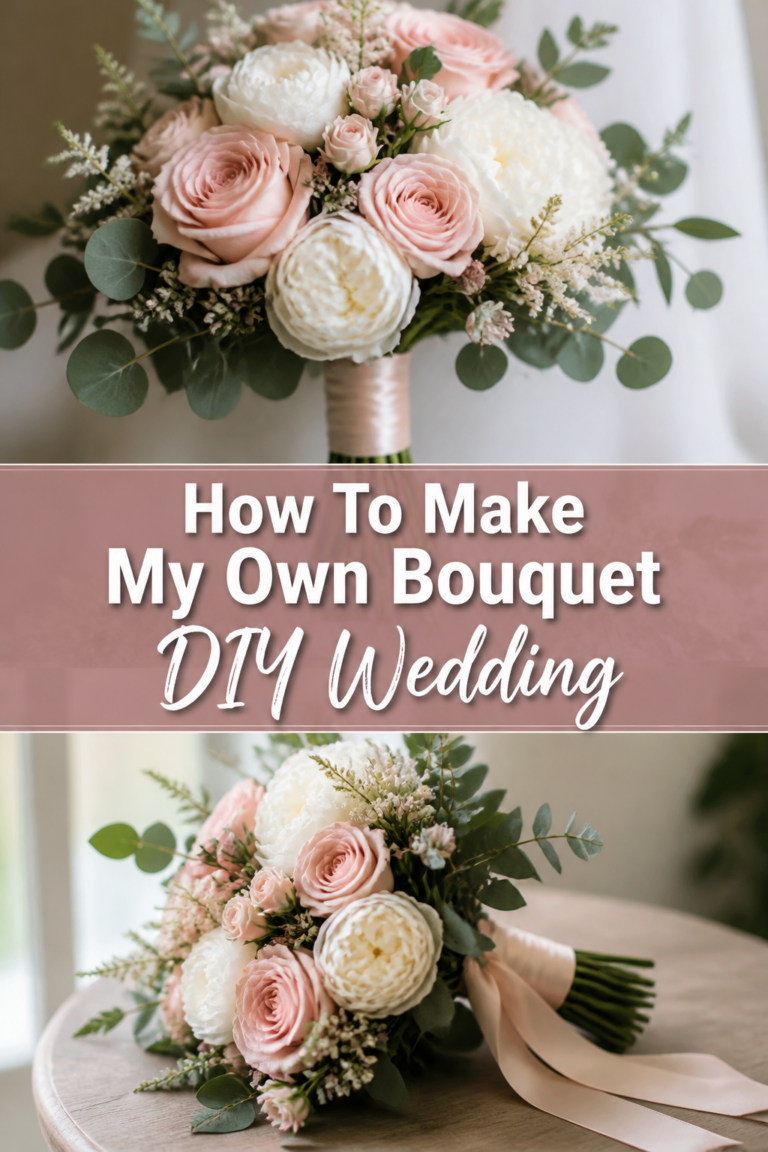
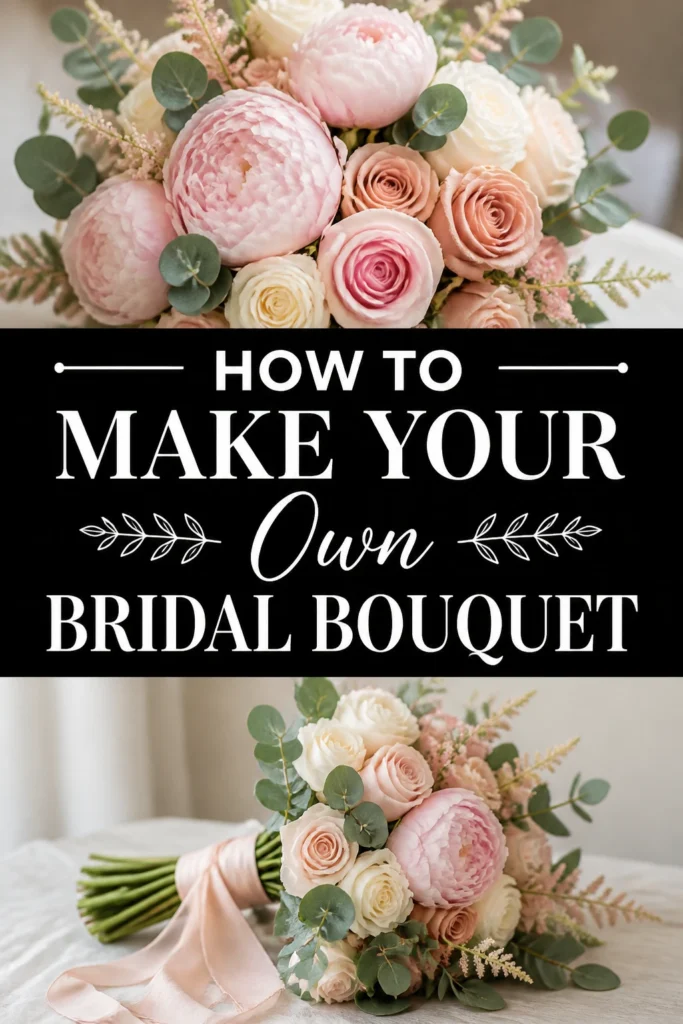
Creating your own bridal bouquet is a beautiful way to infuse your personality into your wedding aesthetic.
I first attempted this for a close friend’s elopement and realized that the process is as much about the ritual as it is about the final product.
This guide provides a clear path to crafting a sturdy, stunning arrangement that will look incredible in your photos and last through your vows.
Quick Overview
Designing your own flowers requires a mix of preparation, patience, and a little bit of creative flair.
- Time needed: 60 to 90 minutes (plus 24 hours for flower hydration)
- Difficulty: Intermediate
- What you’ll need: Fresh flowers, greenery, floral shears, floral tape, satin ribbon, and pearl-headed pins.
Step 1: Select and Source Your Blooms
Choose flowers that are hardy and can withstand being out of water for several hours.
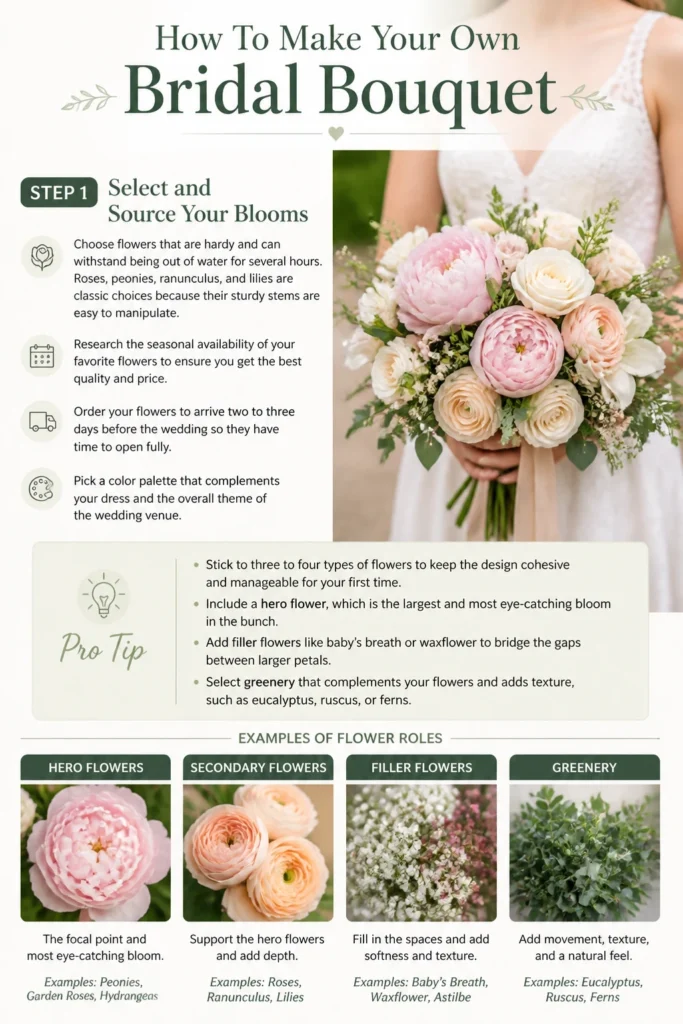
Roses, peonies, ranunculus, and lilies are classic choices because their sturdy stems are easy to manipulate.
Research the seasonal availability of your favorite flowers to ensure you get the best quality and price.
Order your flowers to arrive two to three days before the wedding so they have time to open fully.
Pick a color palette that complements your dress and the overall theme of the wedding venue.
Pro Tip: Stick to three to four types of flowers to keep the design cohesive and manageable for your first time.
Include a “hero” flower, which is the largest and most eye-catching bloom in the bunch.
Add “filler” flowers like baby’s breath or waxflower to bridge the gaps between larger petals.
Select greenery like eucalyptus or ruscus to provide a natural frame and add a sense of movement to the arrangement.
Step 2: Prepare the Stems
Before you begin arranging, you must clean every single stem to ensure a professional finish.
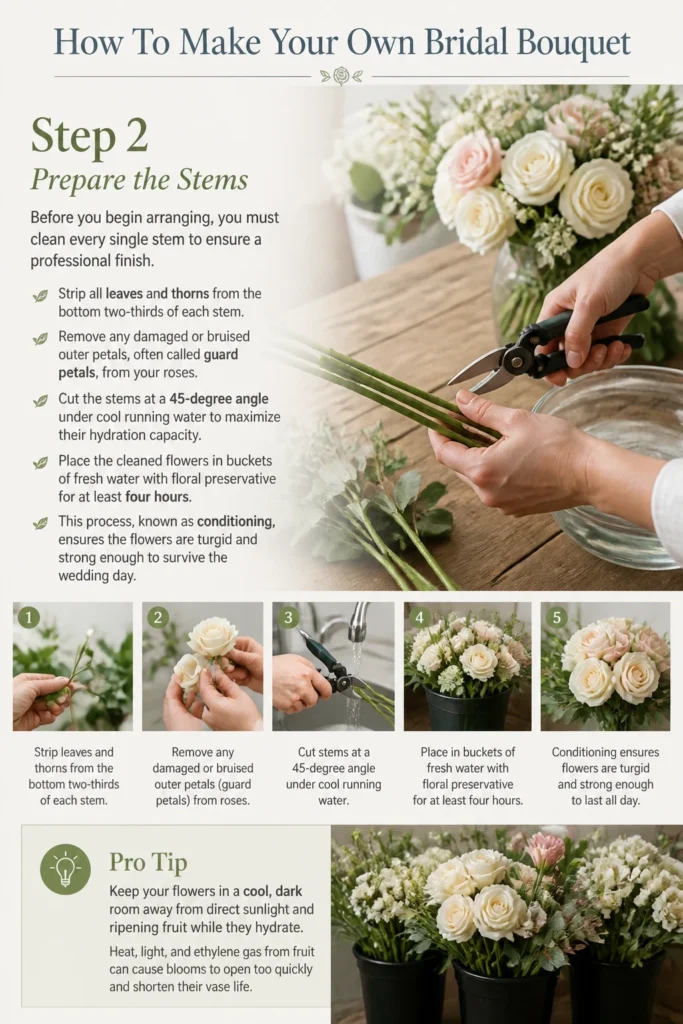
Strip all leaves and thorns from the bottom two-thirds of each stem.
Remove any damaged or bruised outer petals, often called “guard petals,” from your roses.
Cut the stems at a 45-degree angle under cool running water to maximize their hydration capacity.
Place the cleaned flowers in buckets of fresh water with floral preservative for at least four hours.
This process, known as “conditioning,” ensures the flowers are turgid and strong enough to survive the wedding day.
Leaves left on the lower part of the stem will rot in the water, creating bacteria that shorten the life of your flowers.
Pro Tip: Keep your flowers in a cool, dark room away from direct sunlight and ripening fruit while they hydrate.
Check the stems for any signs of weakness or drooping before you move on to the design phase.
If a stem is too soft, it may not hold up in a hand-tied bouquet and should be used for a boutonniere instead.
Step 3: Create the Focal Core
Start your bouquet by selecting three or four of your best “hero” flowers to form the center.
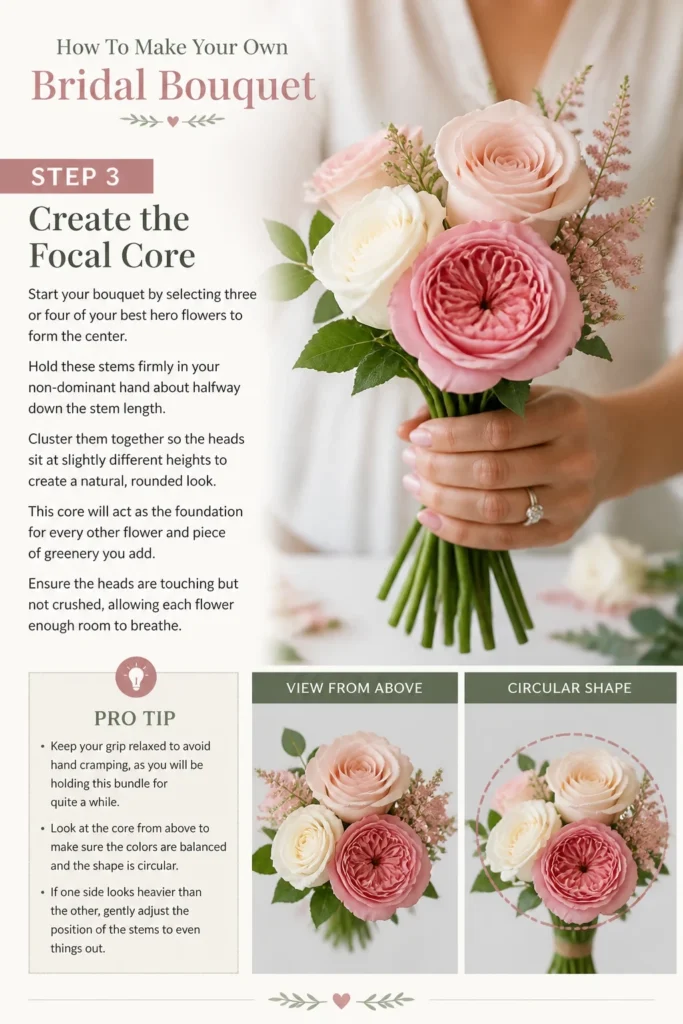
Hold these stems firmly in your non-dominant hand about halfway down the stem length.
Cluster them together so the heads sit at slightly different heights to create a natural, rounded look.
This core will act as the foundation for every other flower and piece of greenery you add.
Ensure the heads are touching but not crushed, allowing each flower enough room to breathe.
If you are using roses, you can gently blow into the center of the bloom to help the petals open wider.
Pro Tip: Keep your grip relaxed to avoid hand cramping, as you will be holding this bundle for quite a while.
Look at the core from above to make sure the colors are balanced and the shape is circular.
If one side looks heavier than the other, adjust the placement now before the bundle becomes too thick.
Step 4: Use the Spiral Technique
The secret to a professional bridal bouquet is the spiral method, which creates a beautiful flared handle.
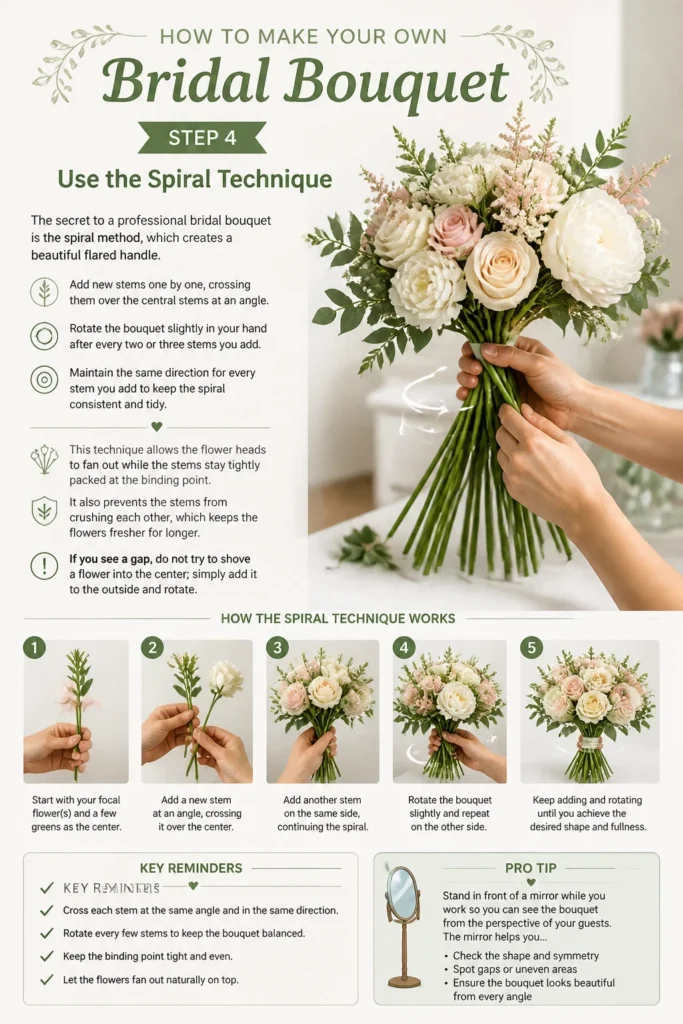
Add new stems one by one, crossing them over the central stems at an angle.
Rotate the bouquet slightly in your hand after every two or three stems you add.
Maintain the same direction for every stem you add to keep the spiral consistent and tidy.
This technique allows the flower heads to fan out while the stems stay tightly packed at the binding point.
It also prevents the stems from crushing each other, which keeps the flowers fresher for longer.
If you see a gap, do not try to shove a flower into the center; simply add it to the outside and rotate.
Pro Tip: Stand in front of a mirror while you work so you can see the bouquet from the perspective of your guests.
The mirror helps you spot holes or flat spots in the arrangement that you might miss from a top-down view.
Continue adding flowers until the bouquet reaches your desired size and fullness.
Step 5: Incorporate Texture and Greenery
Once the main flowers are in place, it is time to add the supporting elements that give the bouquet character.
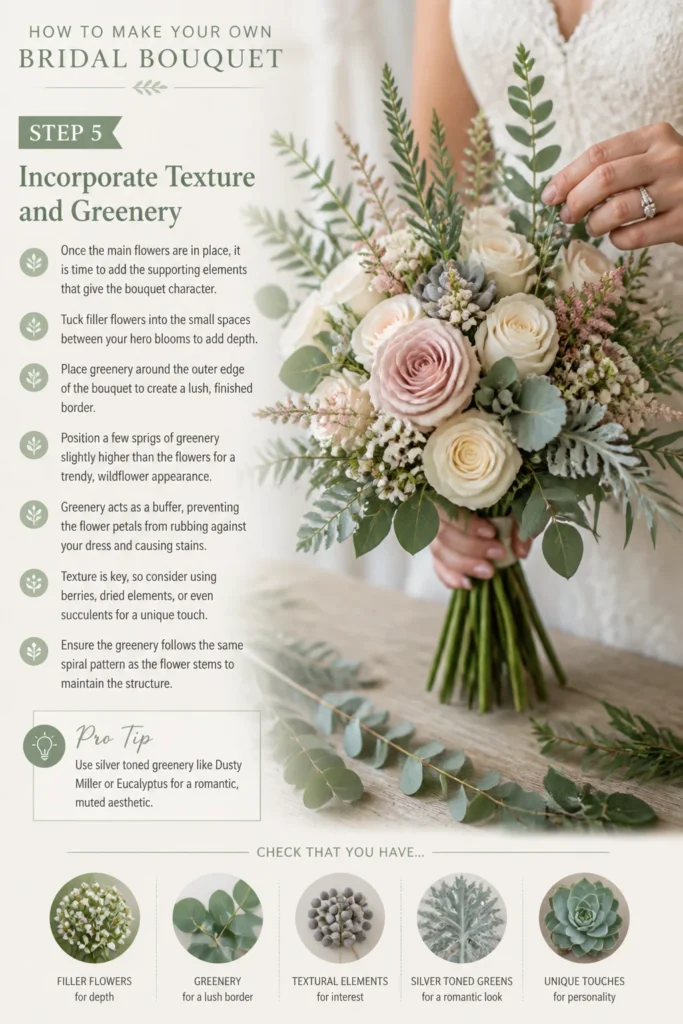
Tuck filler flowers into the small spaces between your hero blooms to add depth.
Place greenery around the outer edge of the bouquet to create a lush, finished border.
Position a few sprigs of greenery slightly higher than the flowers for a trendy, “wildflower” appearance.
Greenery acts as a buffer, preventing the flower petals from rubbing against your dress and causing stains.
Texture is key, so consider using berries, dried elements, or even succulents for a unique touch.
Ensure the greenery follows the same spiral pattern as the flower stems to maintain the structure.
Pro Tip: Use “silver” toned greenery like Dusty Miller or Eucalyptus for a romantic, muted aesthetic.
Check the weight of the bouquet frequently; you want it to feel substantial but not so heavy that it tires your arm.
Adjust any stems that have slipped too low or popped up too high before you move to the securing stage.
Step 6: Secure the Arrangement
Now that your design is complete, you need to lock everything in place so it doesn’t shift during the ceremony.
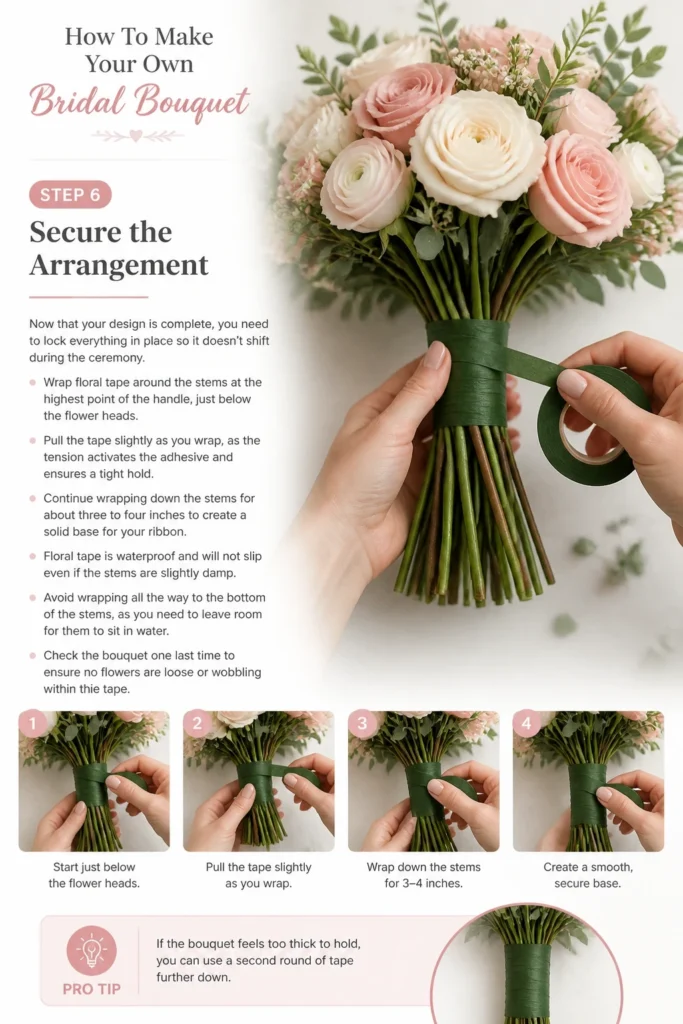
Wrap floral tape around the stems at the highest point of the handle, just below the flower heads.
Pull the tape slightly as you wrap, as the tension activates the adhesive and ensures a tight hold.
Continue wrapping down the stems for about three to four inches to create a solid base for your ribbon.
Floral tape is waterproof and will not slip even if the stems are slightly damp.
Avoid wrapping all the way to the bottom of the stems, as you need to leave room for them to sit in water.
Check the bouquet one last time to ensure no flowers are loose or wobbling within the tape.
Pro Tip: If the bouquet feels too thick to hold, you can use a second round of tape further down the handle for extra stability.
The tape should be tight enough to hold the shape but not so tight that it snaps the delicate stems.
Once secured, you can finally set the bouquet down for a moment to rest your hands.
Step 7: Wrap with Ribbon
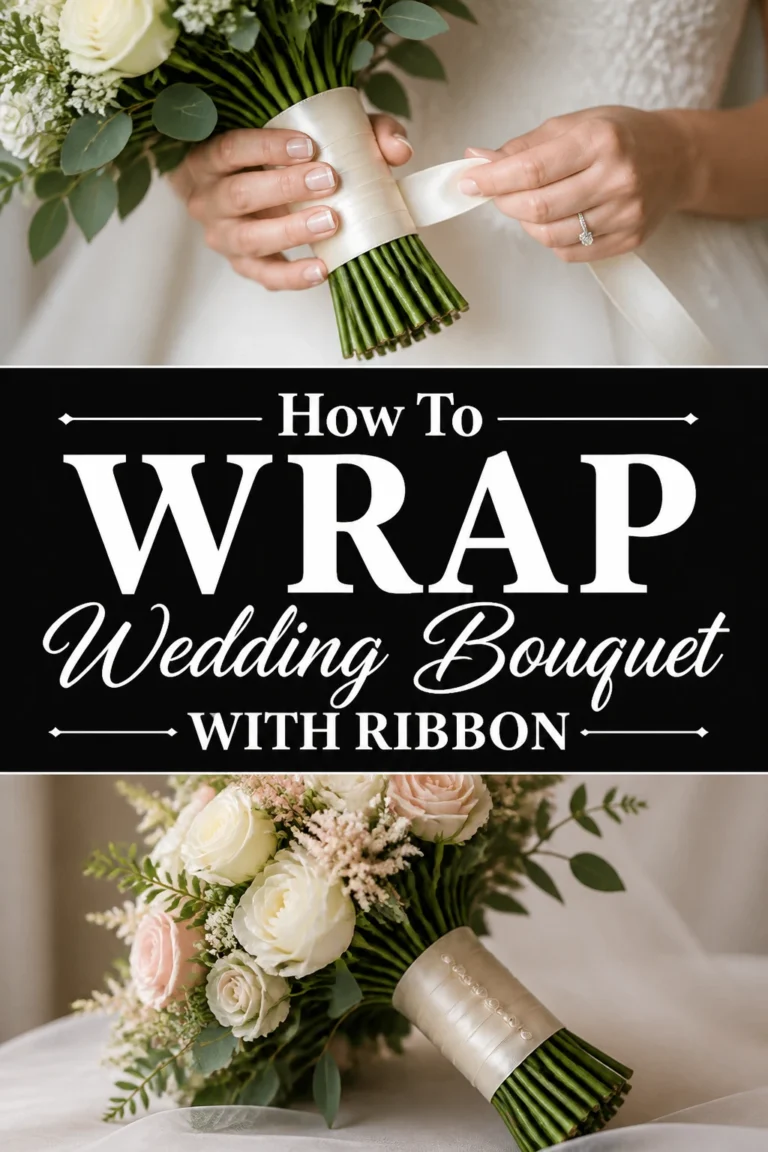
The ribbon wrap is the final decorative touch that hides the tape and makes the bouquet comfortable to hold.
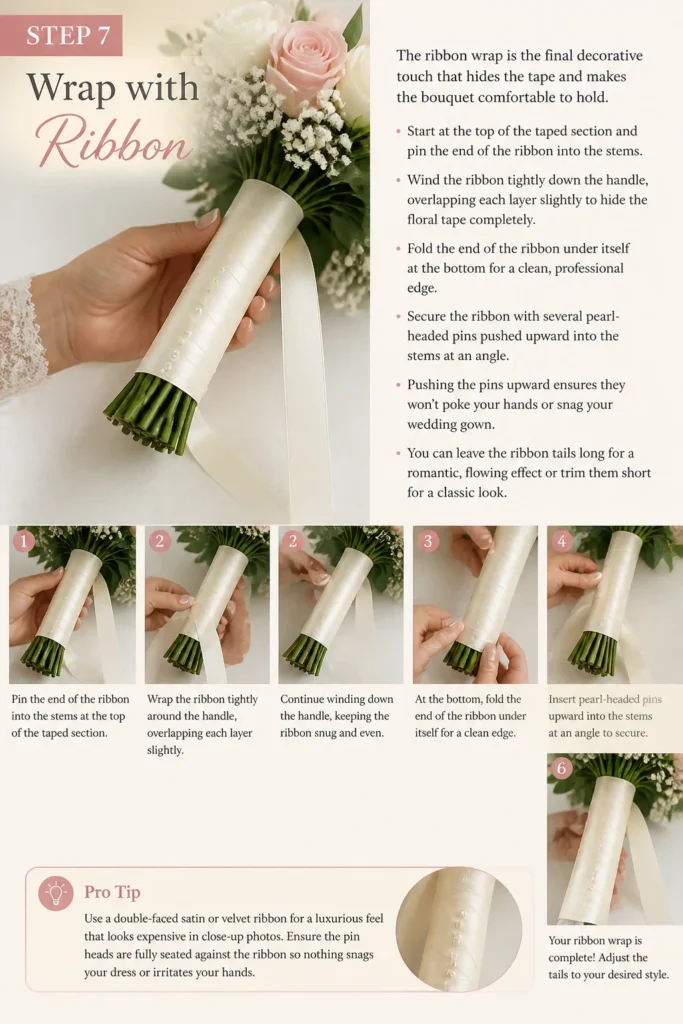
Start at the top of the taped section and pin the end of the ribbon into the stems.
Wind the ribbon tightly down the handle, overlapping each layer slightly to hide the floral tape completely.
Fold the end of the ribbon under itself at the bottom for a clean, professional edge.
Secure the ribbon with several pearl-headed pins pushed upward into the stems at an angle.
Pushing the pins upward ensures they won’t poke your hands or snag your wedding gown.
You can leave the ribbon “tails” long for a romantic, flowing effect or trim them short for a classic look.
Pro Tip: Use a double-faced satin or velvet ribbon for a luxurious feel that looks expensive in close-up photos.
Ensure the pins are evenly spaced and pushed all the way in so they stay secure throughout the day.
The handle should be roughly six inches long, or about the width of two hands stacked together.
Step 8: The Final Trim and Hydration
Your bouquet is finished, but it needs a final trim to look its best and stay hydrated.
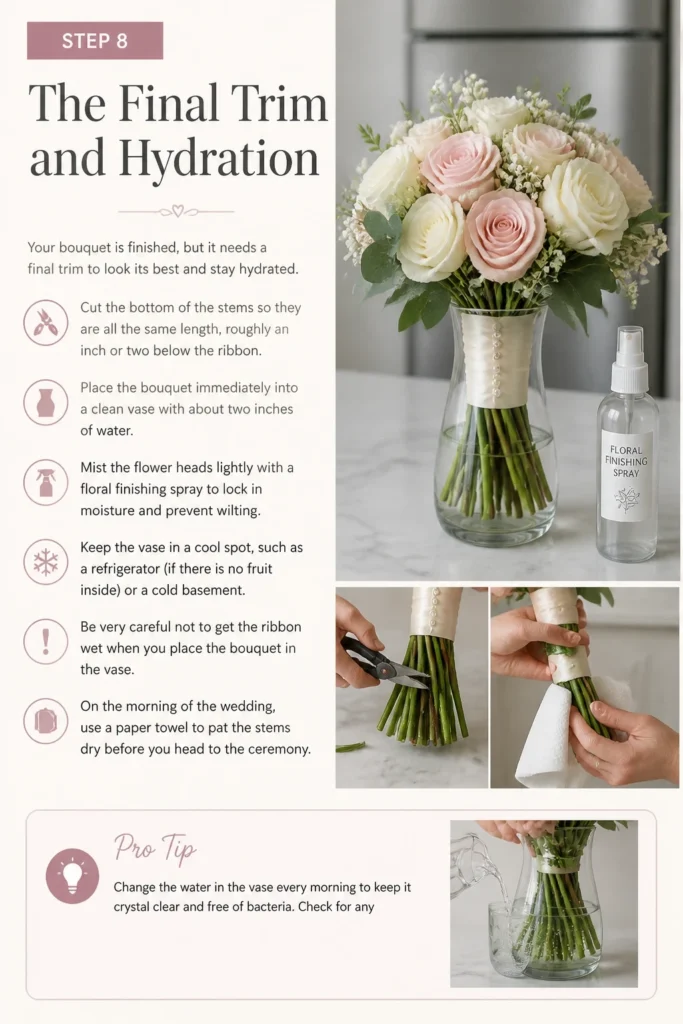
Cut the bottom of the stems so they are all the same length, roughly an inch or two below the ribbon.
Place the bouquet immediately into a clean vase with about two inches of water.
Mist the flower heads lightly with a floral finishing spray to lock in moisture and prevent wilting.
Keep the vase in a cool spot, such as a refrigerator (if there is no fruit inside) or a cold basement.
Be very careful not to get the ribbon wet when you place the bouquet in the vase.
On the morning of the wedding, use a paper towel to pat the stems dry before you head to the ceremony.
Pro Tip: Change the water in the vase every morning to keep it crystal clear and free of bacteria.
Check for any brown edges on the petals and carefully trim them away with small scissors if necessary.
Your bouquet is now ready to take center stage as you walk down the aisle.
Common Mistakes to Avoid
Choosing Fragile or Out-of-Season Blooms
Many beginners pick flowers based solely on photos without considering their durability. Some flowers, like hydrangeas, wilt almost instantly without a constant water source. Always check the “vase life” and water needs of your chosen blooms before committing to them for a hand-held bouquet.
Wrapping the Stems Too High
If you wrap the floral tape too close to the flower heads, you risk snapping the stems or restricting the natural “bloom” of the arrangement. Leave about an inch of space between the tape and the base of the lowest flower. This allows the bouquet to retain a soft, organic shape rather than looking stiff and forced.
Ignoring the “Front” of the Bouquet
While a bouquet should look good from all sides, it usually has a “best” side that should face the camera. If you don’t designate a front, you might accidentally hold it at an angle that shows a gap or a less-than-perfect flower. Mark the front of the ribbon handle with an extra pin so you know exactly how to hold it during the ceremony.
Troubleshooting
The Bouquet Feels Lopsided or Heavy on One Side
This usually happens if the spiral technique wasn’t followed or if too many heavy flowers were placed together. You can fix this by tucking a few extra stems of greenery or filler flowers into the “lighter” side. If it is significantly unbalanced, it is better to carefully unwrap the tape and reposition a few key stems before re-securing.
A Main Flower Stem Snaps Near the Top
Do not panic if a stem breaks; this is a common issue even for professional florists. You can “splint” the flower by using a thin floral wire and taping it to a sturdy stem nearby. If the break is too high, simply remove the flower and replace it with a fresh one from your leftover stock.
The Flowers Start to Wilt Before the Ceremony
If your flowers look thirsty, they likely haven’t had enough “drink” time or the room is too warm. Submerge the stems in lukewarm water and move them to the coolest part of your home. You can also try a “hydration dip” product designed to force water into the flower heads quickly.
Key Takeaways
- Clean your stems thoroughly to prevent bacteria and ensure a professional look.
- Use the spiral method to create a balanced, flared shape that is easy to hold.
- Condition flowers for at least 24 hours before you start the assembly process.
- Secure tightly with floral tape before adding decorative ribbon to prevent shifting.
- Store in a cool place and keep the stems in water until the very last moment.
- Choose hardy flowers like roses or ranunculus for a bouquet that lasts all day.
Frequently Asked Questions
How far in advance can I make my bouquet?
It is best to assemble your bouquet one day before the wedding. This allows the flowers to settle into their shape while remaining fresh. Making it too early can lead to wilting, while making it on the morning of the wedding can be too stressful for most brides.
How do I keep the ribbon dry?
When placing your bouquet in a vase, ensure the water level is well below the bottom of the ribbon wrap. You only need an inch or two of water to keep the stems hydrated. If the ribbon does get damp, use a hairdryer on a cool setting to dry it quickly before the ceremony.
Do I need to use floral foam?
For a standard hand-tied bridal bouquet, floral foam is not necessary and can actually make the arrangement too heavy. Foam is better suited for centerpieces or installations. A hand-tied bouquet is more natural and allows the stems to be placed directly into a vase of water.
What if I want to use silk flowers instead?
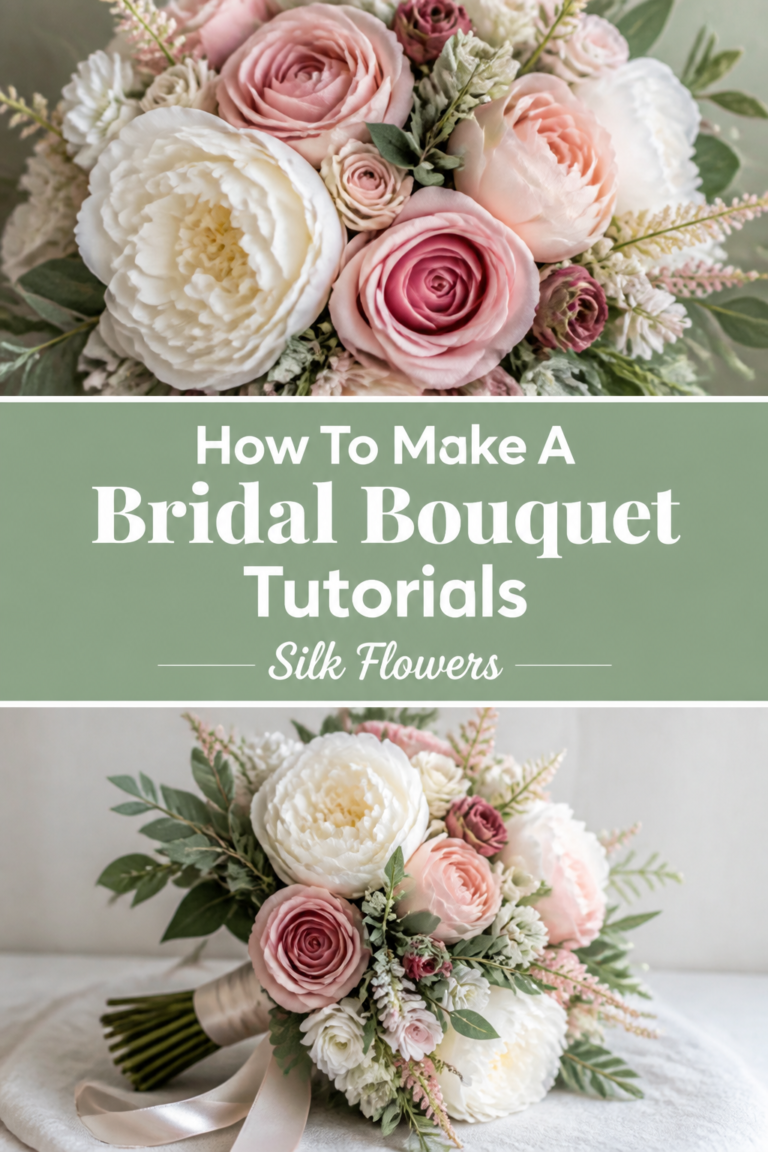
The process for silk flowers is almost identical, though you won’t need to worry about hydration or conditioning. You will need wire cutters instead of floral shears, as silk stems usually have a wire core. Silk bouquets are a great option for destination weddings or for brides who want a permanent keepsake.
Our Top Recommended Finds
- Professional Floral Shears: A sharp, clean cut is essential for flower health, and standard kitchen scissors can crush the stems.
- Waterproof Floral Tape: This specific tape is designed to stick to itself even when wet, providing the most secure hold for your arrangement.
- Floral Finishing Spray: This clear spray acts like hairspray for flowers, sealing the petals to prevent moisture loss throughout the day.
Bringing Your Vision to Life
Now that you have the techniques and the plan, you are ready to start gathering your materials.
Designing your own bouquet is a rewarding experience that allows you to carry something truly unique as you start your new chapter.
If you enjoyed this guide, consider looking into how to make matching boutonnieres or simple greenery table runners to complete your wedding look.
Take a deep breath, trust your creative instincts, and enjoy the process of crafting your wedding day blooms.
Wedding Planning
No fluff, no drama. Just easy weekly advice, planning shortcuts, and gentle reminders to help you actually enjoy your engagement.