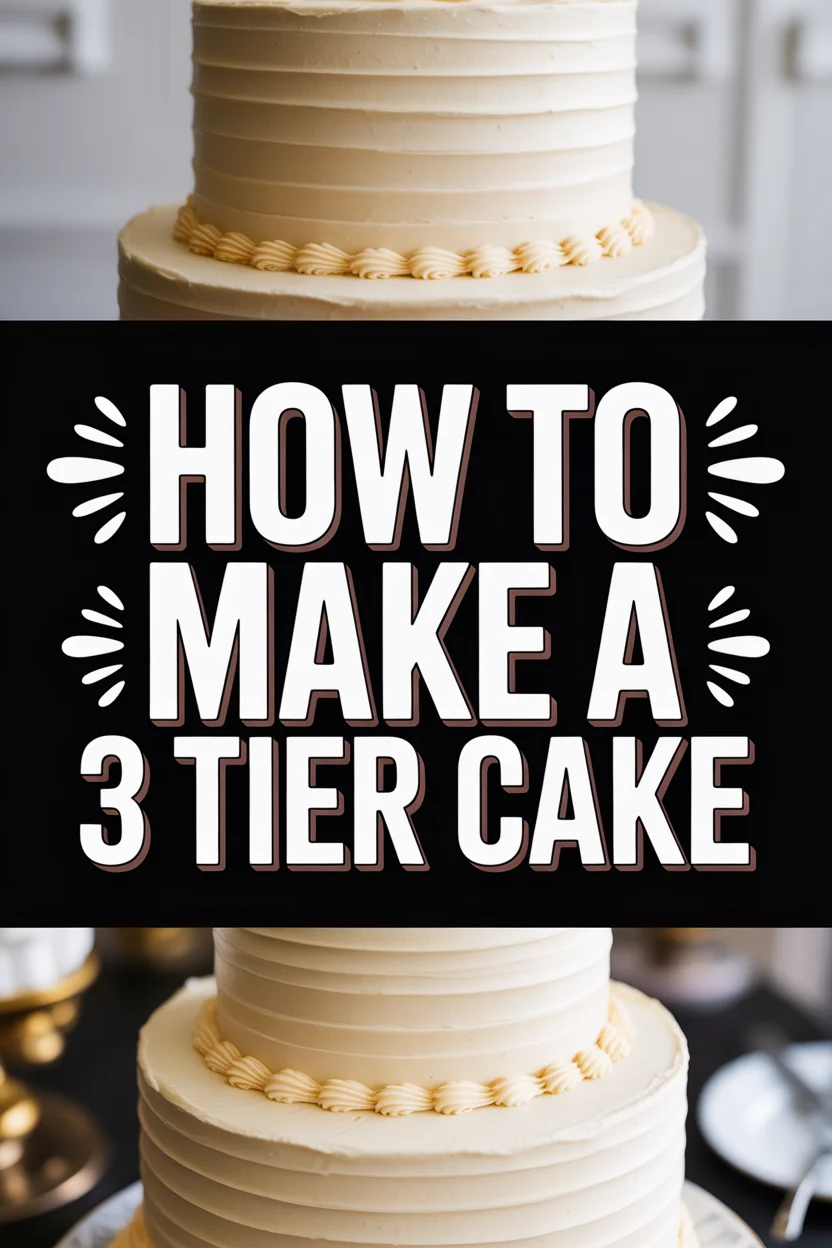
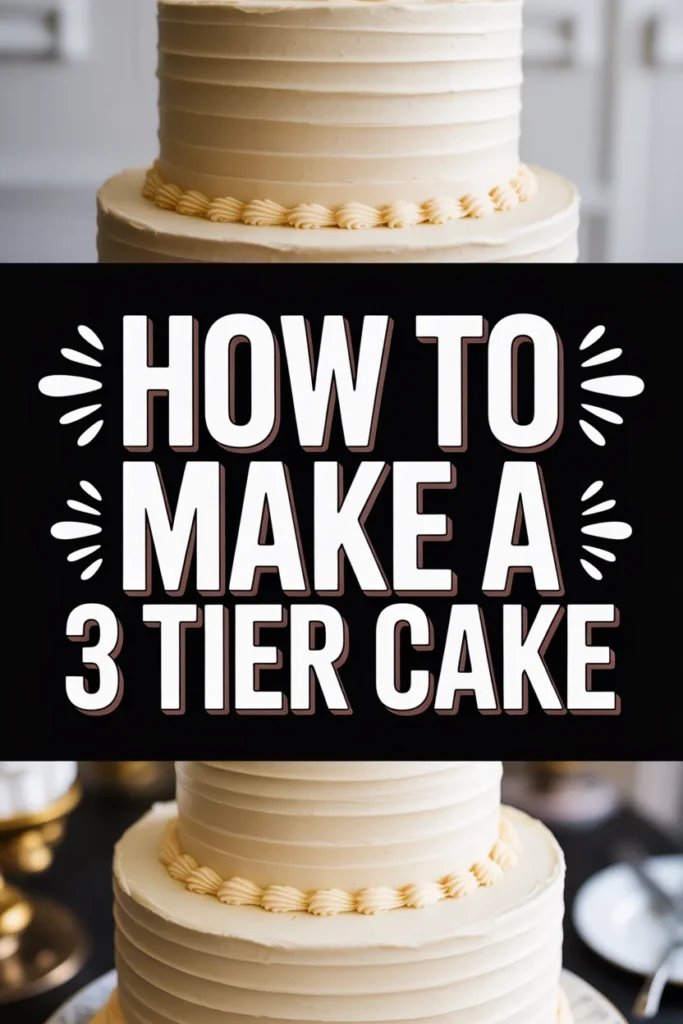
🎂 How To Make A 3 Tier Cake

Wedding Planning
No fluff, no drama. Just easy weekly advice, planning shortcuts, and gentle reminders to help you actually enjoy your engagement.
Creating a 3 tier cake might seem like a daunting task at first glance.
I remember my own initial hesitation, but with the right guidance, it transforms into an incredibly rewarding experience.
This guide draws from years of baking and decorating, offering practical steps to ensure your tiered masterpiece stands tall and looks stunning.
Quick Overview
You’re about to embark on a journey to create a show-stopping 3 tier cake, perfect for any grand celebration. This guide will walk you through baking, frosting, assembling, and decorating with confidence.
- Time needed: 10-14 hours (spread over 2-3 days for best results)
- Difficulty: Intermediate
- What you’ll need: Cake pans, ingredients, frosting, dowels, cake boards, turntable, spatulas
Step-by-Step Instructions
Step 1: Plan Your Cake Sizes and Recipe
Start by deciding on your cake sizes. A common combination for a 3 tier cake is 6-inch, 8-inch, and 10-inch diameter layers.
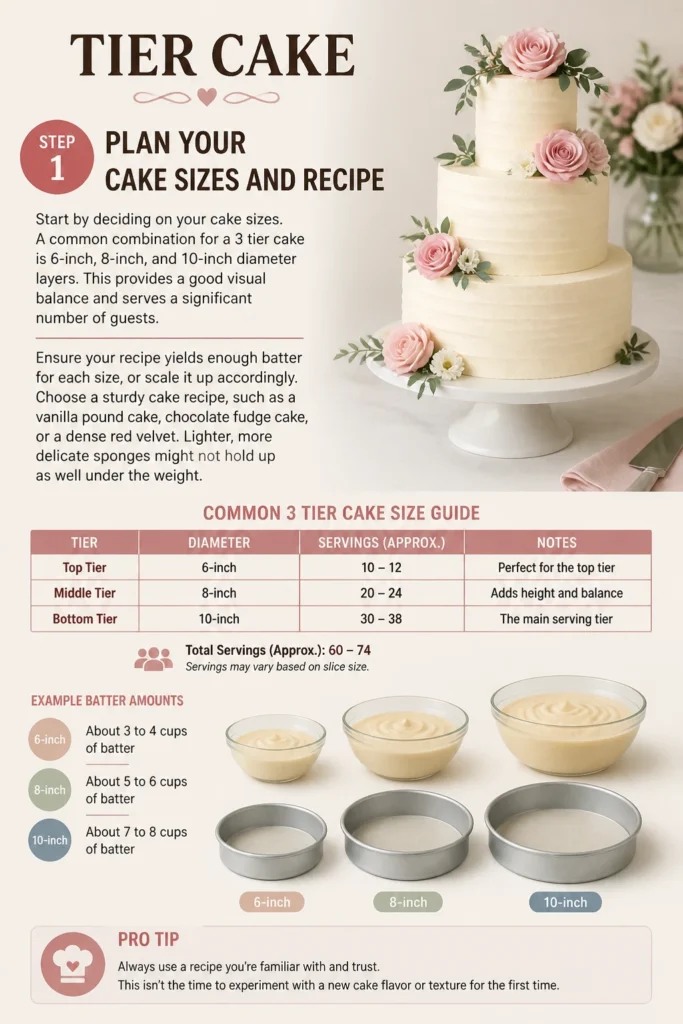
This provides a good visual balance and serves a significant number of guests. Ensure your recipe yields enough batter for each size, or scale it up accordingly.
Choose a sturdy cake recipe, such as a vanilla pound cake, chocolate fudge cake, or a dense red velvet. Lighter, more delicate sponges might not hold up as well under the weight.
Pro Tip: Always use a recipe you’re familiar with and trust. This isn’t the time to experiment with a new cake flavor or texture for the first time.
Step 2: Bake and Cool Your Cake Layers
Preheat your oven and prepare your cake pans by greasing and flouring them, or lining the bottoms with parchment paper. Divide your batter evenly into the prepared pans.
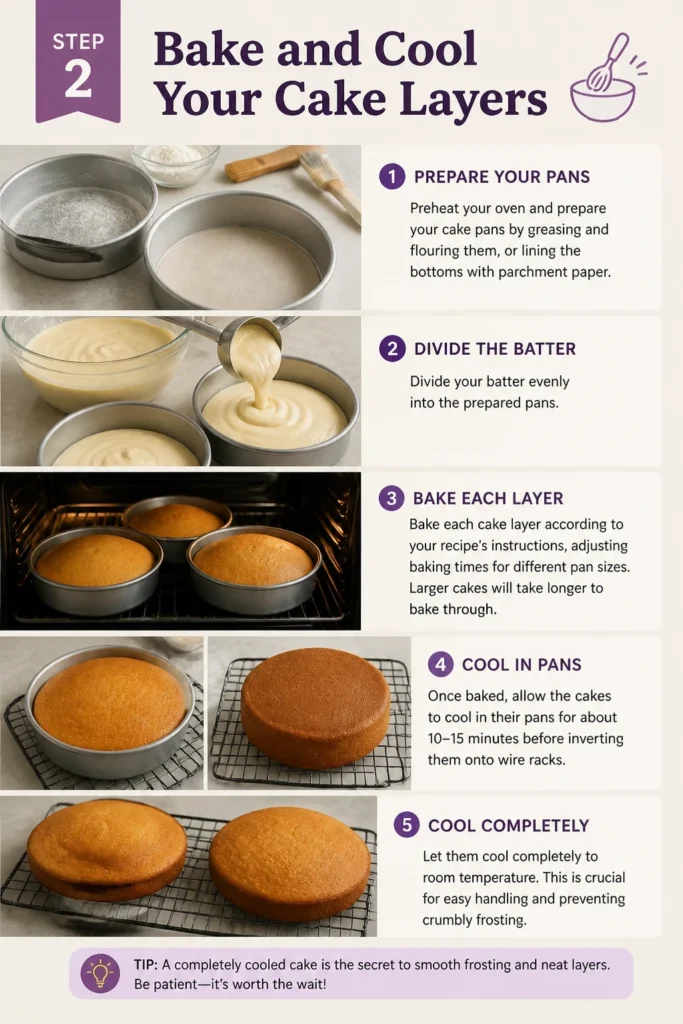
Bake each cake layer according to your recipe’s instructions, adjusting baking times for different pan sizes. Larger cakes will take longer to bake through.
Once baked, allow the cakes to cool in their pans for about 10-15 minutes before inverting them onto wire racks. Let them cool completely to room temperature. This is crucial for easy handling and preventing crumbly frosting.
Step 3: Level, Tort and Fill Cake Layers
Once completely cool, use a serrated knife or a cake leveler to level the tops of each cake layer. Aim for perfectly flat surfaces to ensure stable stacking.
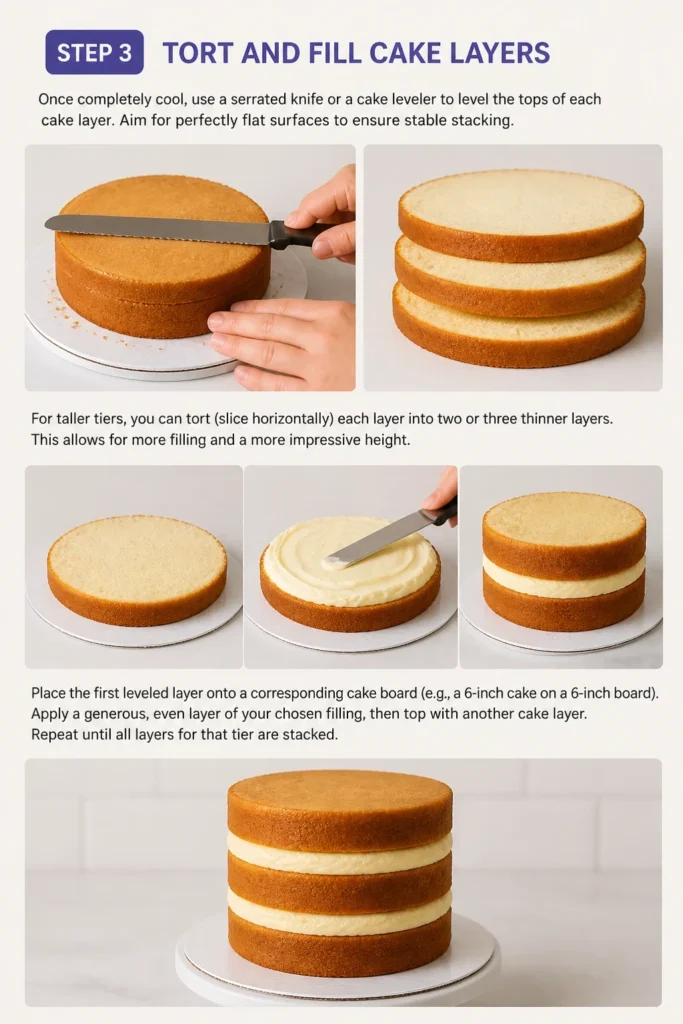
For taller tiers, you can tort (slice horizontally) each layer into two or three thinner layers. This allows for more filling and a more impressive height.
Place the first leveled layer onto a corresponding cake board (e.g., a 6-inch cake on a 6-inch board). Apply a generous, even layer of your chosen filling, then top with another cake layer. Repeat until all layers for that tier are stacked.
Step 4: Crumb Coat and Chill
Apply a thin layer of frosting to the outside of each stacked cake tier. This is called a “crumb coat,” and its purpose is to trap any loose crumbs.
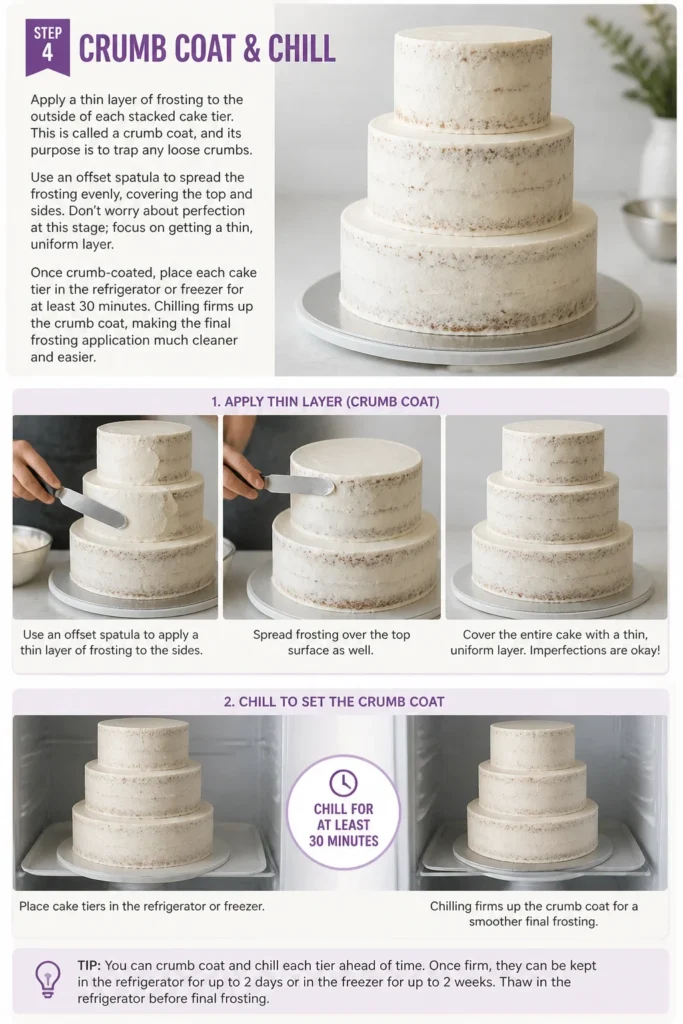
Use an offset spatula to spread the frosting evenly, covering the top and sides. Don’t worry about perfection at this stage; focus on getting a thin, uniform layer.
Once crumb-coated, place each cake tier in the refrigerator or freezer for at least 30 minutes. Chilling firms up the crumb coat, making the final frosting application much cleaner and easier.
Step 5: Apply Final Frosting and Smooth Finish
After chilling, retrieve your crumb-coated cake tiers. Apply a second, thicker layer of frosting to each cake, working from the largest to the smallest.
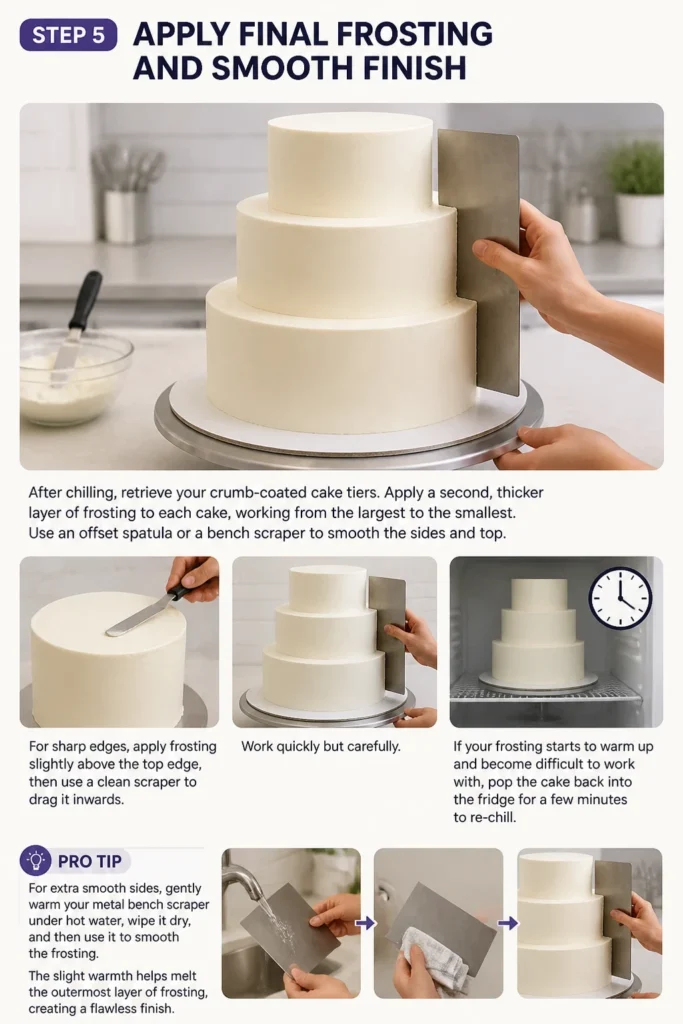
Use an offset spatula or a bench scraper to smooth the sides and top. For sharp edges, apply frosting slightly above the top edge, then use a clean scraper to drag it inwards.
Work quickly but carefully. If your frosting starts to warm up and become difficult to work with, pop the cake back into the fridge for a few minutes to re-chill.
Pro Tip: For extra smooth sides, gently warm your metal bench scraper under hot water, wipe it dry, and then use it to smooth the frosting. The slight warmth helps melt the outermost layer of frosting, creating a flawless finish.
Step 6: Insert Dowel Supports and Assemble Tiers
This is the most critical step for a stable tiered cake. For each tier (except the top one), you’ll need to insert support dowels.
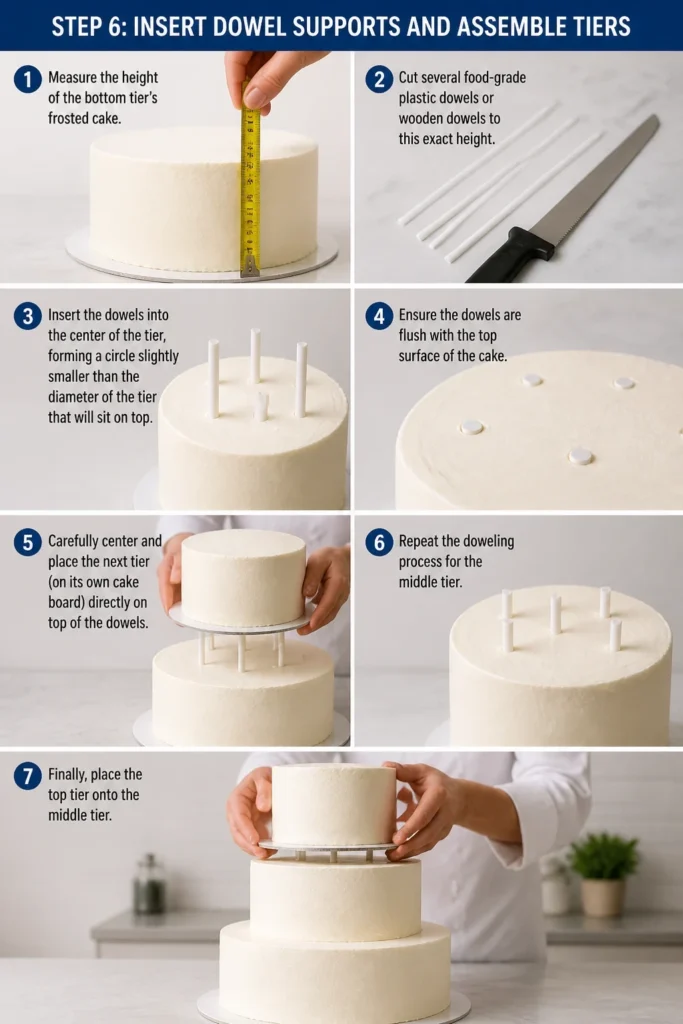
Measure the height of the bottom tier’s frosted cake. Cut several food-grade plastic dowels or wooden dowels to this exact height. You’ll need 4-5 dowels for the 10-inch tier to support the 8-inch cake, and 3-4 dowels for the 8-inch tier to support the 6-inch cake.
Insert the dowels into the center of the tier, forming a circle slightly smaller than the diameter of the tier that will sit on top. Ensure the dowels are flush with the top surface of the cake.
Carefully center and place the next tier (on its own cake board) directly on top of the dowels. Repeat the doweling process for the middle tier. Finally, place the top tier onto the middle tier.
Step 7: Decorate and Personalize
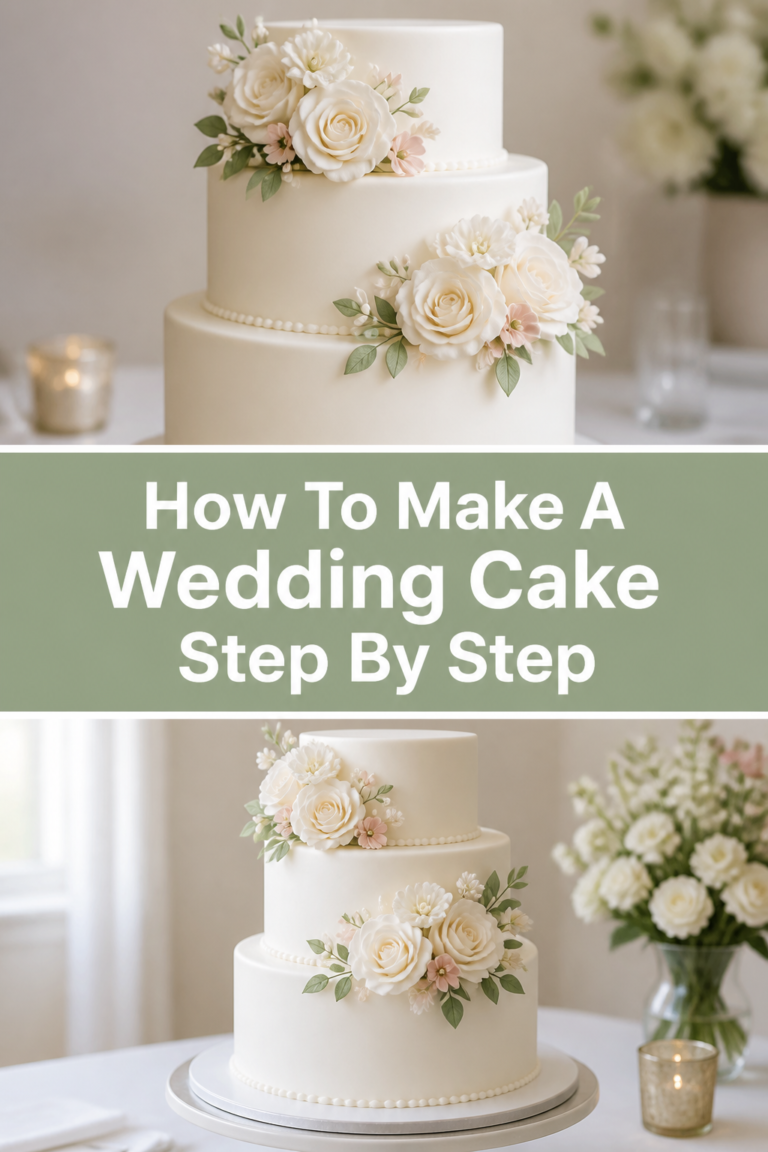
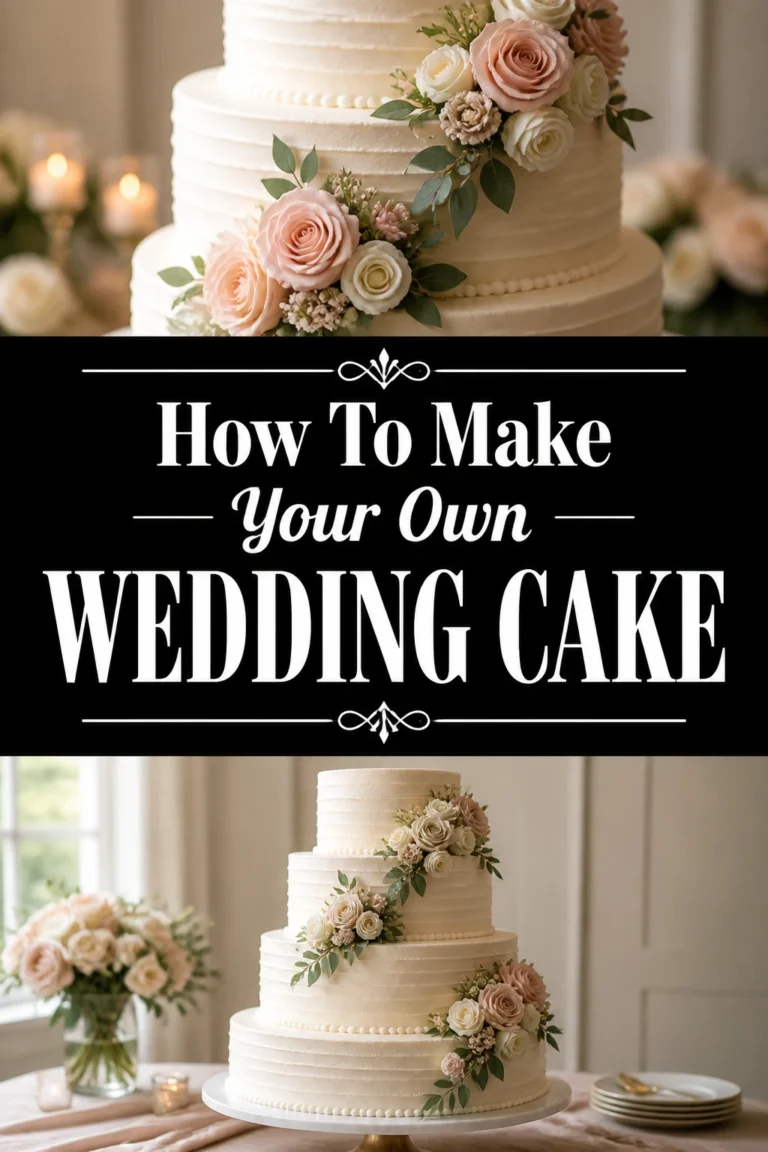
With your tiers assembled and stable, it’s time for the fun part: decorating! Use piping bags with various tips to add borders, rosettes, or intricate designs.
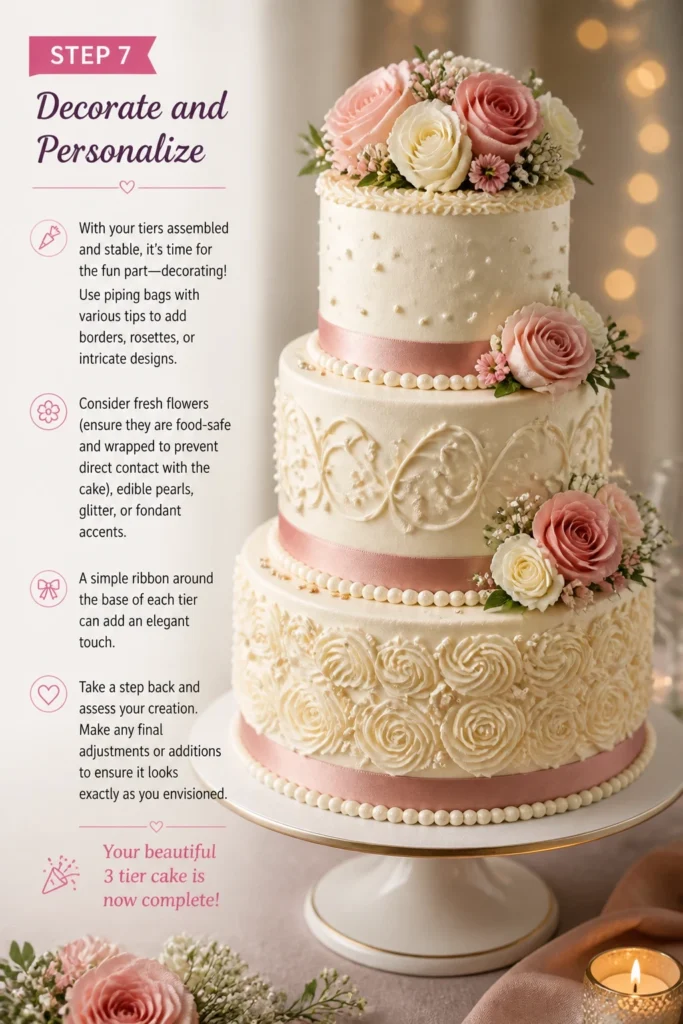
Consider fresh flowers (ensure they are food-safe and wrapped to prevent direct contact with the cake), edible pearls, glitter, or fondant accents. A simple ribbon around the base of each tier can add an elegant touch.
Take a step back and assess your creation. Make any final adjustments or additions to ensure it looks exactly as you envisioned. Your beautiful 3 tier cake is now complete!
Common Mistakes to Avoid
Insufficient Chilling
Not chilling your cake layers enough, especially after the crumb coat, is a common pitfall. Warm cakes are prone to crumbling and sliding, making frosting a messy and frustrating experience. Always give your cakes ample time to firm up in the refrigerator.
Incorrect Dowel Placement
Placing dowels too far apart or not cutting them to the correct height can lead to a leaning or collapsing cake. Dowels must be directly beneath the tier they are supporting and absolutely flush with the cake’s surface. Incorrect dowel height will cause sag or gaps.
Rushing the Process
Baking a tiered cake is a project that benefits from patience. Trying to rush through cooling, chilling, or frosting steps often results in imperfections. Break the process into manageable stages over a few days if possible, allowing plenty of time for each step.
Over-mixing Batter or Frosting
Over-mixing cake batter develops gluten, leading to a tough, dense cake. Similarly, over-mixing buttercream can incorporate too much air, making it difficult to smooth and prone to air bubbles. Mix until just combined for cake batter, and to the desired consistency for frosting.
Troubleshooting
Cake Leaning
If your cake starts to lean, it’s often due to uneven layers or improperly placed dowels. Gently push a long, thin skewer or a sharpened dowel through all tiers, directly into the cake board below, to provide central stability. Ensure all layers were level before stacking.
Frosting Not Smooth
Lumps or air bubbles in your frosting can prevent a smooth finish. Sift powdered sugar before adding it to your buttercream to remove lumps. After mixing, beat your buttercream on low speed for several minutes to remove air bubbles. Use a hot, dry bench scraper for final smoothing.
Tiers Sliding
If a tier is sliding, it means there’s not enough friction or support. Ensure each tier is on its own cake board. You can also place a small dollop of frosting between the cake board of the upper tier and the top of the lower tier to act as an adhesive before pressing down.
Key Takeaways
- Planning cake sizes and choosing a sturdy recipe are crucial for success.
- Thoroughly chilling cake layers at multiple stages prevents crumbs and instability.
- Accurate dowel placement is the secret to a stable, non-leaning tiered cake.
- Take your time; patience and attention to detail yield the best results.
- Practice makes perfect, so don’t be afraid to try again if your first attempt isn’t flawless.
- Use a cake board under each individual tier for easy handling and proper support.
Frequently Asked Questions
Can I make the cake layers ahead of time?
Yes, absolutely! Baking your cake layers a few days in advance is highly recommended. Once completely cooled, wrap them tightly in plastic wrap and store them at room temperature, or freeze them for up to a month. Thaw frozen cakes in the refrigerator before decorating.
What’s the best frosting for a tiered cake?
Buttercream, specifically American buttercream or Swiss/Italian meringue buttercream, is excellent for tiered cakes due to its stability. Cream cheese frosting can be used, but it’s softer and may require refrigeration, which can dry out the cake. Fondant also works well over a crumb-coated buttercream.
How do I transport a 3 tier cake?
For safe transport, a sturdy cake box is essential. For very large or tall cakes, you might need a custom box. Keep the cake level and cool during transit. If traveling a long distance, consider transporting the tiers separately and assembling them at the final destination.
Do I need a special recipe for tiered cakes?
While most standard cake recipes can work, choosing a recipe known for its density and sturdiness is best. Pound cakes, dense butter cakes, or even certain sponge cakes with a slightly tighter crumb hold up better to stacking and the weight of upper tiers.
Our Top Recommended Finds
- Cake Turntable: Makes frosting and smoothing infinitely easier, allowing you to rotate the cake smoothly.
- Adjustable Cake Leveler: Ensures perfectly flat cake layers, which are essential for stable stacking.
- Strong Food-Grade Dowels: Provides reliable internal support for your tiers, preventing leaning or collapse.
Your Next Masterpiece Awaits
You now have a clear roadmap to creating a breathtaking 3 tier cake. This journey combines precision with artistic flair, culminating in a dessert that’s truly a centerpiece.
Don’t be intimidated; each step builds confidence, and the reward is a stunning creation made with your own hands. Gather your ingredients and tools, and let your baking adventure begin today!
Wedding Planning
No fluff, no drama. Just easy weekly advice, planning shortcuts, and gentle reminders to help you actually enjoy your engagement.