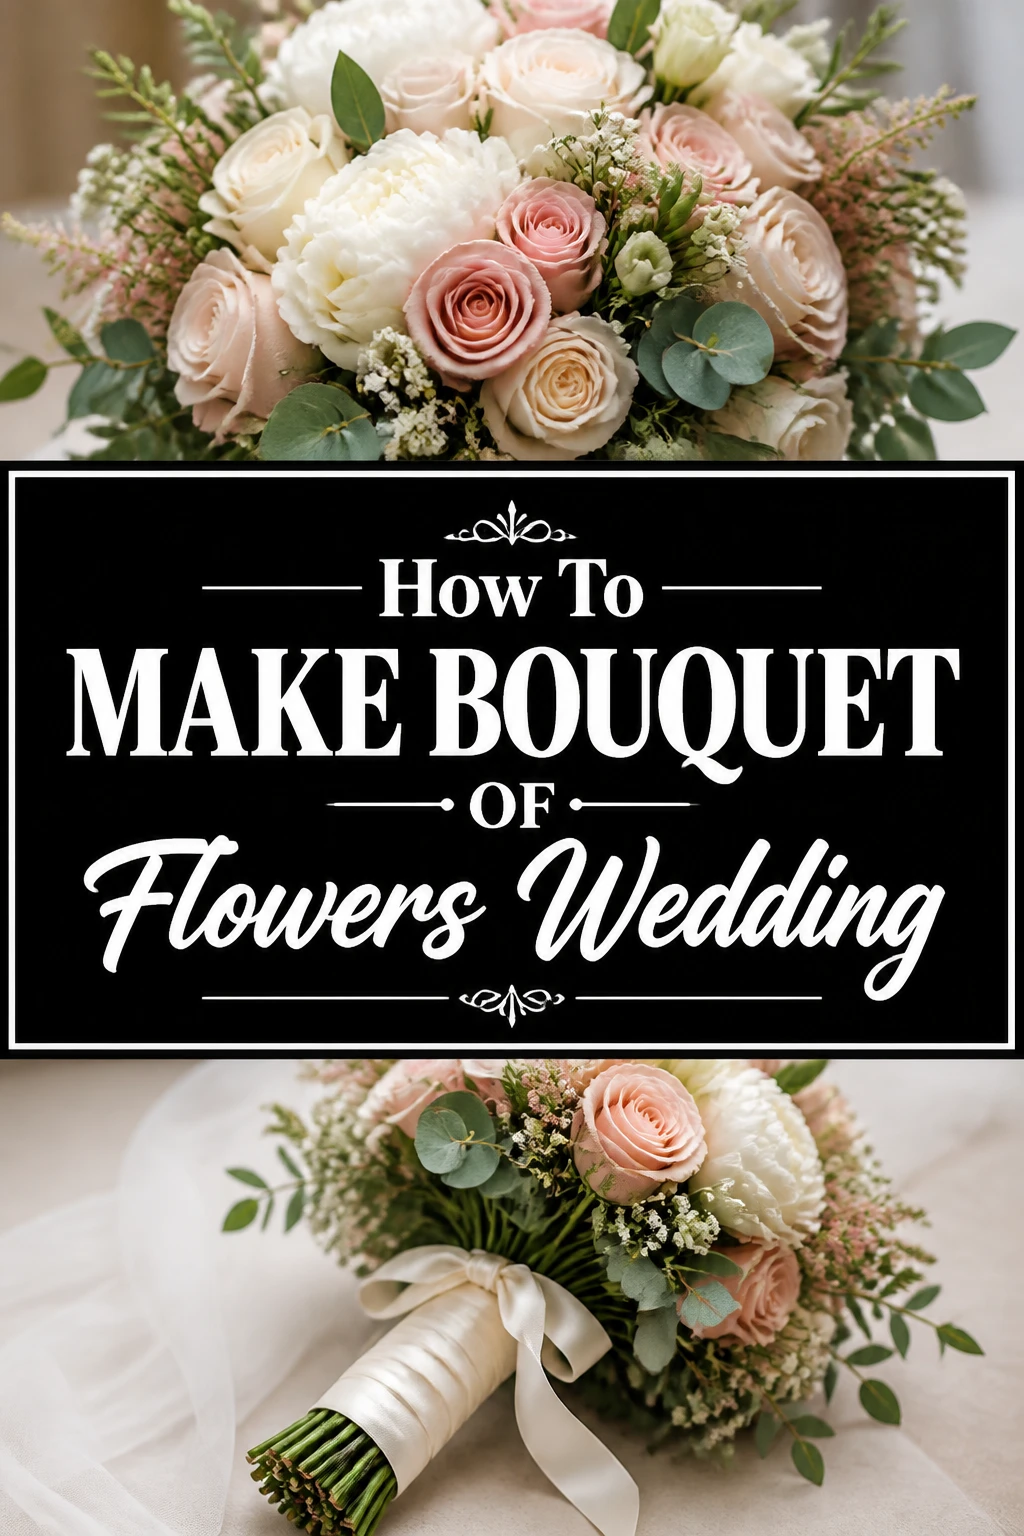
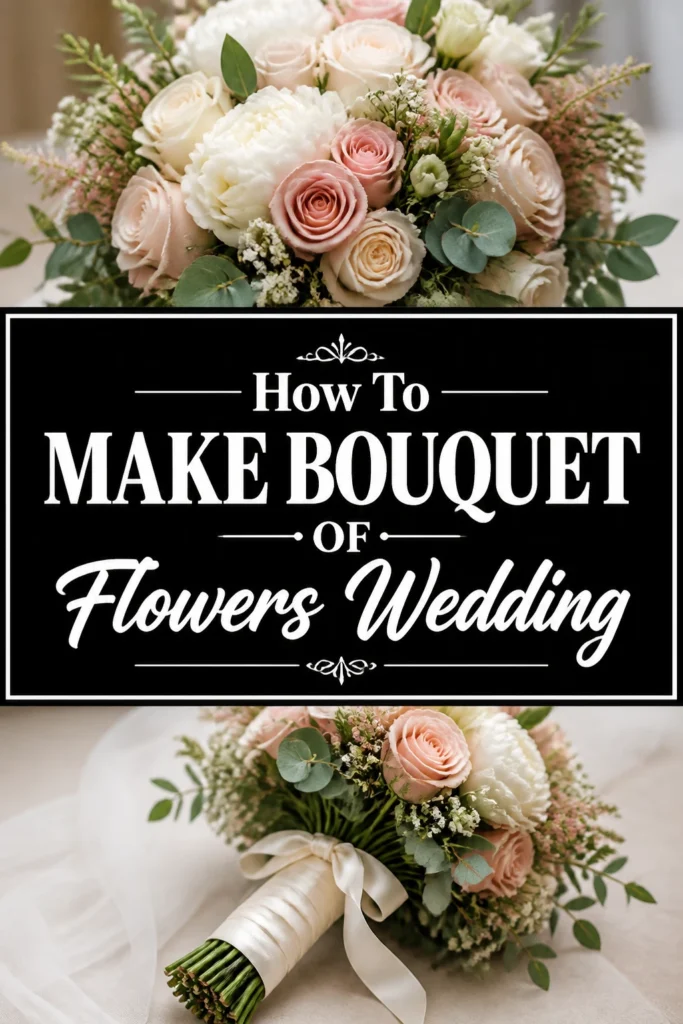
💐 How To Make Bouquet Of Flowers Wedding

Wedding Planning
No fluff, no drama. Just easy weekly advice, planning shortcuts, and gentle reminders to help you actually enjoy your engagement.
I remember the quiet hum of the refrigerator as I stood in my kitchen at 2 AM, surrounded by buckets of fresh, fragrant peonies and eucalyptus.
After designing floral arrangements for dozens of weddings, I can tell you that making your own bouquet is one of the most rewarding parts of the planning process.
This guide shares the professional techniques I’ve used to ensure every stem stays in place from the walk down the aisle to the final dance.
Quick Overview
Creating a professional-looking bridal bouquet requires patience and a bit of practice, but the results are incredibly personal and cost-effective.
- Time needed: 60 to 90 minutes (plus prep time)
- Difficulty: Intermediate
- What you’ll need: Fresh flowers, floral tape, sharp shears, ribbon, pins, and a bucket of water.
Step 1: Prepare Your Workspace and Tools
Clear a large, flat surface like a kitchen island or a sturdy dining table where you can spread out your materials.
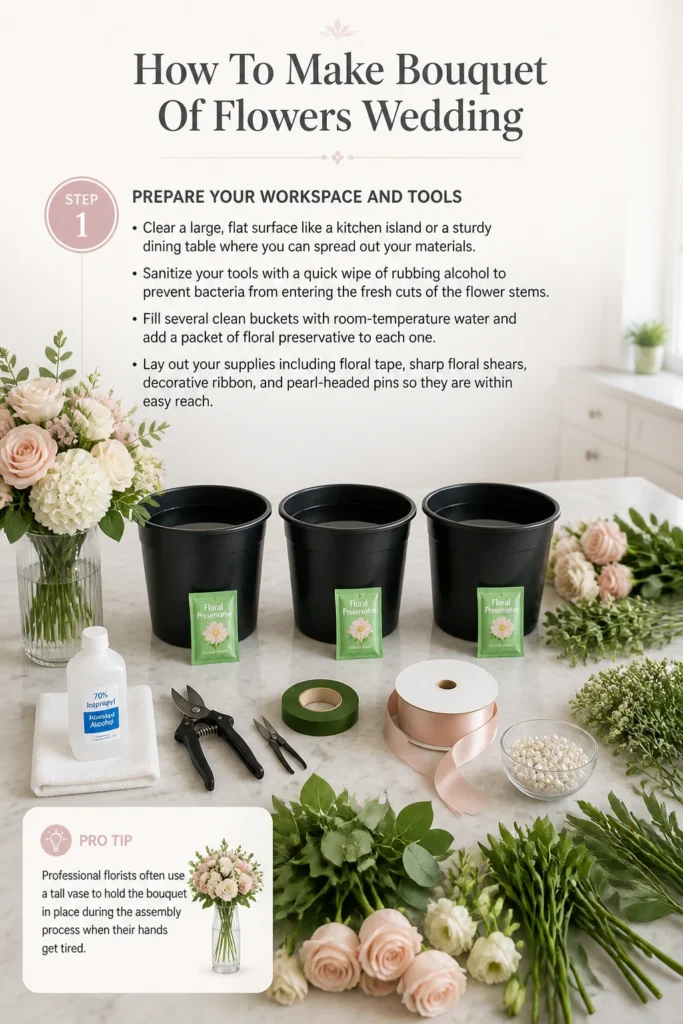
Sanitize your tools with a quick wipe of rubbing alcohol to prevent bacteria from entering the fresh cuts of the flower stems.
Fill several clean buckets with room-temperature water and add a packet of floral preservative to each one.
Lay out your supplies including floral tape, sharp floral shears, decorative ribbon, and pearl-headed pins so they are within easy reach.
Pro Tip: Professional florists often use a tall vase to hold the bouquet in place during the assembly process when their hands get tired.
Step 2: Condition and Clean Your Flowers
Remove all foliage from the bottom two-thirds of every stem to ensure no leaves are trapped below the binding point or in the water.
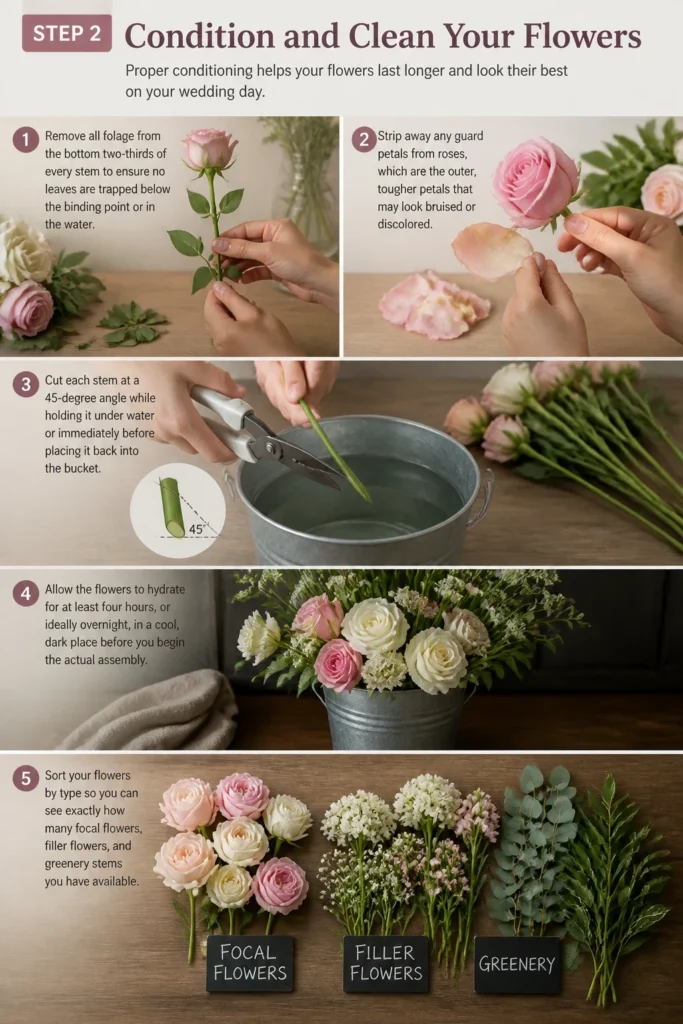
Strip away any “guard petals” from roses, which are the outer, tougher petals that may look bruised or discolored.
Cut each stem at a 45-degree angle while holding it under water or immediately before placing it back into the bucket.
Allow the flowers to hydrate for at least four hours, or ideally overnight, in a cool, dark place before you begin the actual assembly.
Sort your flowers by type so you can see exactly how many focal flowers, filler flowers, and greenery stems you have available.
Step 3: Select Your Focal and Filler Blooms
Identify your “hero” flowers, which are the largest and most eye-catching blooms like peonies, garden roses, or dahlias.
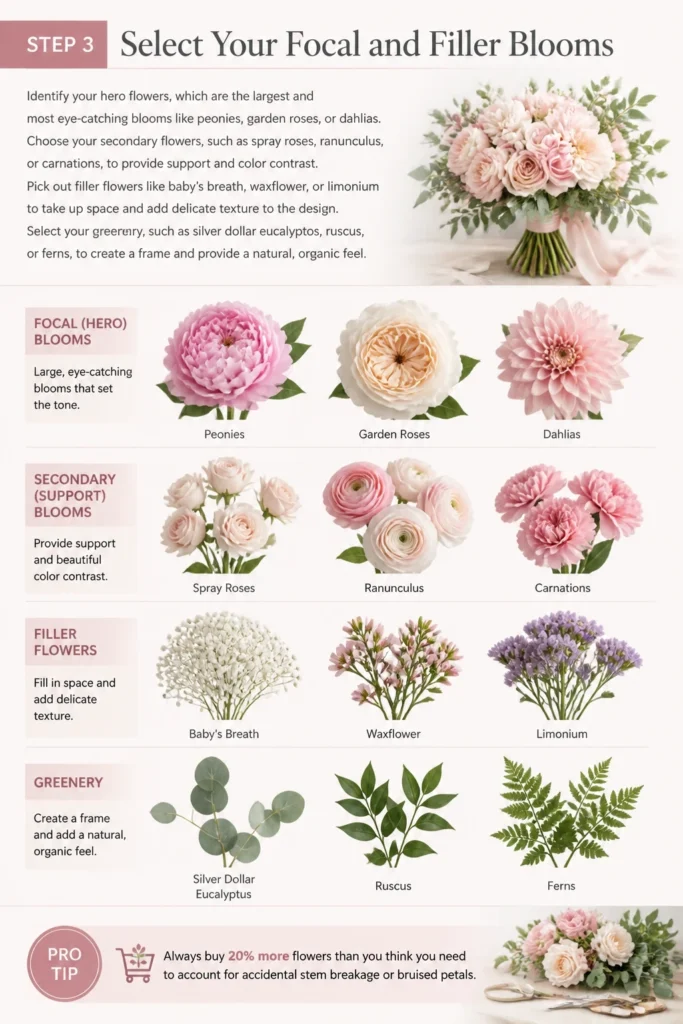
Choose your secondary flowers, such as spray roses, ranunculus, or carnations, to provide support and color contrast.
Pick out filler flowers like baby’s breath, waxflower, or limonium to take up space and add delicate texture to the design.
Select your greenery, such as silver dollar eucalyptus, ruscus, or ferns, to create a frame and provide a natural, organic feel.
Pro Tip: Always buy 20% more flowers than you think you need to account for accidental stem breakage or bruised petals.
Step 4: Build the Core Foundation
Select three or four focal flowers to serve as the center of your bouquet and hold them firmly in your non-dominant hand.
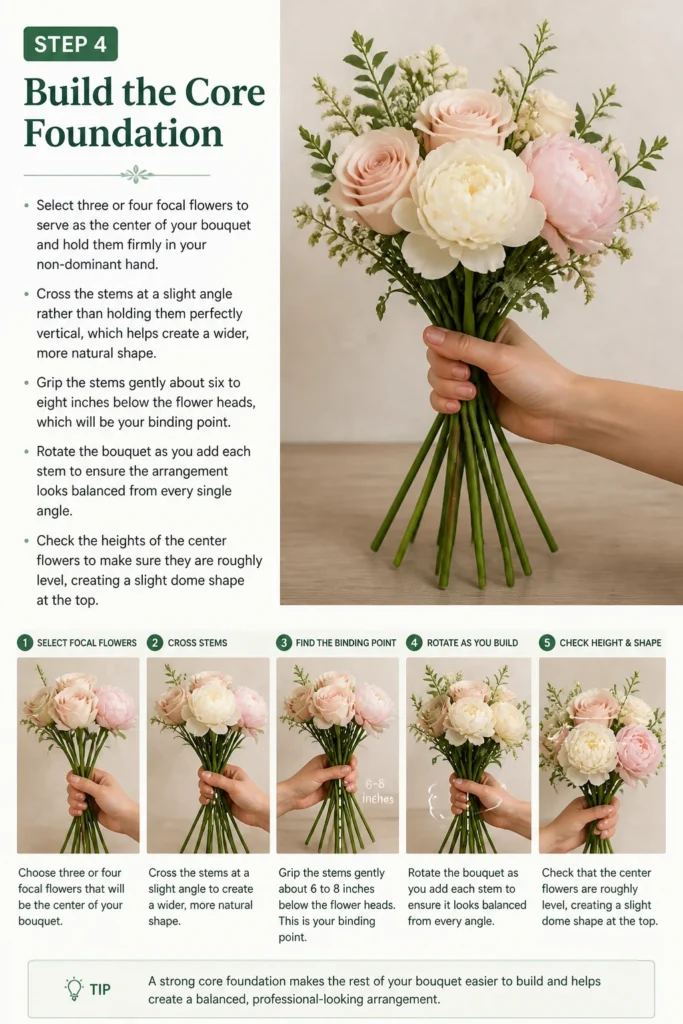
Cross the stems at a slight angle rather than holding them perfectly vertical, which helps create a wider, more natural shape.
Grip the stems gently about six to eight inches below the flower heads, which will be your “binding point.”
Rotate the bouquet as you add each stem to ensure the arrangement looks balanced from every single angle.
Check the heights of the center flowers to make sure they are roughly level, creating a slight dome shape at the top.
Step 5: Apply the Spiral Technique
Add new stems one by one, always placing them in the same diagonal direction to create a spiral pattern with the stems.
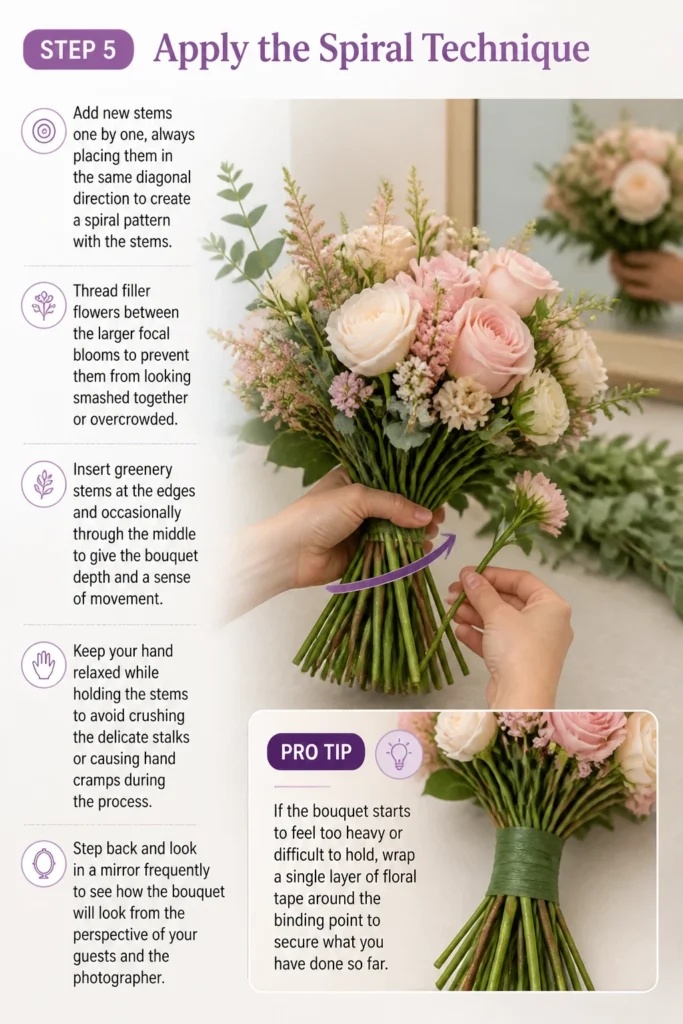
Thread filler flowers between the larger focal blooms to prevent them from looking smashed together or overcrowded.
Insert greenery stems at the edges and occasionally through the middle to give the bouquet depth and a sense of movement.
Keep your hand relaxed while holding the stems to avoid crushing the delicate stalks or causing hand cramps during the process.
Step back and look in a mirror frequently to see how the bouquet will look from the perspective of your guests and the photographer.
Pro Tip: If the bouquet starts to feel too heavy or difficult to hold, wrap a single layer of floral tape around the binding point to secure what you have done so far.
Step 6: Secure the Bouquet with Floral Tape
Wrap floral tape tightly around the binding point, starting about an inch below the foliage and moving down about three inches.
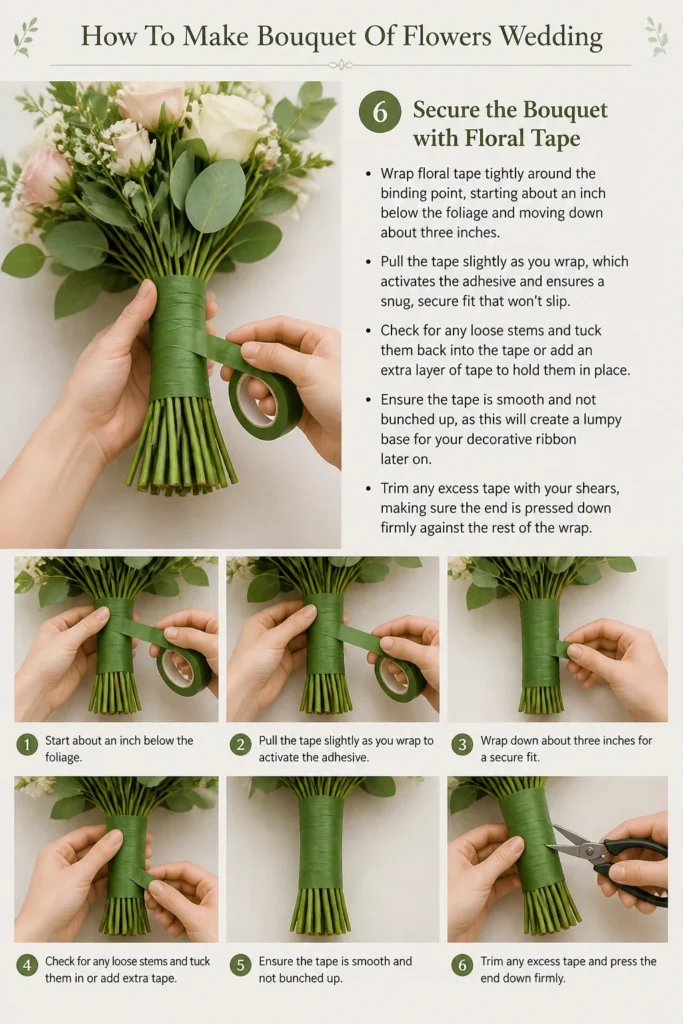
Pull the tape slightly as you wrap, which activates the adhesive and ensures a snug, secure fit that won’t slip.
Check for any loose stems and tuck them back into the tape or add an extra layer of tape to hold them in place.
Ensure the tape is smooth and not bunched up, as this will create a lumpy base for your decorative ribbon later on.
Trim any excess tape with your shears, making sure the end is pressed down firmly against the rest of the wrap.
Step 7: Add the Decorative Ribbon Wrap
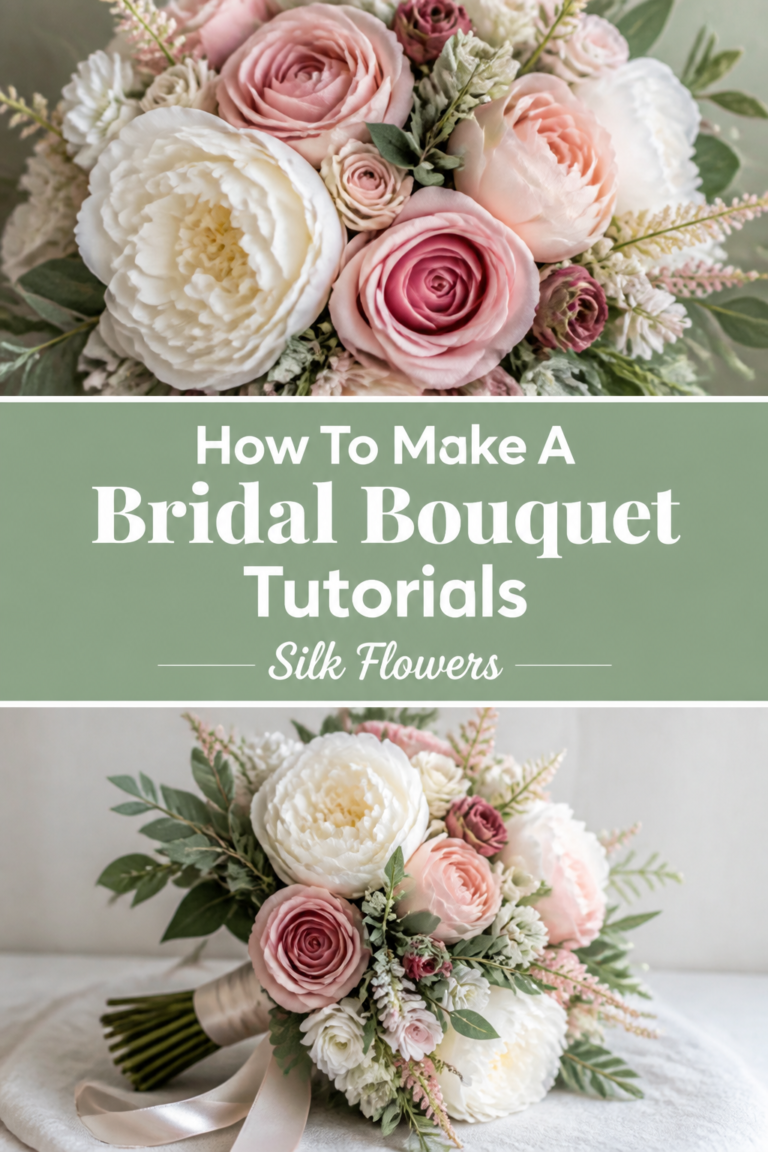
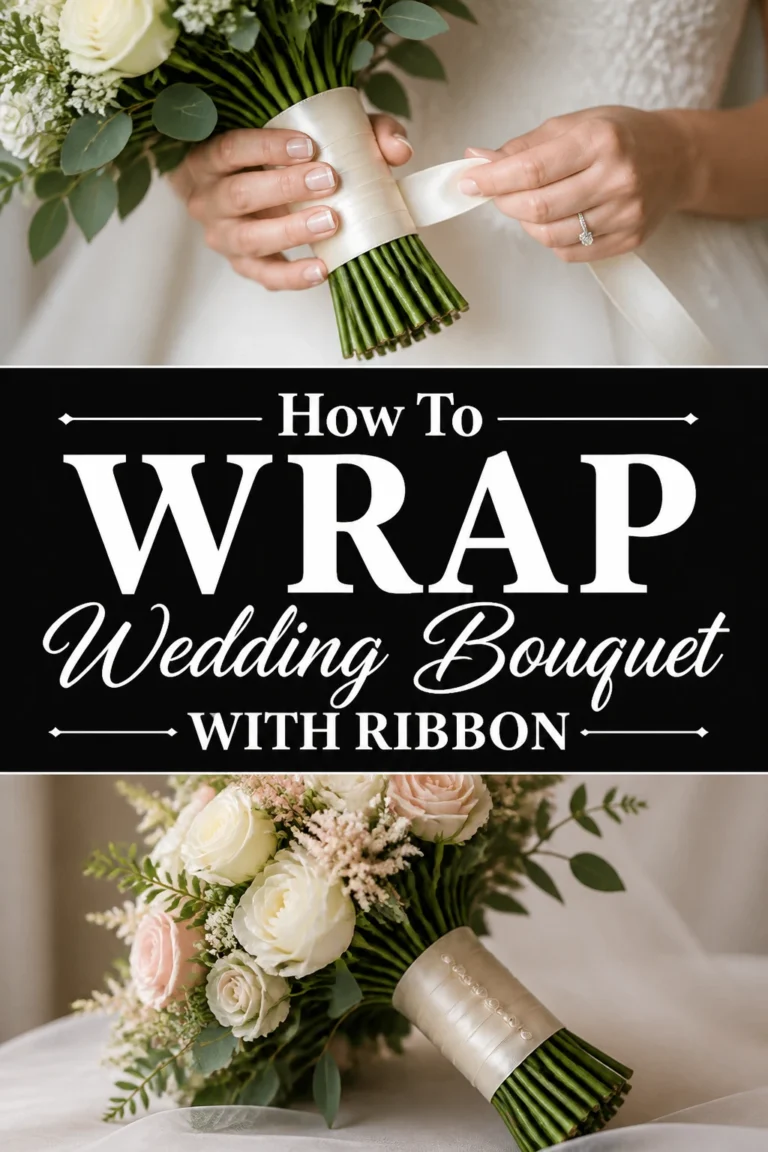
Choose a ribbon that complements the wedding colors and is wide enough to cover the green floral tape completely.
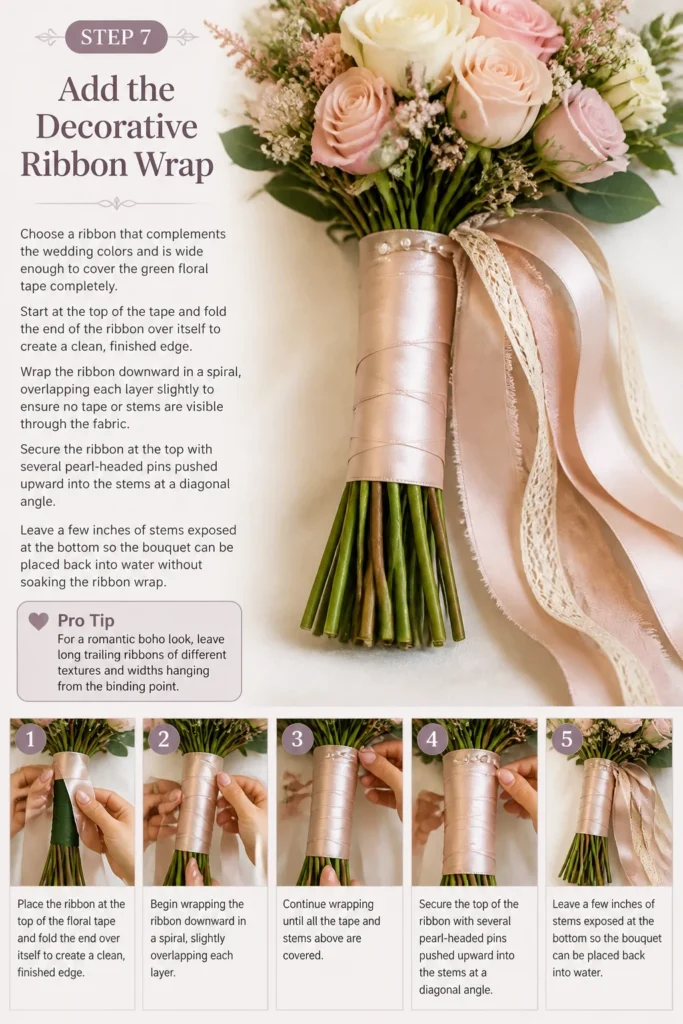
Start at the top of the tape and fold the end of the ribbon over itself to create a clean, finished edge.
Wrap the ribbon downward in a spiral, overlapping each layer slightly to ensure no tape or stems are visible through the fabric.
Secure the ribbon at the top with several pearl-headed pins pushed upward into the stems at a diagonal angle.
Leave a few inches of stems exposed at the bottom so the bouquet can be placed back into water without soaking the ribbon wrap.
Pro Tip: For a romantic “boho” look, leave long trailing ribbons of different textures and widths hanging from the binding point.
Step 8: Perform the Final Trim and Hydration
Cut the bottom of the stems so they are all the same length, usually about one to two inches below the ribbon wrap.
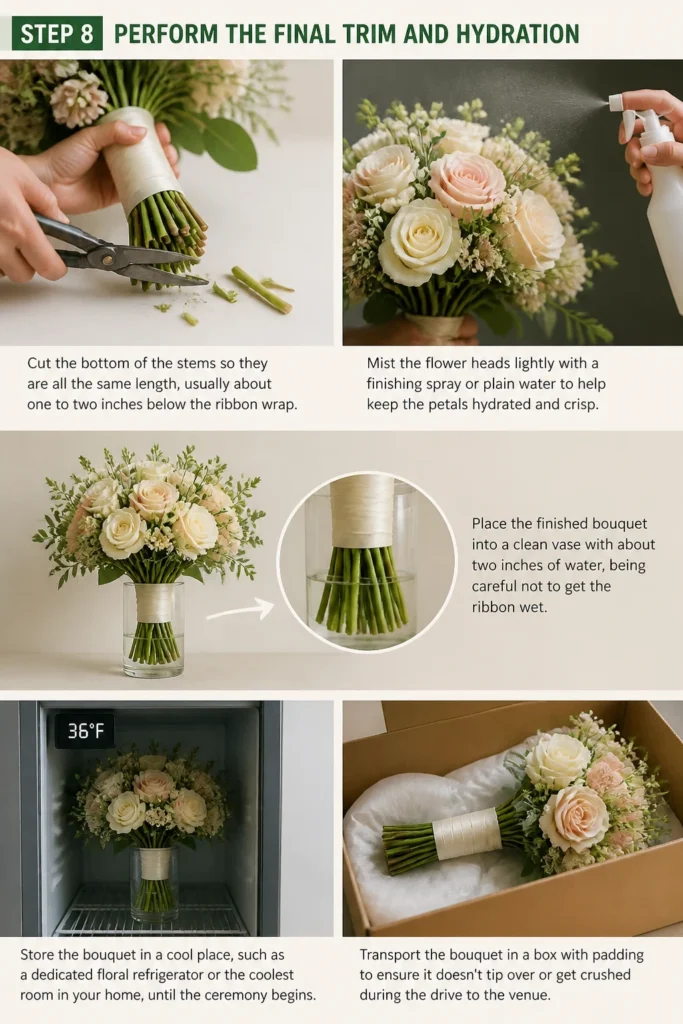
Mist the flower heads lightly with a finishing spray or plain water to help keep the petals hydrated and crisp.
Place the finished bouquet into a clean vase with about two inches of water, being careful not to get the ribbon wet.
Store the bouquet in a cool place, such as a dedicated floral refrigerator or the coolest room in your home, until the ceremony begins.
Transport the bouquet in a box with padding to ensure it doesn’t tip over or get crushed during the drive to the venue.
Common Mistakes to Avoid
Using Flowers That Wilt Quickly
Many beginners choose flowers based solely on appearance without considering their vase life or durability. Hydrangeas, for example, are notorious for wilting almost instantly if they are out of water for even a few minutes on a hot day. Always research the heartiness of your chosen blooms or use internal water tubes for delicate varieties.
Wrapping the Stems Too High
If you wrap the floral tape or ribbon too close to the flower heads, the bouquet will look stiff and lose its natural “bounce.” It can also put pressure on the delicate necks of the flowers, causing them to snap. Leave enough space for the blooms to breathe and move naturally as you walk.
Ignoring the Weight of the Bouquet
A bouquet that looks beautiful on the table might be far too heavy to carry comfortably for several hours. Using too many heavy-stemmed flowers or excessive amounts of floral wire can lead to arm fatigue and awkward photos. Test the weight frequently during assembly and remove unnecessary bulk from the center if it becomes a burden.
Troubleshooting
The Bouquet Keeps Losing Its Shape
This usually happens when the stems are held too loosely or are placed perfectly vertical instead of in a spiral. To fix this, you may need to carefully unwind your tape and re-position the stems at 45-degree angles. Ensure your binding point is tight and secure before applying the final ribbon.
Flower Heads are Drooping Downward
Drooping is often a sign of dehydration or a weak stem that cannot support a heavy bloom. You can provide extra support by carefully inserting a thin floral wire through the base of the flower head and wrapping it down the stem. Make sure the wire is hidden by other flowers or greenery so it remains invisible to the eye.
The Ribbon Wrap is Slipping Off
Ribbon often slips on smooth stems or if the floral tape underneath wasn’t pulled tight enough to be “tacky.” Use more pins than you think you need, and ensure they are pushed firmly into the center of the stem bundle. You can also apply a small dot of floral glue or hot glue at the very start and end of the ribbon wrap for extra security.
Key Takeaways
- Conditioning is vital: Always let your flowers drink for several hours before you start building the bouquet.
- The spiral technique is key: Crossing stems at an angle creates a professional, flared shape and prevents crushing.
- Tape before you ribbon: Never rely on ribbon alone to hold the flowers together; use floral tape as your structural foundation.
- Mind the binding point: Keep your grip consistent and secure the bouquet at the narrowest part of the “waist.”
- Keep it hydrated: Even after the bouquet is finished, keep the stems in water until the very moment you need to walk down the aisle.
Frequently Asked Questions
How far in advance can I make my wedding bouquet?
It is best to assemble the bouquet one day before the wedding. This allows the flowers to settle into their shape while remaining fresh. Store the finished arrangement in a cool, dark place or a refrigerator that does not contain ripening fruit, as fruit emits ethylene gas which kills flowers.
What are the best flowers for a beginner to use?
Roses, carnations, and mums are excellent choices for beginners because they have sturdy stems and are very resilient. These flowers can handle a bit of manhandling during the assembly process without wilting or breaking. Avoid very delicate stems like sweet peas or poppies until you have more experience.
How many flowers do I need for a standard bridal bouquet?
A standard medium-sized bouquet typically requires 20 to 30 stems in total. This usually includes about 10 to 12 focal flowers, 5 to 8 filler stems, and a handful of greenery. Larger, “wild” style bouquets may require 40 or more stems to achieve the desired fullness.
Do I need to use floral wire for every flower?
No, you only need to use wire for flowers with very weak or hollow stems, or if you want to manipulate a flower into a specific position. Most sturdy flowers like roses and lilies do not require wiring if they are fresh and well-hydrated. Over-wiring can make the bouquet unnecessarily heavy and stiff.
Our Top Recommended Finds
- Ergonomic Floral Shears: A pair of high-quality, sharp shears will prevent you from crushing the stems and make the process much easier on your hands.
- Stem Stripper Tool: This simple tool allows you to remove thorns and leaves from roses in seconds without damaging the outer bark of the stem.
- Floral Finishing Spray: A professional anti-transpirant spray seals the moisture into the petals, which is crucial for outdoor summer weddings.
Bring Your Floral Vision To Life
Now that you have the technical foundation for creating a stunning arrangement, it is time to start experimenting with your favorite colors and textures.
Consider visiting a local flower market this weekend to pick up a few “practice” bunches and try out the spiral technique for yourself.
Once you master the art of the hand-tied bouquet, you might find yourself wanting to create centerpieces, boutonnieres, or even floral crowns for your special day.
Wedding Planning
No fluff, no drama. Just easy weekly advice, planning shortcuts, and gentle reminders to help you actually enjoy your engagement.