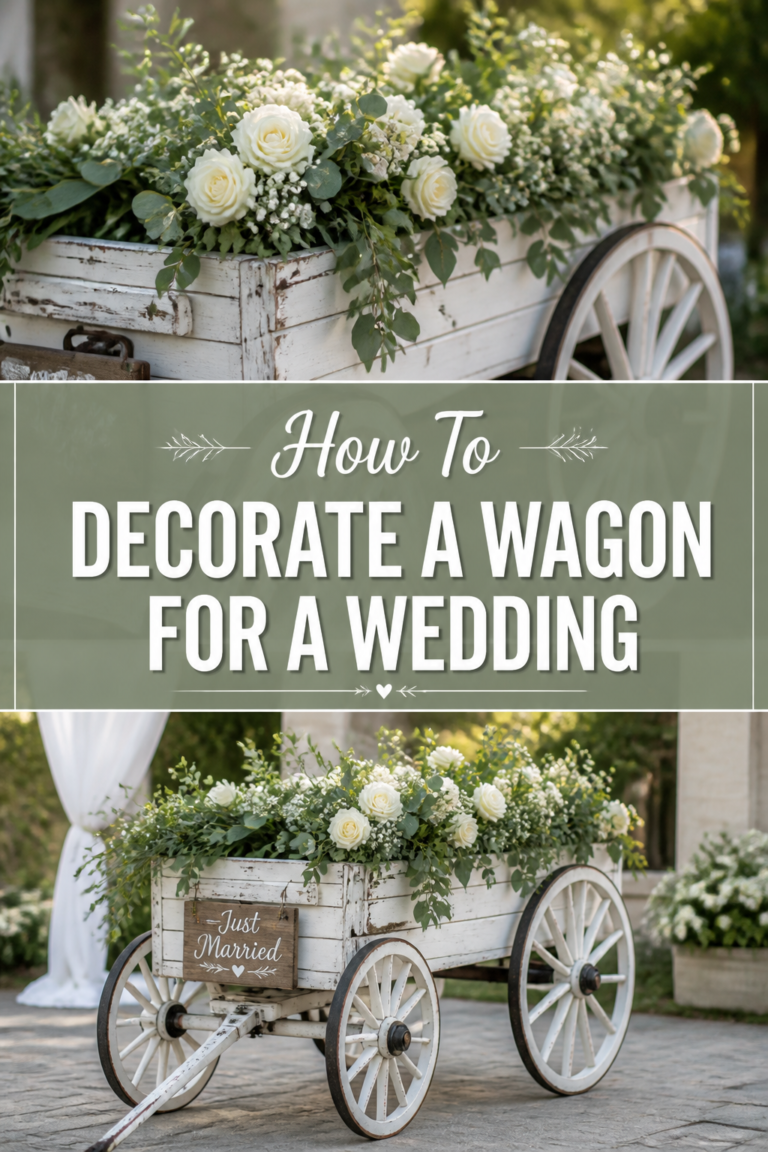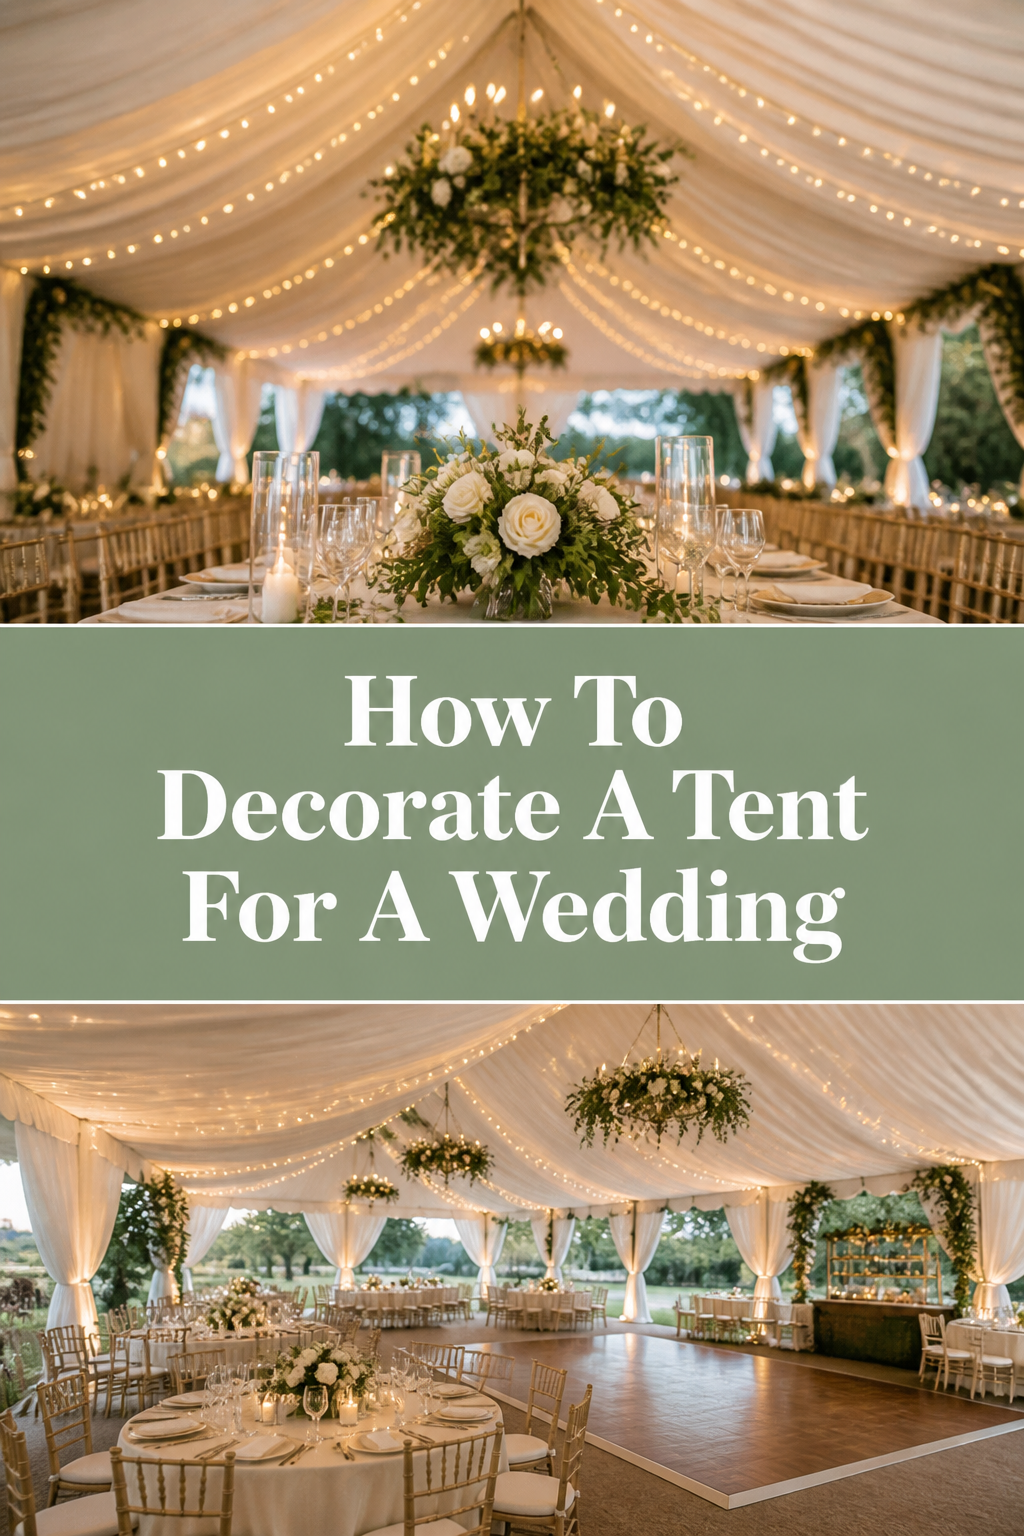
⛺ How To Decorate A Tent For A Wedding
Walking into a bare white tent can feel intimidating and cold at first glance.
My first professional wedding project involved a massive pole tent that felt more like a storage facility than a celebration space.
After years of refining the process, I have learned how to turn these blank canvases into glowing, intimate sanctuaries that guests never want to leave.

Quick Overview
Decorating a tent requires a blend of structural planning and aesthetic layering to create a cohesive atmosphere.
- Time needed: 2 to 3 days (including setup and fine-tuning)
- Difficulty: Intermediate
- What you’ll need: Fabric bolts, lighting fixtures, zip ties, floral wire, ladders, floor coverings, and a clear floor plan.
Step-by-Step Instructions
Step 1: Map Your Layout and Traffic Flow
Begin by sketching a detailed floor plan that accounts for the tent poles and the entrance.
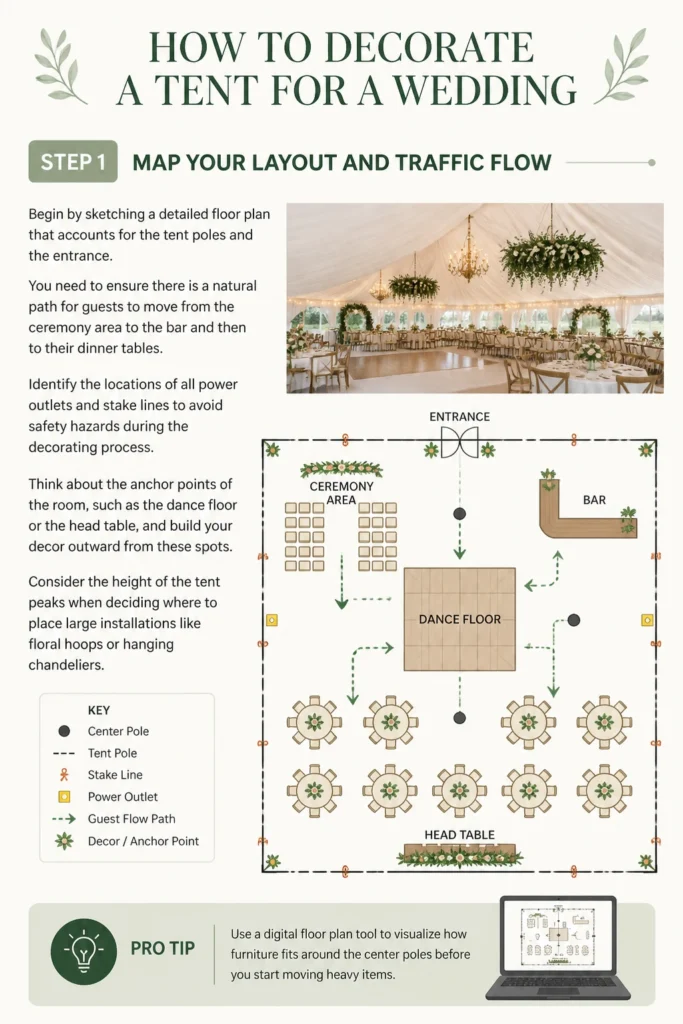
You need to ensure there is a natural path for guests to move from the ceremony area to the bar and then to their dinner tables.
Identify the locations of all power outlets and stake lines to avoid safety hazards during the decorating process.
Think about the “anchor points” of the room, such as the dance floor or the head table, and build your decor outward from these spots.
Consider the height of the tent peaks when deciding where to place large installations like floral hoops or hanging chandeliers.
Pro Tip: Use a digital floor plan tool to visualize how furniture fits around the center poles before you start moving heavy items.
Step 2: Install Primary Overhead Lighting
Hang your main light sources while the tent is empty so you have plenty of room for ladders and lifts.
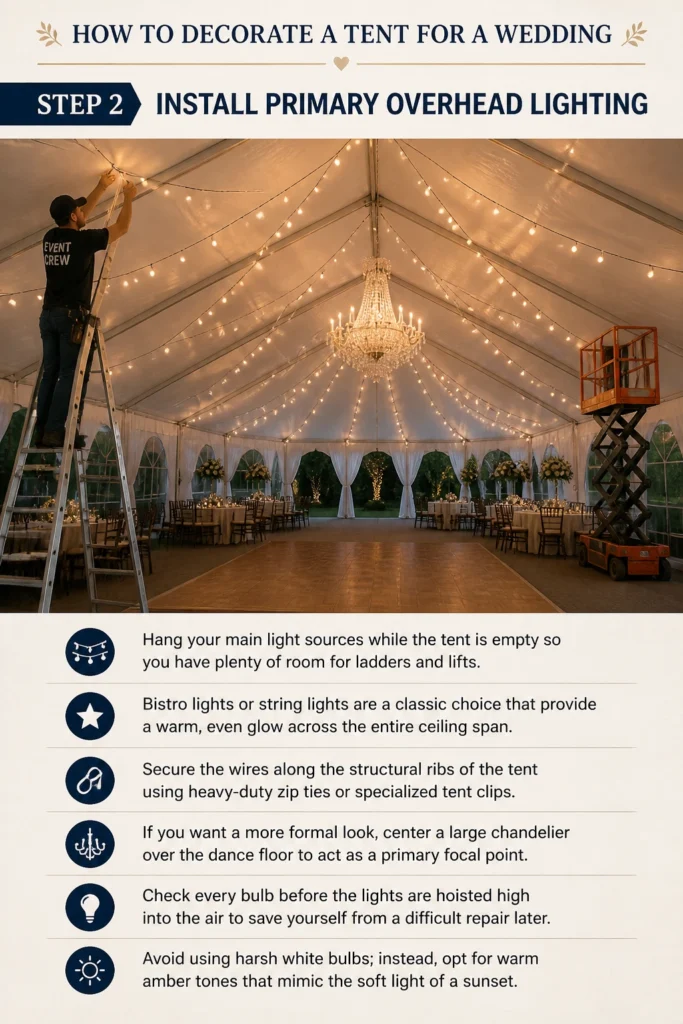
Bistro lights or “string lights” are a classic choice that provide a warm, even glow across the entire ceiling span.
Secure the wires along the structural ribs of the tent using heavy-duty zip ties or specialized tent clips.
If you want a more formal look, center a large chandelier over the dance floor to act as a primary focal point.
Check every bulb before the lights are hoisted high into the air to save yourself from a difficult repair later.
Avoid using harsh white bulbs; instead, opt for warm amber tones that mimic the soft light of a sunset.
Step 3: Drape the Ceiling and Support Poles
Soften the industrial look of the tent by using long swaths of fabric like chiffon, voile, or organza.
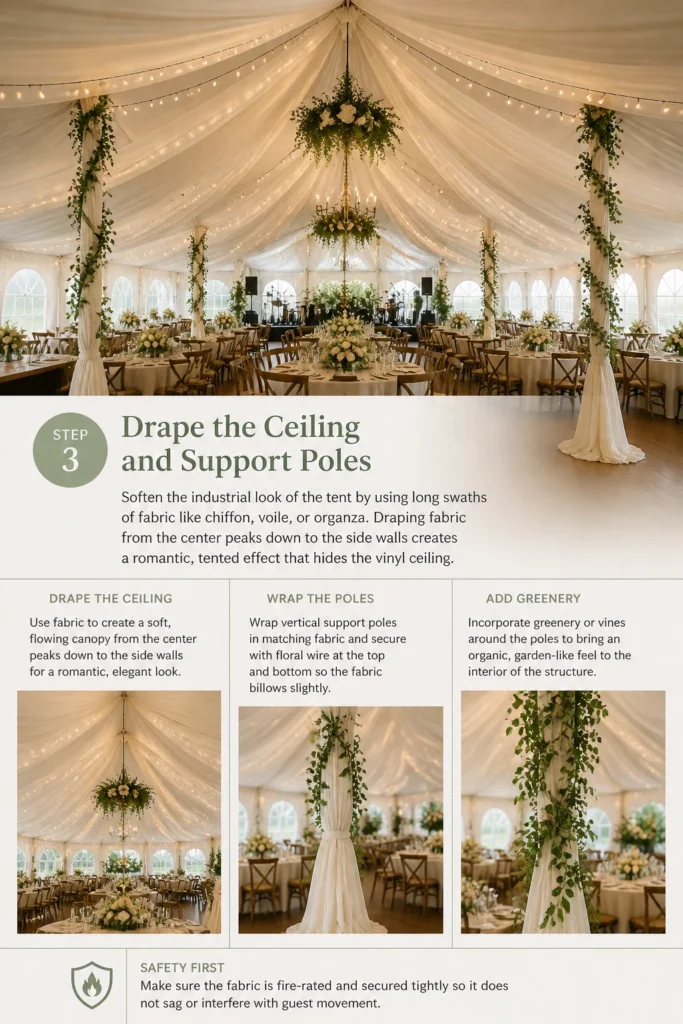
Draping fabric from the center peaks down to the side walls creates a romantic, “tented” effect that hides the vinyl ceiling.
Wrap the vertical support poles in matching fabric to make them blend into the background or become part of the decor.
Use floral wire to gather the fabric at the top and bottom, allowing it to billow slightly for a luxurious texture.
Incorporate greenery or vines around the poles to bring an organic, garden-like feel to the interior of the structure.
Make sure the fabric is fire-rated and secured tightly so it does not sag or interfere with guest movement.
Step 4: Establish a Solid Flooring Foundation
Evaluate the ground surface to decide if you need a full subfloor or just strategic area rugs.
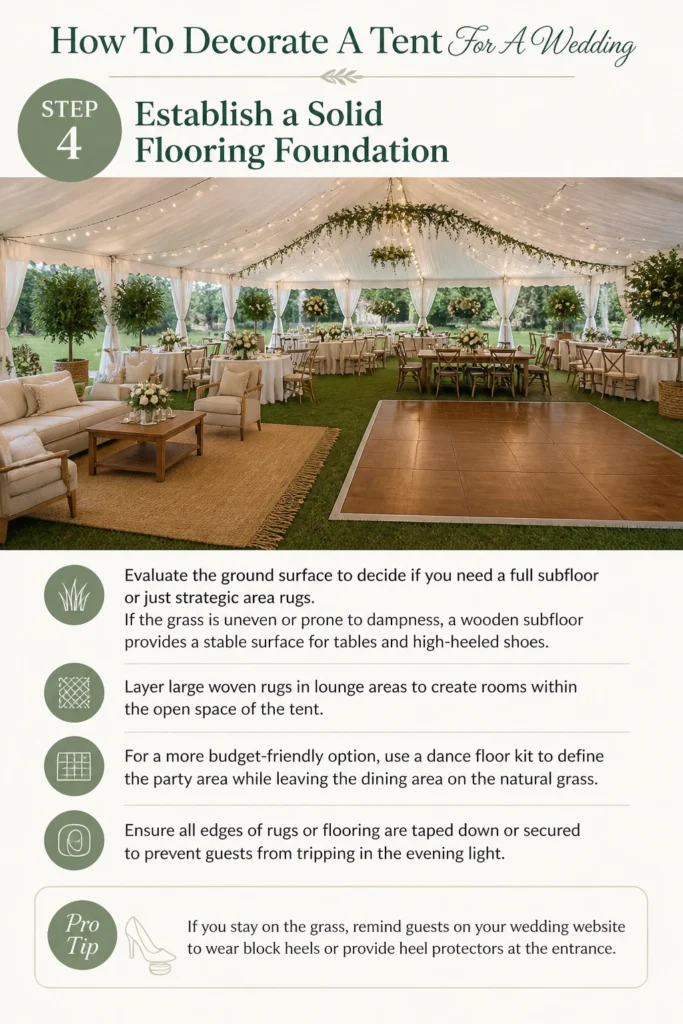
If the grass is uneven or prone to dampness, a wooden subfloor provides a stable surface for tables and high-heeled shoes.
Layer large woven rugs in lounge areas to create “rooms” within the open space of the tent.
For a more budget-friendly option, use a dance floor kit to define the party area while leaving the dining area on the natural grass.
Ensure all edges of rugs or flooring are taped down or secured to prevent guests from tripping in the evening light.
Pro Tip: If you stay on the grass, remind guests on your wedding website to wear block heels or provide “heel protectors” at the entrance.
Step 5: Create Intimate Lounge Zones
Break up the vastness of the tent by setting up comfortable seating areas away from the dining tables.
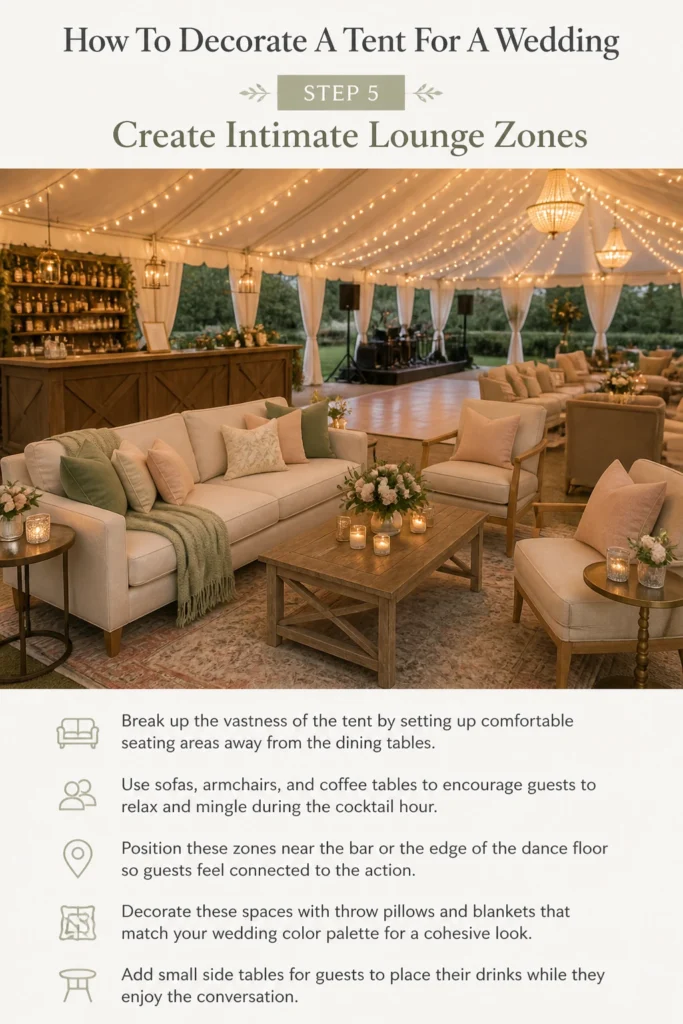
Use sofas, armchairs, and coffee tables to encourage guests to relax and mingle during the cocktail hour.
Position these zones near the bar or the edge of the dance floor so guests feel connected to the action.
Decorate these spaces with throw pillows and blankets that match your wedding color palette for a cohesive look.
Add small side tables for guests to place their drinks while they enjoy the conversation.
Step 6: Add Vertical Decor and Hanging Installations
Utilize the massive vertical space of the tent by hanging decor items from the ceiling frame.
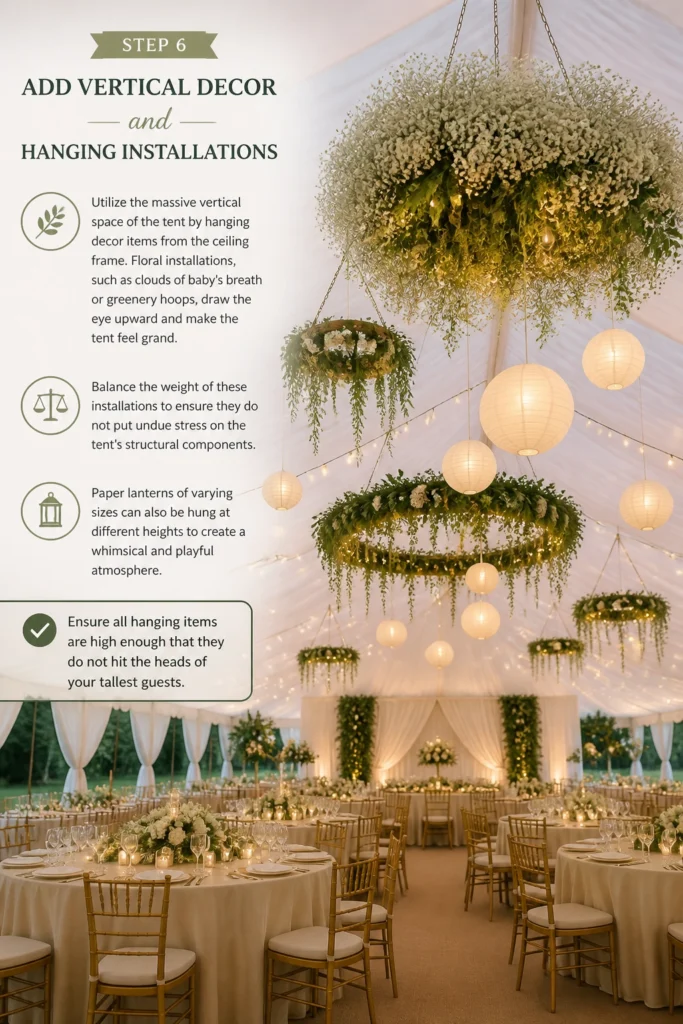
Floral installations, such as “clouds” of baby’s breath or greenery hoops, draw the eye upward and make the tent feel grand.
Balance the weight of these installations to ensure they do not put undue stress on the tent’s structural components.
Paper lanterns of varying sizes can also be hung at different heights to create a whimsical and playful atmosphere.
Ensure all hanging items are high enough that they do not hit the heads of your tallest guests.
Step 7: Design Detailed Table Landscapes
Focus on the details of the dining tables, as this is where guests will spend a significant portion of the evening.
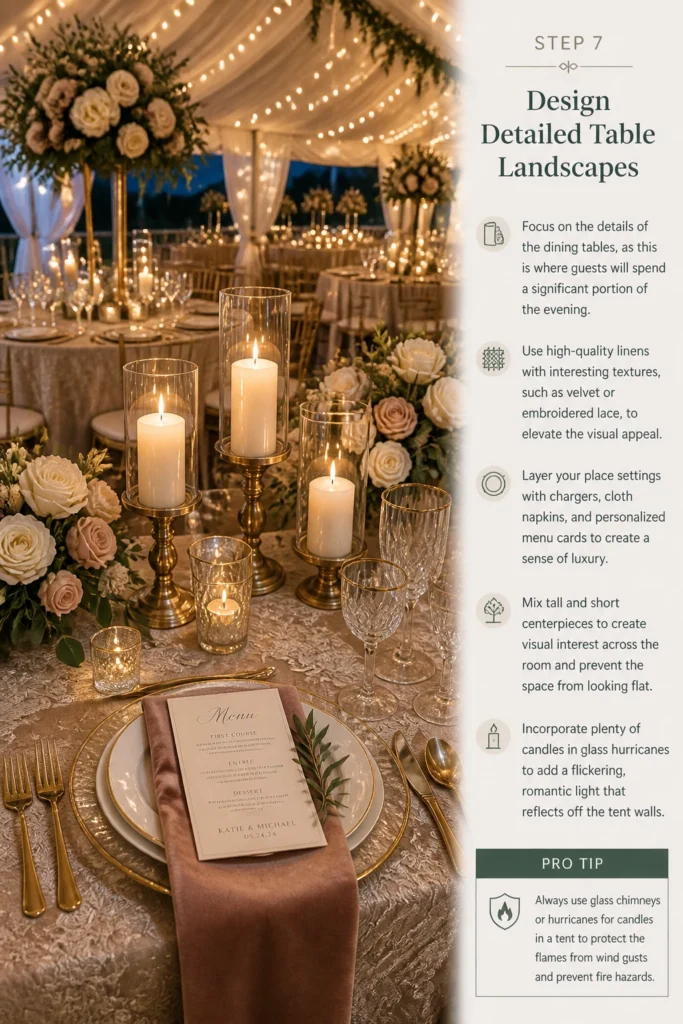
Use high-quality linens with interesting textures, such as velvet or embroidered lace, to elevate the visual appeal.
Layer your place settings with chargers, cloth napkins, and personalized menu cards to create a sense of luxury.
Mix tall and short centerpieces to create visual interest across the room and prevent the space from looking flat.
Incorporate plenty of candles in glass hurricanes to add a flickering, romantic light that reflects off the tent walls.
Pro Tip: Always use glass chimneys or hurricanes for candles in a tent to protect the flames from wind gusts and prevent fire hazards.
Step 8: Enhance the Exterior Perimeter
Extend the decor beyond the tent walls to create a beautiful view for guests looking out from the inside.
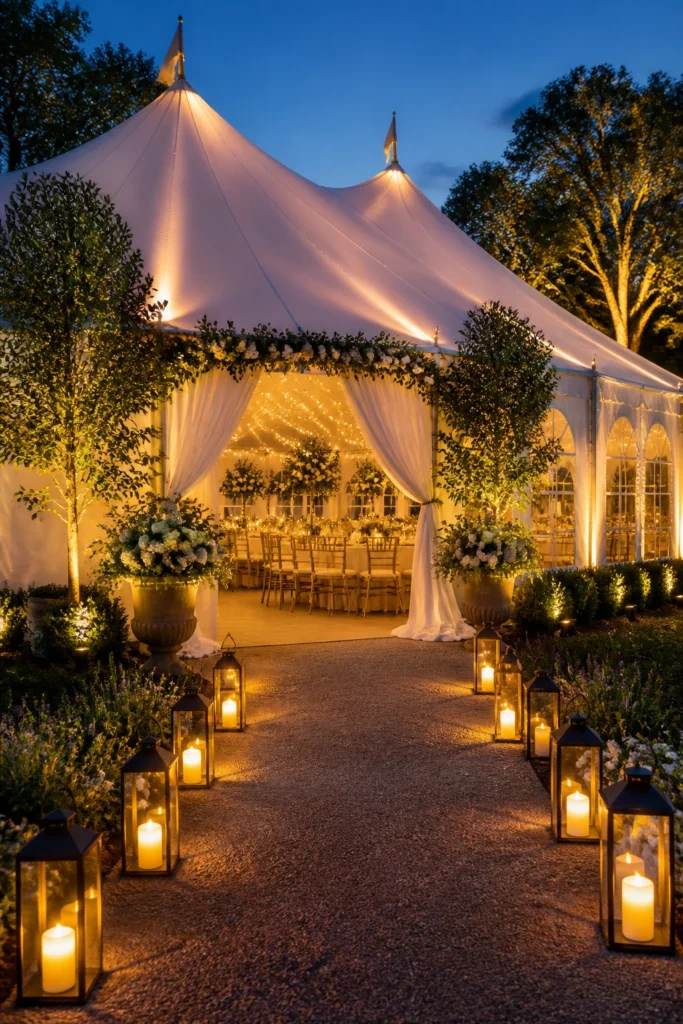
Line the entrance path with lanterns or luminaries to guide guests safely into the tent as the sun goes down.
Place potted trees or large floral arrangements at the tent openings to create a seamless transition from nature to the decorated space.
If the tent has “window” walls, keep them clean and clear so the surrounding landscape becomes part of your backdrop.
Install uplighting on the exterior of the tent or nearby trees to create a magical glow that can be seen from a distance.
Common Mistakes to Avoid
Ignoring the Temperature Control
Many couples focus so much on the visual elements that they forget how quickly a tent can become a greenhouse or an icebox. Without proper fans or heaters, your guests will be uncomfortable regardless of how beautiful the flowers look. Always rent industrial-grade quiet fans for summer weddings or propane heaters for evening events in the fall.
Underestimating the Power Requirements
Tents are often placed in fields or backyards where power is limited or non-existent. Plugging all your lighting, the DJ’s equipment, and the caterer’s ovens into one circuit will lead to a blackout. Rent a dedicated silent generator and run separate power lines for decor lighting and functional equipment.
Neglecting the Tent Stakes and Poles
Safety equipment like heavy-duty stakes and yellow ratchet straps can be an eyesore if left uncovered. Many people forget to plan for hiding these functional items, which can ruin the “fairytale” aesthetic of the photos. Use greenery, wooden crates, or custom fabric covers to disguise the hardware that keeps the tent standing.
Troubleshooting
The Ground is Saturated or Muddy
If heavy rain occurs in the days leading up to the wedding, the interior of the tent may become soft or muddy. The best solution is to bring in extra wood chips or straw to cover the damp spots before laying down your rugs. If the budget allows, a last-minute rental of a plastic “pro-floor” can save the event from becoming a muddy mess.
Wind is Blowing Decor Around
High winds can cause hanging installations to swing dangerously or lightweight centerpieces to topple over. Use fishing line to “anchor” hanging items to the side poles or the ground to limit their range of motion. For tables, choose heavier vases and use museum wax to secure smaller items to the tabletops.
Condensation Forming on the Ceiling
In humid climates, moisture can collect on the inside of the vinyl tent top and begin to drip on guests. Increasing airflow is the only way to combat this, so keep the side walls open as much as possible. If the walls must be closed, use high-powered dehumidifiers placed discreetly behind the bar or draping.
Key Takeaways
- Start with lighting to establish the mood and ensure safety before adding other layers.
- Use fabric draping to hide the industrial skeleton of the tent and add a sense of softness.
- Incorporate vertical elements like hanging flowers to fill the large empty space above the tables.
- Plan for climate control early to ensure guest comfort is not sacrificed for aesthetics.
- Define functional zones using rugs and furniture to make the large space feel more intimate.
- Disguise structural hardware like stakes and poles to maintain a polished look.
Frequently Asked Questions
How much fabric do I need to drape a standard wedding tent?
The amount of fabric depends on the “swag” or dip you want in the ceiling. Generally, you should calculate 1.5 to 2 times the length of the area you are covering to allow for the fabric to drape gracefully rather than pulling tight. Always order extra to account for the height of the peaks and the wrapping of the poles.
Can I hang heavy items from the tent frame?
Most professional-grade wedding tents can support a reasonable amount of weight, but you must check with the rental company first. They can provide the “load-bearing capacity” for specific points on the frame. Never hang items directly from the vinyl fabric; always use the metal rafters or support beams.
What is the best way to light a tent without power?
If you cannot use a generator, focus on high-quality battery-operated LED options. Look for “commercial grade” LED candles and battery-powered uplights that can last for 8 to 12 hours. Solar-powered string lights can work for the exterior, but they are often not bright enough for the main interior lighting.
Should I keep the tent sides on or off?
If the weather is clear and the temperature is mild, keeping the sides off provides the best view and airflow. However, you should always have the side walls on-site and ready to be installed in case of sudden wind or rain. Clear “cathedral” walls are a great middle-ground that provides protection while still letting in light.
Our Top Recommended Finds
- Commercial Grade Bistro Lights: These are essential for creating that classic wedding glow and are durable enough to withstand outdoor conditions.
- Heavy Duty Zip Ties: You will use hundreds of these to secure fabric, lights, and greenery to the tent frame throughout the setup.
- Battery-Operated LED Uplights: These allow you to add color and depth to the tent walls without having to run messy extension cords across the floor.
Bringing Your Vision To Life
Now that you have the structural plan and the decorative steps in place, you are ready to begin the transformation.
A tented wedding is a labor of love, but the result is a completely custom environment that reflects your personal style.
Start by contacting your rental company to confirm the tent dimensions and then begin sourcing your lighting and fabric materials.
If you enjoyed this guide, you might also want to look into our tips for outdoor wedding lighting or our checklist for backyard wedding logistics.
Take the first step today by sketching out your ideal floor plan and imagining how your guests will feel when they step into your masterpiece.