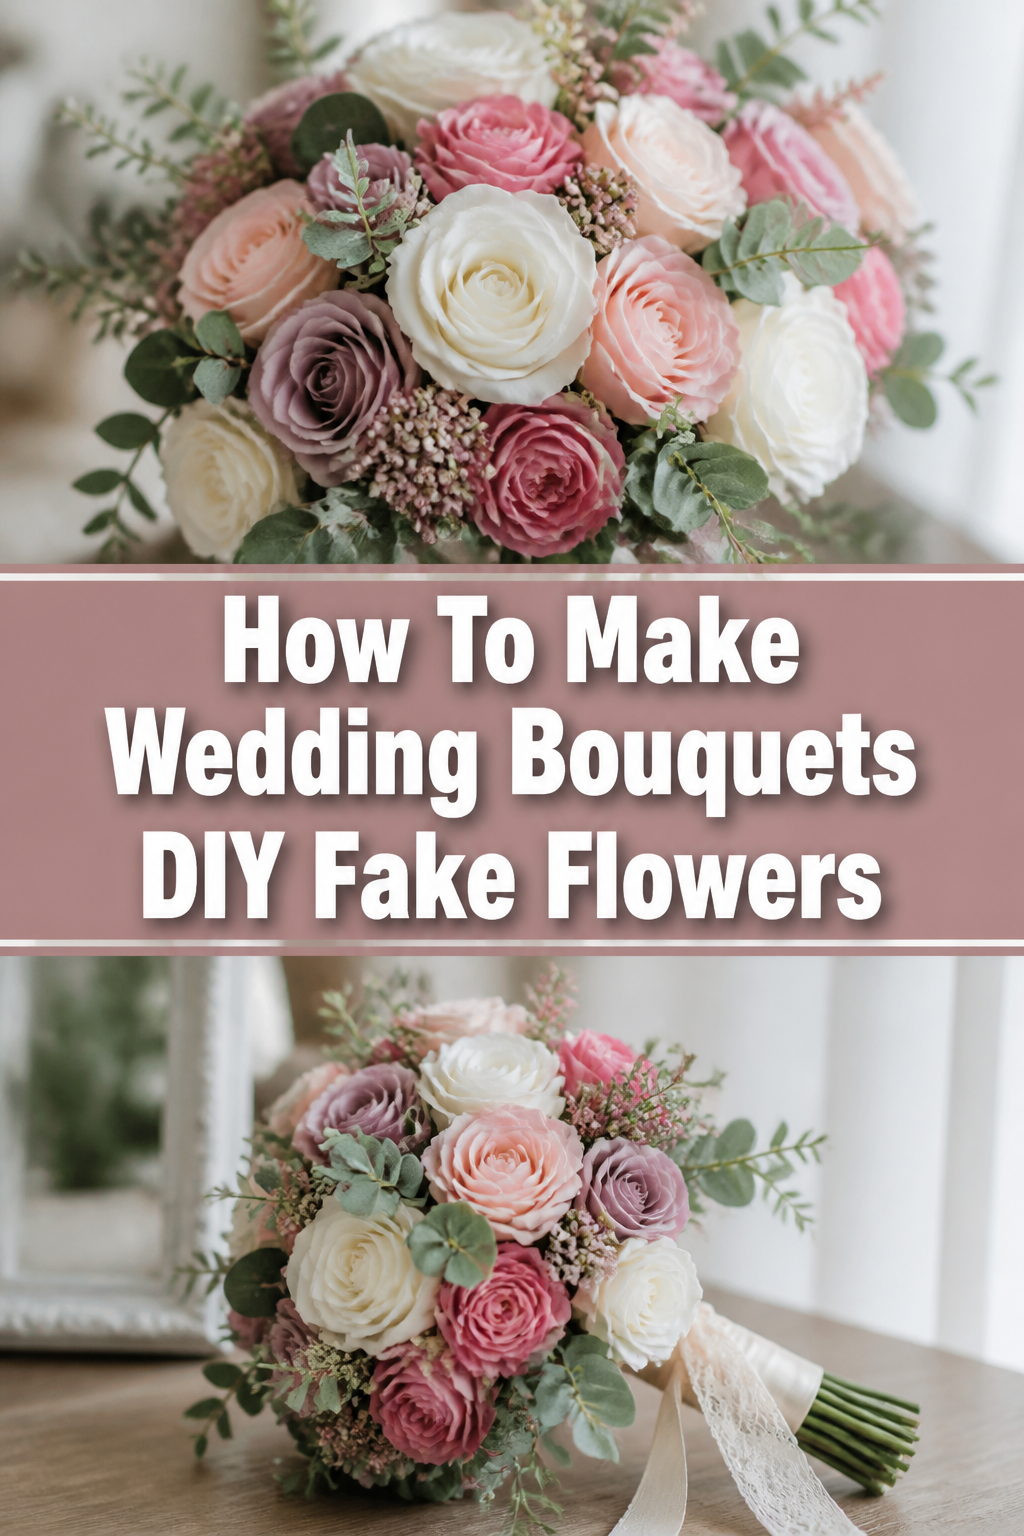
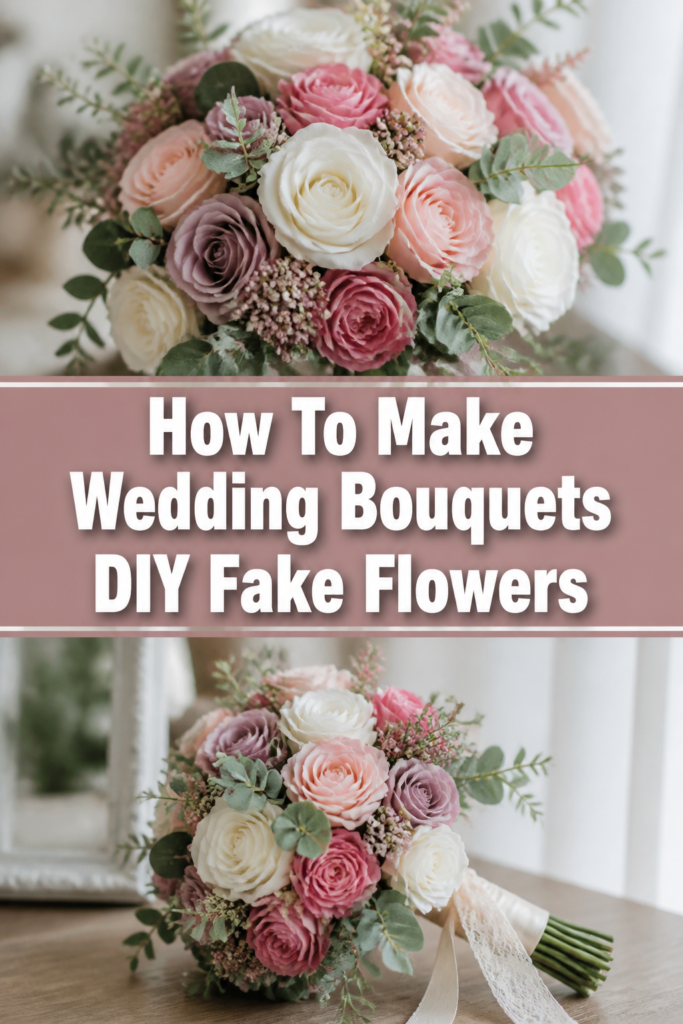
💐 How To Make Wedding Bouquets DIY Fake Flowers
Crafting your own wedding bouquet with fake flowers can be a truly rewarding experience. It offers a wonderful way to infuse your personality into your special day. Plus, it’s a fantastic option for saving money and creating a lasting keepsake.
I remember the joy of making my sister’s bouquet, seeing her face light up with a creation that was uniquely hers. This guide shares all the practical steps I learned along the way. You absolutely can create a stunning, professional-looking bouquet yourself.
Quick Overview
You’re about to embark on a creative journey to design a beautiful, custom wedding bouquet. This project allows for incredible personalization and a lasting memento of your big day. By the end, you’ll have a gorgeous, durable bouquet ready for your wedding.
- Time needed: 3-6 hours (depending on complexity and experience)
- Difficulty: Beginner to Intermediate
- What you’ll need: Assorted fake flowers and greenery, floral wire, floral tape, wire cutters, hot glue gun and glue sticks, ribbon, corsage pins (optional).
Step-by-Step Instructions
Step 1: Gather Your Supplies and Vision
Begin by collecting all the necessary materials. This includes a variety of high-quality artificial flowers and greenery. Think about your wedding colors and overall theme when selecting your blooms.
Consider different sizes and textures to add depth and interest to your bouquet. You’ll also need essential tools like wire cutters, floral tape, and a hot glue gun. Don’t forget beautiful ribbon for the handle wrap.
Pro Tip: Visit a craft store or online retailer with a clear idea of your color palette. Purchase more flowers than you think you’ll need; it’s better to have extra options than to run out mid-project. Look for “real touch” or “silk” flowers for a more realistic appearance.
Step 2: Prepare Your Flowers and Greenery
Once you have your flowers, it’s time for preparation. Carefully remove any tags or plastic packaging. Trim the stems of your flowers and greenery to a manageable length using wire cutters.
Aim for stems that are approximately 10-12 inches long for now. You can always trim them shorter later. Remove any excess leaves or small buds from the lower parts of the stems that would be covered by floral tape or ribbon.
This step ensures a clean foundation for your bouquet. It also helps in achieving a more natural flow and shape.
Step 3: Identify Your Focal Flowers
Select 2-3 of your largest or most prominent flowers. These will be the focal points of your bouquet. Hold these flowers together in your non-dominant hand.
Arrange them slightly offset from each other, creating a natural cluster. This initial grouping sets the central theme and height for your entire bouquet. Ensure they are visually balanced.
Step 4: Build Around Your Focal Points
Start adding smaller flowers and greenery around your focal blooms. Work in a spiral motion, turning the bouquet slightly as you add each new piece. This technique helps create a round, balanced shape.
Layer different textures and colors. Place some flowers higher, some lower, to add dimension. Ensure no two identical flowers are directly next to each other.
Pro Tip: Step back frequently to assess your progress. View the bouquet from different angles to ensure it looks good from all sides. Adjust stems as needed to maintain balance and avoid a flat appearance.
Step 5: Incorporate Filler Flowers and Greenery
Now, begin filling in any gaps with your smaller filler flowers and greenery. These elements add lushness and help create a cohesive look. Think about how real flowers would naturally grow together.
Use greenery to frame your main flowers and add a touch of organic beauty. Tuck pieces of greenery deep into the bouquet. Allow some to extend slightly beyond the flowers for a more natural, cascading effect.
This step is crucial for giving the bouquet a full, professional finish. It also helps to hide any visible floral tape or wire.
Step 6: Secure the Bouquet Base
Once you are happy with the arrangement, it’s time to secure the stems. Tightly wrap floral tape around the stems, starting just below the lowest bloom. Wrap downwards for about 4-5 inches.
Overlap the tape as you go, pulling it taut to activate its adhesive properties. This creates a strong, stable base for your bouquet. It also ensures all elements stay firmly in place.
Step 7: Trim Stems and Refine Shape
With the base secured, hold the bouquet against your body to visualize its final length. Use your wire cutters to trim all the stems to a uniform, comfortable length. Aim for about 6-8 inches from the base of the blooms.
This makes the bouquet easier to hold and gives it a clean, polished look. Make any final adjustments to the flower placement. Ensure the shape is pleasing and balanced from all angles.
Step 8: Add the Ribbon Wrap
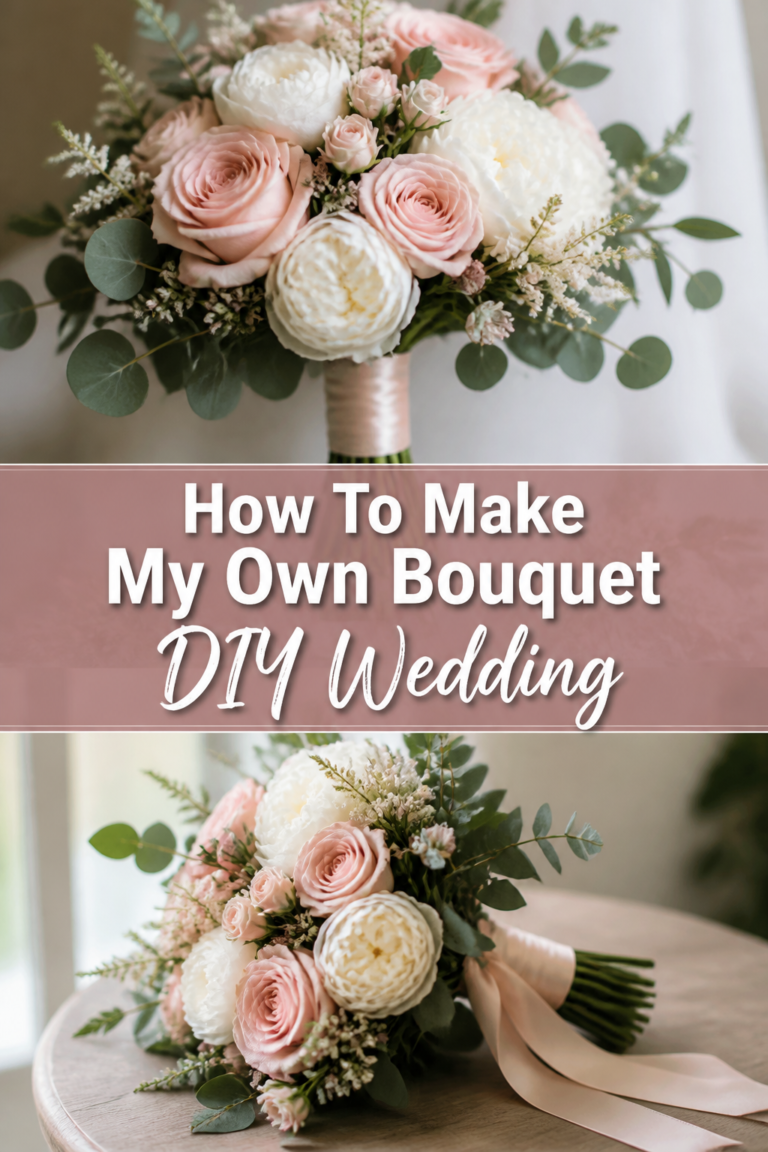
Select your desired ribbon for the handle. Start by applying a small dot of hot glue to the top of the floral tape, just below the blooms. Press one end of the ribbon firmly onto the glue.
Begin wrapping the ribbon tightly downwards, overlapping slightly as you go. Ensure there are no gaps or visible floral tape. When you reach the desired length for the handle, secure the end with another small dot of hot glue.
You can leave the end neat or create a small bow or decorative knot. For extra security and a touch of elegance, you can use corsage pins to secure the ribbon wrap. Insert them through the ribbon and into the floral tape underneath.
Step 9: Final Inspection and Storage
Give your completed bouquet one last thorough inspection. Check for any loose flowers, visible wires, or gaps. Make any final adjustments to ensure perfection.
Gently mist the bouquet with a floral sealant spray if desired (check compatibility with your artificial flowers). This can help protect the colors and add a subtle sheen. Store your finished bouquet in a cool, dry place away from direct sunlight.
This helps prevent any fading or dust accumulation. Your beautiful, handmade wedding bouquet is now ready for your special day!
Common Mistakes to Avoid
Overstuffing the Bouquet
A common pitfall is adding too many flowers, resulting in a dense, unnatural-looking bouquet. This can make the arrangement feel heavy and appear less elegant. Instead, focus on balance and allowing each bloom some space to shine.
Aim for a cohesive flow rather than a packed mass of flowers. Less can often be more, allowing for depth and visual interest. A well-proportioned bouquet feels light and ethereal.
Ignoring Greenery and Texture
Neglecting to incorporate sufficient greenery and varied textures can make a bouquet look flat and uninteresting. Fake flowers can sometimes appear one-dimensional without the contrast of leaves and different shapes. Greenery adds vital depth, realism, and organic movement.
Always include a mix of foliage like eucalyptus, ferns, or ivy. Introduce small berries or delicate filler flowers to break up the larger blooms. This creates a more dynamic and lifelike arrangement.
Skipping Proper Stem Preparation
Failing to properly prepare stems can lead to a messy and unstable bouquet. Leaving on too many leaves or not trimming stems to a consistent length makes the wrapping process difficult. It also results in a bulky, uncomfortable handle.
Always take the time to strip excess foliage from the lower stems. Trim all stems to a suitable length before you begin wrapping. This ensures a neat, firm foundation and a comfortable grip.
Using Low-Quality Materials
Opting for very cheap, low-quality artificial flowers can make your DIY bouquet look obviously fake. Poor quality materials often have unnatural colors, visible plastic seams, or flimsy construction. This detracts significantly from the overall elegance.
Invest in high-quality silk or “real touch” flowers for your wedding bouquet. These materials mimic the look and feel of fresh blooms much more convincingly. The slight extra cost is well worth the elevated appearance.
Troubleshooting
Bouquet Feels Unstable or Loose
If your bouquet feels wobbly or like individual flowers might shift, the floral tape probably wasn’t wrapped tightly enough. The adhesive in floral tape activates with stretching and pressure. Re-tape the base firmly.
Start just below the blooms and wrap downwards, pulling the tape taut as you go. Overlap each layer to create a strong, secure bond. For extra reinforcement, you can insert thin floral wire through the center of the bouquet. Twist the ends together tightly at the base, then cover with tape.
Flowers Look Too “Fake”
Sometimes artificial flowers can look stiff or unnatural right out of the package. To enhance realism, gently bend the petals and leaves into more natural shapes. Many artificial flowers have wires within their stems and petals, allowing for manipulation.
Layer different shades of the same flower color to add depth. Mix in some natural elements like dried grasses or preserved greenery if appropriate for your style. A light mist of matte floral sealant can also reduce any artificial sheen.
Bouquet is Too Heavy or Awkward to Hold
A bouquet can become uncomfortably heavy if too many flowers are used or if the stems are too long. First, assess the number of blooms. You might need to remove a few of the larger, heavier flowers.
Next, check the stem length. If they are excessively long, trim them further to a comfortable 6-8 inches from the base of the blooms. This reduces leverage and makes the bouquet feel lighter. Ensure the ribbon wrap is firm and ergonomic for a good grip.
Key Takeaways
- Quality Matters: Invest in high-quality artificial flowers for a realistic and lasting bouquet.
- Prep is Key: Always prepare your stems by trimming and removing excess foliage before arranging.
- Build in Layers: Start with focal flowers, then add fillers and greenery in a spiral motion for balance.
- Secure Firmly: Use floral tape tightly to create a stable base that holds all elements in place.
- Personalize with Ribbon: Choose a beautiful ribbon and wrap the handle neatly for a polished finish.
- Step Back and Adjust: Frequently assess your bouquet from different angles to ensure a balanced and pleasing shape.
Frequently Asked Questions
How far in advance can I make a DIY fake flower wedding bouquet?
One of the greatest benefits of using fake flowers is their durability. You can comfortably create your bouquet several months in advance. This removes a lot of wedding day stress.
Just ensure you store it properly once completed. Keep it in a cool, dry place away from direct sunlight to prevent dust accumulation or color fading.
How do I store my finished artificial bouquet?
To store your bouquet, first ensure it’s completely clean and free of dust. You can gently dust it with a soft brush or a hairdryer on a cool, low setting. Place the bouquet in a sturdy box, ideally one that allows it to sit upright or is padded.
Wrap it loosely in tissue paper or a breathable fabric to protect it from dust. Store the box in a cool, dry place away from direct sunlight or extreme temperatures.
Can I mix real and fake flowers in my wedding bouquet?
Yes, absolutely! Mixing real and fake flowers can create a stunning and unique bouquet. This approach allows you to incorporate delicate fresh blooms that might be too expensive or fragile to use entirely.
Ensure the real flowers are added as close to the wedding day as possible. They will need to be properly conditioned and potentially have their stems wrapped separately within the artificial base.
What’s the best type of fake flower to use for a realistic look?
For the most realistic appearance, look for “real touch” or high-quality silk flowers. These varieties often have a more natural texture and color gradation than cheaper plastic options. They are designed to mimic the feel and visual softness of fresh blooms.
Pay attention to details like veining on leaves and the way petals are shaped. Avoid flowers with obvious plastic centers or overly glossy finishes.
Our Top Recommended Finds
- High-Quality Silk Flower Assortments: Look for sets that offer varied sizes and shades within your color palette. These provide the most natural look and feel.
- Professional Floral Wire and Tape Kit: A good kit will include various gauges of wire and stretchy, self-adhesive floral tape, essential for sturdy construction.
- Precision Wire Cutters: A sharp, comfortable pair of wire cutters makes stem trimming much easier and safer, preventing hand fatigue.
Craft Your Dream Bouquet Today
Embarking on the journey of creating your own wedding bouquet is a truly special endeavor. It’s an opportunity to pour your love and creativity into a meaningful keepsake. Not only will you save money, but you’ll also have a beautiful, lasting reminder of your wedding day.
So, gather your inspiration, select your favorite blooms, and let your imagination take flight. Don’t wait; start planning and assembling your stunning DIY fake flower wedding bouquet today. The joy of holding your handmade creation will be an unforgettable part of your celebration.