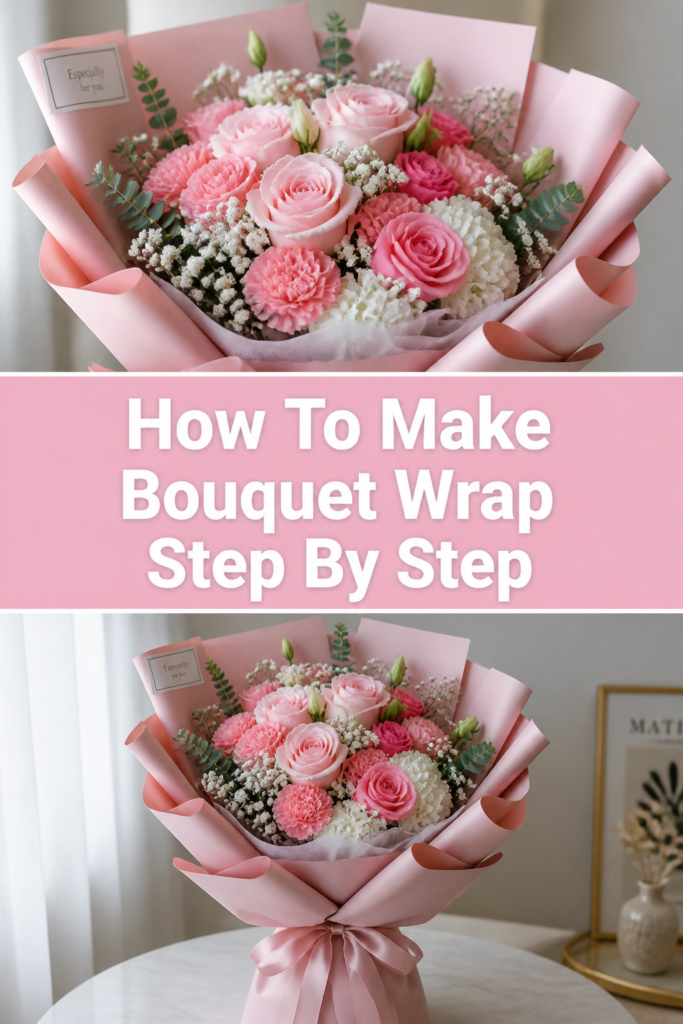
💐 How To Make Bouquet Wrap Step By Step
I have spent years in busy flower shops perfecting the “perfect fold” that turns a simple bunch of stems into a luxury gift.
Learning how to wrap flowers is a tactile skill that blends geometry with artistic flair to elevate any floral arrangement.
This guide shares the professional techniques I use to ensure every bouquet looks high-end and stays secure during transport.
Quick Overview
Before you start cutting your paper, here is a quick look at what this project involves.
- Time needed: 15 to 20 minutes
- Difficulty: Beginner
- What you’ll need: Fresh flowers, kraft or waterproof wrapping paper, floral tape, scissors, and ribbon.
Step-by-Step Instructions
Step 1: Clean and Prep Your Stems
Remove any leaves that will sit below the water line or the wrapping point to prevent rot and bulk.
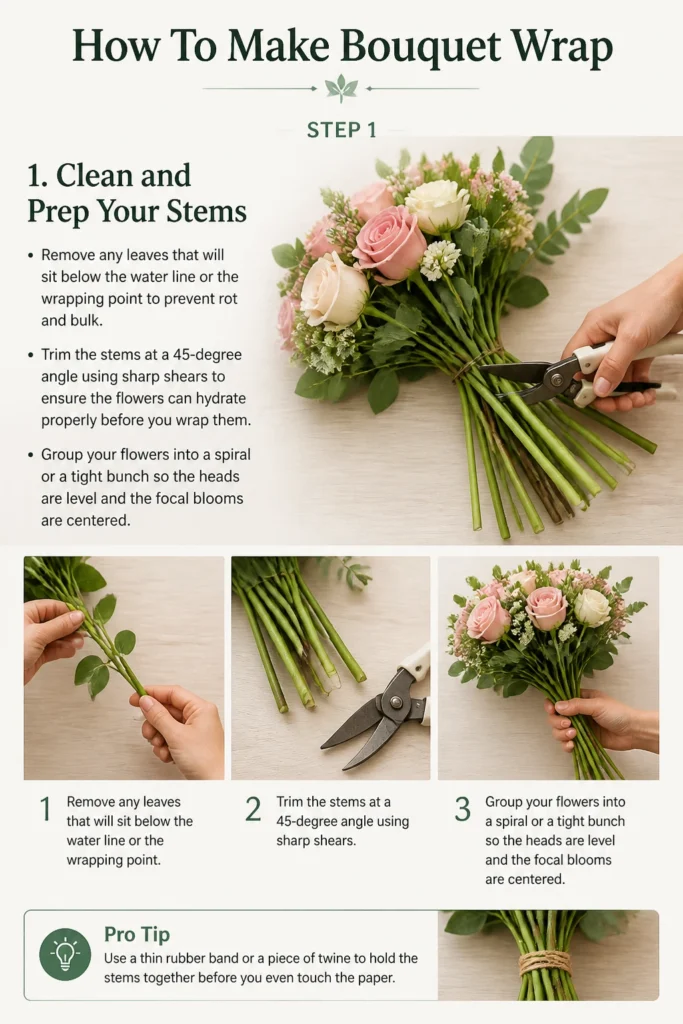
Trim the stems at a 45-degree angle using sharp shears to ensure the flowers can hydrate properly before you wrap them.
Group your flowers into a spiral or a tight bunch so the heads are level and the focal blooms are centered.
Pro Tip: Use a thin rubber band or a piece of twine to hold the stems together before you even touch the paper.
Step 2: Select the Right Wrapping Material
Choose a paper that complements the colors of your blooms without overpowering their natural beauty.
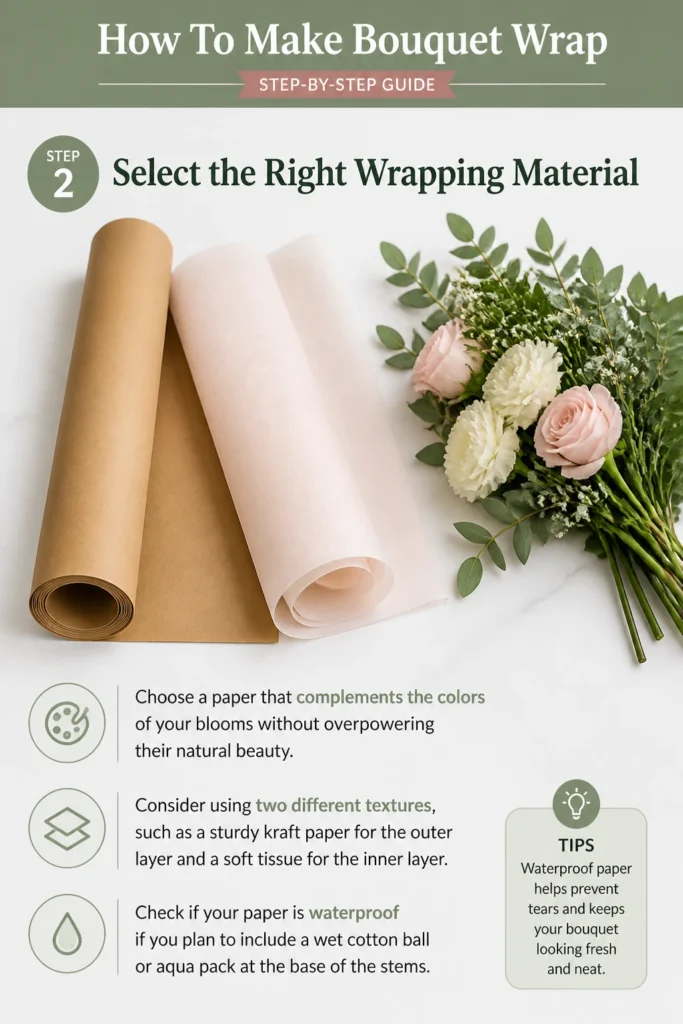
Consider using two different textures, such as a sturdy kraft paper for the outer layer and a soft tissue for the inner layer.
Check if your paper is waterproof if you plan to include a wet cotton ball or “aqua pack” at the base of the stems.
Step 3: Measure and Cut Your Paper Squares
Lay your paper flat on a clean table and cut two or three large squares, roughly 20 inches by 20 inches.
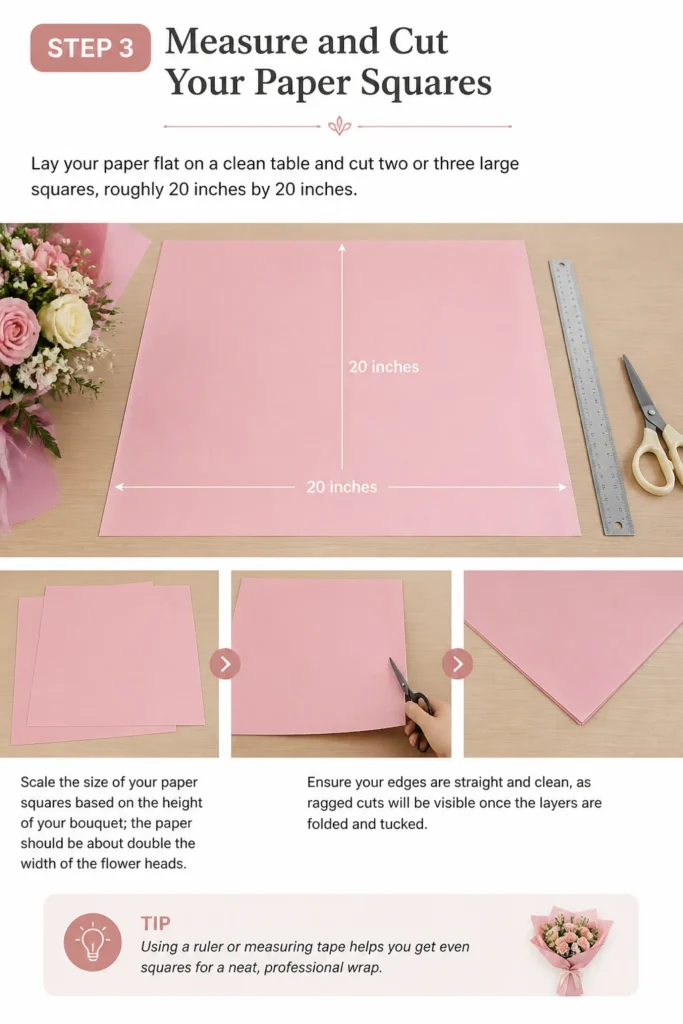
Scale the size of your paper squares based on the height of your bouquet; the paper should be about double the width of the flower heads.
Ensure your edges are straight and clean, as ragged cuts will be visible once the layers are folded and tucked.
Step 4: Create the First Diagonal Fold
Place one square of paper diagonally on the table so it looks like a diamond shape rather than a square.
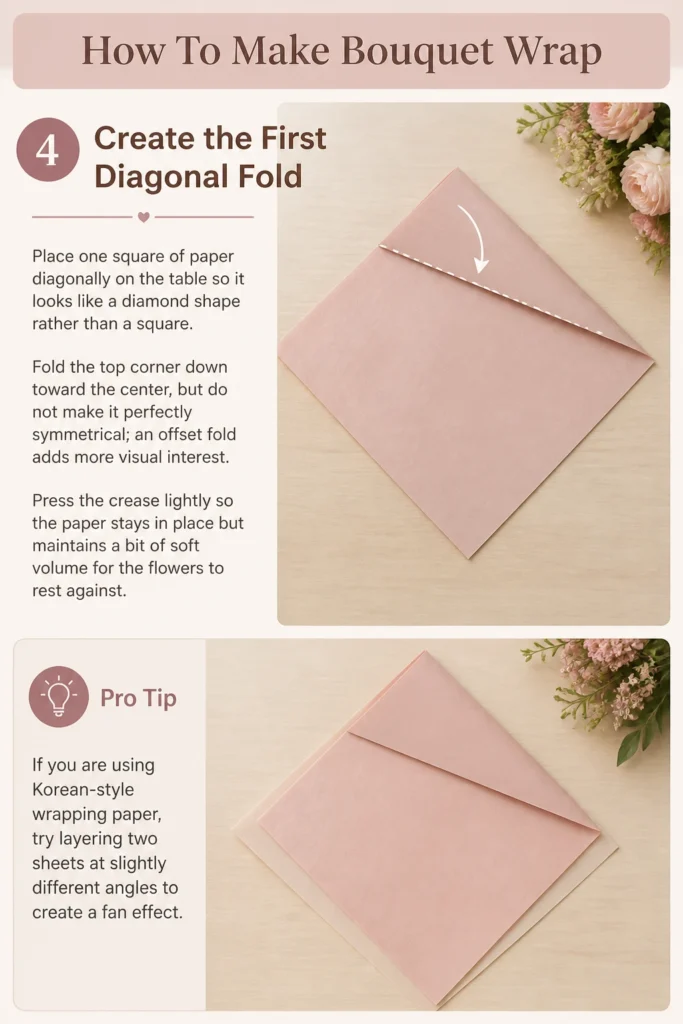
Fold the top corner down toward the center, but do not make it perfectly symmetrical; an offset fold adds more visual interest.
Press the crease lightly so the paper stays in place but maintains a bit of soft volume for the flowers to rest against.
Pro Tip: If you are using Korean-style wrapping paper, try layering two sheets at slightly different angles to create a “fan” effect.
Step 5: Position the Flowers on the Paper
Lay your tied bouquet onto the folded paper so the flower heads sit just below the top edge of the fold.
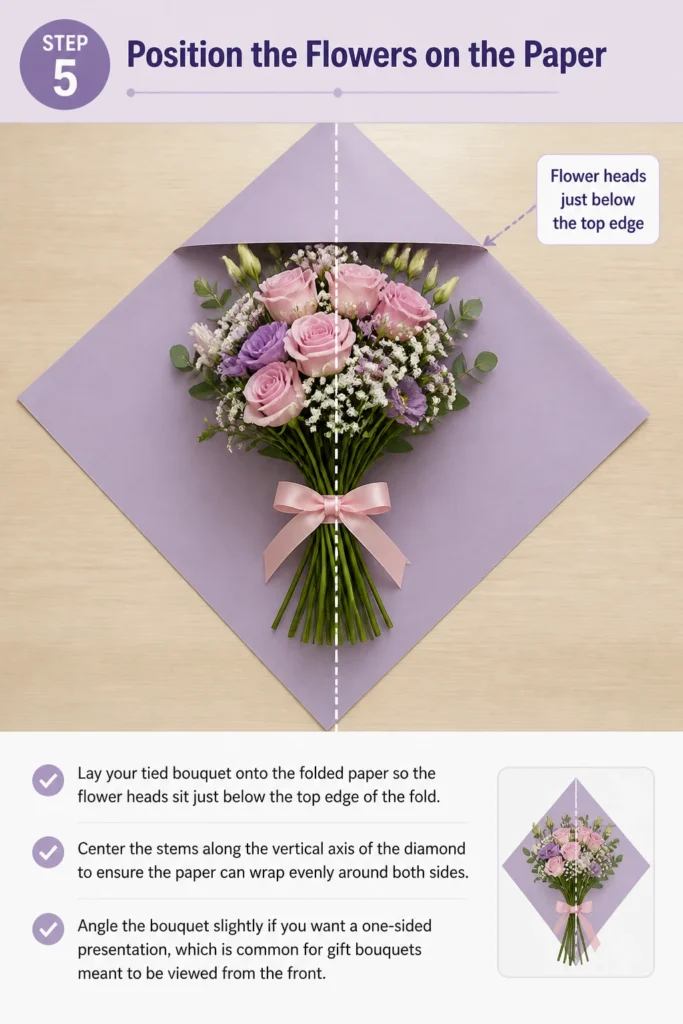
Center the stems along the vertical axis of the diamond to ensure the paper can wrap evenly around both sides.
Angle the bouquet slightly if you want a “one-sided” presentation, which is common for gift bouquets meant to be viewed from the front.
Step 6: Fold the Sides to Create a Cone
Bring the left side of the paper over the stems, tucking it snugly against the stalks to create a secure base.
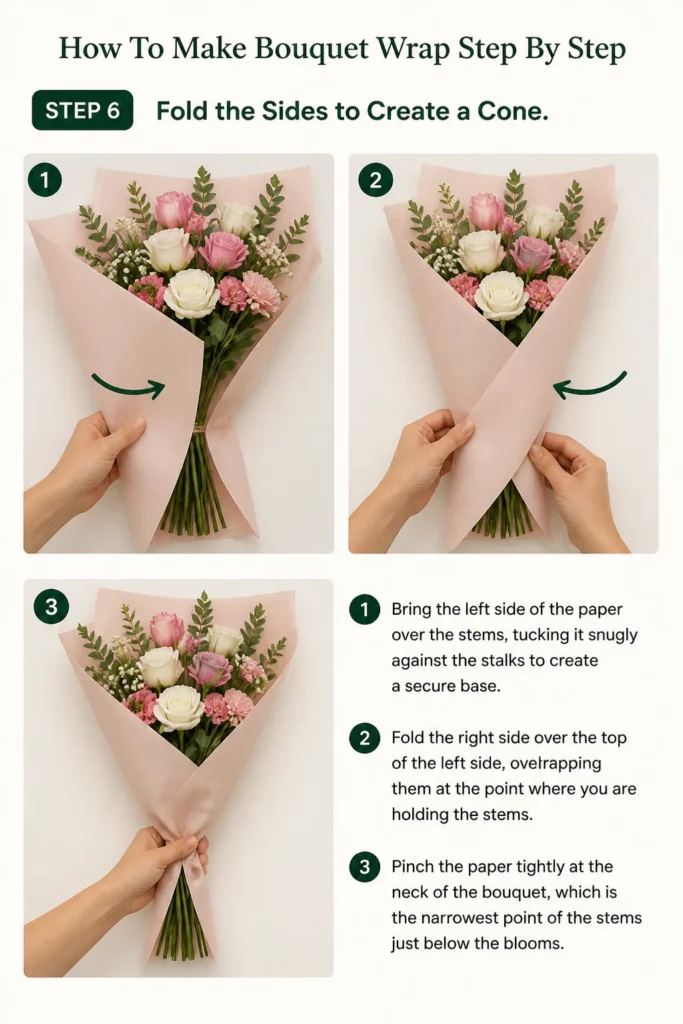
Fold the right side over the top of the left side, overlapping them at the point where you are holding the stems.
Pinch the paper tightly at the “neck” of the bouquet, which is the narrowest point of the stems just below the blooms.
Step 7: Add a Second Layer for Volume
Repeat the folding process with a second sheet of paper, placing it behind the first layer to add depth and “fluff.”
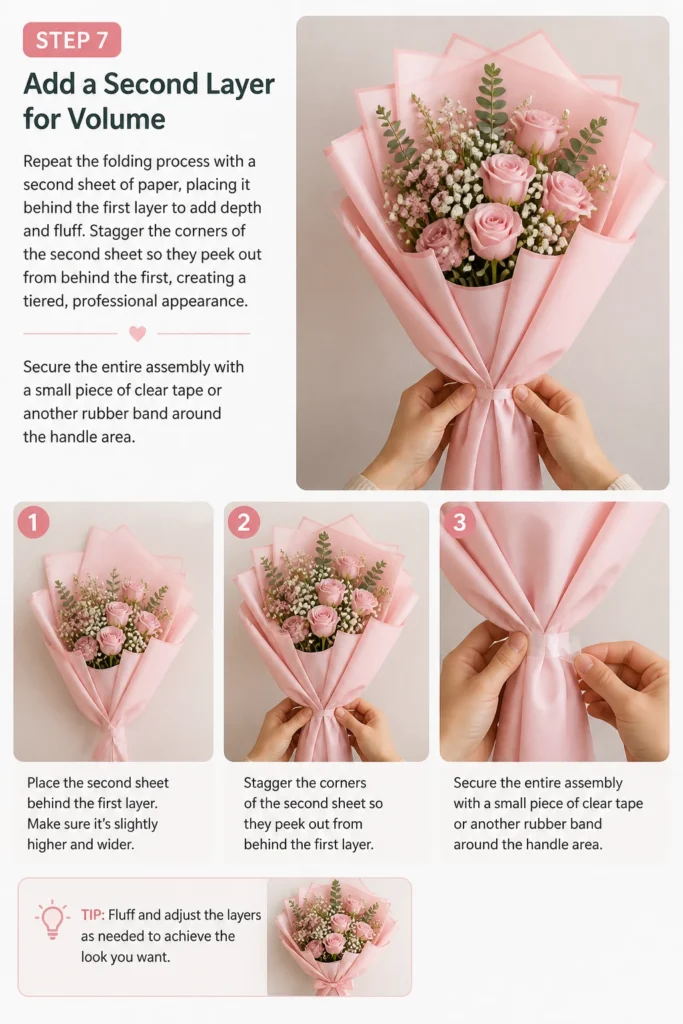
Stagger the corners of the second sheet so they peek out from behind the first, creating a tiered, professional appearance.
Secure the entire assembly with a small piece of clear tape or another rubber band around the handle area.
Step 8: Finish with a Decorative Ribbon
Cut a length of ribbon that is at least three times the circumference of the bouquet handle.
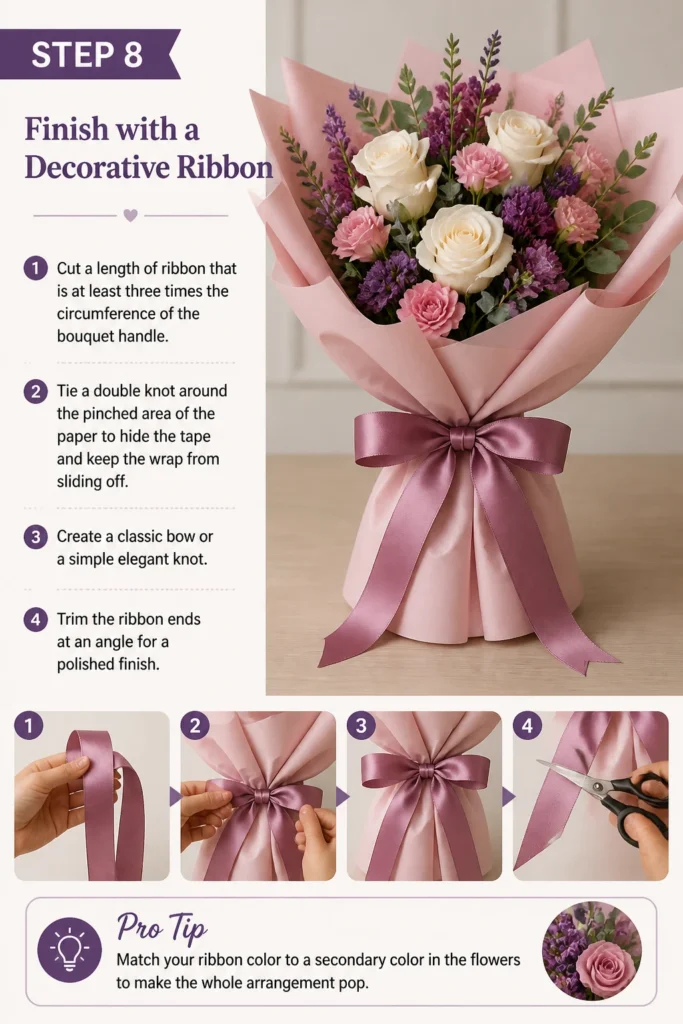
Tie a double knot around the pinched area of the paper to hide the tape and keep the wrap from sliding off.
Create a classic bow or a simple elegant knot, and trim the ribbon ends at an angle for a polished finish.
Pro Tip: Match your ribbon color to a secondary color in the flowers to make the whole arrangement pop.
Common Mistakes to Avoid
Using Too Much Paper
It is easy to think that more paper equals a more luxurious look, but too much bulk can drown out the flowers.
If the wrap is too thick, the recipient will struggle to hold the bouquet, and the focus shifts away from the blooms.
Stick to two or three layers of paper to maintain a balance between the packaging and the natural elements.
Ignoring Stem Moisture
Wrapping dry stems in paper is fine for a quick hand-off, but the flowers will start to wilt almost immediately.
If the flowers need to last more than an hour without water, the paper will get soggy and tear if it touches wet stems.
Always wrap the very bottom of the stems in a damp paper towel and a small plastic bag before adding the decorative outer wrap.
Tightening the Neck Too Much
While you want the wrap to be secure, squeezing the stems too tightly can actually crush them and stop water flow.
This also tends to crush the bottom layer of paper, making the wrap look wrinkled and messy rather than crisp.
Aim for a firm hold that keeps the paper in place but allows the stems a little bit of breathing room.
Troubleshooting
The Paper Keeps Slipping Off
This usually happens when the stems are too smooth or the paper is too stiff to grip the bouquet.
Try wrapping a piece of floral tape (which is slightly tacky) around the stems before you apply the paper.
This creates a “non-slip” surface that the paper can grab onto when you tie your ribbon.
The Bouquet Looks Flat and One-Dimensional
Flatness occurs when the paper is folded too tightly against the flowers or if only one sheet is used.
Gently pull the edges of the paper outward and upward after tying the ribbon to “fluff” the layers.
Using tissue paper as an inner layer also helps fill in the gaps and provides a soft cushion that adds perceived volume.
The Paper Is Tearing at the Bottom
Tears are often caused by the sharp ends of the stems poking through the paper during transport.
Ensure your stems are cut cleanly and consider folding the bottom inch of the paper upward before you wrap the sides.
This creates a reinforced “cup” at the base that protects the paper from the weight and sharp edges of the stems.
Key Takeaways
- Clean and prep your stems by removing lower leaves and cutting at an angle for longevity.
- Use the diagonal diamond fold technique to create a professional cone shape.
- Layer different types of paper to add texture, volume, and a high-end aesthetic.
- Secure the wrap at the “neck” of the bouquet with tape before adding decorative ribbon.
- Protect the paper from moisture by using a small plastic barrier for the stem ends if needed.
- Balance the amount of paper used so it enhances rather than hides the floral arrangement.
Frequently Asked Questions
What is the best paper for wrapping flowers?
Kraft paper is a favorite for its rustic look and durability, while Korean-style plastic film is excellent because it is waterproof and holds its shape. You can also use heavy-weight tissue paper, but it tends to wilt if it gets even slightly damp from the stems.
How do I keep the flowers fresh while they are wrapped?
The best method is to create a “water bootie” by wrapping the stem ends in a wet paper towel and covering that with a small plastic bag or cling wrap. This keeps the moisture contained and away from your decorative paper while providing the flowers with a temporary water source.
Can I wrap a bouquet without using tape?
Yes, you can use a sturdy rubber band or just the ribbon itself if you have a second pair of hands to help hold the paper in place. However, using a small piece of clear tape makes the process much easier for beginners and ensures the folds stay crisp while you tie the bow.
How large should the paper squares be?
A standard size is usually 20×20 inches for a medium bouquet, but you should adjust based on the scale of your flowers. A good rule of thumb is that the diagonal length of the paper should be roughly 1.5 times the total height of the bouquet.
Our Top Recommended Finds
- Waterproof Floral Wrapping Paper: This prevents the edges from getting soggy and maintains a crisp look even in humid environments.
- Double-Sided Satin Ribbon: A high-quality ribbon provides a luxurious weight and shine that makes the entire gift feel more expensive.
- Stem Stripper Tool: This helps you quickly remove thorns and leaves without damaging the delicate outer skin of the flower stalks.
Elevate Your Floral Presentation Today
Now that you have mastered the basics of the professional bouquet wrap, you can experiment with different colors and textures.
Try mixing matte papers with metallic ribbons or using newspaper for a vintage, eco-friendly aesthetic.
The more you practice these folds, the more natural the process will become, allowing you to focus on the creative side of floral design.
Pick up a fresh bunch of blooms this weekend and give these techniques a try to see the difference a professional wrap makes.