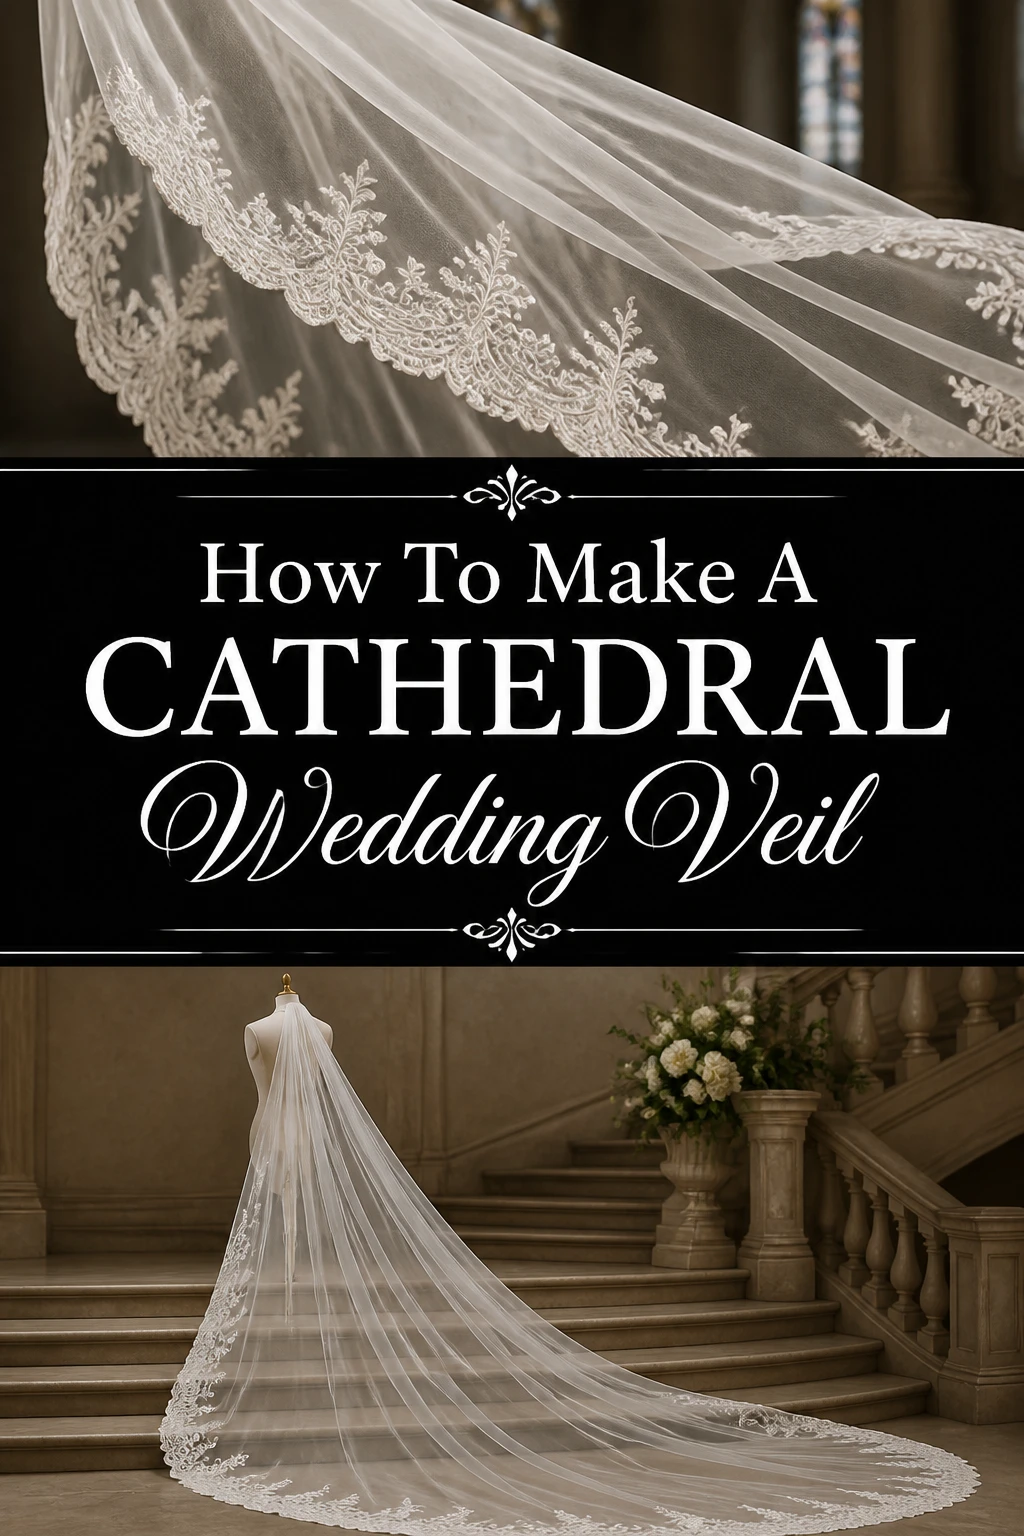
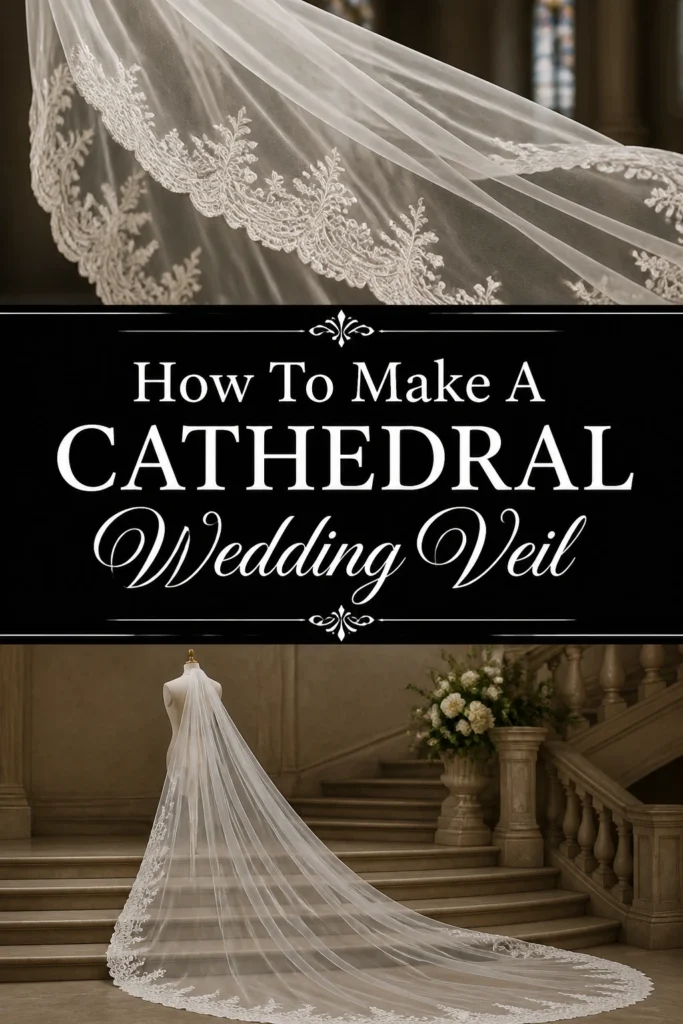
👰♀️ How To Make A Cathedral Wedding Veil

Wedding Planning
No fluff, no drama. Just easy weekly advice, planning shortcuts, and gentle reminders to help you actually enjoy your engagement.
Creating your own wedding veil is a truly special endeavor. It adds an incredibly personal touch to your big day. I remember the joy of making my sister’s veil, seeing her light up when she tried it on.
This guide will walk you through each step. You’ll gain the confidence to craft a beautiful, custom cathedral-length veil.
Quick Overview
Crafting a cathedral wedding veil allows for personalization and a unique bridal accessory. You will learn to measure, cut, gather, and secure your veil with professional results. This project culminates in a stunning piece ready for your wedding day.
- Time needed: 6-10 hours (spread over a few days for breaks)
- Difficulty: Intermediate
- What you’ll need: Bridal tulle, bridal comb, thread, sewing machine (optional), measuring tape, sharp fabric scissors, pins
Step-by-Step Instructions
Step 1: Gather Your Materials and Prepare Your Workspace
Before beginning, ensure you have all necessary items. A well-prepared space makes the process much smoother. This initial setup prevents interruptions and ensures accuracy.
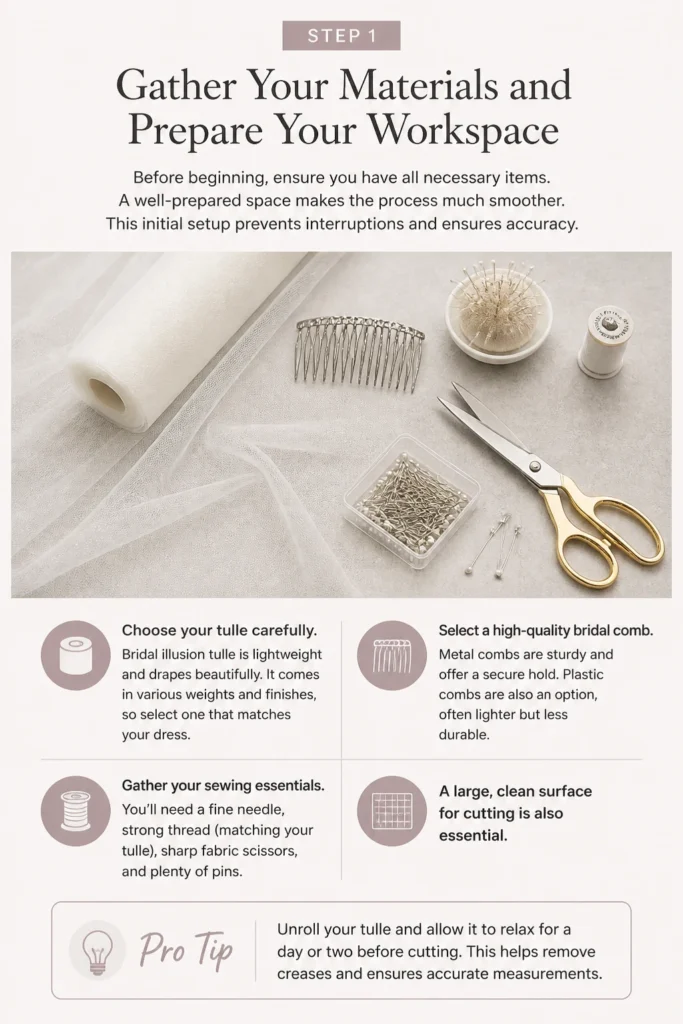
Choose your tulle carefully. Bridal illusion tulle is lightweight and drapes beautifully. It comes in various weights and finishes, so select one that matches your dress.
Select a high-quality bridal comb. Metal combs are sturdy and offer a secure hold. Plastic combs are also an option, often lighter but less durable.
Gather your sewing essentials. You’ll need a fine needle, strong thread (matching your tulle), sharp fabric scissors, and plenty of pins. A large, clean surface for cutting is also essential.
Pro Tip: Unroll your tulle and allow it to relax for a day or two before cutting. This helps remove creases and ensures a smoother, more accurate cut. You can gently steam it if needed, but test a small scrap first.
Step 2: Measure and Cut Your Tulle
Accurate measurements are crucial for a perfect veil length. Cathedral veils are typically very long, often extending beyond the train of the wedding gown.
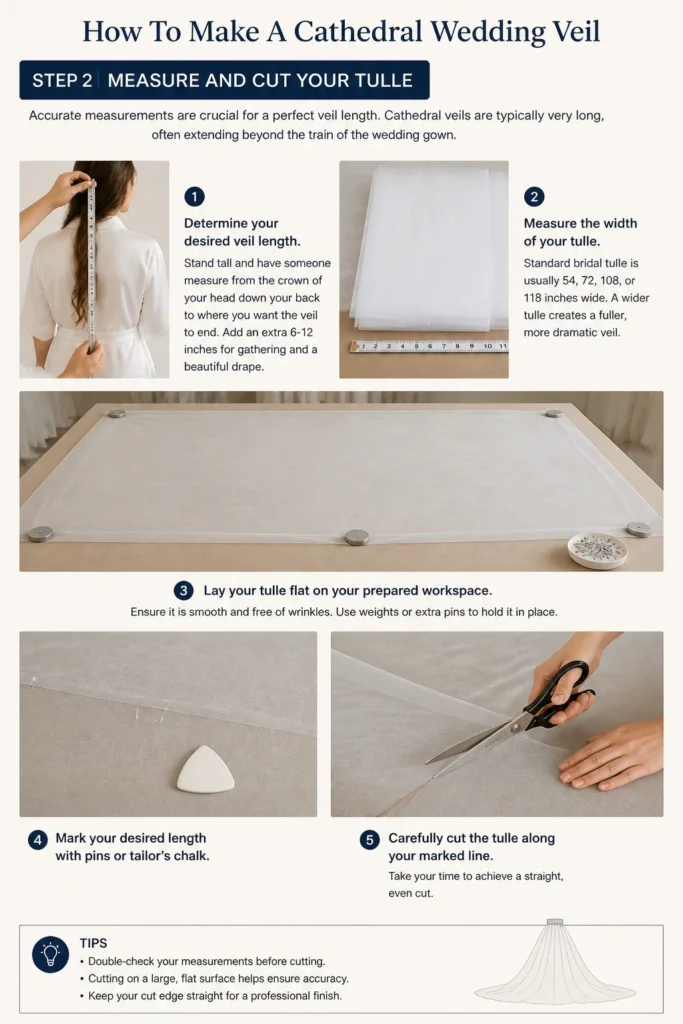
Determine your desired veil length. Stand tall and have someone measure from the crown of your head down your back to where you want the veil to end. Add an extra 6-12 inches for gathering and a beautiful drape.
Measure the width of your tulle. Standard bridal tulle is usually 54, 72, 108, or 118 inches wide. A wider tulle creates a fuller, more dramatic veil.
Lay your tulle flat on your prepared workspace. Ensure it is smooth and free of wrinkles. Use weights or extra pins to hold it in place.
Mark your desired length with pins or tailor’s chalk. Carefully cut the tulle along your marked line. Take your time to achieve a straight, even edge.
Step 3: Shape the Veil
Most cathedral veils have a rounded bottom edge for an elegant finish. This shaping prevents harsh corners and enhances the drape.
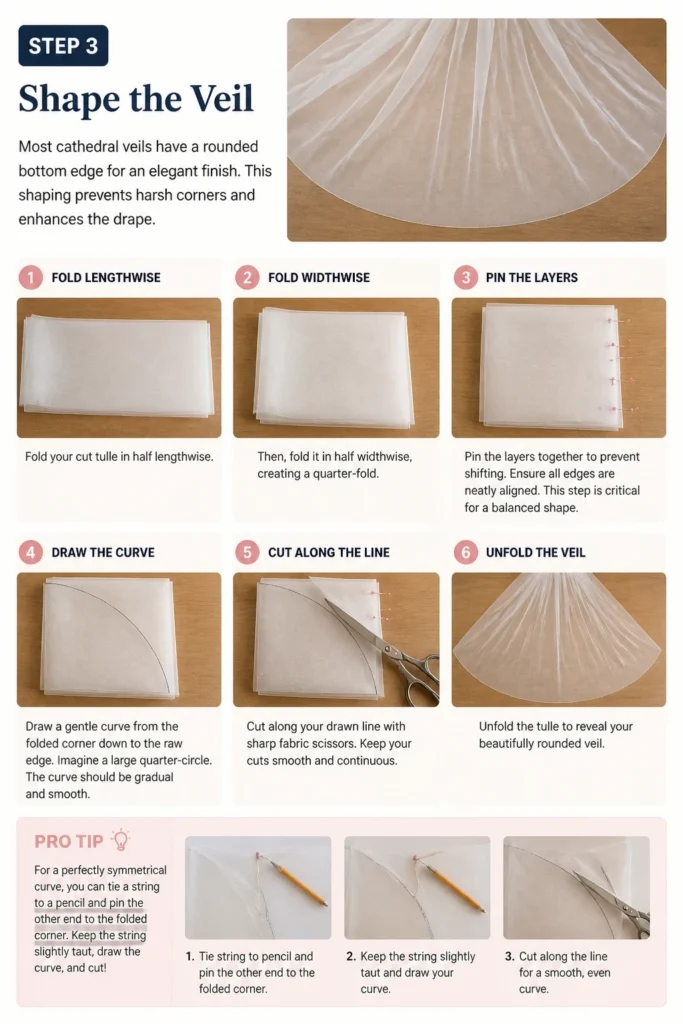
Fold your cut tulle in half lengthwise. Then, fold it in half widthwise, creating a quarter-fold. This makes it easier to cut a symmetrical curve.
Pin the layers together to prevent shifting. Ensure all edges are neatly aligned. This step is critical for a balanced shape.
Draw a gentle curve from the folded corner down to the raw edge. Imagine a large quarter-circle. The curve should be gradual and smooth.
Cut along your drawn line with sharp fabric scissors. Keep your cuts smooth and continuous. Unfold the tulle to reveal your beautifully rounded veil.
Pro Tip: For a perfectly symmetrical curve, you can tie a string to a pencil and pin the other end of the string to the folded corner. Use the string as a compass to draw your curve.
Step 4: Prepare the Comb
The bridal comb provides the structure and attachment point for your veil. Preparing it correctly ensures a secure and comfortable fit.
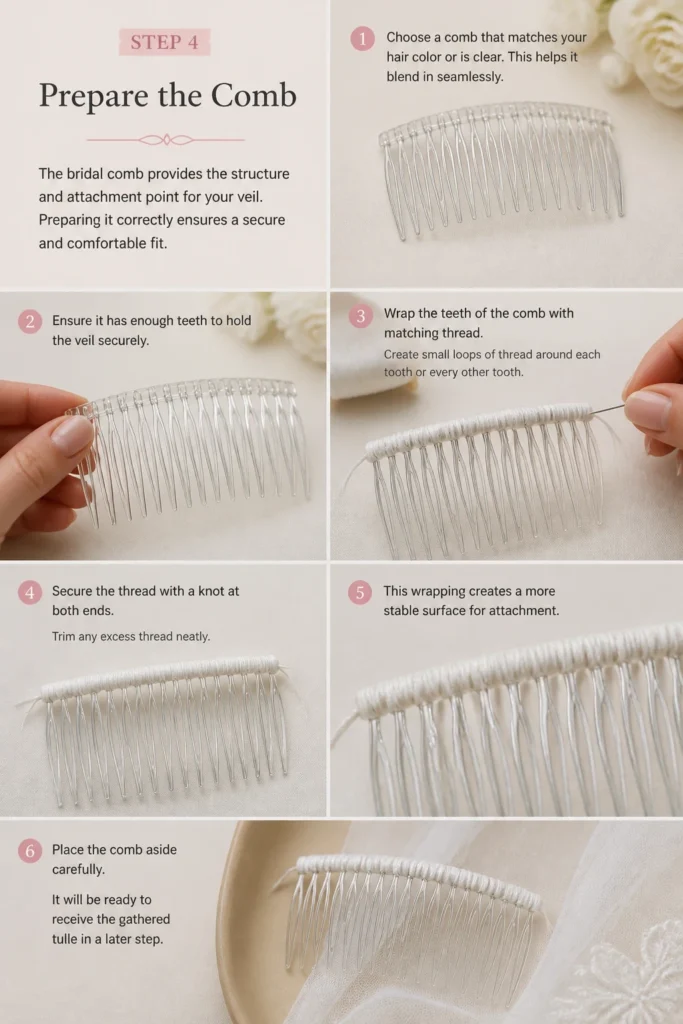
Choose a comb that matches your hair color or is clear. This helps it blend in seamlessly. Ensure it has enough teeth to hold the veil securely.
Wrap the teeth of the comb with matching thread. Create small loops of thread around each tooth or every other tooth. This provides a base for sewing the tulle.
Secure the thread with a knot at both ends. Trim any excess thread neatly. This wrapping creates a more stable surface for attachment.
Place the comb aside carefully. It will be ready to receive the gathered tulle in a later step.
Step 5: Gather the Veil Edge
Gathering creates the volume and drape at the top of the veil where it attaches to the comb. This technique makes the veil flow beautifully.
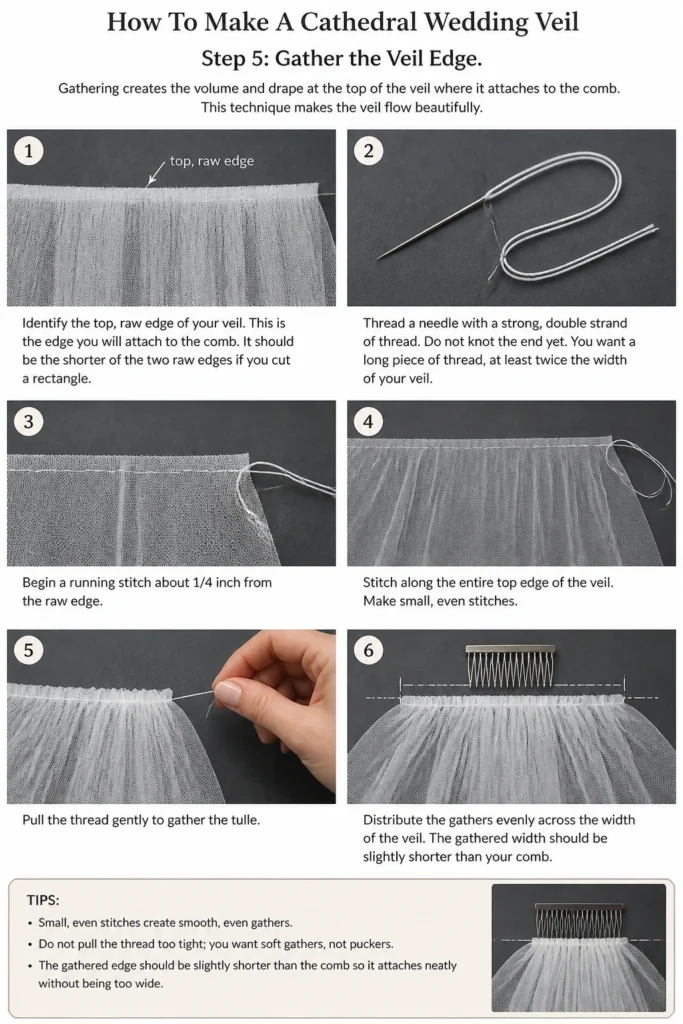
Identify the top, raw edge of your veil. This is the edge you will attach to the comb. It should be the shorter of the two raw edges if you cut a rectangle.
Thread a needle with a strong, double strand of thread. Do not knot the end yet. You want a long piece of thread, at least twice the width of your veil.
Begin a running stitch about 1/4 inch from the raw edge. Stitch along the entire top edge of the veil. Make small, even stitches.
Pull the thread gently to gather the tulle. Distribute the gathers evenly across the width of the veil. The gathered width should be slightly shorter than your comb.
Step 6: Attach Veil to Comb
Attaching the gathered tulle to the comb is a delicate step. It requires careful hand-stitching for a secure and invisible finish.
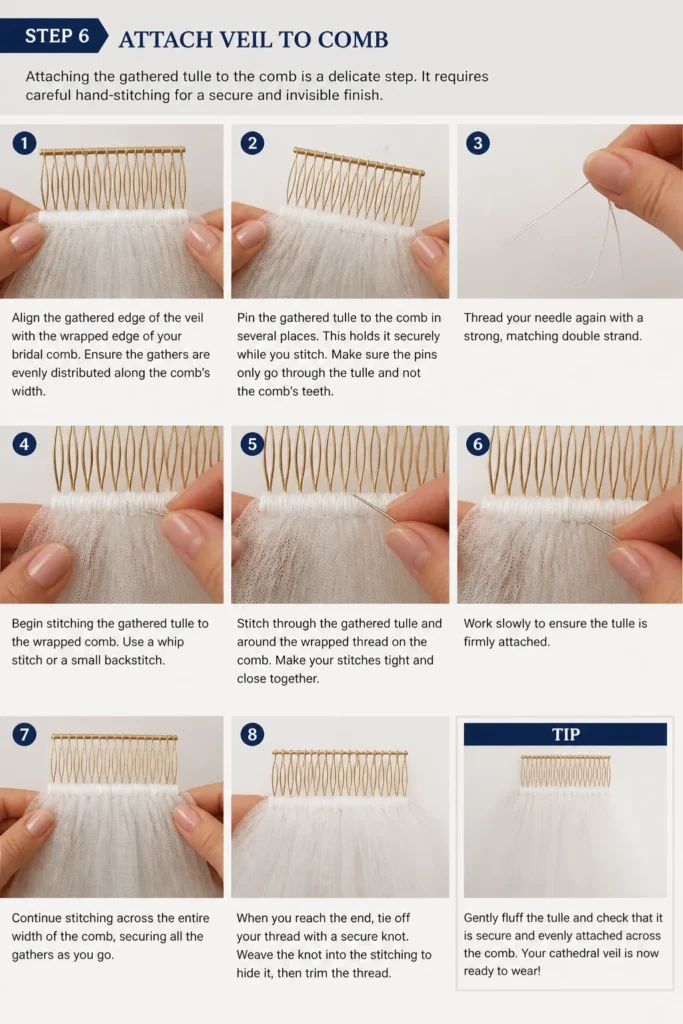
Align the gathered edge of the veil with the wrapped edge of your bridal comb. Ensure the gathers are evenly distributed along the comb’s width.
Pin the gathered tulle to the comb in several places. This holds it securely while you stitch. Make sure the pins only go through the tulle and not the comb’s teeth.
Thread your needle again with a strong, matching double strand. Begin stitching the gathered tulle to the wrapped comb. Use a whip stitch or a small backstitch.
Stitch through the gathered tulle and around the wrapped thread on the comb. Make your stitches tight and close together. Work slowly to ensure the tulle is firmly attached.
Continue stitching across the entire gathered edge. Go back and forth a few times for extra security. Knot your thread securely and trim any excess.
Step 7: Embellish (Optional)
Adding embellishments can personalize your veil and make it truly unique. Consider details that complement your wedding dress.
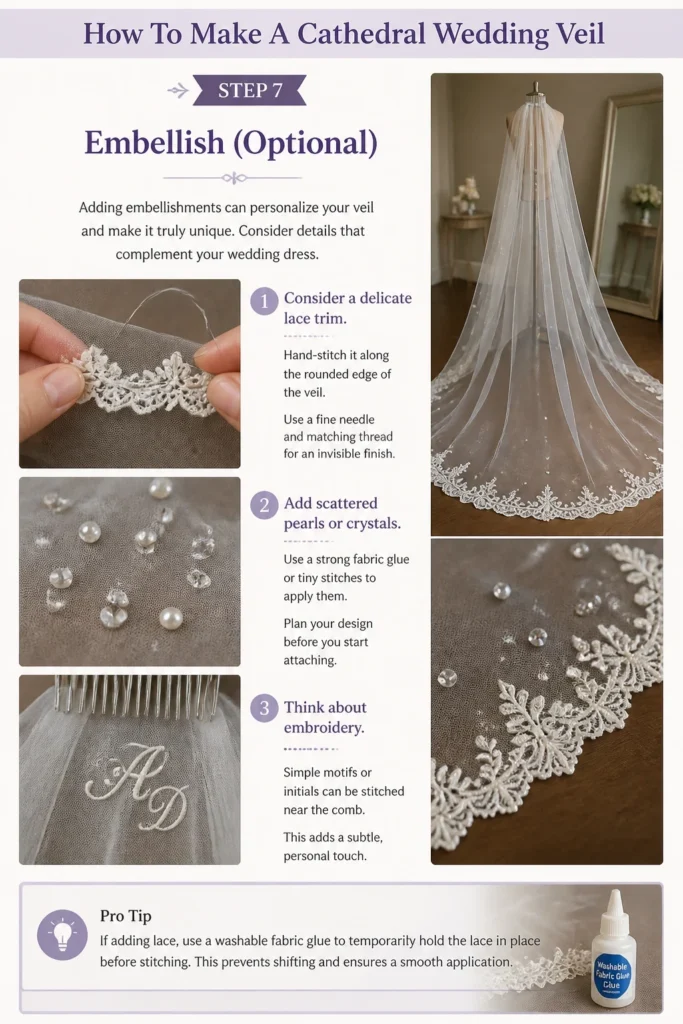
Consider a delicate lace trim. Hand-stitch it along the rounded edge of the veil. Use a fine needle and matching thread for an invisible finish.
Add scattered pearls or crystals. Use a strong fabric glue or tiny stitches to apply them. Plan your design before you start attaching.
Think about embroidery. Simple motifs or initials can be stitched near the comb. This adds a subtle, personal touch.
Pro Tip: If adding lace, use a washable fabric glue to temporarily hold the lace in place before stitching. This prevents shifting and ensures a smooth application.
Step 8: Final Touches and Pressing
The final steps ensure your veil is perfectly presented and ready for wear. A little attention to detail here makes a big difference.
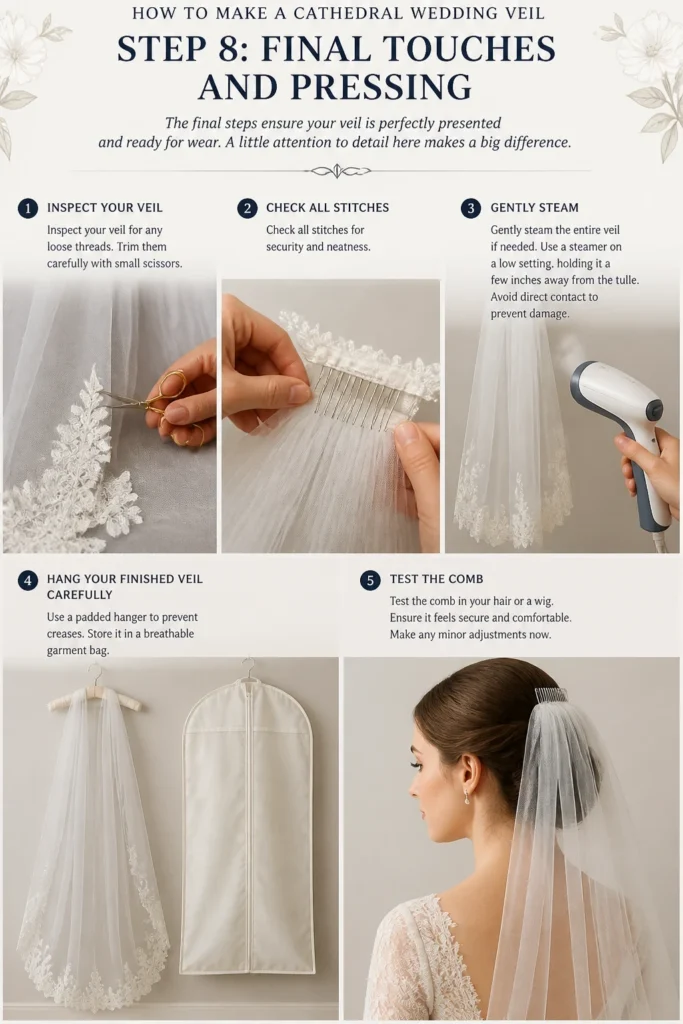
Inspect your veil for any loose threads. Trim them carefully with small scissors. Check all stitches for security and neatness.
Gently steam the entire veil if needed. Use a steamer on a low setting, holding it a few inches away from the tulle. Avoid direct contact to prevent damage.
Hang your finished veil carefully. Use a padded hanger to prevent creases. Store it in a breathable garment bag.
Test the comb in your hair or a wig. Ensure it feels secure and comfortable. Make any minor adjustments now.
Common Mistakes to Avoid
Incorrect Tulle Choice
Using the wrong type of tulle can significantly impact the veil’s drape and appearance. Stiff or heavy tulle may not flow elegantly, while overly soft tulle might lack structure. Always select bridal illusion tulle for its delicate yet durable qualities, and consider its weight in relation to your dress.
Uneven Gathering
Poorly distributed gathers at the comb will result in an imbalanced and unprofessional look. The veil might appear lopsided or too bulky in one area. Take your time during the gathering step, pulling the thread gently and constantly adjusting the tulle to ensure even distribution across the comb’s width.
Visible Stitching
One of the hallmarks of a professional-looking veil is invisible stitching, especially where the tulle meets the comb. Using contrasting thread or large, messy stitches will detract from the elegance. Always use a fine needle and thread that precisely matches your tulle color, taking small, neat stitches that are hidden within the gathers.
Improper Storage
After all your hard work, improper storage can lead to creases, snags, or dust accumulation. Folding the veil instead of hanging it can create permanent wrinkles that are difficult to remove. Always hang your finished veil on a padded hanger in a breathable garment bag, away from direct sunlight and humidity, until the wedding day.
Troubleshooting
Veil Droops or Feels Insecure
If your veil isn’t sitting right or feels like it might fall out, the comb might not be properly secured or the gathers are too heavy for the comb. Ensure you’ve used enough stitches to attach the veil firmly to the comb, going back and forth several times for reinforcement. You might also need a stronger comb or to add more hairpins to secure it to your hairstyle.
Edges Are Fraying
While bridal illusion tulle doesn’t typically fray, rough handling or dull scissors can cause slight damage to the cut edges. If you notice fraying, carefully trim the affected areas with extremely sharp fabric scissors. For future projects, always use dedicated fabric scissors that are kept sharp and only used for fabric.
Veil Has Stubborn Creases
Creases can occur during storage or if the tulle was tightly folded. Avoid ironing tulle directly, as it can melt. Instead, use a handheld garment steamer on a low setting, holding it several inches away from the fabric. Allow the steam to relax the fibers, then gently smooth the tulle with your hands. Hanging it in a steamy bathroom can also help.
Key Takeaways
- Accurate measuring and careful cutting are fundamental for a well-proportioned veil.
- Choosing the right bridal illusion tulle ensures beautiful drape and a professional finish.
- Evenly distributing your gathers creates a balanced and elegant volume at the comb.
- Securely attaching the gathered tulle to a wrapped bridal comb is crucial for stability.
- Hand-stitching with matching thread ensures an invisible and refined attachment.
- Optional embellishments like lace or pearls add a unique, personalized touch to your creation.
- Proper storage in a garment bag prevents creases and protects your finished veil.
Frequently Asked Questions
What is the best type of tulle for a cathedral veil?
Bridal illusion tulle is generally the best choice for cathedral veils. It’s lightweight, soft, and drapes beautifully without being too stiff or too flimsy. It comes in various weights, allowing you to choose the level of softness and transparency you prefer.
How do I store my finished veil before the wedding?
Once complete, hang your veil on a padded hanger to prevent creases. Place it inside a breathable garment bag, like one made from cotton or non-woven fabric. Store it in a cool, dry place away from direct sunlight to protect the fabric and any embellishments.
Can I wash my homemade wedding veil?
It is generally not recommended to wash a wedding veil, especially if it has delicate embellishments or lace. Spot cleaning with a very mild soap and water solution is an option for small marks. For more significant cleaning, consult a professional dry cleaner specializing in delicate bridal wear.
How long should a cathedral veil be?
A cathedral veil typically extends at least 108 inches (9 feet) from the comb, often going beyond the bride’s dress train. The exact length depends on personal preference and the length of the wedding gown’s train. Always measure from the crown of your head down to your desired endpoint.
Our Top Recommended Finds
- Soft Bridal Illusion Tulle: Essential for a graceful drape, choose a weight that complements your dress and desired fullness.
- Metal Bridal Comb with Teeth: Provides a sturdy and secure foundation, ensuring your veil stays perfectly in place.
- Sharp Fabric Scissors: Crucial for clean, precise cuts that prevent fraying and ensure professional-looking edges.
Your Masterpiece Awaits
Crafting your own cathedral wedding veil is a rewarding journey, culminating in a beautiful, deeply personal accessory. Imagine the feeling of walking down the aisle, adorned with something made with your own hands and heart. This isn’t just a veil; it’s a testament to your dedication and love.
Now is the perfect time to begin. Gather your materials, clear your space, and embark on this creative adventure. Your unique veil will be a cherished part of your wedding day story, and a beautiful heirloom for years to come.
Wedding Planning
No fluff, no drama. Just easy weekly advice, planning shortcuts, and gentle reminders to help you actually enjoy your engagement.