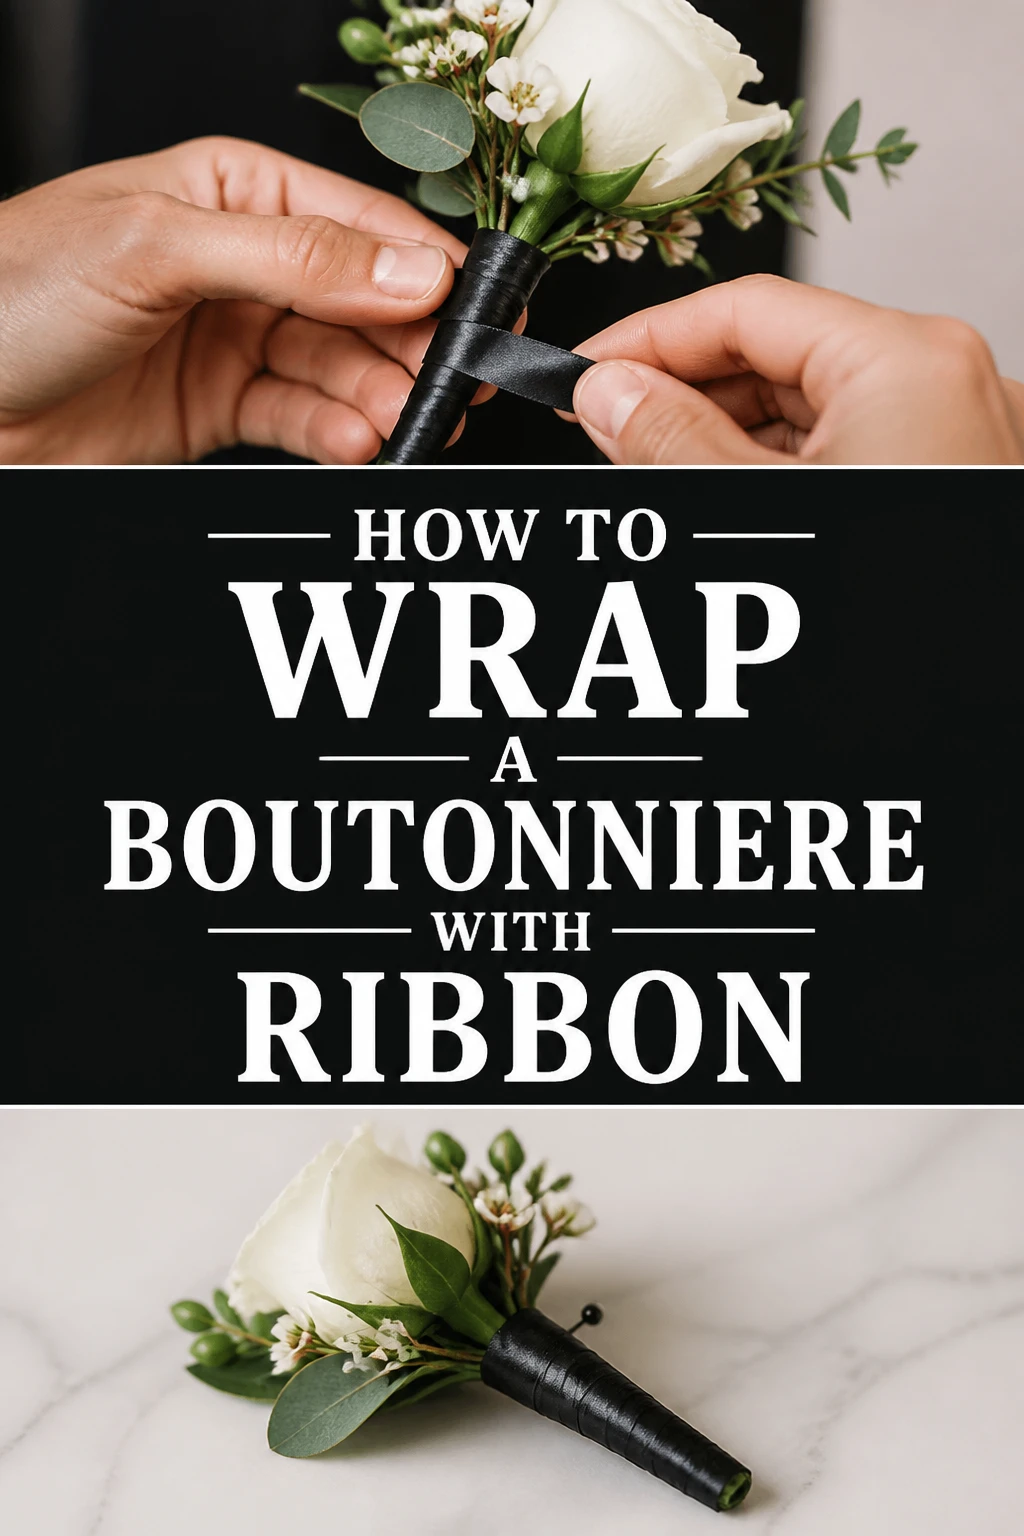
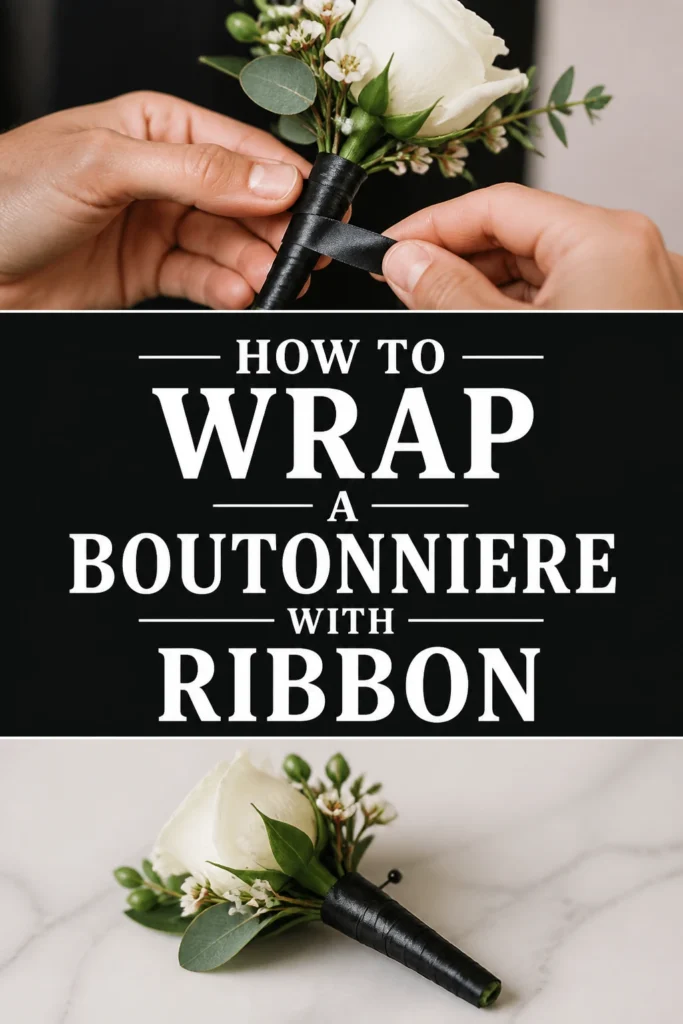
🎀 How To Wrap A Boutonniere With Ribbon

Wedding Planning
No fluff, no drama. Just easy weekly advice, planning shortcuts, and gentle reminders to help you actually enjoy your engagement.
Creating a beautiful boutonniere is an art, and the final touch of a perfectly wrapped ribbon elevates it from simple to stunning.
I remember the first time I made boutonnieres for a friend’s wedding; the ribbon wrap felt intimidating, but mastering it made all the difference in their professional appearance.
This guide shares that hands-on experience, ensuring you can achieve a polished, elegant finish every time.
Quick Overview
This guide will walk you through the process of wrapping a boutonniere stem with ribbon, transforming it into a refined accessory.
You’ll learn essential techniques for a secure, smooth, and aesthetically pleasing finish, perfect for weddings, proms, or any special occasion.
- Time needed: 10-15 minutes per boutonniere
- Difficulty: Beginner
- What you’ll need: A prepared boutonniere, floral tape, ribbon of choice, sharp scissors, floral pins (optional)
Step-by-Step Instructions
Step 1: Gather Your Materials
Lay out all your necessary tools and supplies on a clean, flat surface.
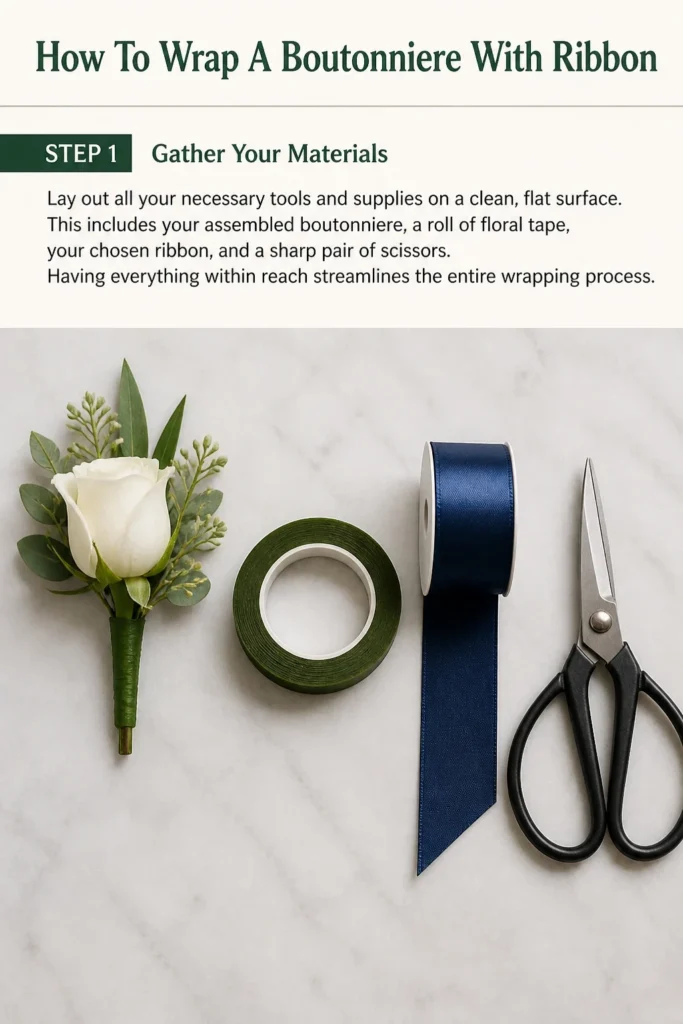
This includes your assembled boutonniere, a roll of floral tape, your chosen ribbon, and a sharp pair of scissors.
Having everything within reach streamlines the entire wrapping process.
Step 2: Prepare the Boutonniere STEM
First, trim the boutonniere stem to your desired length, typically around 2.5 to 3 inches (6-7.5 cm).
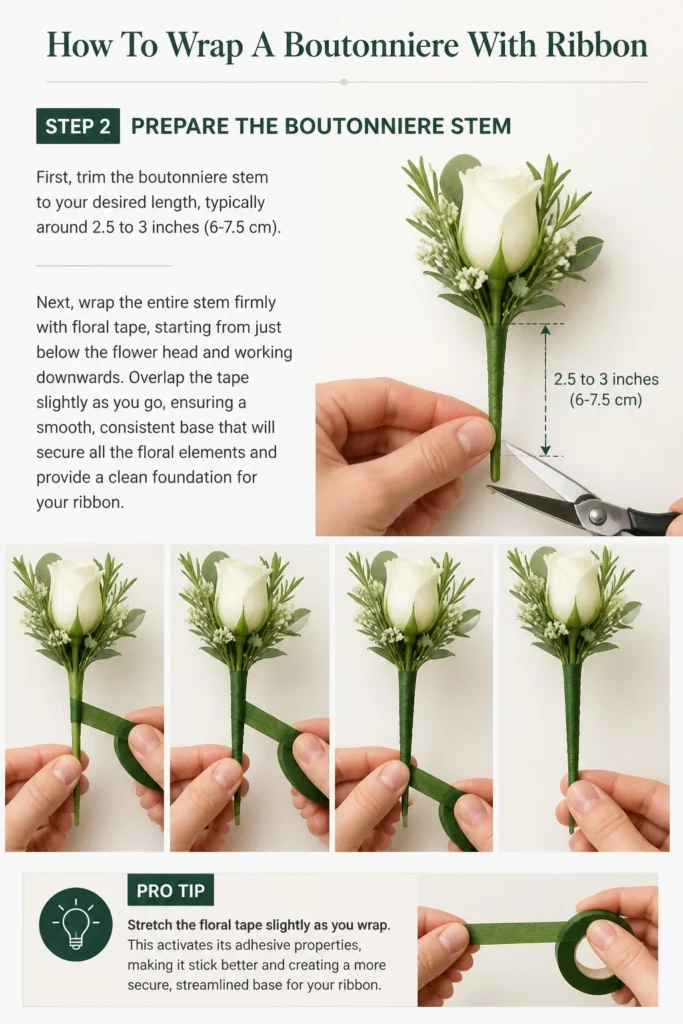
Next, wrap the entire stem firmly with floral tape, starting from just below the flower head and working downwards.
Overlap the tape slightly as you go, ensuring a smooth, consistent base that will secure all the floral elements and provide a clean foundation for your ribbon.
Pro Tip: Stretch the floral tape slightly as you wrap. This activates its adhesive properties, making it stick better and creating a more secure, streamlined base for your ribbon.
Step 3: Measure and Cut Your Ribbon
Unroll a length of your chosen ribbon. The exact length will depend on the thickness of your stem and the desired wrap style.
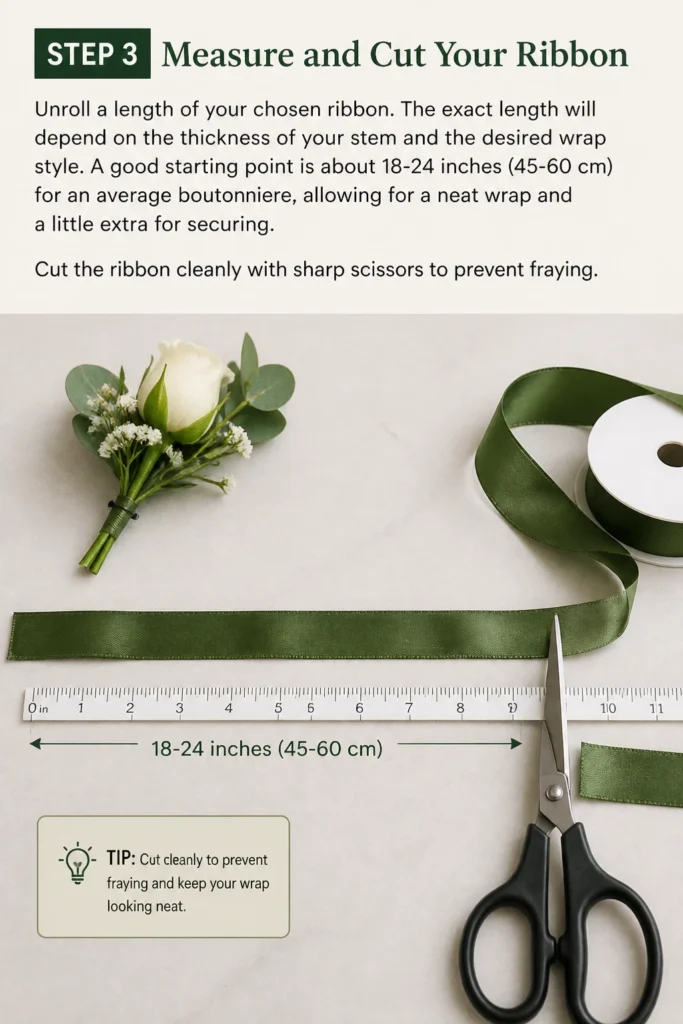
A good starting point is about 18-24 inches (45-60 cm) for an average boutonniere, allowing for a neat wrap and a little extra for securing.
Cut the ribbon cleanly with sharp scissors to prevent fraying.
Step 4: Anchor the Ribbon
Position one end of your ribbon at the top of the boutonniere stem, just below the flower head where your floral tape begins.
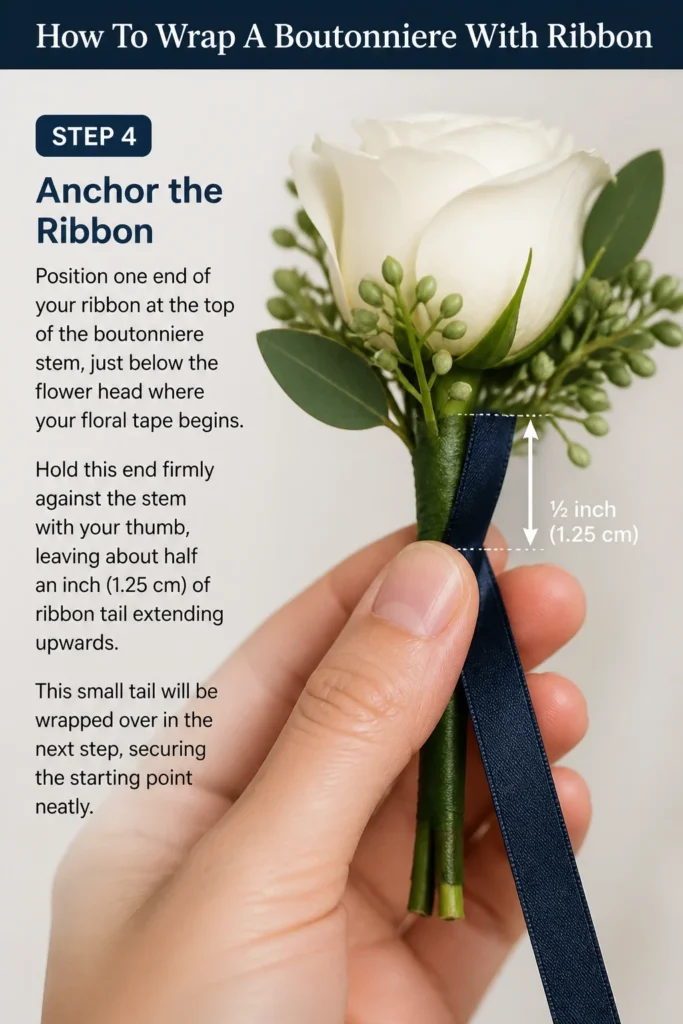
Hold this end firmly against the stem with your thumb, leaving about half an inch (1.25 cm) of ribbon tail extending upwards.
This small tail will be wrapped over in the next step, securing the starting point neatly.
Step 5: Wrap the STEM
With the ribbon anchored, begin to wrap the longer section of ribbon around the stem.
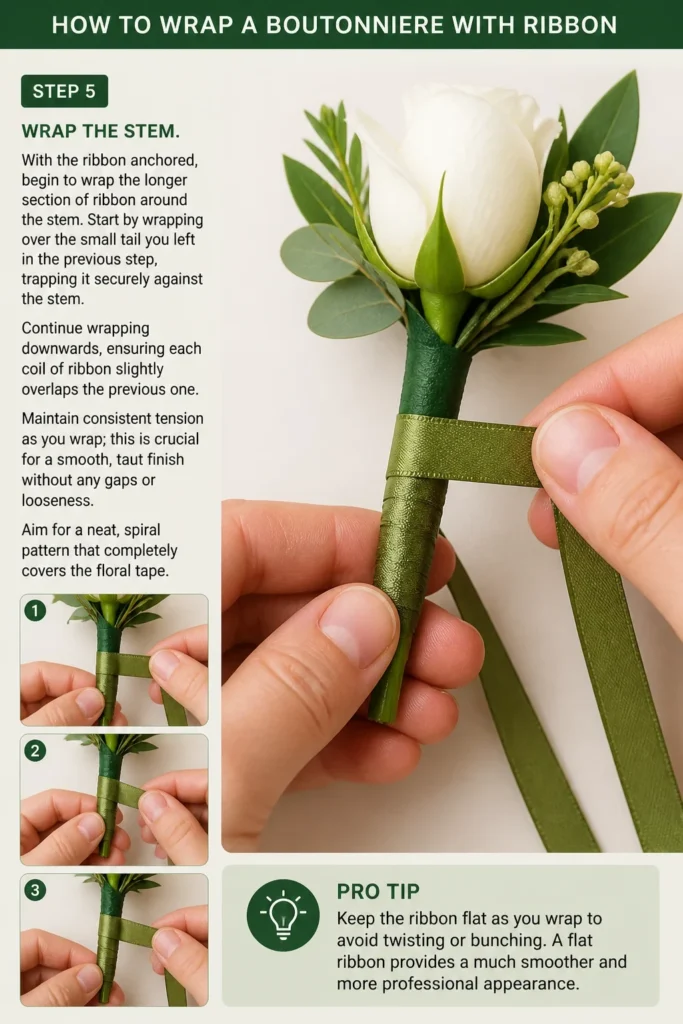
Start by wrapping over the small tail you left in the previous step, trapping it securely against the stem.
Continue wrapping downwards, ensuring each coil of ribbon slightly overlaps the previous one.
Maintain consistent tension as you wrap; this is crucial for a smooth, taut finish without any gaps or looseness.
Aim for a neat, spiral pattern that completely covers the floral tape.
Pro Tip: Keep the ribbon flat as you wrap to avoid twisting or bunching. A flat ribbon provides a much smoother and more professional appearance.
Step 6: Secure the End
Once you reach the bottom of the stem, or your desired stopping point, wrap the ribbon around the stem one last time.
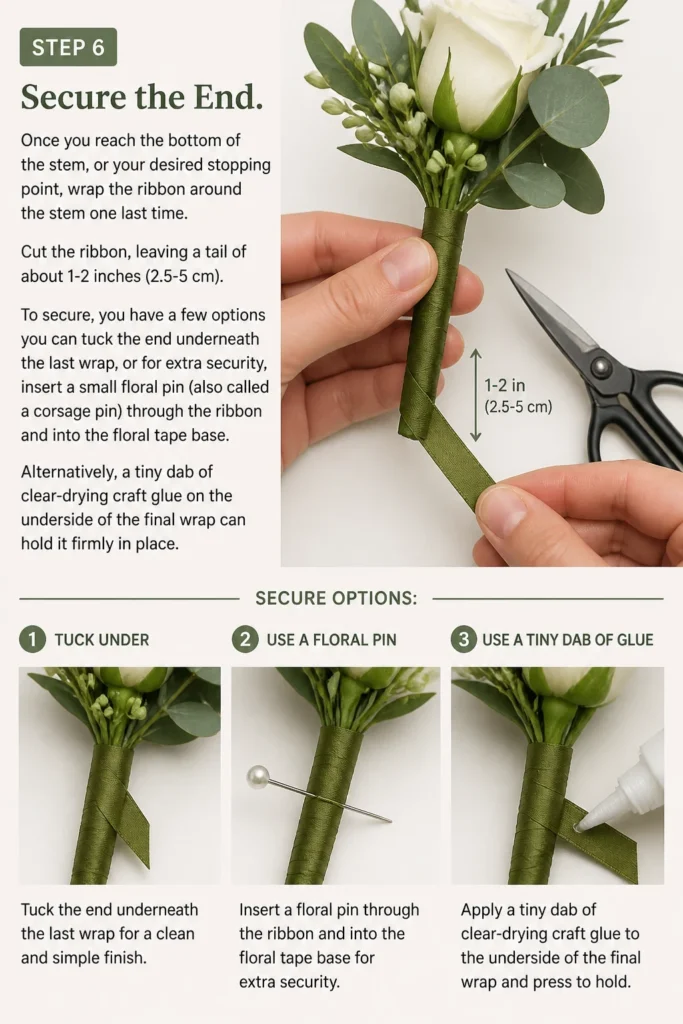
Cut the ribbon, leaving a tail of about 1-2 inches (2.5-5 cm).
To secure, you have a few options: you can tuck the end underneath the last wrap, or for extra security, insert a small floral pin (also called a corsage pin) through the ribbon and into the floral tape base.
Alternatively, a tiny dab of clear-drying craft glue on the underside of the final wrap can hold it firmly in place.
Step 7: Trim and Refine
Inspect your wrapped stem for any stray threads or uneven edges.
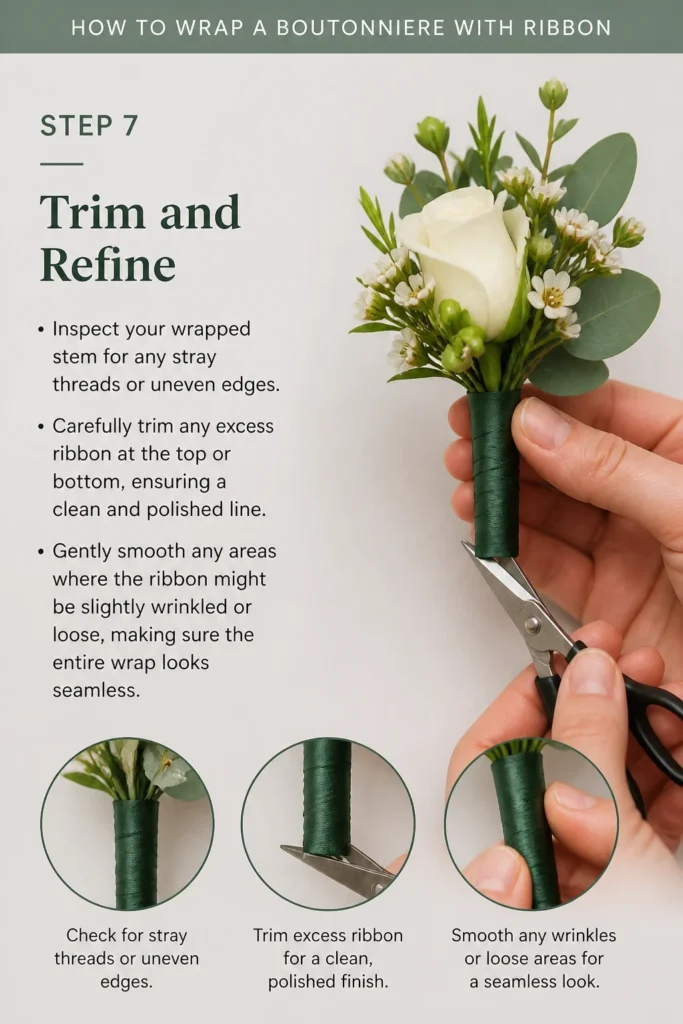
Carefully trim any excess ribbon at the top or bottom, ensuring a clean and polished line.
Gently smooth any areas where the ribbon might be slightly wrinkled or loose, making sure the entire wrap looks seamless.
Step 8: Add a Finishing Touch (Optional)
For an extra touch of elegance, you can tie a small, neat bow just below the flower head.
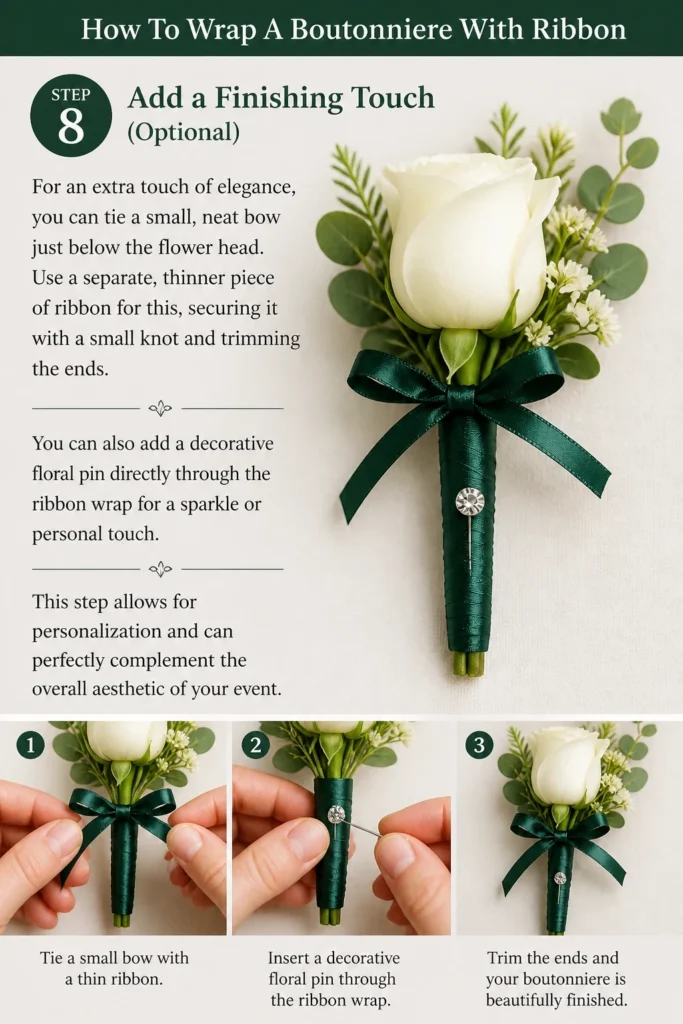
Use a separate, thinner piece of ribbon for this, securing it with a small knot and trimming the ends.
You can also add a decorative floral pin directly through the ribbon wrap for a sparkle or personal touch.
This step allows for personalization and can perfectly complement the overall aesthetic of your event.
Common Mistakes to Avoid
Uneven Tape Application
Applying floral tape unevenly can create bumps and ridges beneath your ribbon.
This results in a lumpy, unprofessional finish that detracts from the boutonniere’s elegance.
Always strive for a smooth, consistent layer of floral tape to provide the best foundation for your ribbon wrap.
Too Much or Too Little Ribbon
Using an excessive amount of ribbon leads to unnecessary waste and can make the wrapping process cumbersome.
Conversely, cutting the ribbon too short means you might not be able to complete the wrap or secure it properly, leaving gaps.
Measure carefully, perhaps adding a few extra inches to your estimate, to ensure you have just enough for a clean finish.
Loose or Gaping Wrap
A ribbon wrap that is too loose will shift, slide, or even unravel, exposing the floral tape beneath.
Gaps between the ribbon coils also create an unfinished and unprofessional appearance.
Always maintain consistent, firm tension as you wrap to ensure the ribbon lies flat and securely against the stem.
Incorrect Ribbon Material
Choosing the wrong type of ribbon can significantly impact the final look and durability.
Ribbons that are too stiff won’t conform well to the stem, while those that are too flimsy might wrinkle or fray easily.
Opt for high-quality satin, grosgrain, or silk ribbons that offer a good balance of flexibility and structure for a beautiful drape and secure wrap.
Troubleshooting
Ribbon Slips Down
If your ribbon begins to slide down the stem, it’s likely due to insufficient tension during wrapping or an insecure starting point.
To fix this, carefully unwrap the affected section and re-wrap, ensuring you maintain firm, consistent tension.
Make sure your initial anchor point at the top of the stem is very secure, perhaps with an extra loop or a tiny dab of floral adhesive under the first wrap.
Bumpy Appearance
A bumpy ribbon wrap usually indicates an uneven floral tape base or inconsistent ribbon tension.
Gently unwrap the ribbon and inspect the floral tape; smooth out any lumps or re-tape if necessary.
When re-wrapping with ribbon, focus on keeping each coil flat and maintaining even tension to eliminate any bulges.
Ribbon Fraying
Fraying ribbon, especially at the cut ends, can quickly make your boutonniere look less polished.
Always use very sharp scissors to make clean cuts; dull scissors can crush and fray the ribbon fibers.
For extra protection, you can lightly singe the very edges of synthetic ribbons with a flame (carefully!) or apply a clear fray-check liquid to the ends before wrapping.
Key Takeaways
- Preparation is paramount: A well-taped stem is the foundation for a flawless ribbon wrap.
- Consistent tension is crucial: Maintain even pressure throughout the wrapping process to prevent gaps and slippage.
- Choose the right ribbon: Select a ribbon material and width appropriate for the boutonniere’s size and desired aesthetic.
- Anchor securely: Ensure both the start and end of your ribbon are firmly attached for a durable finish.
- Refine the details: Trim excess ribbon and smooth any imperfections for a truly polished look.
- Practice makes perfect: Don’t be discouraged if your first attempt isn’t flawless; each wrap improves your technique.
Frequently Asked Questions
What type of ribbon is best for boutonnieres?
Satin, grosgrain, and silk ribbons are excellent choices due to their smooth texture, rich colors, and good draping qualities.
Opt for a ribbon width between 3/8 inch to 5/8 inch (1 cm to 1.5 cm) for most standard boutonnieres, as this size wraps neatly without being too bulky.
Can I use hot glue to secure the ribbon?
While a tiny dab of low-temp hot glue can secure the very end of the ribbon, it’s generally not recommended for the entire wrap.
Hot glue can be bulky, messy, and difficult to adjust, often leading to a less refined finish than simply tucking or pinning the ribbon securely.
How far up the stem should I wrap the ribbon?
The ribbon should typically start just below the flower head, covering all visible floral tape.
It should extend down the stem to your desired length, usually covering about 2 to 2.5 inches (5-6.5 cm) of the stem, leaving a small portion of the stem unwrapped at the very bottom for easy pinning.
How do I make a small bow for the boutonniere?
To create a small bow, take a separate, thinner piece of ribbon (around 1/4 inch or 0.6 cm wide and 8-10 inches long).
Tie a simple shoelace-style bow and then carefully position it just below the flower head, securing it to the wrapped stem with a tiny dab of craft glue or a small floral pin.
Our Top Recommended Finds
- High-Quality Double-Faced Satin Ribbon: This type of ribbon offers a luxurious sheen on both sides, ensuring your wrap looks beautiful from any angle. Its smooth texture makes it easy to work with.
- Professional Floral Tape: A good quality, stretchy floral tape that adheres well is essential for creating a stable and smooth base for your ribbon. It’s the unsung hero of a perfect wrap.
- Sharp Floral Shears or Craft Scissors: Clean cuts prevent fraying and ensure neat edges. Invest in a pair specifically for fabric or ribbon to maintain their sharpness.
Crafting Elegance, One Boutonniere At A Time
Mastering the art of ribbon wrapping transforms a simple boutonniere into a truly polished and elegant accessory.
Each step, from preparing the stem to securing the final end, contributes to a professional finish that will be admired.
Don’t hesitate to experiment with different ribbon textures and colors to match various event themes and personal styles.
Take these techniques and apply them, not just to boutonnieres, but to other floral crafts, expanding your creative horizons today.
Wedding Planning
No fluff, no drama. Just easy weekly advice, planning shortcuts, and gentle reminders to help you actually enjoy your engagement.