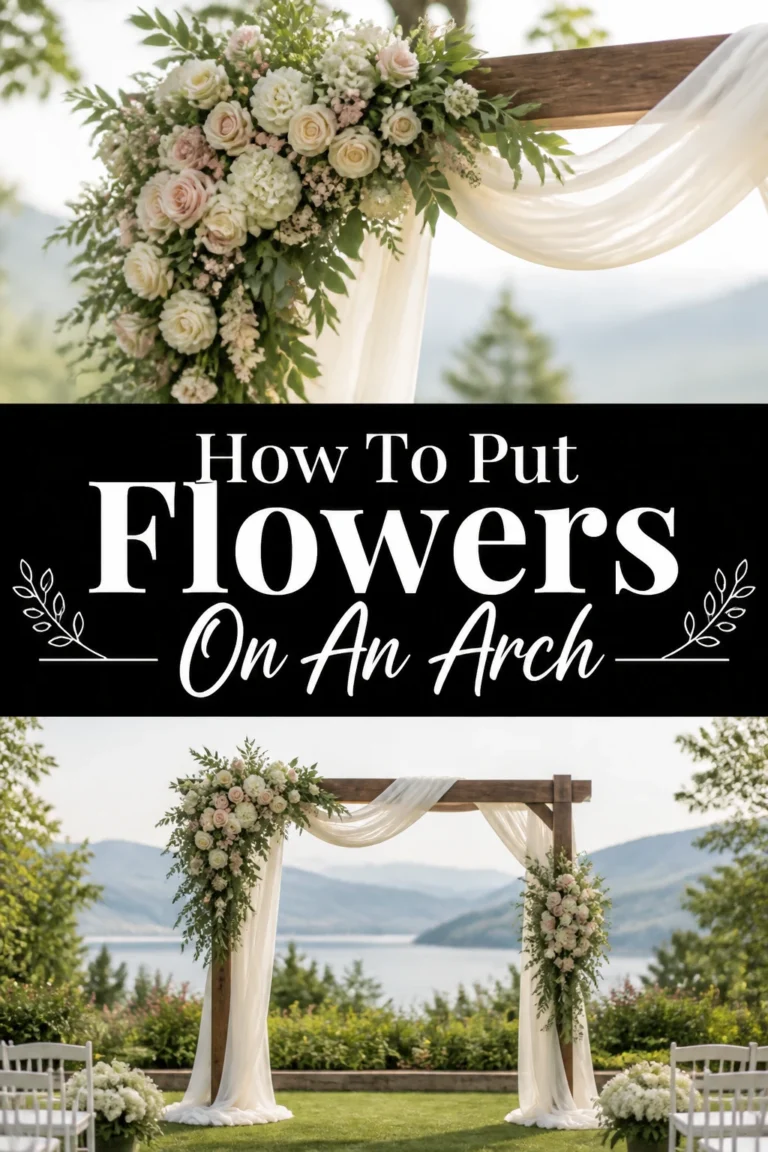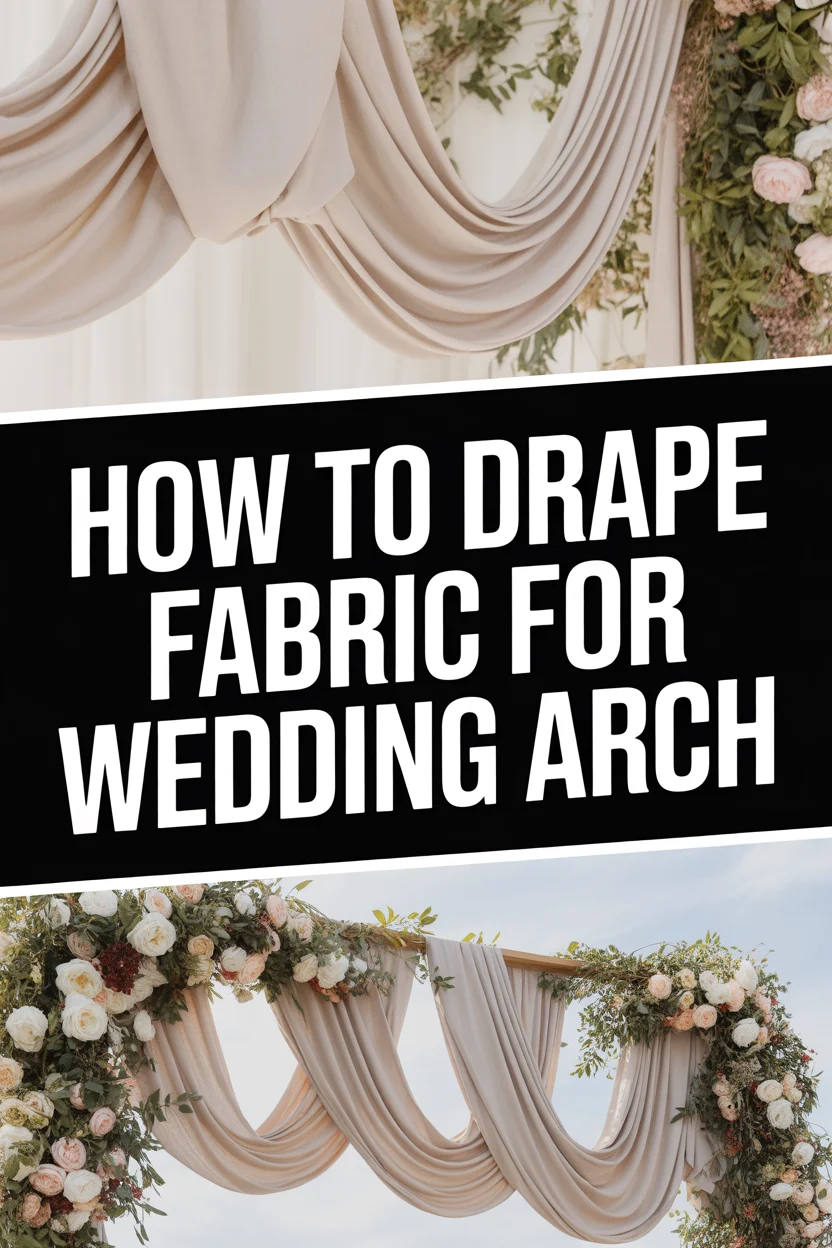
🌿 How To Drape Fabric For Wedding Arch

Wedding Planning
No fluff, no drama. Just easy weekly advice, planning shortcuts, and gentle reminders to help you actually enjoy your engagement.
Creating a breathtaking wedding arch draped with fabric adds an ethereal touch to any ceremony. It transforms a simple structure into a focal point, framing your most cherished moments.
I’ve had the joy of helping friends and family craft these beautiful backdrops for their special days, seeing firsthand the magic a well-draped arch can bring.
This guide shares practical, step-by-step advice to help you achieve that perfect, flowing look, ensuring your wedding arch is as stunning as your love story.
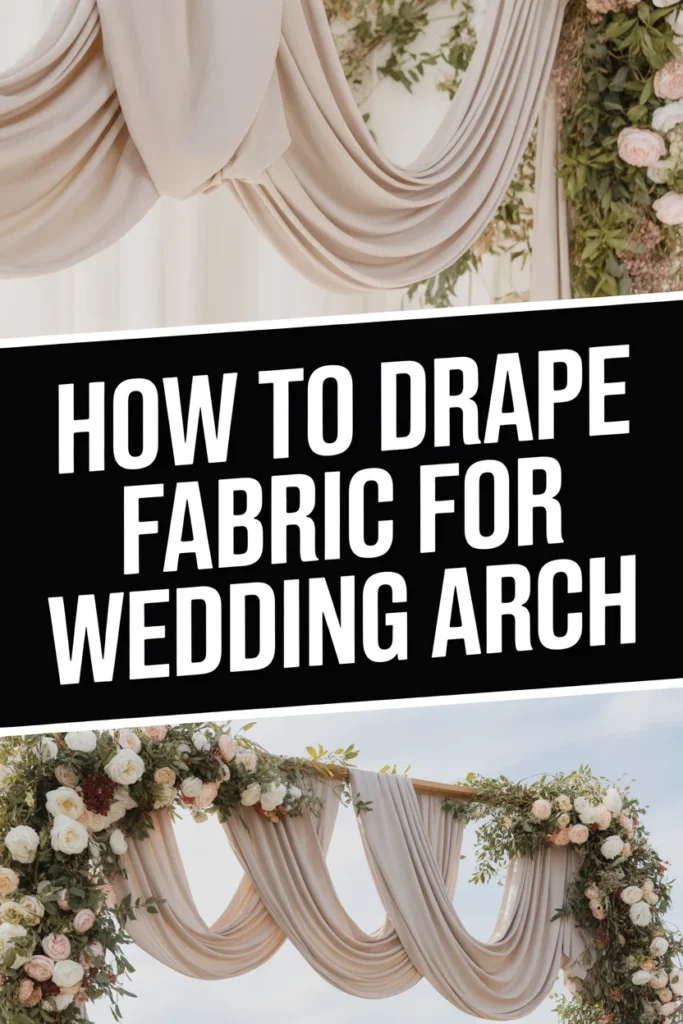
Quick Overview
You’re about to learn how to select the right fabrics, secure them properly, and create elegant drapes that will elevate your wedding ceremony. This guide covers everything from initial planning to final adjustments, ensuring a beautiful result.
- Time needed: 1-3 hours (depending on arch size and desired complexity)
- Difficulty: Beginner
- What you’ll need: Fabric, zip ties or floral wire, scissors, ladder or step stool, measuring tape, optional embellishments.
Step-by-Step Instructions
Step 1: Plan Your Vision
Envision the final look for your wedding arch. Consider the overall theme and color palette of your celebration, deciding if you prefer a rustic, elegant, bohemian, or modern aesthetic.
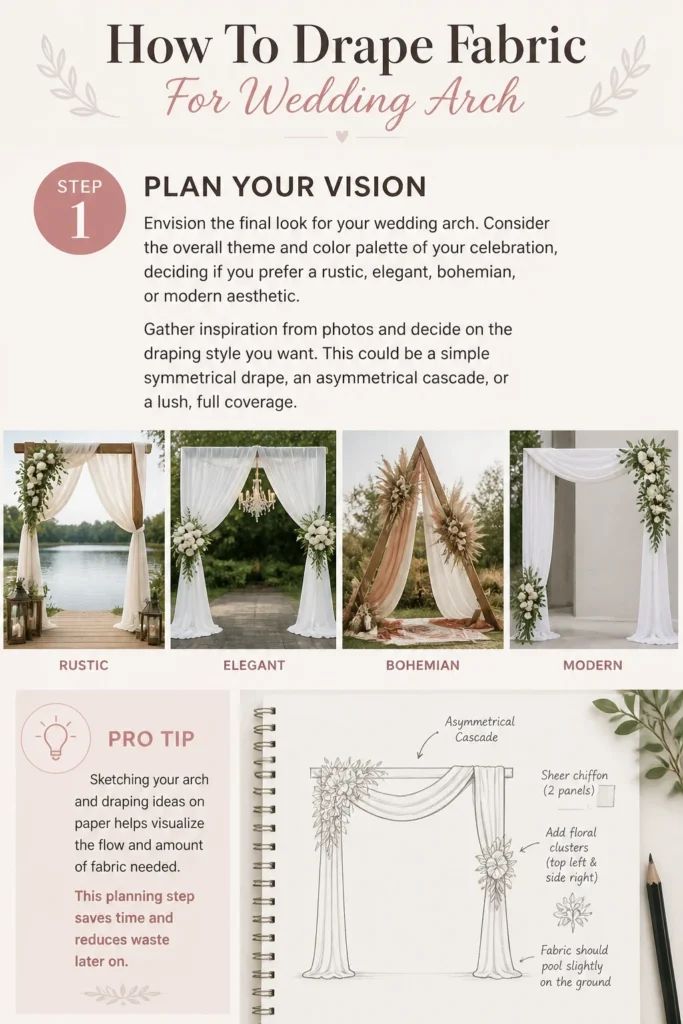
Gather inspiration from photos and decide on the draping style you want. This could be a simple symmetrical drape, an asymmetrical cascade, or a lush, full coverage.
Pro Tip: Sketching your arch and draping ideas on paper helps visualize the flow and amount of fabric needed. This planning step saves time and reduces waste later on.
Step 2: Select Your Fabric
Choose fabrics that complement your wedding style and budget. Sheer fabrics like chiffon, tulle, and organza are popular for their ethereal, flowing qualities.
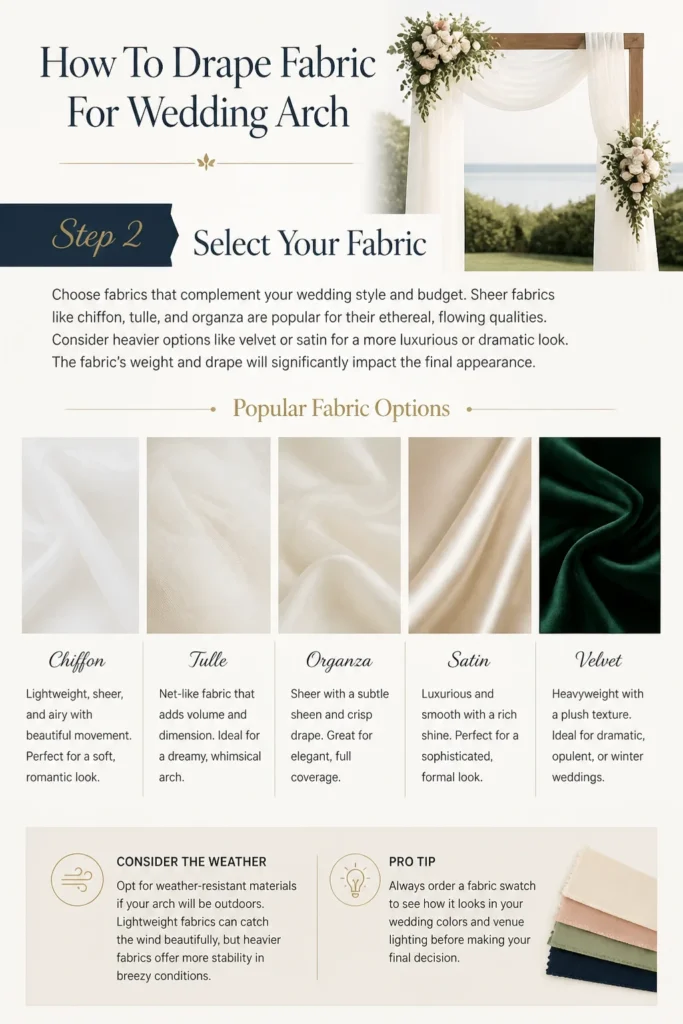
Consider heavier options like velvet or satin for a more luxurious or dramatic look. The fabric’s weight and drape will significantly impact the final appearance.
Opt for weather-resistant materials if your arch will be outdoors. Lightweight fabrics can catch the wind beautifully, but heavier fabrics offer more stability in breezy conditions.
Step 3: Measure and Purchase Fabric
Measure your wedding arch’s dimensions carefully. Account for the height, width, and any specific points where fabric will be gathered or tied.
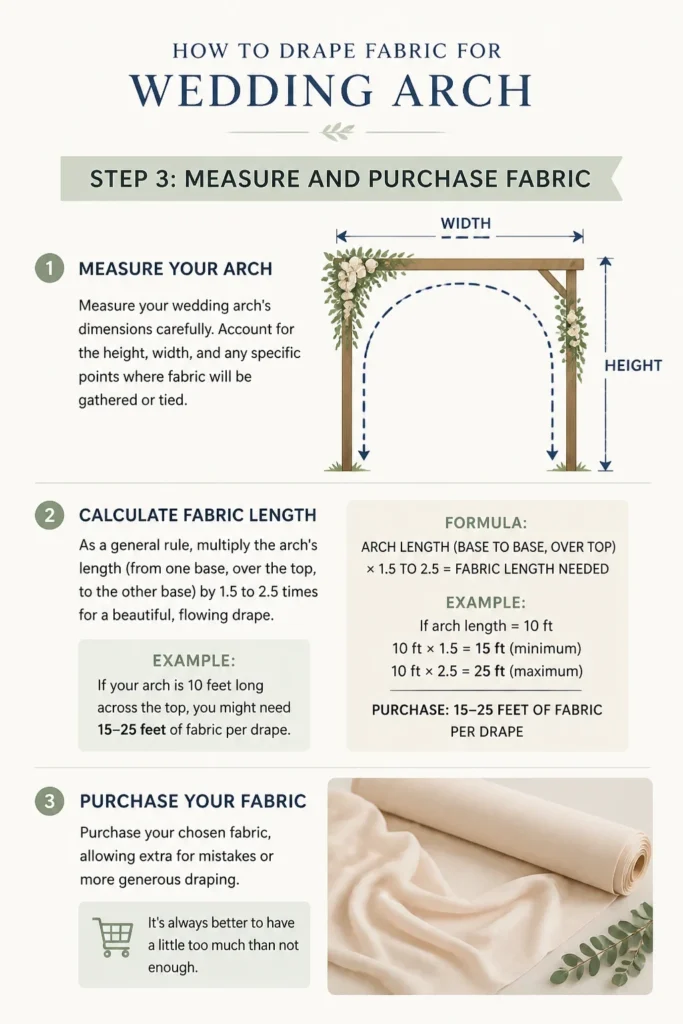
As a general rule, multiply the arch’s length (from one base, over the top, to the other base) by 1.5 to 2.5 times for a beautiful, flowing drape. For example, if your arch is 10 feet long across the top, you might need 15-25 feet of fabric per drape.
Purchase your chosen fabric, allowing extra for mistakes or more generous draping. It’s always better to have a little too much than not enough.
Step 4: Prepare Your Arch
Set up your wedding arch in its final location before you begin draping. Ensure it is stable and securely anchored, especially if it’s an outdoor wedding.
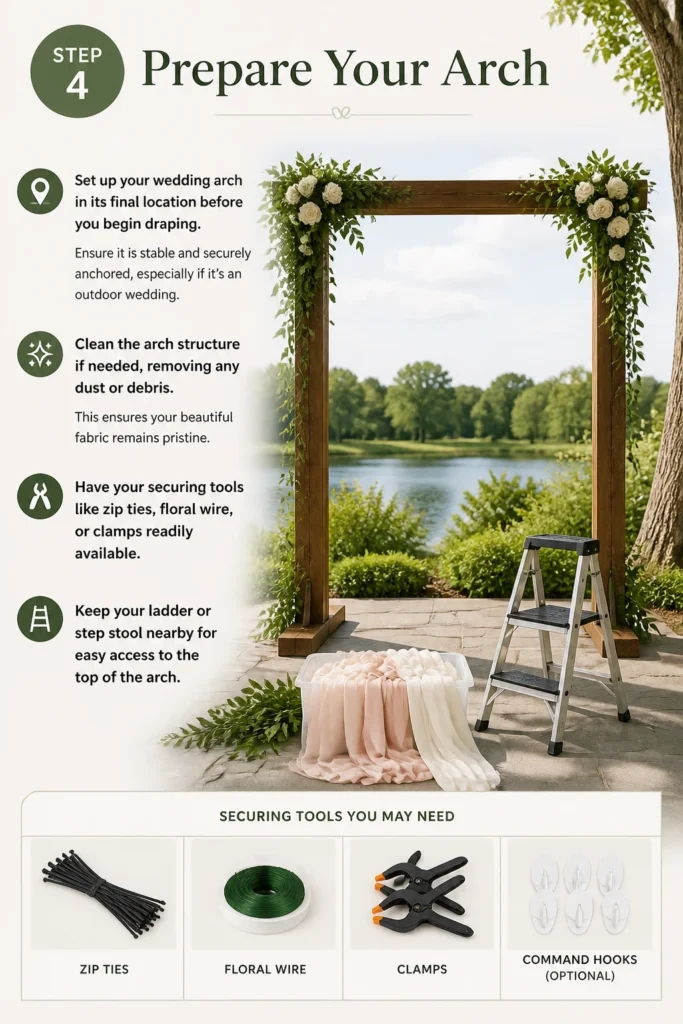
Clean the arch structure if needed, removing any dust or debris. This ensures your beautiful fabric remains pristine.
Have your securing tools like zip ties, floral wire, or clamps readily available. Keep your ladder or step stool nearby for easy access to the top of the arch.
Step 5: Establish Your Anchor Points
Determine where each piece of fabric will begin and end on the arch. These are your anchor points, typically at the top corners, mid-points, or base of the arch.
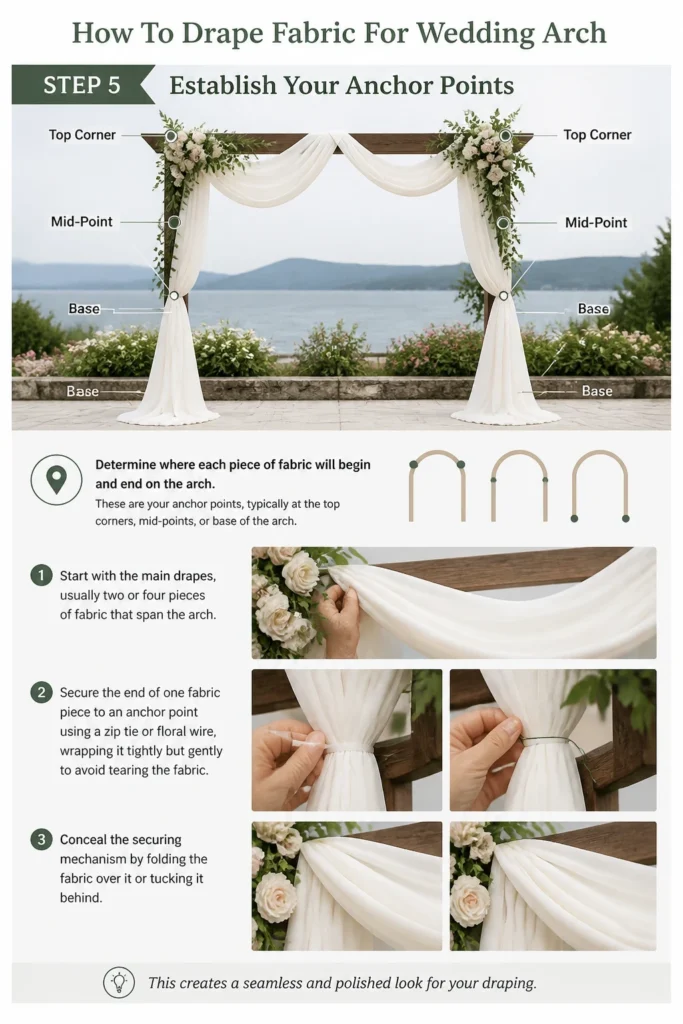
Start with the main drapes, usually two or four pieces of fabric that span the arch. Secure the end of one fabric piece to an anchor point using a zip tie or floral wire, wrapping it tightly but gently to avoid tearing the fabric.
Conceal the securing mechanism by folding the fabric over it or tucking it behind. This creates a seamless and polished look for your draping.
Step 6: Create the Initial Drapes
Drape the fabric from your first anchor point, guiding it over the top of the arch to the next desired anchor point. Allow the fabric to fall naturally, creating graceful curves.
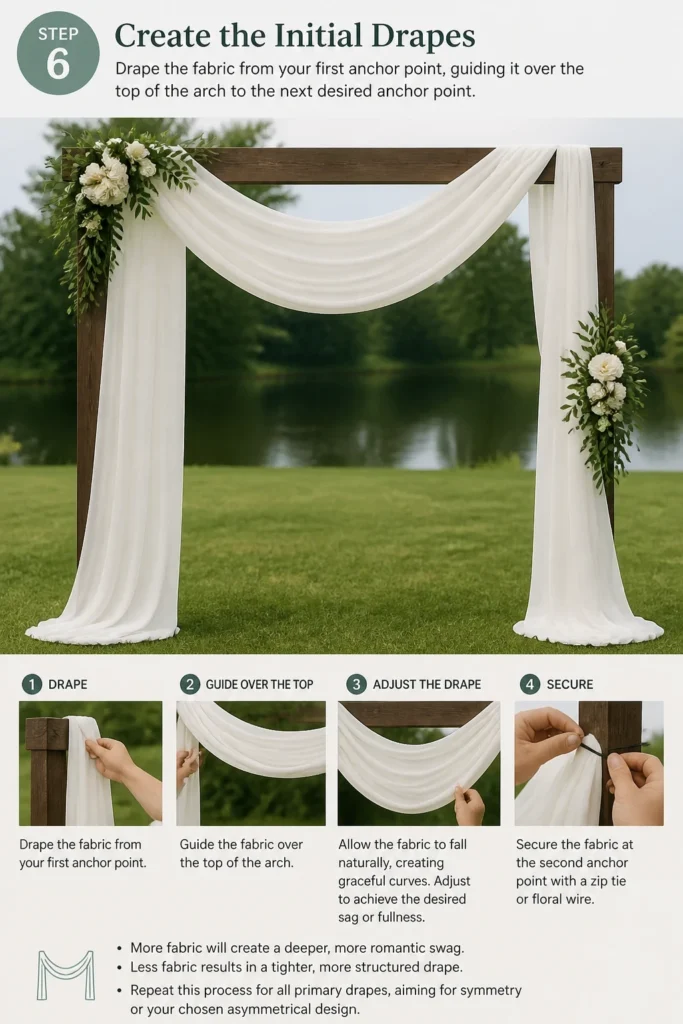
Adjust the fabric to achieve the desired sag or fullness. More fabric will create a deeper, more romantic swag, while less fabric results in a tighter, more structured drape.
Secure the fabric at the second anchor point, again using a zip tie or floral wire. Repeat this process for all primary drapes, aiming for symmetry or your chosen asymmetrical design.
Step 7: Add Layers and Texture
Introduce additional pieces of fabric to add depth and visual interest. You can layer different colors or textures, such as a sheer white chiffon over a blush pink tulle.
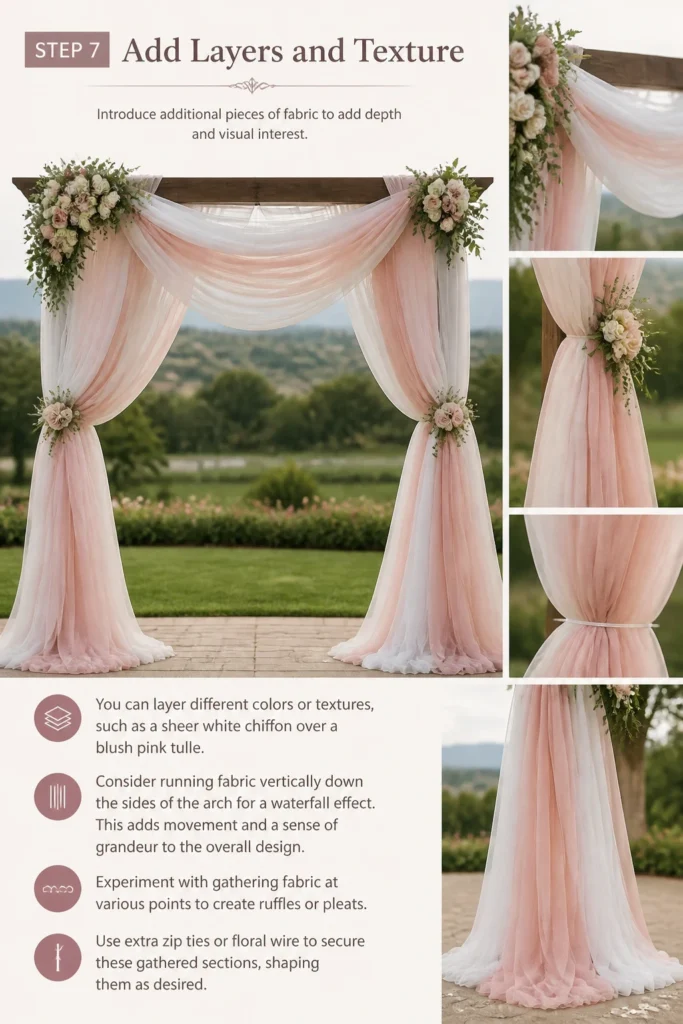
Consider running fabric vertically down the sides of the arch for a waterfall effect. This adds movement and a sense of grandeur to the overall design.
Experiment with gathering fabric at various points to create ruffles or pleats. Use extra zip ties or floral wire to secure these gathered sections, shaping them as desired.
Step 8: Incorporate Embellishments
Attach floral arrangements, greenery, or other decorative elements to your draped arch. These embellishments enhance the beauty and theme of your wedding.
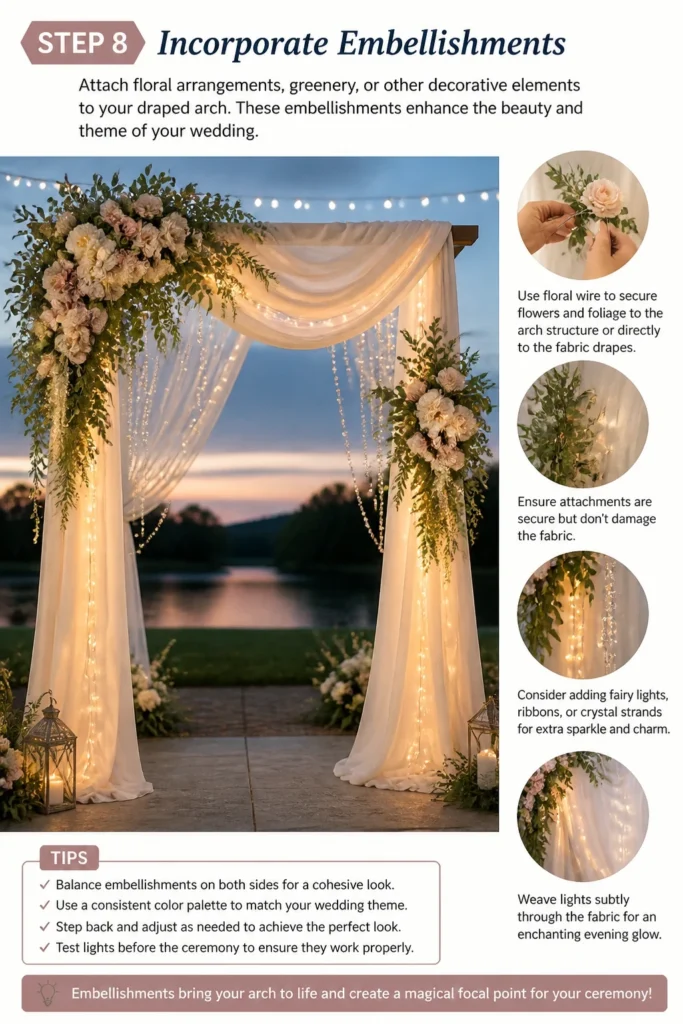
Use floral wire to secure flowers and foliage to the arch structure or directly to the fabric drapes. Ensure attachments are secure but don’t damage the fabric.
Consider adding fairy lights, ribbons, or crystal strands for extra sparkle and charm. Weave lights subtly through the fabric for an enchanting evening glow.
Step 9: Make Final Adjustments
Step back and assess your work from various angles. Look for any unevenness, awkward folds, or areas that could use more volume or less bulk.
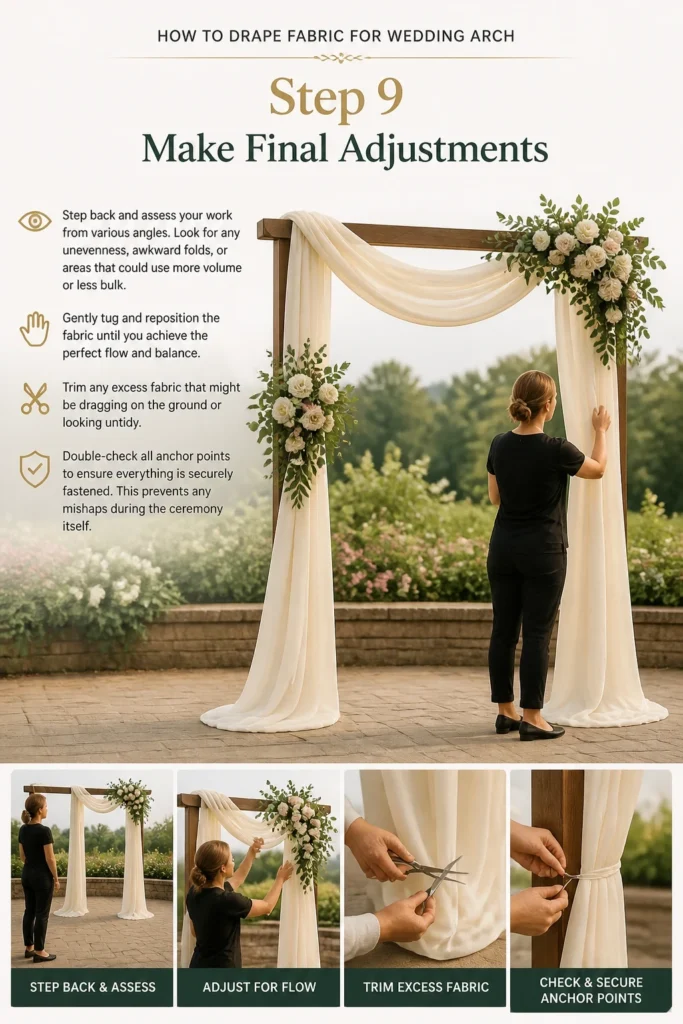
Gently tug and reposition the fabric until you achieve the perfect flow and balance. Trim any excess fabric that might be dragging on the ground or looking untidy.
Double-check all anchor points to ensure everything is securely fastened. This prevents any mishaps during the ceremony itself.
Common Mistakes to Avoid
Using Too Little Fabric
One common pitfall is underestimating the amount of fabric needed. Skimpy drapes look stretched and lack the luxurious, flowing quality that makes an arch truly stunning. Always err on the side of having more fabric than you think you’ll need to allow for generous swags and adjustments.
Insecure Attachments
Failing to properly secure the fabric is another frequent error. A slight breeze or accidental bump can cause drapes to sag or even fall completely. Use strong, reliable zip ties or floral wire, and double-check every attachment point for firmness before the event.
Ignoring the Arch Structure
Some people try to drape without considering the arch’s inherent shape and anchor points. Forcing fabric into unnatural positions can make the drapes look stiff or messy. Work with the arch’s design, using its natural curves and corners to guide your fabric placement for a more harmonious result.
Over-Accessorizing
While embellishments are lovely, too many can overwhelm the fabric and the arch itself. The beauty of draped fabric lies in its elegant simplicity and flow. Choose a few key floral arrangements or decorative elements that complement, rather than compete with, the fabric drapes.
Troubleshooting
Fabric is Slipping or Sagging
If your drapes aren’t holding their shape, the securing points might be too loose or insufficient. Try adding more zip ties or floral wire at closer intervals, especially at points where the fabric changes direction or bears significant weight. Ensure the ties are pulled taut.
Drapes Look Messy or Uneven
This often happens when fabric isn’t evenly distributed. Untie the problematic section and redistribute the fabric more smoothly, ensuring an even amount of material is gathered at each anchor point. Step back frequently to assess symmetry from a distance.
Achieving Symmetry is Difficult
Symmetry can be tricky, especially for beginners. Use a measuring tape to ensure equal lengths of fabric are draped on either side of the arch’s center. You can also mark anchor points on the arch itself with a piece of chalk or painter’s tape to guide your placement.
Key Takeaways
- Plan your vision: Decide on your desired style and sketch it out before buying fabric.
- Choose appropriate fabric: Select materials like chiffon or tulle for flowing drapes, considering weather conditions.
- Measure generously: Always buy more fabric than you calculate to ensure ample draping and flexibility.
- Secure drapes firmly: Use zip ties or floral wire at anchor points to prevent slipping and maintain shape.
- Layer and embellish thoughtfully: Add layers for depth and incorporate flowers or lights to enhance the theme without overwhelming the design.
- Refine with final adjustments: Step back and make small tweaks to ensure balance, flow, and security.
Frequently Asked Questions
How much fabric do I need for a standard arch?
For a standard 7-foot tall by 5-foot wide arch, plan for at least two pieces of fabric, each 15-20 feet long. This allows for beautiful draping and enough material to create graceful swags. For a fuller look, you might need 25-30 feet per piece.
What type of fabric is best for outdoor arches?
Sheer fabrics like chiffon or organza are excellent for outdoor arches as they catch the breeze beautifully and don’t become too heavy when wet. Avoid very delicate silks that can be damaged by sun or rain. Polyester blends are often a durable and weather-resistant choice.
Can I reuse the fabric after the wedding?
Absolutely! Most wedding arch fabrics, especially good quality chiffon or tulle, can be gently washed and stored. They can be repurposed for other events, home decor, or even creative projects. Proper care ensures their longevity for future use.
How do I prevent the fabric from wrinkling?
To minimize wrinkles, transport your fabric on a hanger or rolled loosely. For stubborn creases, a fabric steamer is your best friend. Hang the fabric and gently steam it before draping, avoiding direct iron contact unless the fabric care instructions explicitly allow it.
Our Top Recommended Finds
- Sheer Chiffon Draping Fabric: Lightweight and elegant, perfect for creating soft, romantic swags that float beautifully in the breeze.
- Heavy-Duty Zip Ties: Essential for securely fastening fabric to the arch, ensuring it stays in place throughout your event.
- Floral Wire or Green Garden Wire: Ideal for attaching flowers, greenery, and other embellishments discreetly to the fabric and arch structure.
Transform Your Ceremony Space
Draping your wedding arch is more than just decorating; it’s about crafting an atmosphere. It’s an opportunity to infuse your personality and love story into the very heart of your ceremony space.
With these steps, you have everything you need to create a stunning, memorable backdrop for your vows. Don’t hesitate to experiment and let your creativity shine.
Start planning your arch design today, gather your materials, and prepare to bring your vision to life. The magic of your wedding day begins with these personal touches.
Wedding Planning
No fluff, no drama. Just easy weekly advice, planning shortcuts, and gentle reminders to help you actually enjoy your engagement.