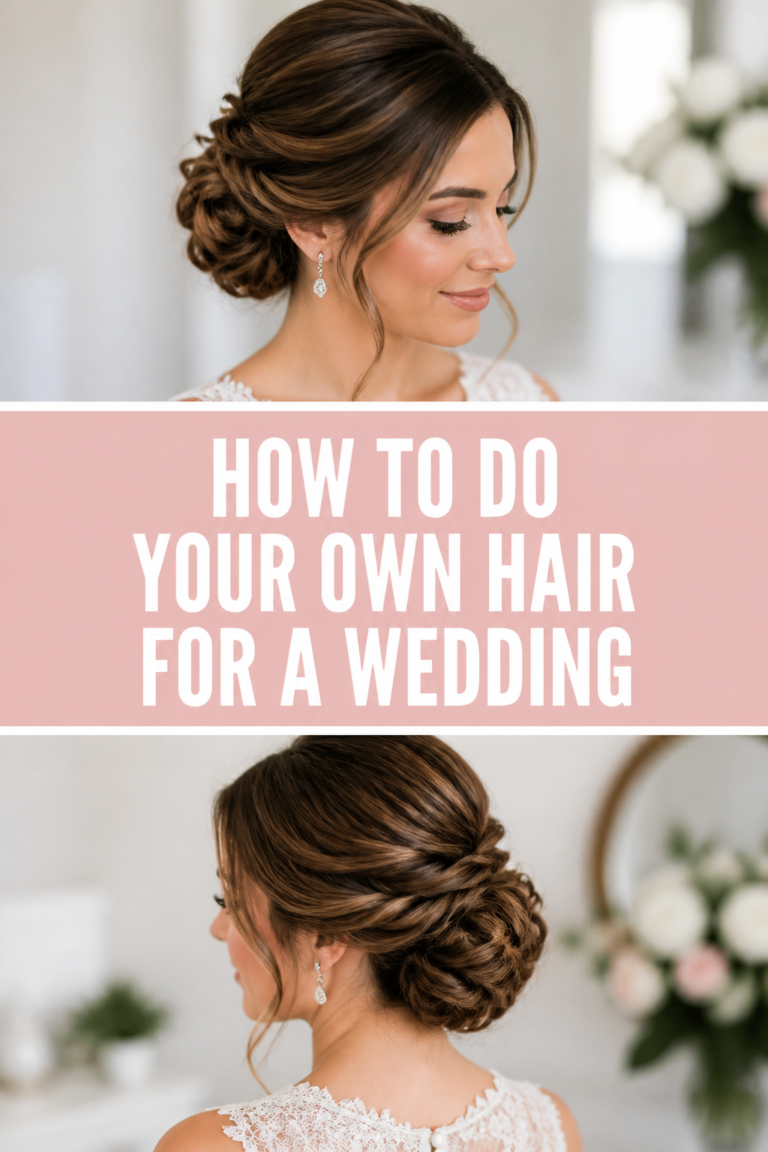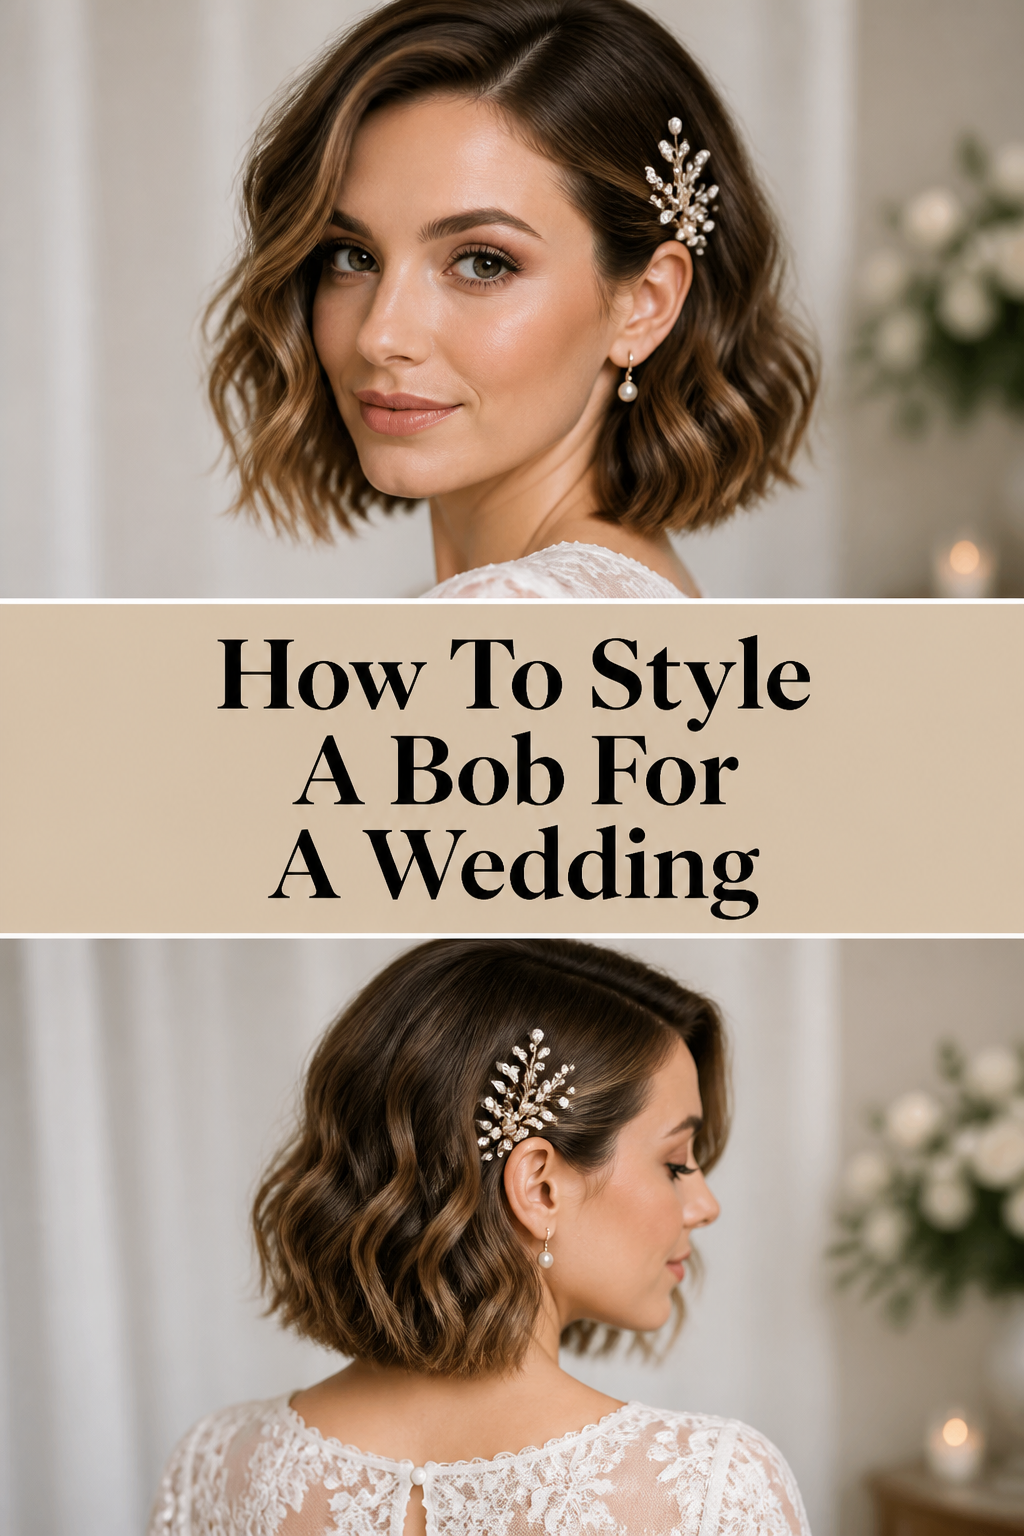
💇♀️ How To Style A Bob For A Wedding
I remember standing in front of the mirror three hours before my cousin’s wedding, staring at my chin-length bob with total uncertainty.
After years of working behind the scenes at bridal shoots, I finally learned that a bob is actually the most versatile “blank canvas” for a sophisticated wedding look.
This guide draws on those professional styling secrets to help you achieve a red-carpet finish that lasts from the first photo to the last dance.

Quick Overview
Styling a bob for a formal event requires a balance of volume, texture, and staying power.
- Time needed: 45 to 60 minutes
- Difficulty: Intermediate
- What you’ll need: 1-inch curling iron, heat protectant, dry texture spray, bobby pins, fine-tooth comb, and a high-hold hairspray.
Step-by-Step Instructions
Step 1: Prepare the Foundation
Start with hair that is about 90% dry if you are using a blow dryer, or completely dry if you washed it the night before.
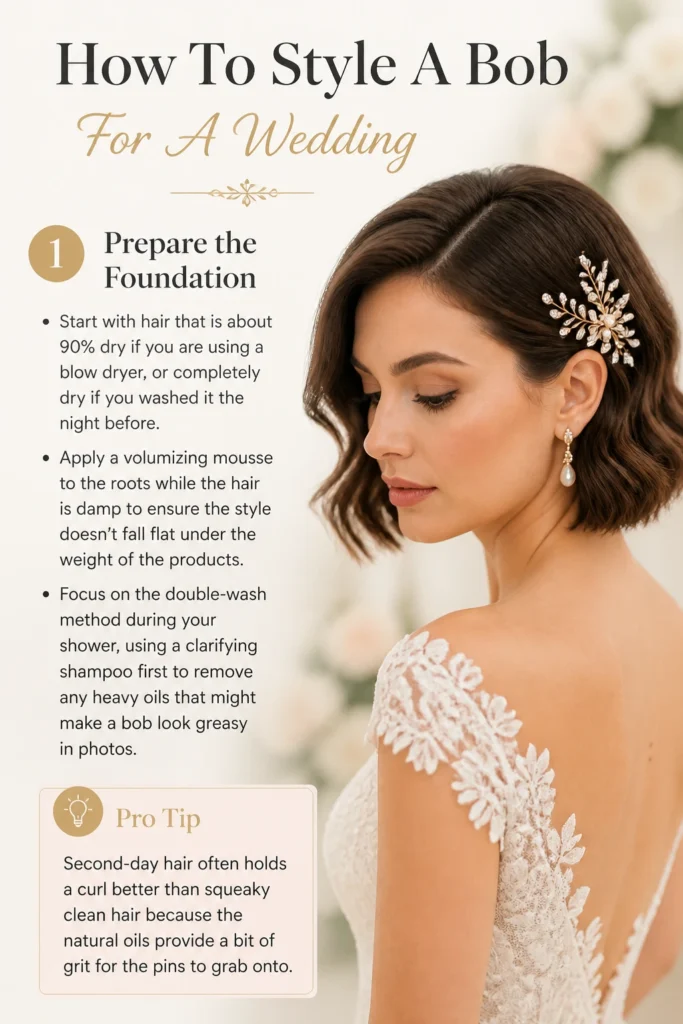
Apply a volumizing mousse to the roots while the hair is damp to ensure the style doesn’t fall flat under the weight of the products.
Focus on the “double-wash” method during your shower, using a clarifying shampoo first to remove any heavy oils that might make a bob look greasy in photos.
Pro Tip: Second-day hair often holds a curl better than “squeaky clean” hair because the natural oils provide a bit of grit for the pins to grab onto.
Step 2: Section for Precision
Divide your hair into three horizontal layers using clips to keep the top sections out of the way.

Begin at the nape of the neck, as this is the shortest part of a bob and the most difficult to curl.
Ensure each section is no wider than one inch, which allows the heat from your iron to penetrate the hair shaft evenly for a long-lasting shape.
Step 3: Apply Thermal Defense
Mist a professional-grade heat protectant over each section before the iron ever touches your strands.
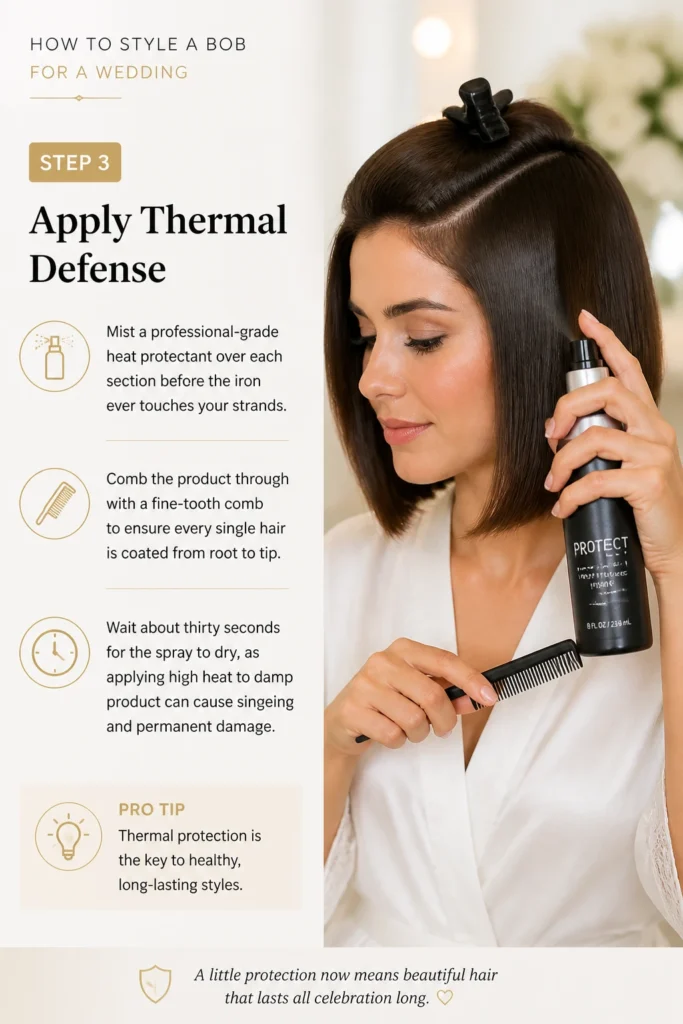
Comb the product through with a fine-tooth comb to ensure every single hair is coated from root to tip.
Wait about thirty seconds for the spray to dry, as applying high heat to damp product can cause “singeing” and permanent damage.
Step 4: Create Dimensional Waves
Wrap a one-inch section of hair around the barrel of your curling iron, leaving the last half-inch of the ends straight.
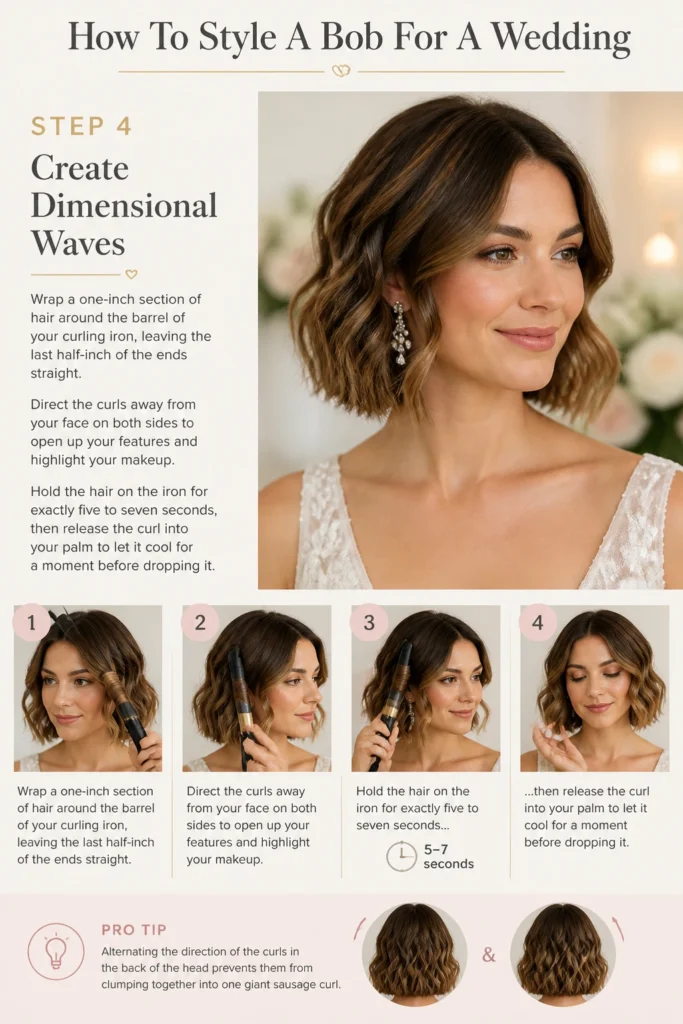
Direct the curls away from your face on both sides to open up your features and highlight your makeup.
Hold the hair on the iron for exactly five to seven seconds, then release the curl into your palm to let it cool for a moment before dropping it.
Pro Tip: Alternating the direction of the curls in the back of the head prevents them from clumping together into one giant “sausage curl.”
Step 5: Master the Cooling Phase
Resist the urge to touch or brush your curls while they are still warm to the touch.
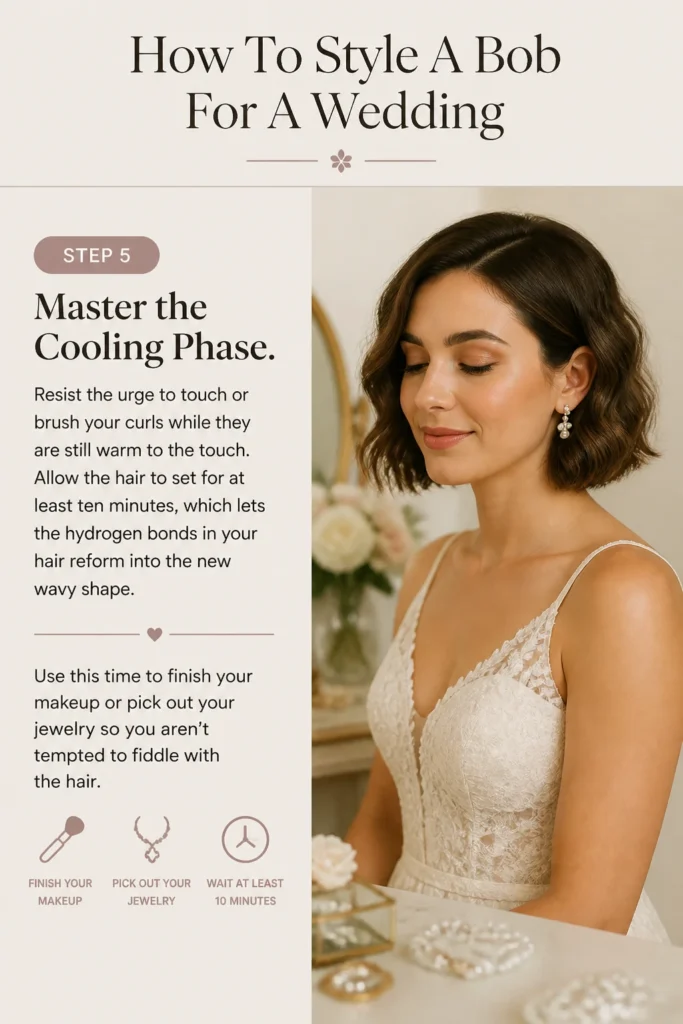
Allow the hair to set for at least ten minutes, which lets the hydrogen bonds in your hair reform into the new wavy shape.
Use this time to finish your makeup or pick out your jewelry so you aren’t tempted to fiddle with the hair.
Step 6: Build Texture and Volume
Shake a bottle of dry texture spray and mist it generously through the mid-lengths and ends of your bob.
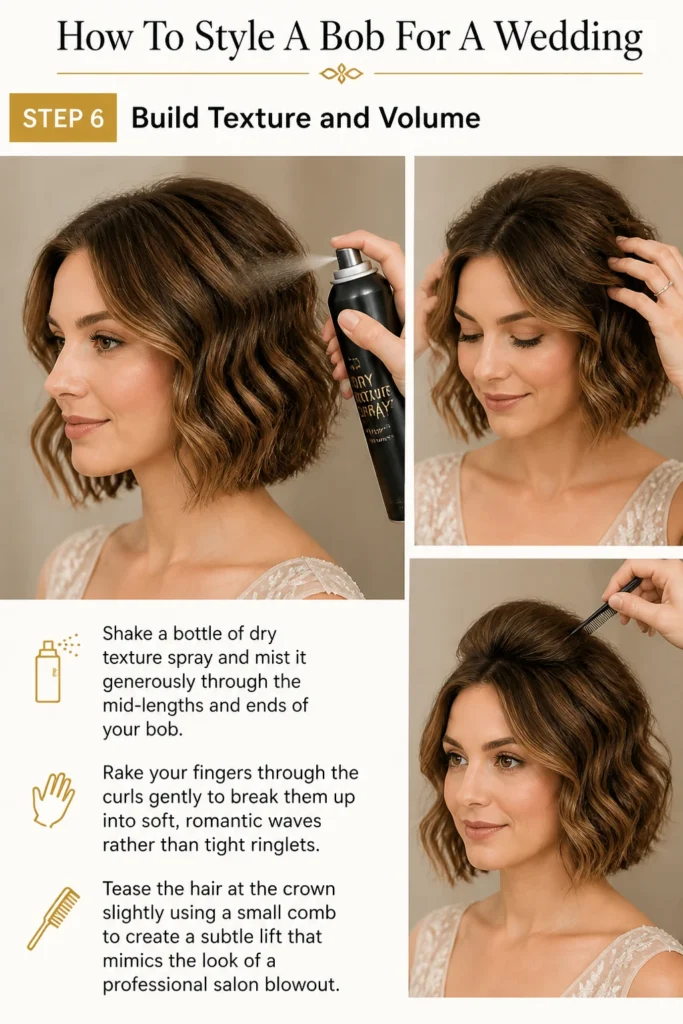
Rake your fingers through the curls gently to break them up into soft, romantic waves rather than tight ringlets.
Tease the hair at the crown slightly using a small comb to create a subtle “lift” that mimics the look of a professional salon blowout.
Step 7: Secure the Side Sweep
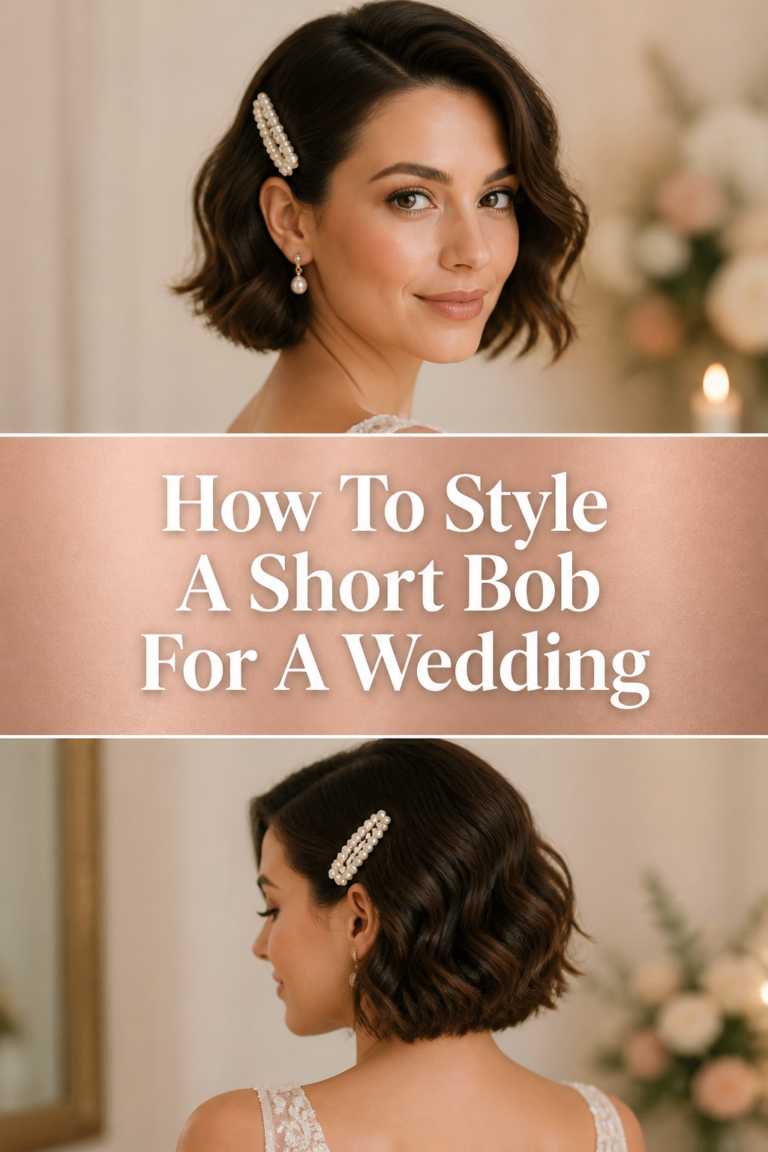
Tuck one side of your hair behind your ear to create an asymmetrical, modern silhouette that looks stunning in profile shots.
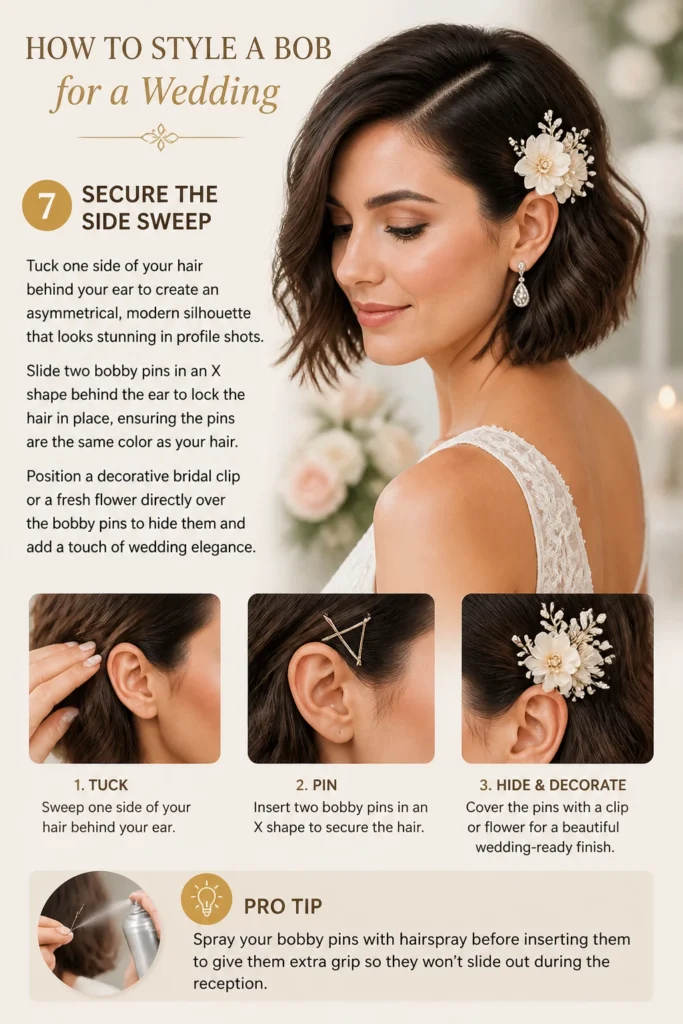
Slide two bobby pins in an “X” shape behind the ear to lock the hair in place, ensuring the pins are the same color as your hair.
Position a decorative bridal clip or a fresh flower directly over the bobby pins to hide them and add a touch of wedding elegance.
Pro Tip: Spray your bobby pins with hairspray before inserting them to give them extra “grip” so they won’t slide out during the reception.
Step 8: The Final Seal
Check the back of your head using a hand mirror to ensure there are no gaps or flat spots in the texture.
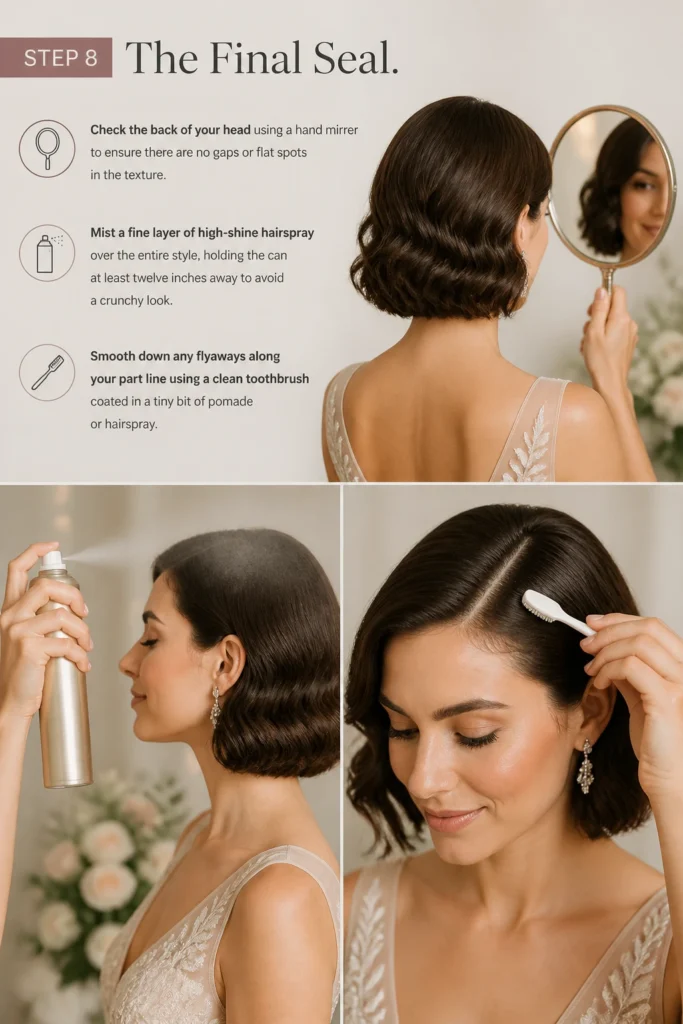
Mist a fine layer of high-shine hairspray over the entire style, holding the can at least twelve inches away to avoid a “crunchy” look.
Smooth down any flyaways along your part line using a clean toothbrush coated in a tiny bit of pomade or hairspray.
Common Mistakes to Avoid
The “Bell” Shape Effect
Many people curl the very ends of their bob under, which creates a wide, triangular shape that can look dated in wedding photos.
Keep the last half-inch of your hair straight when using the curling iron to maintain a modern, “lived-in” aesthetic.
This technique draws the eye downward and elongates the neck, which is particularly flattering with off-the-shoulder or V-neck dresses.
Overloading with Heavy Oils
Using heavy serums or thick oils on a bob can quickly weigh down the style, making it look flat and limp by the time the ceremony starts.
Opt for lightweight “dry” oils or shine sprays that provide a glow without the weight of traditional products.
If you have fine hair, skip the oil entirely and rely on a high-quality hairspray for your shine.
Neglecting the Back View
It is easy to focus only on what you see in the mirror, but wedding guests will spend a lot of time looking at the back of your head during the ceremony.
Ensure you are curling the sections at the back with the same care as the front, using a three-way mirror if possible.
Ask a friend to take a quick photo of the back of your hair so you can spot any uneven sections before you leave the house.
Troubleshooting
Curls Falling Flat Too Quickly
If your hair refuses to hold a curl, you might be using too much conditioner in the shower, which makes the hair too “slippery.”
Next time, only apply conditioner to the very ends of your hair and use a “setting spray” on each section before curling.
You can also try “pinning” each curl to your head with a metal clip while it cools to force the shape to lock in.
Visible Bobby Pins
Visible pins can distract from the elegance of a bridal look, especially in high-resolution photography.
Always insert the pin with the wavy side facing down toward the scalp, as this provides more grip and keeps the pin flatter against the head.
If the pins are still showing, try “weaving” them into the hair by taking a small amount of hair and pushing the pin in the opposite direction of the hair’s fall.
Frizz in High Humidity
Outdoor weddings can be a nightmare for bobs, which tend to “poof” at the first sign of moisture in the air.
Apply an anti-humidity sealant or a weather-proof finishing spray as the very last step of your routine.
Keep a small travel-sized bottle of anti-frizz cream in your clutch to smooth down any rogue strands throughout the day.
Key Takeaways
- Prep is everything: Use volumizing products on damp hair to create a sturdy foundation.
- Leave the ends out: Keeping the tips of your hair straight prevents the dreaded “bell” shape.
- Cooling is mandatory: Never brush out your curls until they are completely cold to the touch.
- Secure with intent: Use the “X” pinning method and hairspray-coated pins for maximum security.
- Texture over tightness: Aim for soft, romantic waves rather than stiff, formal ringlets.
- Check every angle: Use a hand mirror to ensure the back of the bob is just as polished as the front.
Frequently Asked Questions
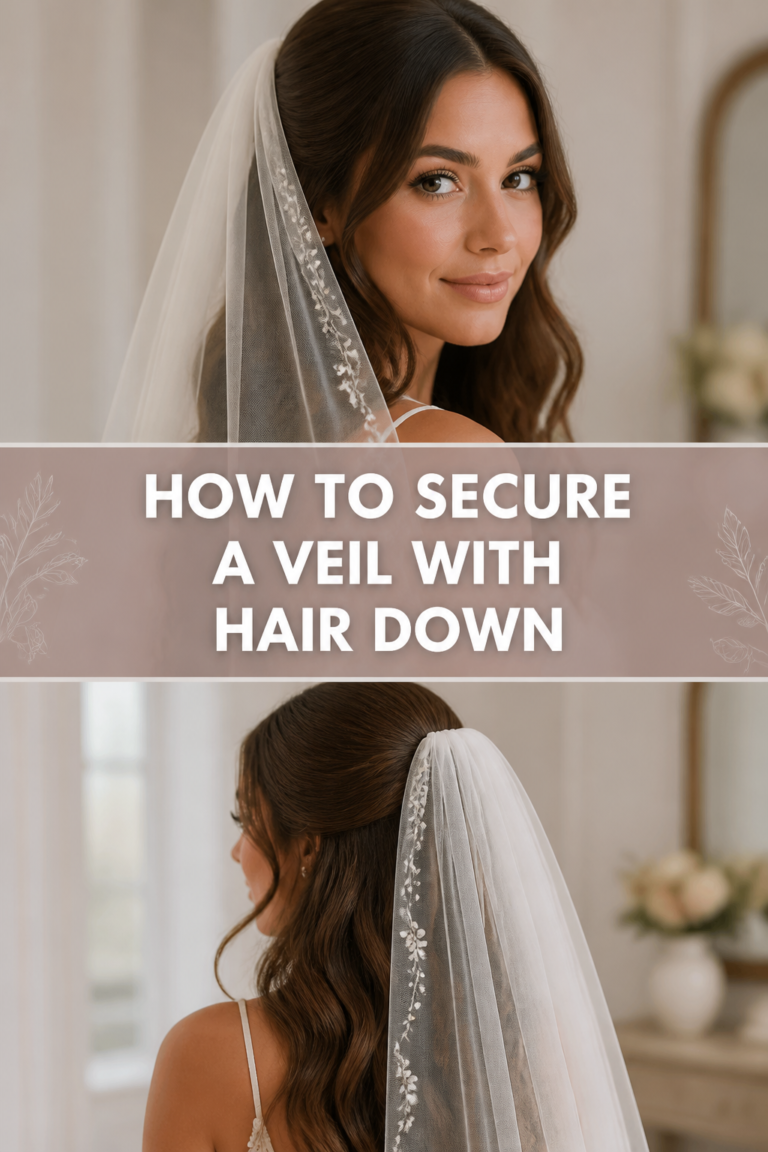
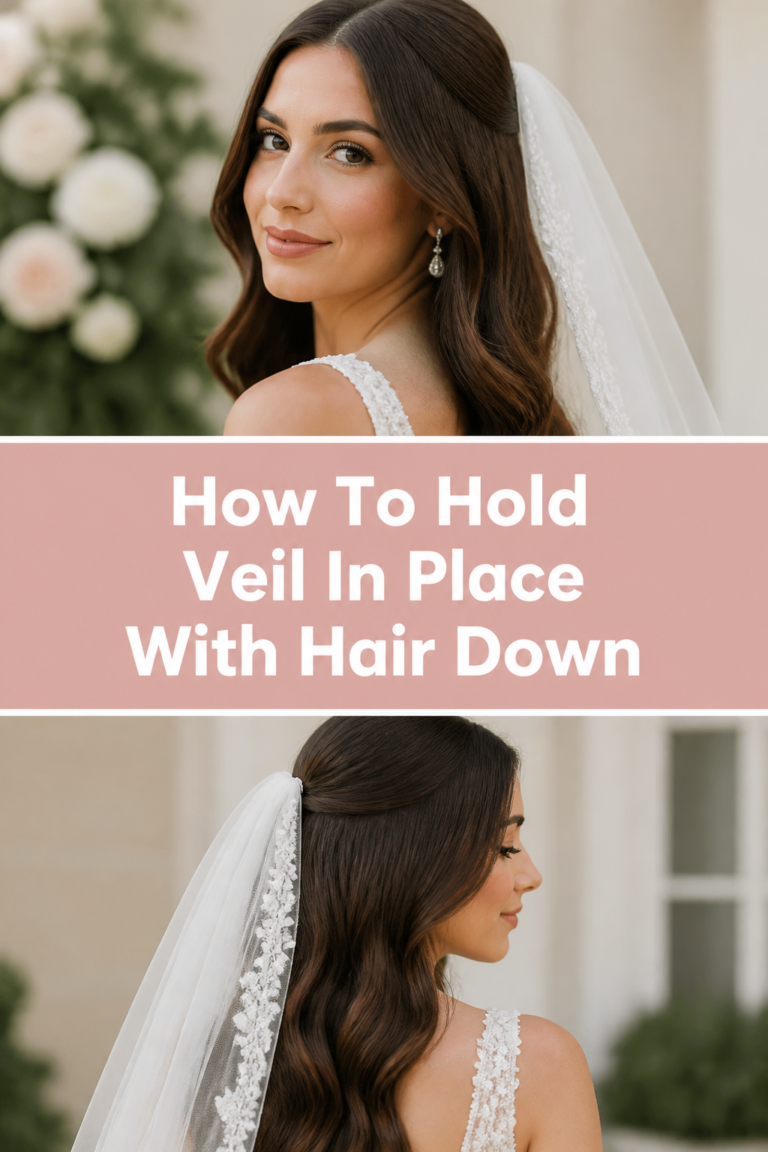
Can I wear a veil with a short bob?
Yes, you can definitely wear a veil with a bob, but you need to create a “shelf” for the comb to sit in.
Backcomb a small section of hair at the crown and secure it with two crossed bobby pins to give the veil’s comb something to grip onto.
Is a bob too casual for a black-tie wedding?
A bob is actually one of the most sophisticated lengths for a formal event because it looks clean and intentional.
To elevate the look for black-tie, focus on high-shine finishes and perhaps a deep side part for a “vintage Hollywood” feel.
How do I keep my bob from looking like a “helmet”?
The key is movement, which you achieve by using a dry texture spray instead of a heavy-duty “freeze” hairspray.
Avoid spraying the hair in one solid sheet; instead, lift sections and spray from underneath to keep the hair bouncy and touchable.
Should I get my hair trimmed right before the wedding?
It is best to get a trim about one to two weeks before the big day to ensure your ends are crisp and healthy.
This gives the hair a few days to “settle” so it doesn’t look too blunt or fresh-cut in the wedding photos.
Our Top Recommended Finds
- 1-Inch Ceramic Curling Wand: Ceramic barrels distribute heat more evenly than metal ones, which is vital for preventing hot spots on short hair.
- Dry Texture Finishing Spray: This product provides the “grit” and volume needed to make a bob look full and romantic without the stickiness of hairspray.
- Silk Hair Wrap: If you are styling your hair the night before, sleeping on a silk wrap will prevent frizz and keep your waves intact.
Walking Down The Aisle With Confidence
Now that you have the blueprint for the perfect wedding bob, the next step is to perform a “dress rehearsal” styling session.
Try the style while wearing a top with a similar neckline to your wedding outfit to see how the hair interacts with your shoulders.
If you found this guide helpful, consider looking into our tutorials on “Bridal Makeup for Short Hair” or “How to Choose the Right Hair Accessories for Your Face Shape.”
Take your curling iron out today and start practicing those dimensional waves so you can be your own best stylist on the big day.