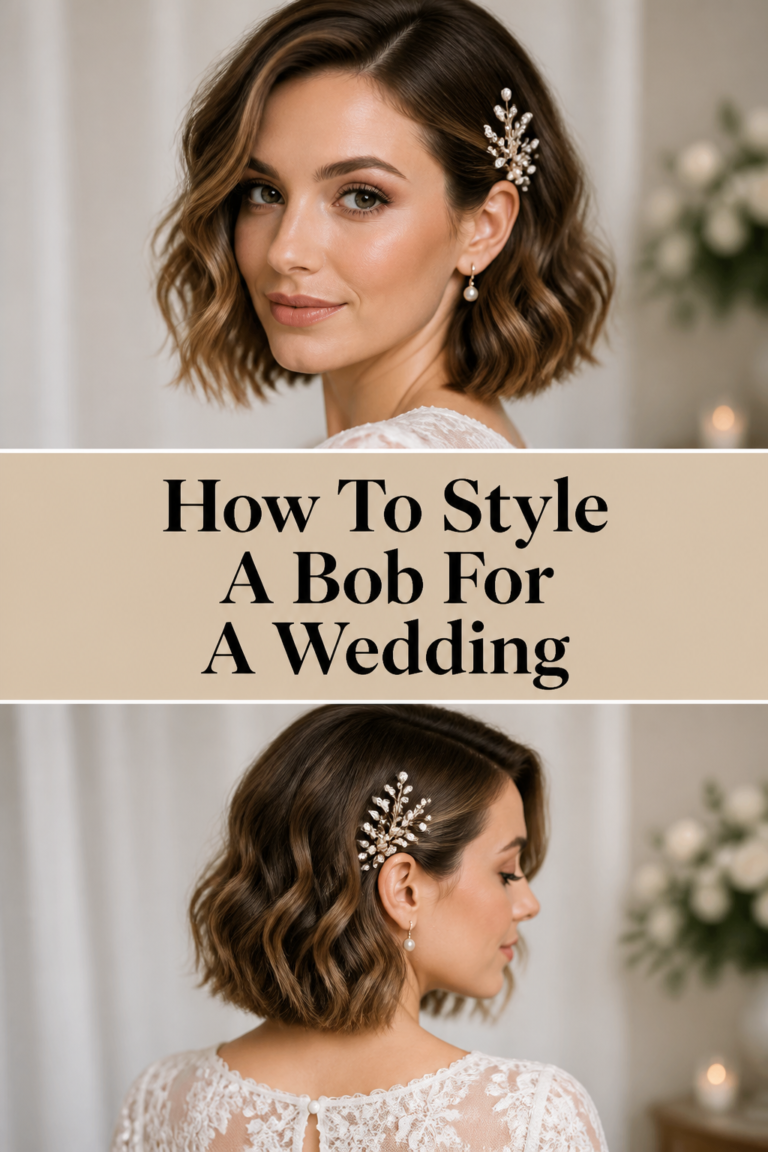
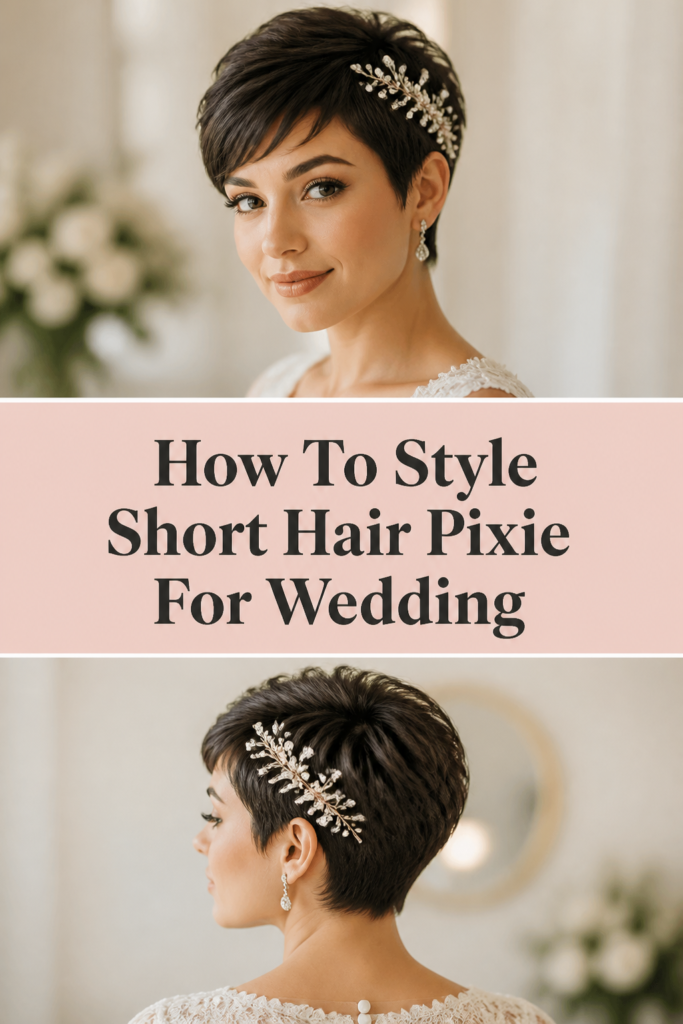
👰♀️ How To Style Short Hair Pixie For Wedding
Planning a wedding with a pixie cut can feel like a unique challenge, but it is truly an opportunity to shine. I’ve seen firsthand how a well-styled pixie can elevate a bridal look, bringing modern elegance and confidence. This guide shares the insights and techniques I’ve gathered, ensuring your short hair becomes a stunning feature of your special day.
Quick Overview
This guide will empower you to create a sophisticated and beautiful pixie hairstyle for a wedding, tailored to your unique style. You’ll learn how to prepare your short hair, add texture, incorporate accessories, and ensure your look lasts all day.
- Time needed: 45-90 minutes (including prep and styling)
- Difficulty: Intermediate
- What you’ll need: Hair gel, mousse, strong-hold hairspray, heat protectant, curling iron/flat iron, fine-tooth comb, bobby pins, hair accessories (optional).
Step-by-Step Instructions
Step 1: Prep Your Pixie
Your wedding day style begins with meticulously prepared hair. Clean hair is crucial, but avoid over-conditioning which can make it too soft to hold a style. A light shampoo and conditioner are perfect.
Wash your hair the night before or the morning of the wedding. This allows natural oils to settle, providing better grip for styling products.
Towel-dry your hair gently, removing excess water without roughing up the cuticles. This prevents frizz and sets the stage for smooth styling.
Step 2: Apply Foundation Products
Building a strong foundation is key for a long-lasting wedding style. These products provide hold, volume, and protection.
Spritz a heat protectant spray evenly throughout damp hair. This shields your strands from potential damage from styling tools.
Distribute a volumizing mousse from roots to ends. Mousse adds body and helps fine hair appear fuller, which is ideal for intricate styling.
Work a small amount of styling gel or cream into your hair. This product will give your pixie definition and a light hold, preparing it for the next steps.
Pro Tip: For extra lift, focus the mousse application at the roots, gently massaging it in with your fingertips. This creates a natural-looking volume base.
Step 3: Blow-Dry for Volume and Direction
The way you blow-dry your pixie can dramatically influence its final shape and volume. This step is about creating the desired foundation.
Use a small round brush or your fingers to lift roots as you blow-dry. Direct the airflow upwards to maximize volume.
Dry your hair in sections, moving from the nape of your neck towards the crown and then the sides. This ensures even drying and control.
Blow-dry your bangs or fringe area in the direction you want them to lay. Use a flat brush for a sleek look or your fingers for a softer, more natural sweep.
Step 4: Add Texture and Movement
Texture is vital for a dynamic and elegant pixie cut. It prevents the style from looking flat and adds visual interest.
Grab a small curling iron (around 1/2 to 1 inch barrel) or a flat iron. For pixies, smaller tools offer more control.
Curl small sections of hair, focusing on the longer pieces around the crown, top, and front. Alternate the direction of the curls (towards and away from your face) for a more natural, tousled effect.
Twist your flat iron through sections for soft waves if a curling iron feels too cumbersome. This technique creates a beautiful, subtle bend.
Step 5: Define and Sculpt
Now it’s time to bring your vision to life by shaping and defining your pixie’s unique features. This is where your chosen style truly emerges.
Use a pomade or styling wax on your fingertips. Warm a tiny amount between your palms to make it pliable.
Define individual pieces, adding texture and separation. For a sleek look, smooth down specific sections. For a textured look, piece out strands.
Push hair back from your face for an elegant, swept-back style. Alternatively, sweep it to the side for a chic, asymmetrical appearance.
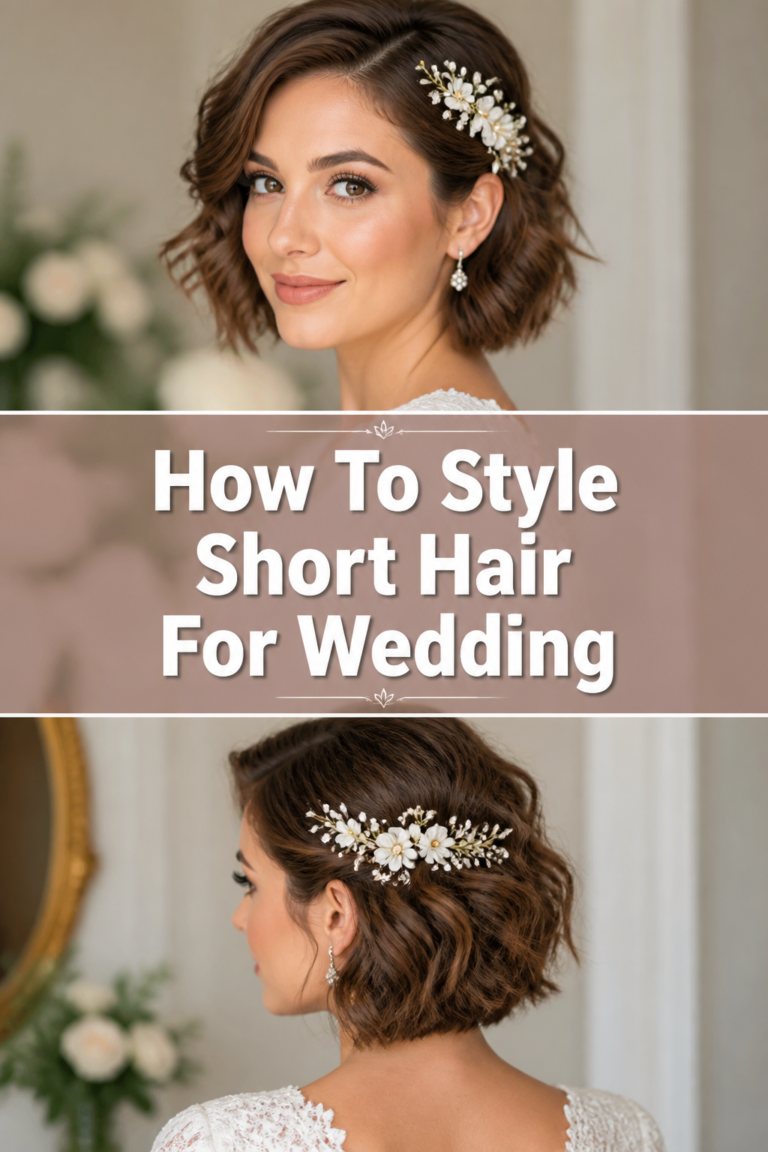
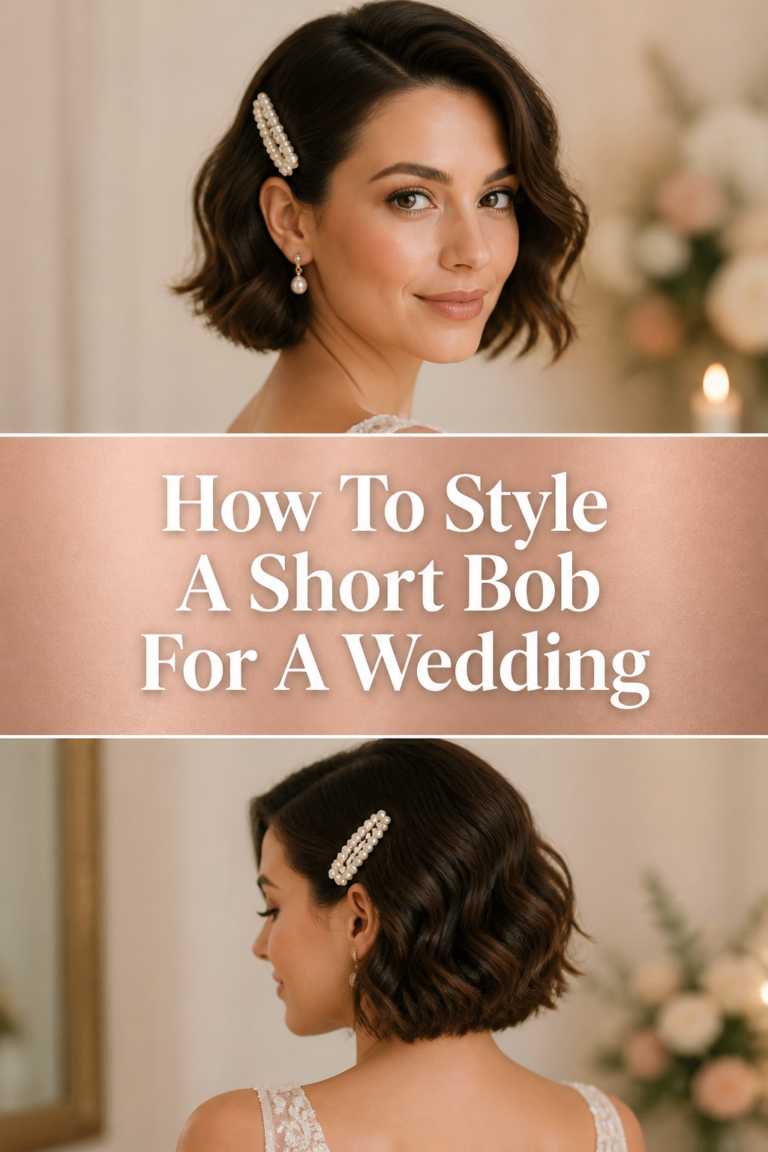
Step 6: Incorporate Accessories (Optional but Recommended)
Hair accessories are a pixie cut’s best friend for a wedding. They add a touch of bridal glamour and personalize your look.
Choose accessories that complement your dress and overall wedding theme. Think delicate hairpins, jeweled clips, small headbands, or even a miniature fascinator.
Secure your chosen accessory carefully. Bobby pins often help anchor larger pieces into short hair, ensuring they stay put.
Place the accessory strategically. A sparkling clip above the ear, a delicate band across the crown, or small pins woven into textured sections can all look stunning.
Step 7: Lock in Your Style
A strong hold is non-negotiable for a wedding day hairstyle. You want your pixie to look flawless from ceremony to reception.
Apply a strong-hold hairspray evenly over your entire style. Hold the can about 10-12 inches away to ensure a fine, even mist without making your hair stiff.
Focus on areas that need extra staying power, like bangs or any lifted sections. A light second mist can provide additional security.
Allow the hairspray to dry completely before touching your hair. This prevents smudging or disturbing the carefully crafted style.
Pro Tip: Carry a travel-size hairspray and a few bobby pins in your emergency kit. These can be lifesavers for quick touch-ups throughout the day.
Common Mistakes to Avoid
Over-Product Application
Applying too much product, especially heavy gels or waxes, can weigh down short hair. This results in a greasy, stiff, or flat look that lacks natural movement. Always start with a tiny amount and add more only if necessary. A little goes a long way with pixie cuts.
Ignoring Hair Type
Treating all pixie cuts the same, regardless of hair texture or thickness, is a common error. Fine hair needs volumizing products and gentle styling to prevent it from collapsing, while thick hair might require more sculpting product and heat to hold its shape. Always consider your specific hair type when selecting products and techniques.
Forgetting Heat Protection
Skipping heat protectant before using hot tools is a significant oversight. Even short hair is susceptible to damage from curling irons or flat irons, leading to dryness, breakage, and dullness. Always apply a protective spray to damp hair to maintain its health and shine.
Over-Complicating the Style
Sometimes, less is more, especially with a chic pixie. Trying to force an overly elaborate or intricate style onto short hair can look messy or unnatural. Embrace the elegant simplicity of your cut, focusing on texture, definition, and perhaps one statement accessory.
Troubleshooting
Hair Lacks Volume
If your pixie feels flat, it might be due to insufficient root lift during blow-drying or using products that are too heavy. Try re-wetting the roots slightly, applying more volumizing mousse directly to the scalp, and blow-drying with your head upside down for maximum lift. A dry texturizing spray can also add instant body.
Style Won’t Hold
A lack of staying power often comes from not using strong enough holding products or not applying them correctly. Ensure you’re using a strong-hold hairspray and misting it evenly over the entire style. For stubborn areas, a targeted spray or a dab of strong-hold gel can reinforce the style. Also, ensure your hair is completely dry before applying finishing sprays.
Frizz and Flyaways
Frizz can be a nuisance, especially on a humid wedding day. Combat this by using an anti-frizz serum or a light hair oil after styling. Apply a small amount to your palms and gently smooth over the surface of your hair. A final mist of humidity-resistant hairspray will also create a protective barrier against moisture.
Key Takeaways
- Always begin with clean, lightly conditioned hair for the best styling foundation.
- Layer styling products (heat protectant, mousse, gel) to build volume, hold, and definition.
- Use your blow-dryer strategically to create desired volume and direction.
- Add texture with small curling irons or flat irons to give your pixie movement and depth.
- Accessorize wisely to enhance your bridal look without overwhelming your short cut.
- Lock in your style with a strong-hold hairspray for all-day perfection.
Frequently Asked Questions
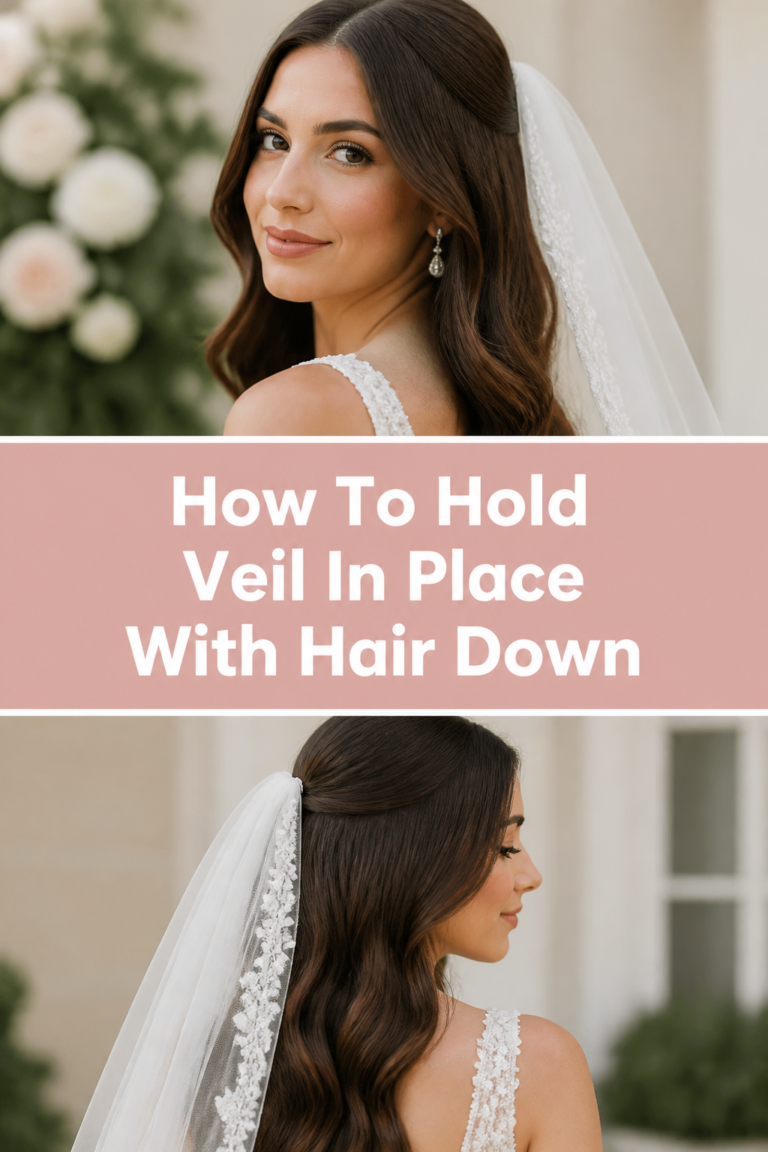
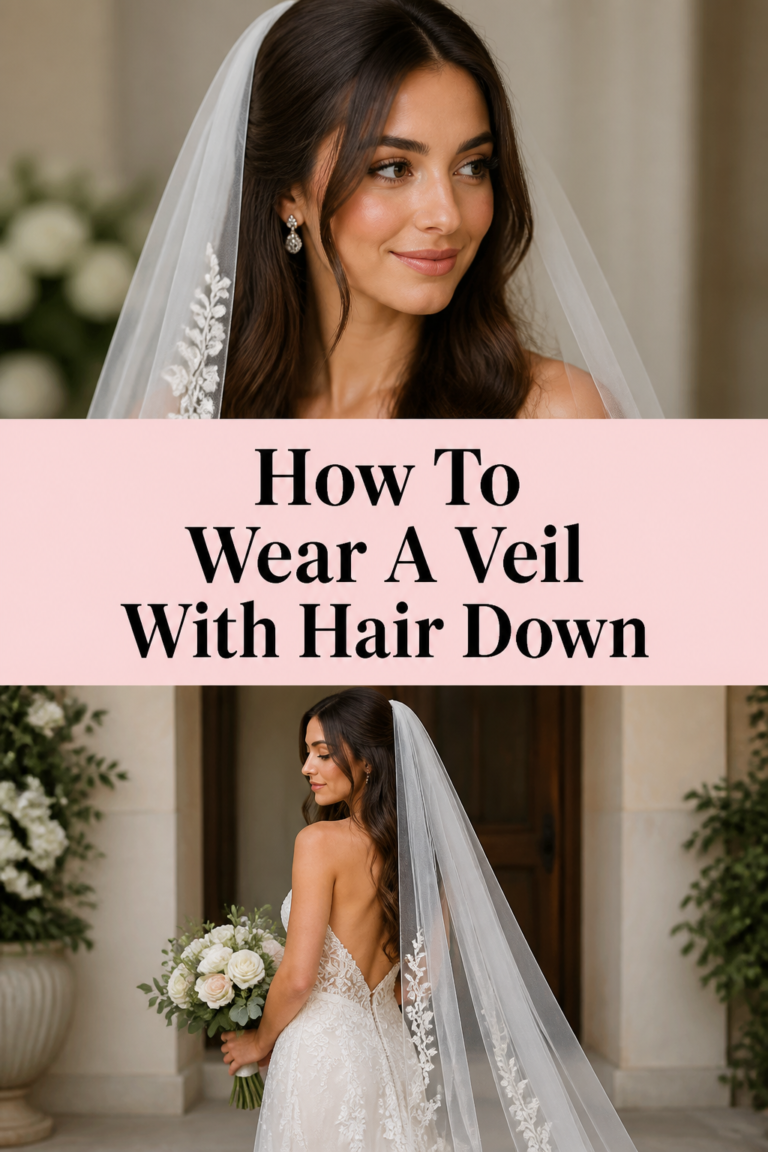
Can I wear a veil with a pixie cut?
Absolutely! Many brides successfully wear veils with pixie cuts. Opt for a lightweight veil that can be secured with small combs or bobby pins directly into your hair or attached to a small decorative hairpiece. A birdcage veil is also a stunning and popular choice for short hair.
How do I make sure my short hair doesn’t look too casual?
The key is in the styling and accessories. Focus on polished texture, defined sections, and strategic volume. Elegant accessories like jeweled clips, delicate headbands, or even fresh flowers can instantly elevate your pixie from casual to bridal chic. Your makeup and dress will also contribute significantly to the overall formal look.
Should I get a fresh cut right before the wedding?
It’s generally recommended to get your final pixie trim about one to two weeks before the wedding. This allows your hair to settle into its natural shape and gives you time to adjust to the cut. Avoid last-minute trims that could go wrong or feel unfamiliar on your big day.
What if my hair is very fine?
For fine hair, focus on volumizing products specifically designed to add body without weight. Use a volumizing shampoo and conditioner, followed by a root-lifting mousse. Blow-dry upside down to maximize lift, and consider gentle backcombing at the roots (followed by smoothing) for extra fullness that lasts.
Our Top Recommended Finds
- Volumizing Mousse: A lightweight mousse that provides lift without stickiness, perfect for adding body to short hair.
- Strong-Hold Hairspray: An invisible, humidity-resistant spray that locks your style in place all day without stiffness.
- Mini Flat Iron/Curling Wand: Essential for creating precise waves, curls, or texture in shorter sections of hair.
Embrace Your Bridal Pixie
Your wedding day is a celebration of your unique love story, and your style should reflect your authentic self. A beautifully styled pixie cut exudes confidence, modern elegance, and a touch of daring charm. Let your short hair be a testament to your individuality.
Now is the perfect time to experiment with these steps. Practice different looks to find the one that makes you feel most radiant. Your bridal pixie is ready to shine, captivating everyone with its sophisticated allure.