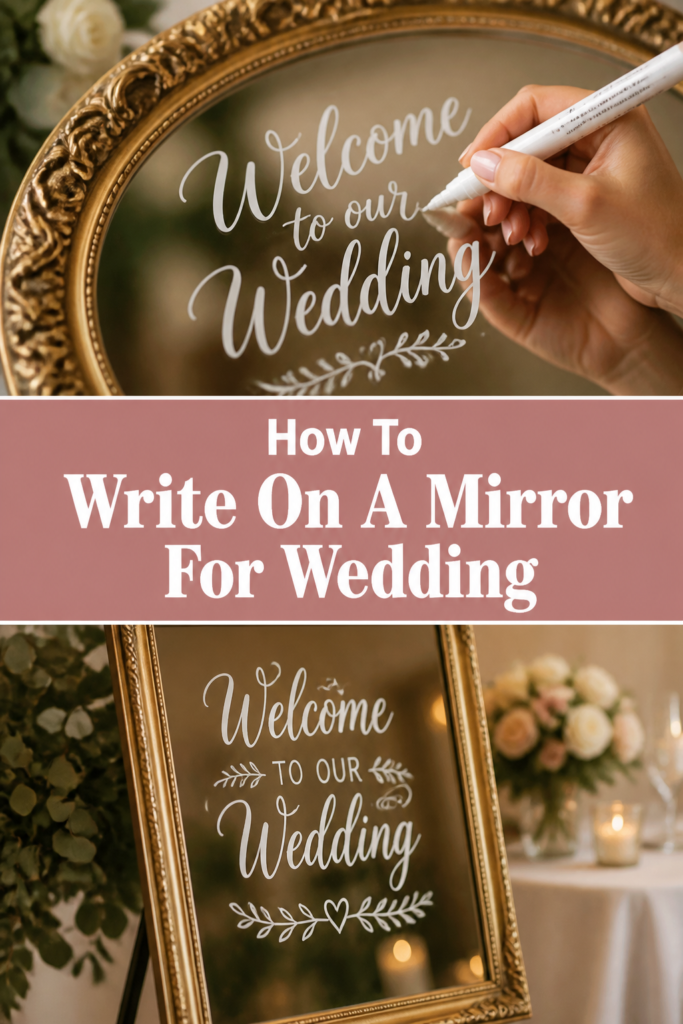
How To Write On A Mirror For Wedding
I have spent years hand-lettering mirrors for high-end weddings and local celebrations alike.
Writing on glass is a unique skill that transforms a simple household object into a stunning piece of decor.
This guide shares the exact techniques and professional secrets I use to ensure your wedding signage looks crisp, clean, and perfectly aligned.
Quick Overview
Before you pick up a marker, it helps to understand the scope of this project.
- Time needed: 2 to 4 hours depending on the complexity of the design.
- Difficulty: Intermediate (requires patience and a steady hand).
- What you’ll need: A clean mirror, glass cleaner, microfiber cloth, chalk markers or oil-based paint pens, a ruler, and a printed template.
Step-by-Step Instructions
Step 1: Select Your Mirror Surface
Choose a mirror that fits the aesthetic of your wedding venue.
Vintage mirrors with ornate gold frames are popular for classic weddings, while frameless or black-framed mirrors suit modern themes.
Ensure the glass is free of deep scratches or “foxing” (dark spots) in the areas where you plan to write.
Check the weight of the mirror to ensure you have a sturdy easel that can support it without wobbling during the ceremony or reception.
Step 2: Clean the Glass Thoroughly
Wipe the entire surface with a mixture of water and white vinegar or a high-quality glass cleaner.
Fingerprints and oils from your skin will prevent the ink from adhering correctly and can cause “beading” of the paint.
Use a lint-free microfiber cloth to dry the surface completely.
Avoid paper towels, as they often leave behind tiny fibers that will get caught in your pen nib.
Pro Tip: Once the mirror is clean, try to wear a thin cotton glove or place a piece of paper under your hand while writing to prevent new smudges.
Step 3: Create a Digital or Paper Template
Design your layout on a computer using software like Canva or Photoshop to ensure the spacing is perfect.
Print your design at full scale so you can use it as a guide for your lettering.
If your mirror is large, you may need to print your design in sections and tape them together.
Measure the mirror’s dimensions twice before printing to ensure your text doesn’t run into the frame.
Step 4: Map Out Your Guidelines
Use a measuring tape and a dry-erase marker to mark the center point of the mirror.
Draw light horizontal lines across the glass to keep your sentences straight.
If you aren’t confident in your freehand skills, you can use a laser level projected onto the mirror surface.
Place small dots of paint or chalk where each line of text should begin and end.
Step 5: Choose the Right Writing Tool
Select between water-based chalk markers and oil-based paint pens based on your needs.
Chalk markers are easier to erase if you make a mistake, but they can smudge if someone touches them.
Oil-based pens are permanent and weather-resistant, making them ideal for outdoor weddings or signs that guests might brush against.
Test your pen on a small corner of the mirror first to see how the ink flows and how easy it is to remove.
Step 6: Prime Your Markers Properly
Shake the marker vigorously for at least thirty seconds to mix the pigment.
Depress the nib on a scrap piece of cardboard until the ink begins to flow smoothly.
Avoid priming the marker directly on the mirror, as a sudden burst of ink can create a messy puddle.
Keep a scrap piece of paper nearby to “re-prime” the nib whenever the lines start to look thin or streaky.
Pro Tip: Always keep your markers capped when not in use, as the tips can dry out in as little as sixty seconds.
Step 7: Execute the First Pass
Write your text using light pressure to create the basic shapes of the letters.
Focus on the “skeleton” of the words first, ensuring the spacing between letters is consistent.
Do not worry about thick or thin lines yet; just get the placement right.
Work from top to bottom and left to right (if you are right-handed) to avoid dragging your hand through wet ink.
Step 8: Apply Faux Calligraphy Techniques
Add thickness to the “downstrokes” of your letters to create a professional calligraphy look.
A downstroke is any part of a letter where your pen moves toward the bottom of the mirror.
Fill in these thickened areas carefully, ensuring the ink is opaque and solid.
This technique gives the illusion of a nib pen without the difficulty of using actual ink and wells on glass.
Step 9: Correct Mistakes with Precision
Wait for a mistake to dry completely before attempting to fix it.
Use a Q-tip dipped in a tiny amount of glass cleaner or rubbing alcohol to “erase” the specific error.
Sharpen the edges of your letters by scraping away excess paint with a wooden toothpick or a razor blade.
This creates the crisp, professional lines that distinguish DIY projects from professional commissions.
Step 10: Final Inspection and Setting
Step back at least five feet from the mirror to check the overall balance and alignment.
Check for any “ghosting” effects where the reflection might make the text hard to read from certain angles.
Allow the ink to cure for at least 24 hours in a dust-free environment before moving the mirror.
If you used oil-based pens, the design is now fairly permanent; if you used chalk, handle the mirror only by the frame.
Common Mistakes to Avoid
Using the Wrong Cleaning Solution
Many people use cleaners that contain wax or silicone to make mirrors shine.
These ingredients create a barrier that causes paint markers to skip or bead up on the surface.
Stick to plain white vinegar or a basic alcohol-based glass cleaner for the best results.
Ignoring the Double Reflection
Because glass has thickness, your writing will cast a small shadow or reflection on the back of the mirror.
This can make your eyes go blurry if you stare too closely while writing.
Try to focus on the surface of the glass rather than the reflection behind the letters.
Writing on a Vertical Surface
It is tempting to write on the mirror while it is sitting on an easel.
However, gravity will cause the ink to run down the glass, creating “drips” in your beautiful lettering.
Always lay the mirror flat on a table or the floor while you are doing the actual writing.
Troubleshooting
The Ink is Streaky or Transparent
This usually happens when the marker hasn’t been shaken enough or the nib is drying out.
Stop writing and shake the pen thoroughly with the cap on.
Apply a second coat of ink once the first coat is completely dry to achieve a solid, professional finish.
The Pen Tip is Clogged
Glass can sometimes have microscopic debris that clogs the porous nib of a paint marker.
Remove the nib if possible and soak it in a little bit of warm water or rubbing alcohol.
If the nib is damaged, most professional markers come with a reversible tip or replacement nibs.
The Layout is Off-Center
If you realize your text is drifting to one side, do not try to squeeze the remaining letters in.
It is better to wipe away that specific line and start over than to have a cramped, lopsided sign.
Use a piece of low-tack painter’s tape to mark the exact center of the mirror as a constant visual reference.
Key Takeaways
- Preparation is everything: A clean, grease-free surface is the difference between success and failure.
- Test your tools: Always check your markers on a hidden corner of the mirror before starting the main design.
- Flat is best: Write on a horizontal surface to prevent ink drips and hand fatigue.
- Faux calligraphy: Mimic professional scripts by thickening the downstrokes of your letters.
- Precision cleaning: Use Q-tips and toothpicks to fix small errors rather than wiping away whole words.
- Patience pays off: Allow the ink to dry fully between coats and before transporting the mirror.
Frequently Asked Questions
What is the best pen for writing on a mirror?
For most weddings, the Uni-Posca Paint Marker or the Sharpie Oil-Based Paint Pen are the industry standards.
Posca markers are water-based and easier to clean, while Sharpie oil-based pens are more durable for outdoor events.
How do I remove the writing after the wedding?
If you used chalk markers, a damp cloth and glass cleaner will take it right off.
For oil-based paint pens, you will need a bit of acetone (nail polish remover) or a razor blade to gently scrape the paint away.
Can I use a stencil instead of freehanding?
Yes, stencils are a great way to ensure perfect lettering if you aren’t comfortable with your handwriting.
Use a repositionable adhesive spray on the back of the stencil to ensure it stays flush against the glass, preventing ink from bleeding underneath.
How do I prevent the ink from smudging during transport?
Wrap the mirror in a layer of glassine paper or soft tissue paper rather than plastic wrap.
Plastic wrap can stick to the paint and pull it off the mirror when you unpack it at the venue.
Our Top Recommended Finds
- Posca Acrylic Paint Markers: These offer incredible opacity and come in various tip sizes for fine details or bold headers.
- Microfiber Glass Cleaning Cloths: These ensure a streak-free surface without leaving behind annoying lint or dust particles.
- T-Square Ruler: A long T-square allows you to draw perfectly horizontal guidelines that are aligned with the edges of the mirror frame.
Bring Your Vision To Life
Now that you have the technical knowledge, it is time to start practicing your strokes.
Begin with a small “Welcome” sign or a “Cards and Gifts” mirror to build your confidence before tackling a large seating chart.
You might also consider practicing on a window or a picture frame glass if you don’t want to work on your final mirror just yet.
Once you master the pressure and flow of the paint pen, you can apply these skills to other wedding elements like acrylic place cards or glass table numbers.
Gather your supplies today and give yourself plenty of time to enjoy the creative process of making your wedding truly unique.