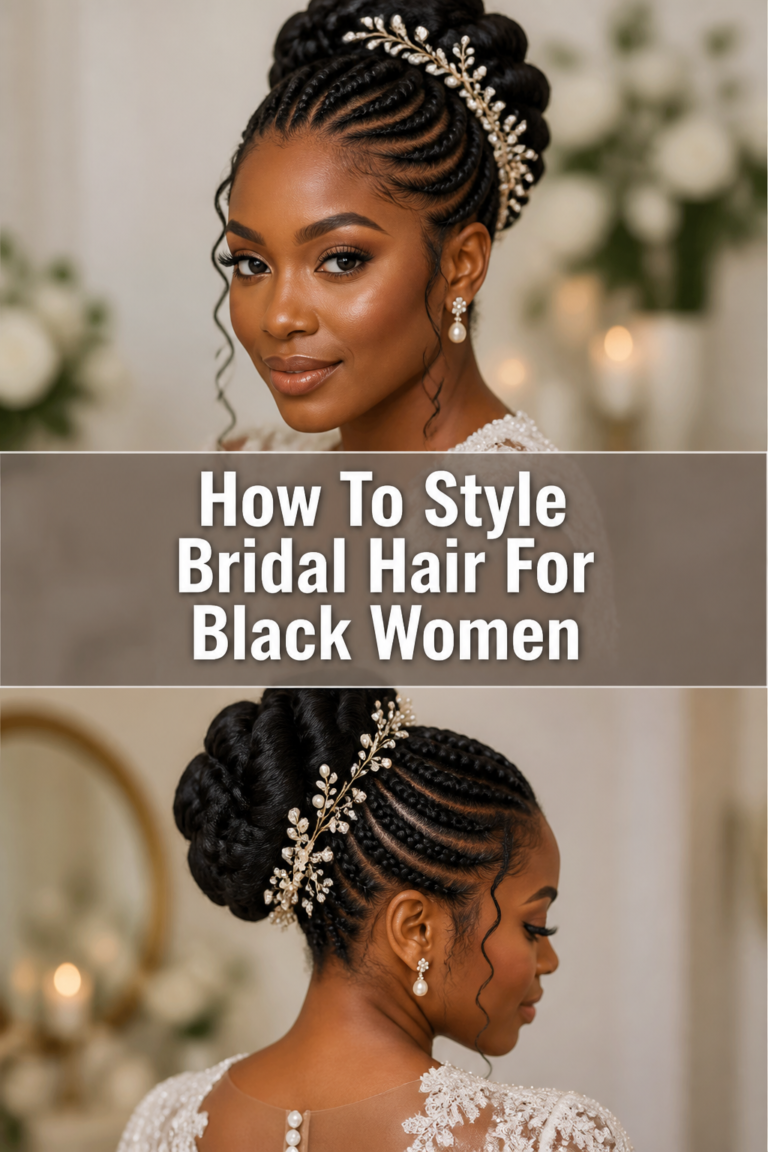
How To Style Box Braids For A Wedding
Your box braids are a stunning canvas for any formal occasion.
I have spent years perfecting high-glamour looks that keep braids secure through hours of dancing and photos.
This guide will help you transform your everyday style into a red-carpet-worthy wedding masterpiece.

Quick Overview
Preparing your braids for a wedding requires a blend of scalp care, creative sculpting, and the right accessories.
- Time needed: 45 to 90 minutes
- Difficulty: Intermediate
- What you’ll need: Edge control, heavy-duty hair pins, decorative jewelry, mousse, and a silk scarf.
Step-by-Step Instructions
Step 1: Refresh and Hydrate the Scalp
Cleanse your scalp using a cotton pad soaked in witch hazel or a specialized root rinse to remove any buildup.
A clean scalp ensures your style looks fresh and prevents itching during the ceremony.
Apply a lightweight hair oil or sheen spray to the length of your braids to restore their natural luster.
Focus on the mid-lengths where the hair might look dull from daily wear.
Pro Tip: Avoid heavy creams at the roots, as they can cause visible white residue that shows up in high-definition wedding photos.
Step 2: Sculpt Your Edges
Apply a firm-hold edge control gel to your hairline using a small brush or a dedicated edge tool.
You can choose a sleek, pulled-back look or create soft “swoops” to frame your face.
Smooth the hair down firmly to ensure the edges stay in place for the duration of the event.
This step provides the “polished” finish that distinguishes a formal style from a casual one.
Step 3: Section for Your Chosen Silhouette
Decide whether you want a full updo, a half-up style, or a side-swept look.
For a classic wedding vibe, a low chignon or a high crown bun are the most popular choices.
Divide your braids into two main sections if you are going for a half-up look, ensuring the part is straight and clean.
Use large sectioning clips to keep the braids you aren’t working on out of your way.
Pro Tip: If your braids are heavy, use the “anchor” method by tying a small section of braids together first to support the weight of the rest.
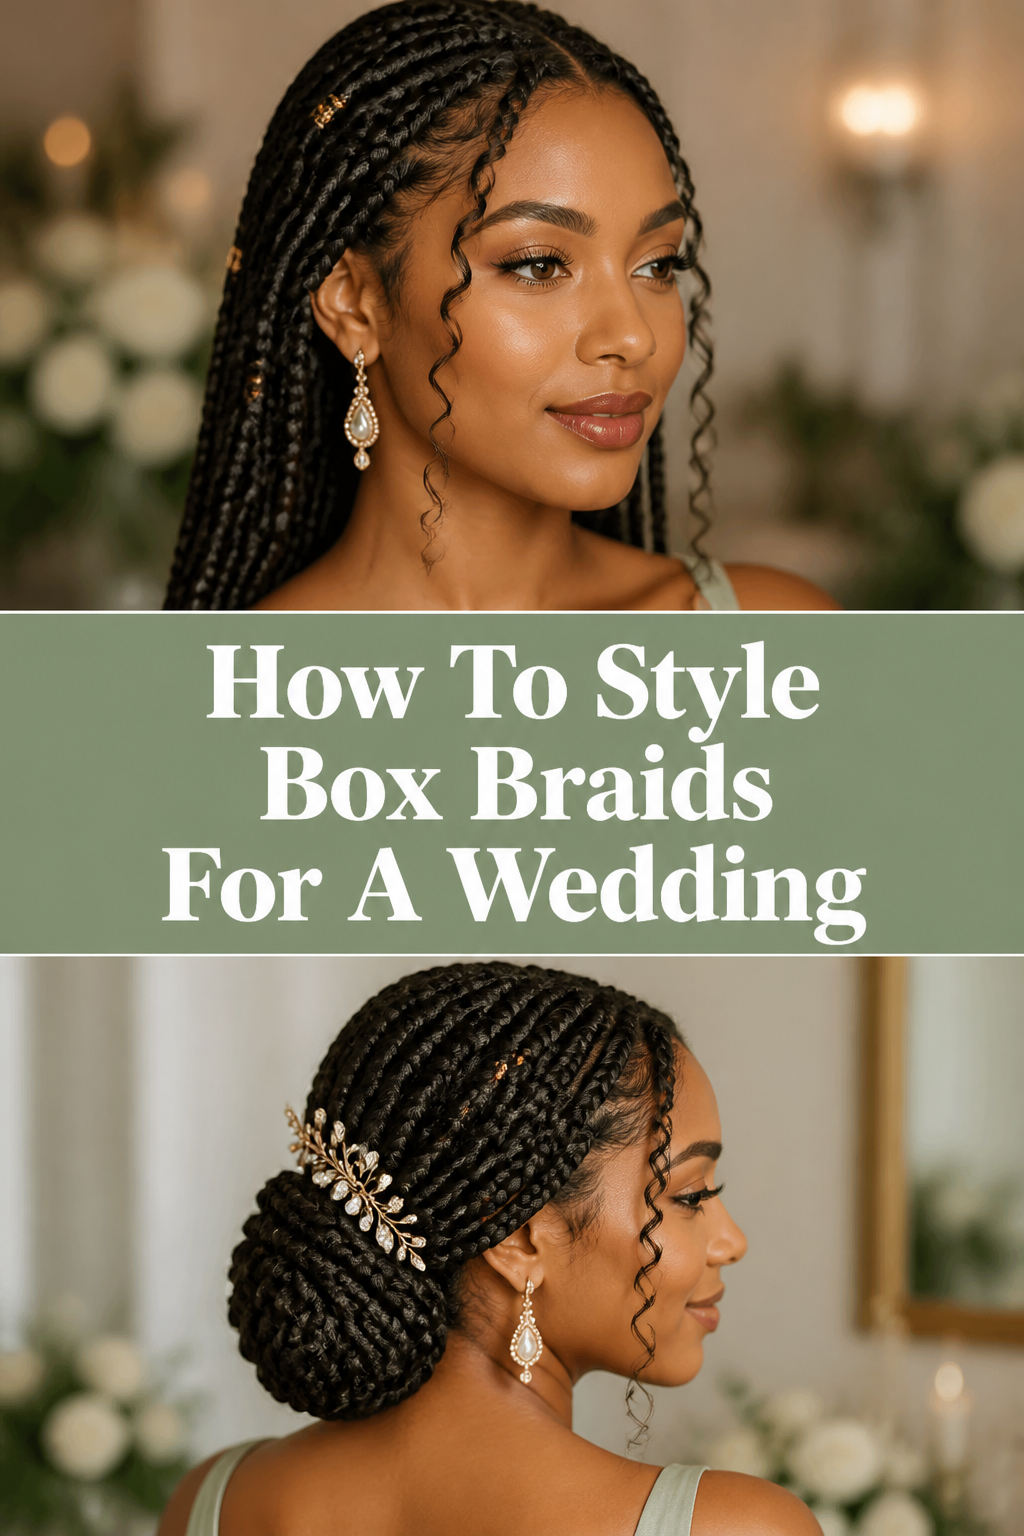
Step 4: Create a Sophisticated Low Chignon
Gather all your braids at the nape of your neck and secure them into a low ponytail with a thick, snag-free elastic.
Divide the ponytail into two or three large sections.
Wrap each section around the base of the ponytail, tucking the ends underneath and securing them with large hair pins.
Continue this process until all braids are incorporated into a neat, rounded bun.
Adjust the shape by gently tugging on the loops of the bun to create a fuller, more voluminous appearance.
Step 5: Braid a Goddess Halo
Start at one side of your head and begin a large French braid or a twist using several box braids as your strands.
Follow the curve of your hairline, moving across the top of your head toward the other side.
Secure the end of the halo braid behind your ear or tuck it into the rest of your hair using pins.
This style keeps the hair off your face while showcasing the intricate texture of your braids.
Step 6: Incorporate Wedding Accessories
Slide gold or silver hair cuffs onto individual braids to add a metallic pop that matches your jewelry.
You can also weave a string of pearls or a delicate floral vine through your bun or halo braid.
Place a decorative hair comb or a jeweled clip at the side of your updo for an asymmetrical focal point.
Ensure the accessories are pinned deeply into the braids so they do not slip out while you move.
Pro Tip: Use “U-shaped” hair pins for accessories, as they grip the texture of box braids much better than standard bobby pins.
Step 7: Set the Style with Mousse
Apply a generous amount of setting mousse over the top of your finished style and your edges.
The mousse helps to flatten any stray flyaways and “locks” the braids into their new shape.
Tie a silk or satin scarf tightly over your hairline and the top of your head.
Leave the scarf on for at least 15 to 20 minutes while you finish your makeup or get dressed.
Step 8: The Final Shine and Inspection
Remove the scarf gently to reveal a perfectly smooth and set hairstyle.
Give your hair a final mist of high-shine spray to ensure it catches the light beautifully in photographs.
Check the back of your head using a hand mirror to ensure no pins are visible and the bun is symmetrical.
Make any minor adjustments by pushing pins further in or smoothing the edges one last time.
Common Mistakes to Avoid
Using Too Much Tension
It is tempting to pull your braids very tight to achieve a sleek look, but this can lead to discomfort and even scalp damage.
A wedding is a long event, and a headache from tight hair can ruin your experience.
Focus on using pins and product for hold rather than pulling on your roots.
Ignoring the Weight Balance
Box braids can be heavy, especially when piled into a high bun or a complex updo.
If you don’t distribute the weight evenly, the style may start to sag or pull on your neck throughout the day.
Always use multiple anchor points with your hair pins to share the load across your scalp.
Over-Accessorizing the Hair
While wedding jewelry is beautiful, adding too many clips, cuffs, and flowers can make the style look cluttered.
Choose one statement piece or a series of small, cohesive accents to maintain an elegant look.
Let the texture of the braids be the star rather than hiding them under too much hardware.
Troubleshooting
Visible Frizz at the Roots
If your braids are a few weeks old, you might notice new growth or frizz near the scalp.
Apply a small amount of edge control or a strong-hold gel directly to the frizzy area and smooth it down with a fine-tooth comb.
Set it with a scarf for ten minutes to force the hair to lay flat against the braid.
Pins Slipping Out of the Braids
Standard bobby pins often slide right off the smooth synthetic hair used for box braids.
Try “roughing up” the pins by spraying them with hairspray before inserting them, or use extra-long crinkled pins.
Cross two pins in an “X” shape inside the style to create a mechanical lock that won’t budge.
The Style Feels Unstable
If your bun feels like it might fall, you likely need more internal support.
Instead of just pinning the outside, drive a few large hair pins straight into the center of the bun toward the base of the ponytail.
This creates a core of stability that holds the entire structure together from the inside out.
Key Takeaways
- Cleanse first: Always start with a refreshed scalp to ensure comfort and a clean appearance.
- Set with mousse: Using a setting mousse and a silk scarf is the secret to a professional, salon-quality finish.
- Balance the weight: Secure your updos with multiple pins to avoid tension and sagging during the wedding.
- Choose a focal point: Use one or two high-quality accessories rather than crowding the style with too many pieces.
- Prioritize comfort: Ensure the style isn’t too tight so you can enjoy the celebration without a headache.
Frequently Asked Questions
Can I style old box braids for a wedding?
Yes, you can definitely style older braids by focusing on refreshing the roots and edges. Use a bit of extra gel to lay down flyaways and consider an updo to hide any loose hair at the base of the braids. Accessories like headbands can also help cover up regrowth while adding a festive touch.
How do I keep my braids from looking too bulky in an updo?
The key is to use the “wrap and flat” technique where you spread the braids out as you wrap them rather than bunching them together. By flattening the braids against your head as you pin them, you create a more streamlined and elegant silhouette. You can also leave a few braids out to frame your face, which breaks up the mass of the hair.
What are the best accessories for box braids?
Gold or silver filigree cuffs are a classic choice that easily slide onto the braids without causing damage. For weddings, consider using hair pins topped with pearls or crystals, as these can be strategically placed to look like they are floating in the hair. Silk ribbons woven into a braid can also provide a soft, romantic aesthetic.
How do I prevent my scalp from showing too much in a tight style?
If your parts are very prominent and you want a fuller look, try to avoid pulling the hair straight back. Instead, swoop the braids slightly to the side or over the parts to create a more draped effect. You can also use a hair shadow powder that matches your hair color to lightly fill in any wide gaps or visible scalp areas.
Our Top Recommended Finds
- Heavy-Duty Open Hair Pins: These are essential for holding the weight of thick braids without bending or snapping.
- Long-Lasting Edge Control: Look for a “max hold” formula that specifically mentions it does not flake or turn white.
- Decorative Gold Hair Cuffs: These add an instant touch of luxury and are very easy to install and remove.
Step Into Your Big Day With Confidence
Your wedding look should be a reflection of your personal style and the joy of the occasion.
By following these steps, you can create a sophisticated hairstyle that remains flawless from the first photo to the last dance.
If you want to explore more options, consider looking into different braid jewelry trends or learning how to do a fishtail braid with your box braids.
Take a moment today to practice your chosen style so you feel completely prepared when the big day arrives.